2 minute read
3.3 Setting-up Model Units from the Options Editor
3.3 Setting-up Model Units from the Options Editor
One of the first key things to do is to set up the desired units within Navisworks Freedom. This only needs to be done the first time the application is loaded on a machine. Click on N > Options (you can also use the F12 key to access Options).
Advertisement
To Change Units: Click on Interface then Display Units > Choose units as Meters or Millimeters > OK.

Note: This setting allows you to accurately measure distances between geometry/elements using the Measure Tool (found under the Review Tab).
And under the Selection tab, Resolution should be set to first object and all others can be left as default settings.
Snapping - Ensure that all the snaps are checked to enable accurate measuring from the model.
Motion Settings - Setting up your Linear speed should be setup from the outset under the Interface section, highlight Viewpoint Defaults and ticking on override linear speed and from there setting your default linear speed to no more than 5000 (mm/sec).
You can also set your Linear Speed within your Current Viewpoint Settings through the Viewpoint ribbon > Navigate panel > then set speeds accordingly.
Units and Transform – Check that the Units and Transform settings are set to the original Navisworks NWD Model created by the BIM Coordinator (otherwise the model will appear skewed/close-up. And this also adversely affects all the Viewpoints saved by the BIM Coordinator if not set at the correct Units upon opening the model. Now open the .nwd model >


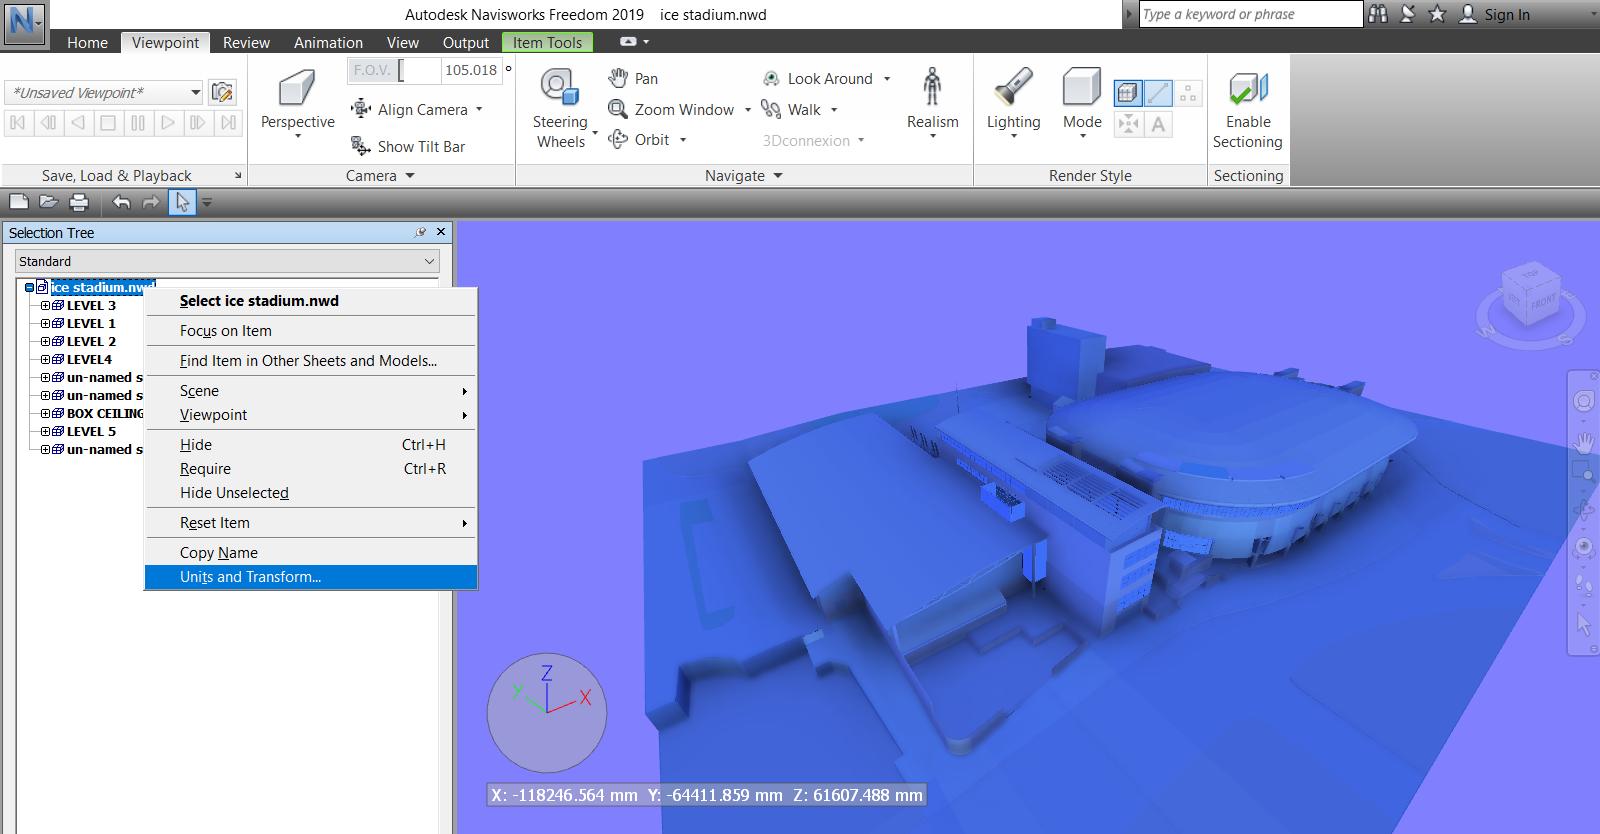
1. Right-click on the .nwd model within the Selection Tree > select Units and Transform.
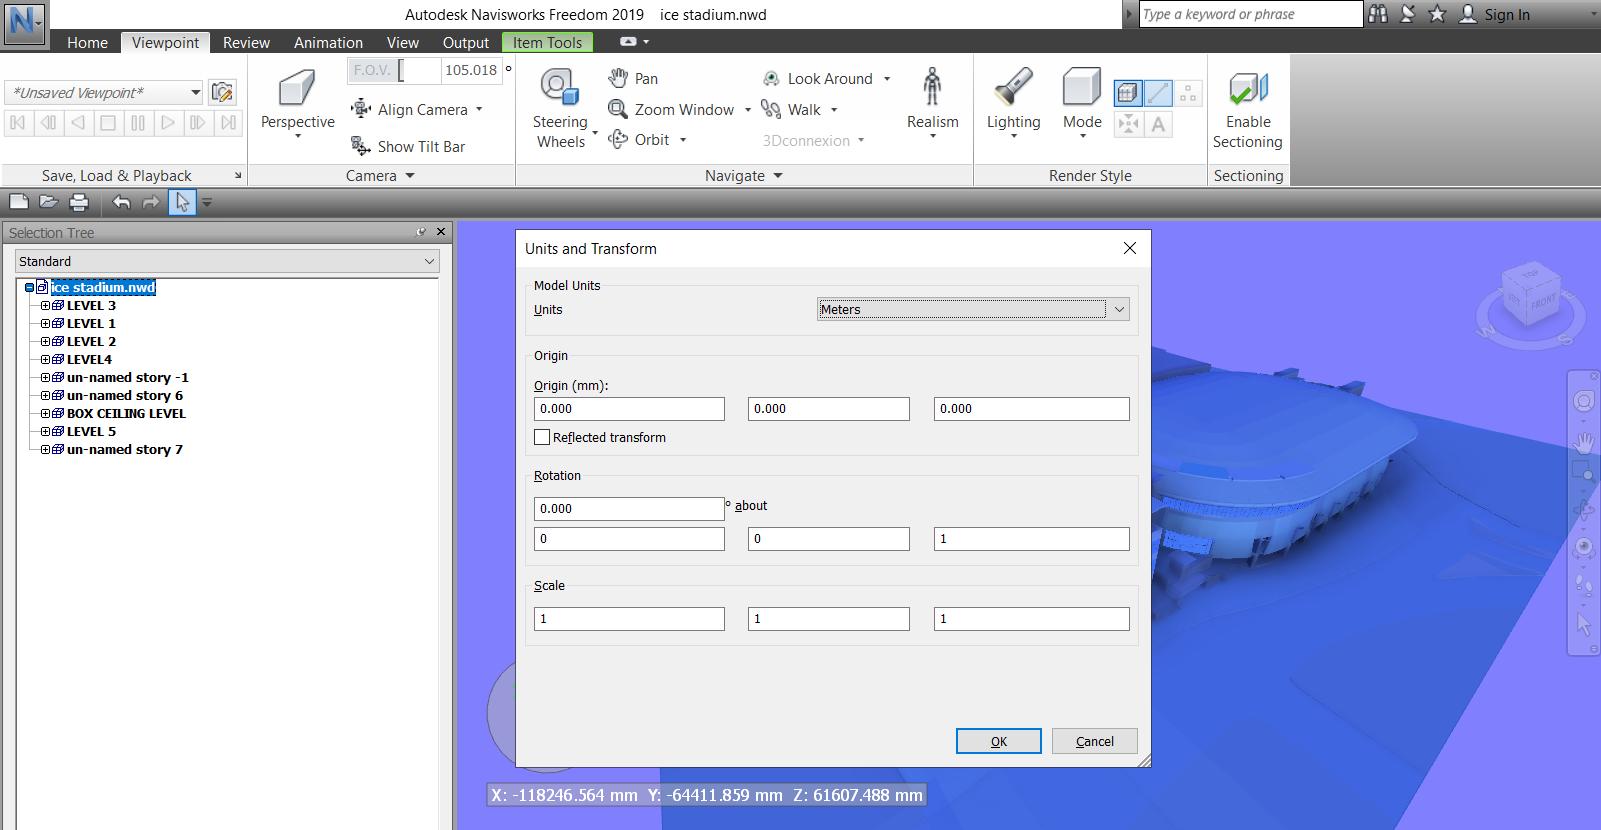
2. Make sure the Units are as per the Units and Transform dialogue box below > OK.


Note: If the model appears at a ‘skewed’ angle on opening, then the ‘scale units’ will probably appear in odd decimal places, and not with 1 as shown above. Change accordingly to 1’s. I recommend setting Units & Transform to Millimetres for UK projects.


