
28 minute read
Technique Boxes


BUILD YOUR SKILLS
TECHNIQUE BOXES
LESSON 1
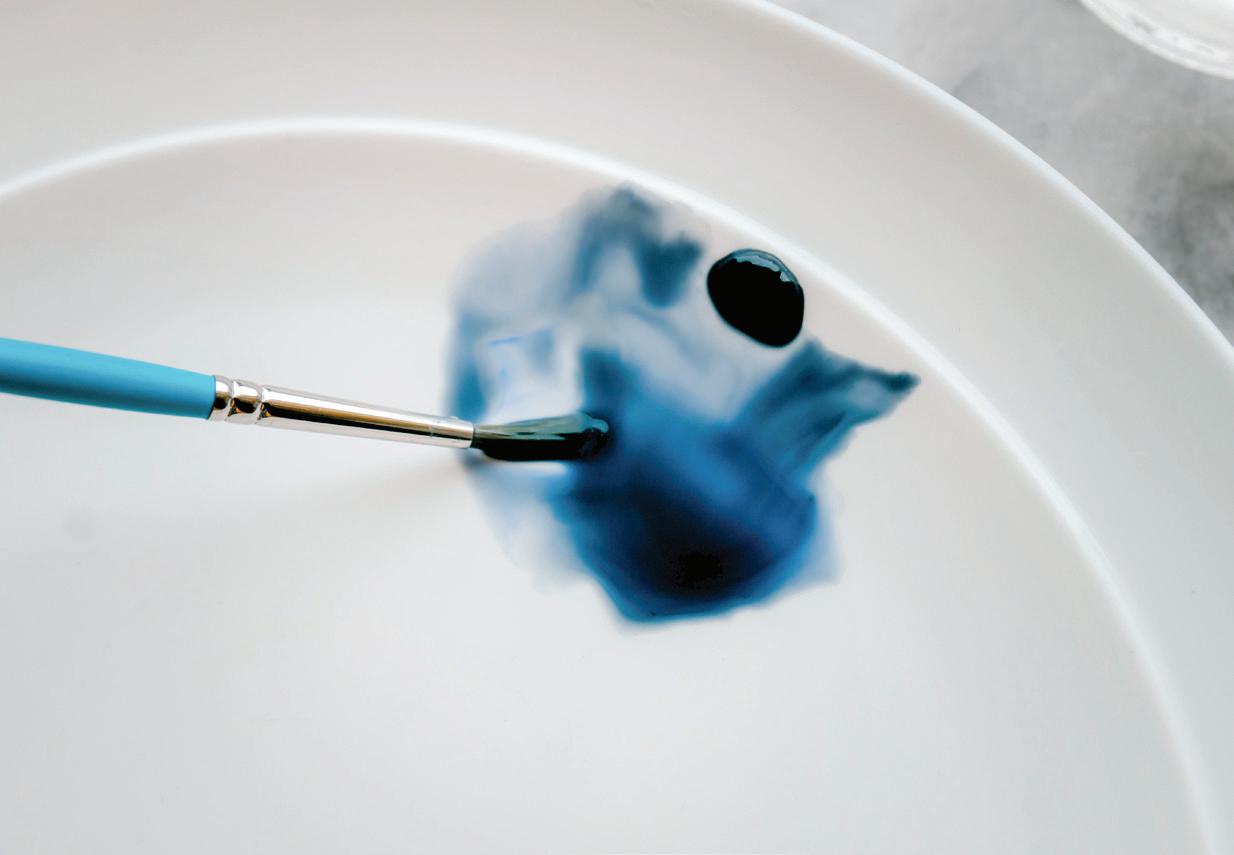
AS YOU LEARNED IN THE MAGIC SAUCE (PAGE 24), THE
beginning of all good watercolor lies not on the paper or in your brush—but on
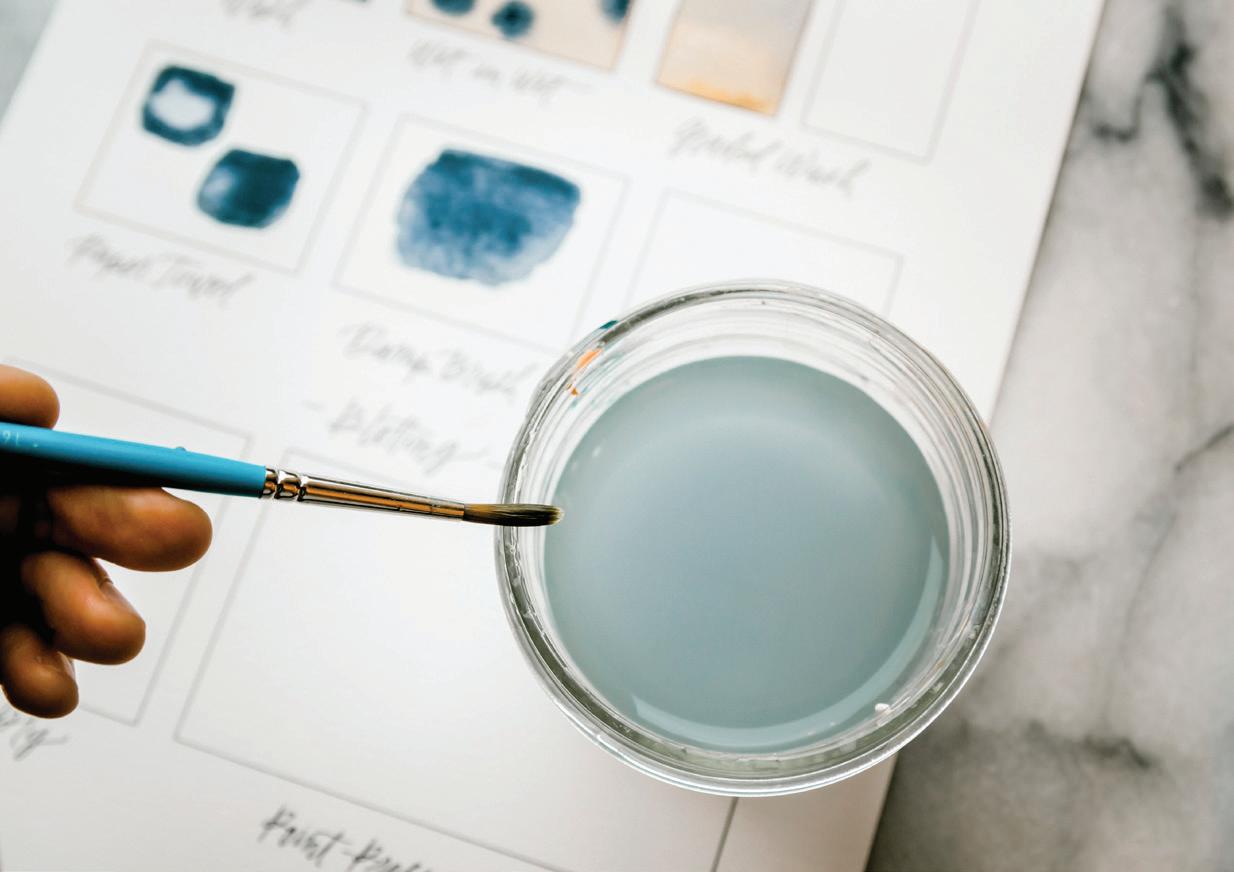
your palette! creating that magic sauce on your palette is where it all begins. Having the right amount of water and paint on the palette allows you to create movement and shine, and then transfer this magic sauce to your paper with your brush. Watercolor is all about time; the more water you have, the more time you have to make changes to your piece while the paint is still wet. The free-flowing and transparent beauty of watercolor is achieved with good water management, which mostly happens right on your palette.
BLOTTING—DAMP BRUSH WATER DROP WET-ON-DRY
TOOLS
Round watercolor brushes, sizes 4 and 1
140-lb. watercolor paper HB pencil Paper towels Watercolor Technique Grid (above) 2 Mason jars of water
PAINT PALETTE
(or one dark pigment and one light of your choosing)
PAYNE’S GRAY PEAcH
Your palette for this lesson will have one dab of dark paint and one dab of light paint. Leave space between them so you can add and play with water near each paint dab.
TE c HNIQUES
Watercolor wash
Wet-in-wet Blotting
Wet-on-dry
AS YOU BEGIN
Using your HB pencil, draw the “Watercolor Technique Grid” above onto your watercolor paper. Label each box to match the box titles.
Set out two Mason jars of clear water (one jar for the dark pigment and one for the light) and prime your brush with water.
Use your brush as your water transportation vehicle. Dip your brush in your Mason jar of water, bring that water to your palette, and begin to mix the water into the side of your paint dab. Take your brush back to your Mason jar and add more water to this mixture on your palette. You want to create an 80w/20p consistency of “soy sauce with wasabi” on your palette (see page 24). I encourage you to repeat these steps four to five times, until there is that desired movement and shine on the surface of your palette.
Remember, if you were to lift your palette and tip it vertically, you would begin to see small paintsaturated raindrops moving along the surface of your palette.
ANIMATING YOUR PALETTE
In order to get that smooth, flowing beauty on your completed watercolor piece, it is essential to begin with movement and shine on the palette before the paint ever touches the paper. “Animating your palette” is essentially keeping the colors you are painting wet enough to work with the entire time you are creating. You will be consistently revisiting your palette, adding water to ensure there is movement and shine before you bring the paint and water mixtures to your paper. When I first sit down to create a piece, I’m often working off of a dinner-plate palette, covered in dried paint dabs and color mixes from the last few times I’ve painted. I don’t add water, or animate, every color every time. I only bring water to the colors I’m going to be working with in the first few stages of the piece, knowing that as I go, the water on my palette evaporates just like the water on my paper, so I will be consistently adding more water to my palette as I paint.

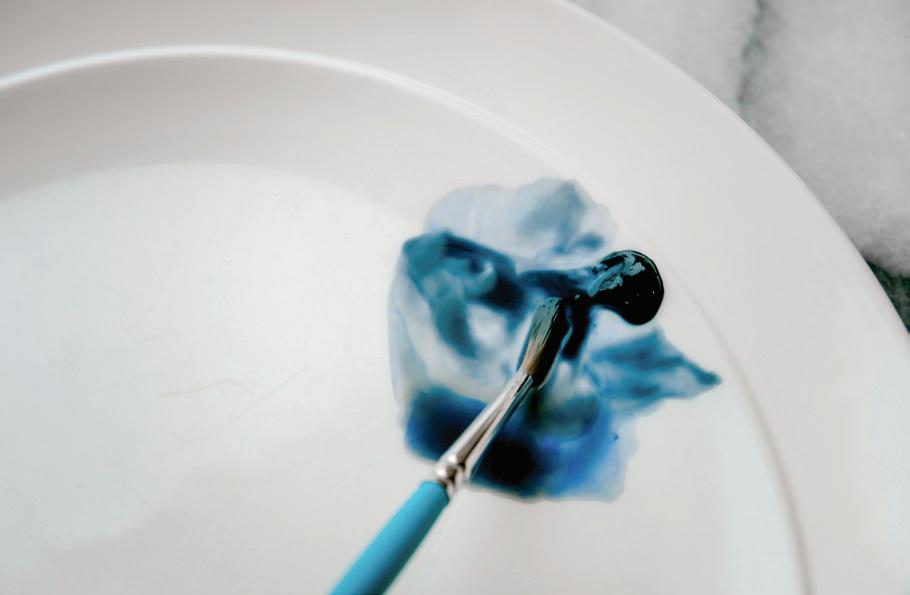
ADDING WATER TO FRESH PAINT VS. DRIED PAINT
If the paint dabs on your palette are fresh, remember the analogy of the wasabi—fresh tube paint is more potent, and a little goes a long way. When you begin to add water to your fresh paint, by using your brush to pull some of the concentrated paint dab away, you can dilute just a portion of the concentrated paint and make your magic sauce to the side of the paint dab. This gives you a bit more control.
If you already have dried paint on your palette, or you’re using cake pans, you will need to use a bit more water to wake up the paint. Use your brush in a side-to-side motion along the dried surface of the cake or dried paint to engage the paint. Once it’s dried, it requires a bit more effort to get the same pigment saturation as paint fresh from the tube.
BRUSH: Round 4 PAINT cONSISTENcY: Wash, 80w/20p “soy sauce with wasabi”
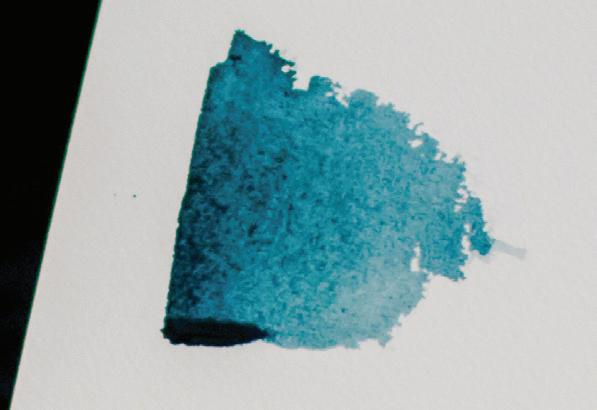
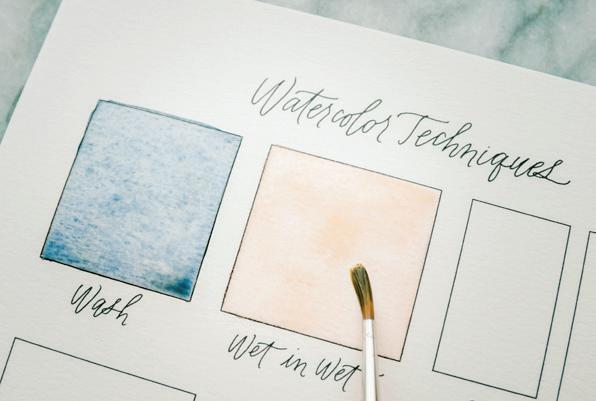
A flat watercolor wash is a translucent layer of color on your paper. The goal is to produce a flat surface of color without any hard lines or variation in color within. This technique is the foundation to watercolor painting, so we will be practicing it again and again.
WASH
1Once your palette is animated with water, and your Payne’s Gray paint-and-water mixture resembles soy sauce with a touch of wasabi, gently place your primed wet brush into your wet palette mixture of Payne’s Gray, soaking it into your brush bristles. [A]
2Take your filled brush to your watercolor paper, and stroke your brush from left to right, right to left, left to right, along the top of the box labeled “Wash” to create a wet pigmented boundary. [B, c, D]
3Once you’ve completed a few strokes along the top of your wash box, you’ll notice the texture of the paper beginning to show through your strokes. That’s your cue to return to your paint and fill your brush with the paint-and-water mixture again.
4For your second stroke, bring your paint to your paper again and make several back-and-forth brushstrokes to enlarge your wet pigmented boundary. You are looking for the right balance of water to paint to fill the boundary, creating MOVEMENT and SHINE. [E]
5To make the final strokes to complete your wash, you will use only water! Take your paintbrush to your dark palette Mason jar, rinse your brush, and bring water to your watercolor paper. Brush
B C

D E A

within the strokes you have already painted with pigment. Then, using the water-only brush, continue to draw the paint down, letting the pigment follow the water as you define its boundary, filling the rest of your wash box. Feel free to move your paper around as needed in order to smooth the outside edges of your wash. [F]
F
6As you draw the pigment down, notice that the paint only moves into the spaces where your brush has provided a water pathway. This is why wet boundaries are such powerful tools in watercoloring. Paint moves where the water is!
7To test the consistency of your wash, tilt your paper and shift it around—you should see a shine of the wet boundary reflecting the light as you tilt the page.


continues on next page

G
H
8 To make sure you have enough movement within the boundary you’ve just created, look for a bead of water and paint forming as you tilt your paper down. Rotate your paper all the way around, watching as the bead travels along the wet boundary. If you don’t see a bead form, use your brush to bring a bit more water to the boundary, and blend it into the pigment. You need to move quickly here, because if you wait too long, the paint marks you’ve made will start to dry. If you add more water to an already-drying wash, you will get watercolor blooms (see page 29), or hard lines, rather than a nice flat wash.
9 Create the movement and shine in your wash boundary and enjoy that tiny raindrop traveling around the edges of your wash. [G, H]
MOVEMENT & SHINE
When creating a wash, always ask yourself these two questions:
Can I see a nice wet SHINE? Does the boundary refl ect the light as I shift my paper?
Do I see MOVEMENT in the boundary, with a small bead (or raindrop) of water forming when I tilt the paper vertically?
BRUSH: Round 4 PAINT cONSISTENcY: Peach base wash, 80w/20p “soy sauce with wasabi;” Payne’s Gray for wet-inwet, 50w/50p “heavy cream”
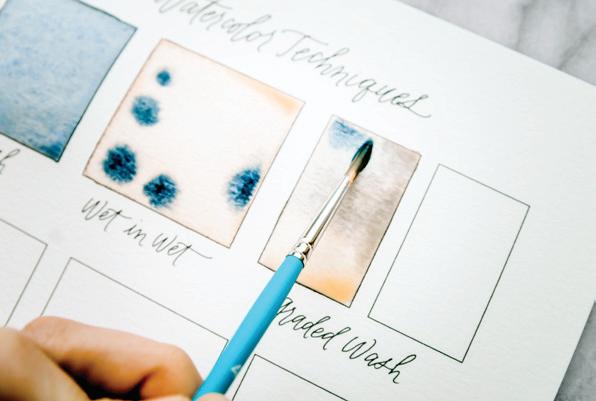
Wet-in-wet simply means adding wet paint into wet paint. You can use this technique to create shadows, contrast, and interesting movement in your watercolor paintings. Note that you will increase the paintto-water ratio for your darker pigment. The goal is to introduce a higher concentration of paint into the wet boundary’s more diluted base wash. This will allow the new paint to bleed, vein, or bloom into the existing wet boundary for an interesting eff ect.
WET-IN-WET


2 Load your brush with your Peach mixture and bring the loaded brush to your watercolor paper, this time to the box labeled “Wet-in-Wet.”
3 Follow the wash instructions on page 45 to create a Peach wash in this box. Define the square boundary of the box by filling it with your 80w/20p Peach mixture. [A]

4 Once your wash is painted, and you’ve made sure there is a raindrop of water that moves around your square boundary, it’s time to
A
add in your Payne’s Gray. Remember to work relatively quickly, because this step must be done while the boundary is still wet.
5 Dip your brush in your light palette Mason jar of water to clear it of excess light pigment. Use your brush to bring water to your palette, creating a 50w/50p consistency of Payne’s Gray.
B C
D
NO FIREWORKS? NO PROBLEM.
If your dab of dark color simply stays put, without bleeding or creating fireworks, it’s because your light wash boundary has already begun to dry. Not to worry. Just rinse your brush, dab it in your 80w/20p Peach mixture and cover the entire boundary with another fine sheen of a light wash.
Once you’ve rewashed the entire boundary, ensuring movement and shine within your wet boundary, dab your brush in your 50w/50p mixture of Payne’s Gray, dab the paint into the light wash, and celebrate your fireworks!
Observe the difference of how the paint moves within a wet boundary versus a drying boundary. Dropping a moving magic sauce into a dried boundary simply stagnates. Whether you’re creating a wet-in-wet wash or a flat wash, remember that changes must be made while the boundary is still wet. 6 Scoop up the magic sauce with your brush and bring it to your watercolor paper, to the box labeled “Wet-in-Wet.” Using the lightest pressure, dab the brush into the wet boundary of the light wash you just created.
7 As you lift your brush from the wet surface, the dark color should bleed and “vein out” like a mini firecracker. Dab a few more times to see what happens. Dab the same spot with more pigment—do you notice how it gets darker and more concentrated in the spot as you lift and add? [B, c, D]
8 Try painting a line with the dark pigment in the wet boundary and see how it bleeds. As you paint the line, lift your brush at points where you would like the paint to bleed. Paint will be the darkest at the points where you lift the brush.
BRUSH: Round 4 PAINT cONSISTENcY: 80w/20p “soy sauce with wasabi”
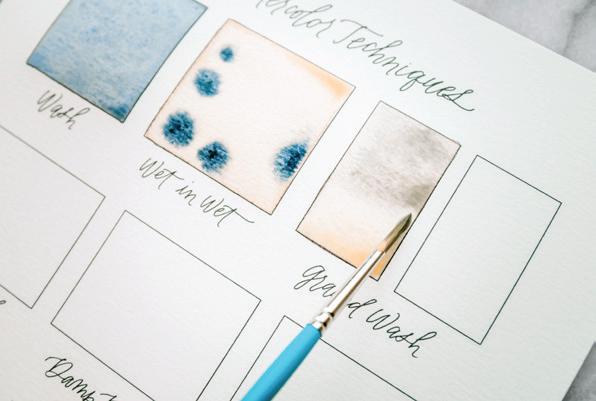
This technique combines the two skills you just learned. A graded wash in its most simple form is three washes, layered one after the other while everything is still wet. The effect is a slow “graded” fade of one color into another and then another. How smoothly the colors blend is completely dependent on the wetness of your base wash.
GRADED WASH
You will use two colors to make three washes:
The first wash is Peach.
The second wash is a combination of Peach and Payne’s Gray. The third wash is Payne’s Gray.
1Dip your brush in your Mason jar of water and use your brush to bring water to your palette, creating an 80w/20p consistency of both Peach and Payne’s Gray colors. Make sure there is movement and shine on your palette in both your light and dark colors, since we will be using both of these colors to create a graded wash.
3Take your loaded brush to your watercolor paper, this time to the box labeled “Graded Wash.” Follow the wash instructions to create your first layer of Peach wash in this box. (Do you see movement? Do you see the raindrop when you turn your paper?) [A]
4To make your second wash layer, bring your brush to your palette and mix together a bit of your Peach sauce with your Payne’s Gray sauce to make a nice blend of these two colors. The blend should be the 80w/20p consistency of soy sauce with wasabi. Feel free to add a bit more water to the sauce if needed.
5Load your brush with this blended sauce and bring it to the wet boundary of your Peach base wash. Use a side-to-side motion to gently paint this new sauce in, but don’t paint the entire box! Stop and lift your brush about two-thirds of the way down the painted box. You should see a soft blending beginning where you lift your brush. You want this slightly darker shade to smoothly blend into the light first layer wash. You should not see a hard line, because your first wash is still
A B


wet. [B, c]
6To create your third wash layer, return your brush your palette and pick up a bit of 80w/20p consistency of Payne’s Gray. Bring your loaded brush to your watercolor paper and apply a dark wash to just the top third of the “Graded Wash” box. When you lift your brush at the one-third mark, you should see a soft blending of the third layer into the second layer wash. [D, E]
7Now you can see each of the three layers of washes before they begin to dry. There are no hard lines, and the movement of water in the first wash enables the entire boundary to stay wet long enough for each added layer to blend in smoothly. Once the three layers are dry, the three colors will be successfully blended into a soft gradient without any hard lines. And this is all because you were working in a wet boundary the entire time! You defined your boundary with your first wash, telling your paint where you’d like it to go. With your two successive washes, you were able to add in a subtle gradation of color, building interest in the wet boundary. [F]
C D E F


WHY AM I GETTING HARD LINES?
At this point, you may be thinking: “WOW, we use a lot of water!” In watercolor, we use more water than people tend to realize. But this is how seamless, smooth watercolor creations begin. You may notice some puddles forming in the corners of your wash boundaries. These bother some folks more than others and are part of learning water management as you paint.
I encourage you to create your washes and let the puddles dry, just to see what happens and if you like the effect (hint: these puddles are one way to create watercolor blooms!). Basically, there are two common problems to keep in mind when it comes to water management: not enough water and too much water.
If you don’t use enough water when you lay down the wash, you will see hard lines from your paintbrush when the wash dries—it will not be smooth. In this example, you can see the dried first wash with a dried second wash on top, with hard lines delineating the two washes. This first wash dried too fast, so when more color was applied, the boundaries did not move and blend with one another. The way to make sure it will dry flat and smooth is by creating the movement and shine on your palette and transferring it to your paper as you paint. As you move your brush on your paper, notice how water smooths any hard lines and breaks down the pigment of the paint so it absorbs nicely into the texture of the paper.
On the flip side, if you put too much water on the paper for a wash, you’ll end up with what I call the “biodome” effect. If you’re using too much water, a bubble of water begins to pool or form in a half-circle above your wet boundary. As an over-watered boundary begins to dry, it may develop water blooms (see page 29), and your paint will bleed over the wet boundary, giving you jagged edges when it dries. You can eliminate puddles or biodomes by gently blotting with a paper towel (see Blotting, page 29).
I’ll tell you that using too much water in the beginning is better than not using enough! The longer your boundaries are wet on your paper the more time you have—more time to add color with the wet-in-wet method or, as we will learn in the next section, more time to take color away with blotting. The more time you have while your boundary is wet, the more you can play and make interesting changes to your piece.
So, don’t worry too much about those puddles for now.

BRUSH: Round 4 PAINT cONSISTENcY: 80w/20p “soy sauce with wasabi”
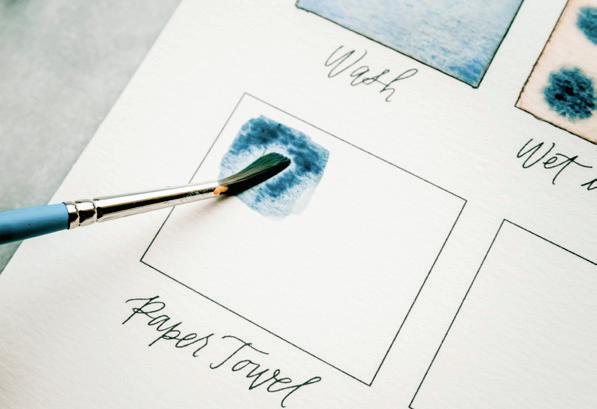
Blotting is the process of removing pigment from a wash. Using different blotting methods allows you to create points of light within a boundary. You can use a paper towel in multiple ways or a damp brush (cleaned in clear water) to do this. In this exercise, you will create a dark wash so you can see the full effects of the different blotting techniques.
BLOTTING
2Take your loaded brush to your watercolor paper, this time to the box labeled “Blotting – Paper Towel.” Follow the wash instructions to create a Payne’s Gray wash in this box. [A]
3Roll the edge of your paper towel to get a fine point (since you’re working in a smaller blotting area). Press the paper towel down into your wet wash using firm pressure, and then lift it straight up. You will see the white of your paper (and perhaps a slight hue left from the color of your wash). I love this effect—I use it all the time to create points of light on small leaves or petals. [B, c]

4When you use a paper towel with firm pressure, you remove a considerable amount of the paint pigment you just applied—to the point where the white of your paper shows through. For a subtler effect, try gently dipping (not pressing) a folded paper towel into a very saturated area in your wet boundary, like the edges, to seep up excess water. It’s like a water vacuum. This is a great solution to any biodome or puddle problems you may encounter as you create your washes.
5Play with both techniques. Notice how when you apply pressure to the paper towel, it takes all the pigment, and when you just dip the paper towel into the edge of the wet boundary, it gently soaks up any excess pigment or water. [D, E]
6Another way to remove pigment from a wet boundary is to use a “thirsty” or damp-brush technique. To try this, gently place your primed wet brush into your 80w/20p mixture of Payne’s Gray, soaking it in.

A B C

E

F

7Take your filled brush to your watercolor paper, this time to the box labeled “Blotting – Damp Brush.” Follow the wash instructions to create a dark-colored wash in this box. [F]
8Next, clean your brush in your Mason jar of clear water. Wring out your brush by running it along the edges of your jar, essentially making it “thirsty” so it will pull water out of your wet wash boundary. [G]
9Touch your damp brush to the wet paint of your dark wash to lift the color off the paper. The brush absorbs more water than it releases, so it will quickly pick up the wet color from your boundary. 10 You can also use your damp brush to move the paint around in your wet wash box, creating points of light wherever you sweep the paint away. Whereas a paper towel merely lifts color or pulls out excess water, a damp brush enables you to sweep and gently suggest to your wet boundary where you’d like color concentration or a light point to be. [H]

G
H
BRUSH: Round 4 PAINT cONSISTENcY: 80w/20p “soy sauce with wasabi”
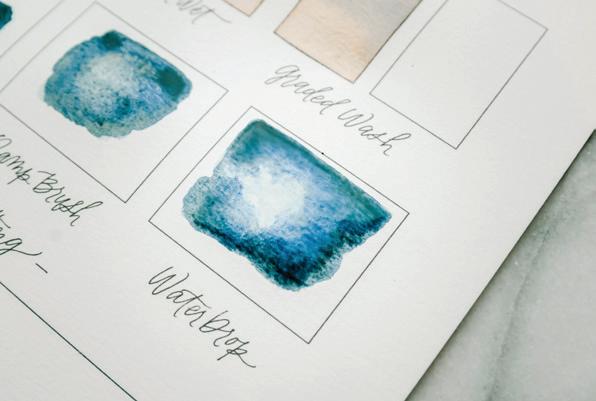
The waterdrop technique is similar to wet-in-wet but involves dropping clear water rather than paint into your wet boundary. It can also be considered another form of blotting, as it dilutes the area and removes color, adding interest and light. In order to get a seamless transition of light to dark, like all techniques in watercolor, the waterdrop must be done while the base wash is still wet. I use this method regularly, as it seems to make washes glow with an inner light. It is how I’ve created some of my all-time favorite leaves!
WATERDROP
1Gently bring your primed wet brush to your wet palette and soak in your 80w/20p mixture of Payne’s Gray.
2Bring your loaded brush to your watercolor paper, this time to the box labeled “Waterdrop.” Follow the wash instructions to create a Payne’s Gray wash in this box.
3Once your wash is painted, and you have ensured there is enough water to see a shine of wet movement on the surface, it’s time to add your waterdrop. 4 Dip your brush in your Mason jar of water and use your brush to gently dab a drop of clear wash water into the wet boundary of the Payne’s Gray wash. [A, B]
5After the water is dropped in, wring out your brush by running it along the edges of your water jar, making it “thirsty.” You will use the damp-brush blotting technique (page 51), moving your brush in a scrubbing motion on the wash, brushing and sweeping from side to side to shove the paint away from the area you want cleared. [c] 6 To complete the effect, press a folded paper towel firmly into the lightened area where you first added your waterdrop, increasing the light spot within your wet wash. [D]
7You just used all three blotting techniques together: waterdrop, damp brush, and paper towel! Combined, they create a seamless transition of color removal. [E]
8You can repeat these three blotting motions (waterdrop, damp brush, paper towel) as many times as you would like to get the desired glowing effect in your wash. As long as the boundary is wet, you can keep making changes! [F, G]
E F

A B


G
C D


BRUSH: Round 4, Round 1 PAINT cONSISTENcY: Peach base wash, 80w/20p “soy sauce with wasabi;” Payne’s Gray for wet-on-dry, 10w/90p “mustard”
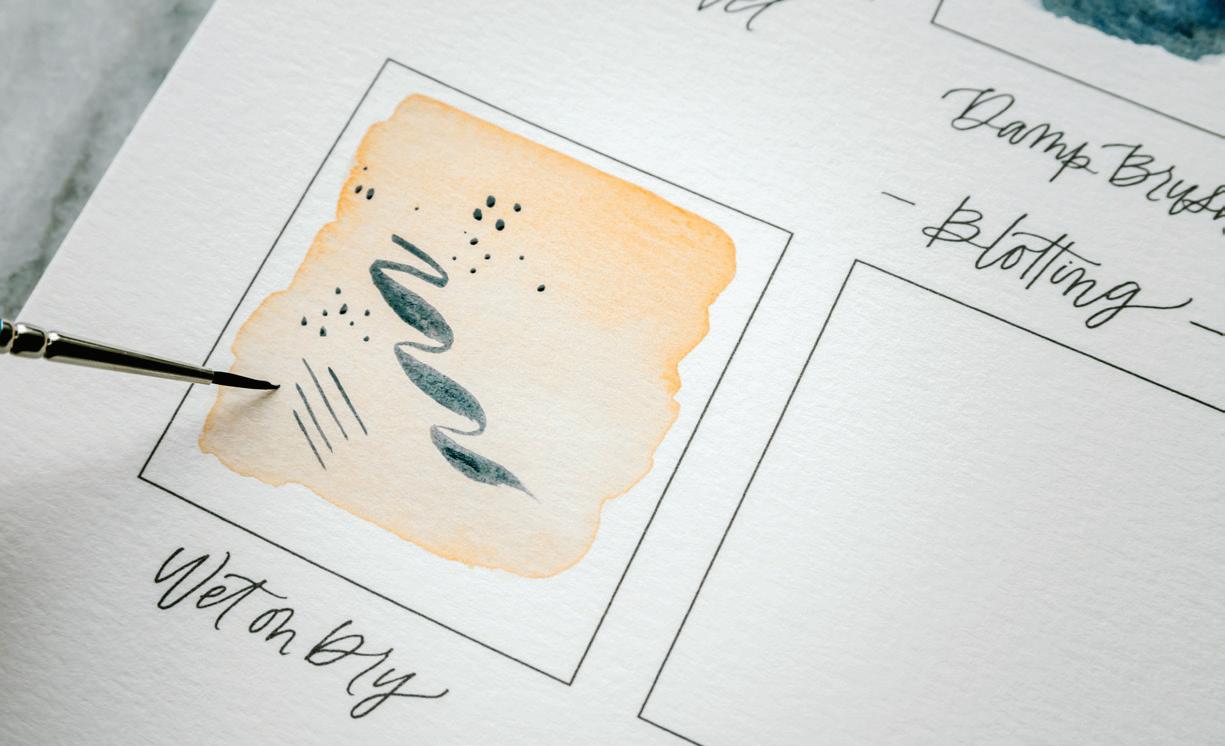
Wet-on-dry simply means adding wet paint to dry paint. This technique is another way to add interest to your piece, but it can be done without the time constraint of working while everything is still wet. It gives you a bit more control, allowing you to create sharp and defined lines. I use this method when I want to add small brushstrokes of contrasting color or defined details.
WET-ON-DRY

1Dip your Round 4 brush in your Mason jar of water and use your brush to bring water to your palette, creating an 80w/20p consistency of Peach. Gently place your primed wet brush into your 80w/20p mixture of Peach, soaking it in.
2Take your loaded brush to your watercolor paper, this time to the box labeled “Wet-on-Dry.” Follow the wash instructions to create a Peach wash in this box.
3Allow the wash to dry completely. Wait at least a few hours, maybe more; hover your hand a quarter inch above the wet boundary to see if you feel any coldness seeping up from the paper—the coldness means it is still wet. In order to achieve strong, defined lines with a wet-on-dry technique, your base wash must be dry before you apply the second layer of paint. If you paint it too soon, your new wet paint will bleed into any area of the underlying wash that’s still wet. The flowers and shells above were painted using the Wet-on-Dry method, waiting until the first wash layer was completely dry so the successive layers of wet paint remained clear and crisp.
4Once your base wash is completely dry, you’re ready to begin your wet-on-dry marks. You will switch to a Round 1 brush for the second part of this technique, because it’s easier to make smaller marks with a smaller brush. Plus, the bristles of smaller brushes hold less water, which works better with the thicker paint consistency you will use for your wet-on-dry marks.
5Dip your Round 1 brush in your Mason jar of water and use your brush to bring a small amount of water to the Payne’s Gray on your palette. Mix water with pigment to create the thicker 10w/90p “mustard” consistency of Payne’s Gray.
6Gently place your primed wet Round 1 brush into your Payne’s Gray mixture, soaking it in.
7Take your loaded brush to the dried Peach wash in the “Weton-Dry” box. Using the lightest pressure, touch the point of your brush to your paper and make different marks and stampings. You will practice mark making more in Lesson 5, so don’t worry about creating any specific shapes for now. Just play and observe how the paint feels as you layer details on top of a dry wash. [A]
A
TROUBLESHOOTING
What’s up with granulation and what do I do about it?
If you have been painting a wash and happen to notice that a certain color seems to deposit little dots or leave behind granulations of color or pigment that cannot seem to be dissolved away, you are not alone.
This is called granulation, and there are multiple factors contributing to this phenomenon in your piece. Granulation occurs in all types of painting where pigment is concerned, but it is most readily observed in watercolor painting, because watercolor is known for its transparent qualities. When you are painting a nice smooth wash, it can be confusing to see little dots of darker pigment where you intended a smooth finish.
Remember that all watercolor is made of a pigment (color in dry form, made of particles) and a binder (the liquid vehicle, gum arabic, that “binds” or holds these color particles together). You see granulation in watercolor paint when the color pigment separates from the binder.
WHY THIS IS HAPPENING
THE TYPE OF PIGMENT: Certain pigments are made from actual minerals and materials from the earth. These colors granulate easier because the natural materials have larger particles, and because of this, they separate more readily from the binder. When this happens, they leave behind the sediment of their color particles as the water dries and evaporates from the paint and paper. They essentially fall into the crevices of the paper and stick there because of their size and weight. In comparison, pigments made from manmade synthetic particles, which are smaller and blend more readily with the gum arabic, tend to more smoothly bind and blend in water. For example, the color Ultramarine is mostly made from natural minerals and is more likely to separate, leaving behind a grainy substance, compared to the synthetically composed colors of Indigo, Yellow Ochre, and Phthalo Blue.
THE AMOUNT OF WATER: The more water you use in your wash, the more likely you will have separation of the pigment and binder, and the more likely you will see granulation.
THE BRAND, QUALITY, AND cOMPOSITION OF YOUR PAINT: Student-grade paints often have a lower pigment-to-binder ratio, compared with professional-grade paints. Pigment is more expensive, so using less in the student-grade lines allows the tubes to be more affordable. This means you’re actually LESS likely to have granulation with student-grade paints, since less pigment means more binder, and thus a lower chance of granulation. Professional-grade paints have a higher pigment-to-binder ratio, giving you more vibrant and quality color, but an increased chance of granulation. Different brands produce professional-grade paints, and brands vary in sensitivity to granulating properties, so if granulation bothers you, make some observations across brands.
THE QUALITY OF YOUR PAPER: Your paper is also a factor in granulating paint. Student-quality paper is often not 100% cotton, and because of its wood fiber, textures can “catch” the granules of the pigment more easily. Using professional-grade paper can help resolve this factor, as the cotton paper is higher-quality and allows the pigment to be absorbed as the water absorbs and evaporates, leaving the pigment smooth.
MY SOLUTION
If granulating paint bothers you, use student-grade paints and high-quality paper, keep your colors bold—using a lower water-to-paint ratio—and research synthetic vs. natural colors to determine which colors are more prone to separating so you can leave them off your palette.
But! Before you write it off completely, I encourage you to play with granulation. While you may not appreciate the granulating effect on a rose petal or a smooth sky, many landscape painters seek out granulating colors specifically for their texturizing effects and properties. Think of the texture granulation could add while painting sand, a forest canopy, tree bark . . . there are some exciting possibilities. Some artists truly enjoy granulation. You can even purchase a granulation medium to increase the granulating abilities of a color!
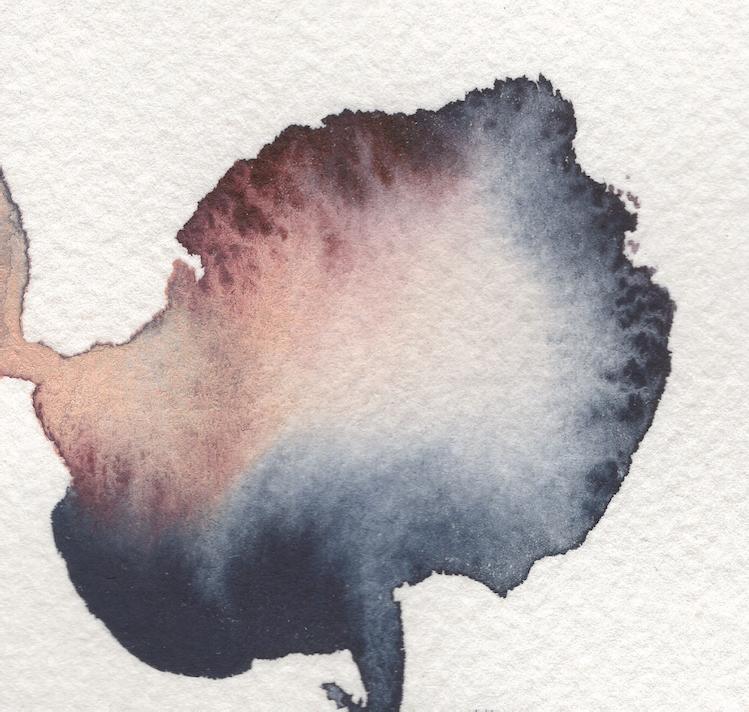
WATER c OLOR BLOOMS

Whether accidental or on purpose, watercolor blooms can be a lovely outcome of playing with watercolor. Learning to embrace them is a lesson in letting go of perfection—and a reminder that what we’re doing is, after all, art. There is no perfect way to paint. There is no perfect art. As you practice watercolor more and more, you will come to understand the drying times of your wet boundaries, and exactly how much water causes puddles or biodomes and, eventually, watercolor blooms. Here, in this little practice section, I’ll show you how to create these unpredictable beauties on purpose.
Gently place your primed wet brush into your 80w/20p mixture of Payne’s Gray or any darker pigment, soaking it in.
Take your loaded brush to your watercolor paper to create a rectangular wash.
Pause and allow the wet wash to dry a little. You still want to see the shine of the wet water/paint mixture but wait until movement is no longer happening within the boundary.
Then, dip your brush in your Mason jar and bring it to your watercolor paper. Touch it lightly to a corner inside the boundary of your drying wash. The new drop of water will spread and create a sharply defined “bloom” as the water wash dries within the paint wash. Play around, adding more waterdrops to your wash layer.
Keep in mind that in order for this to work, the underlying wash needs to be wet, but on its way to drying.
You can also use this technique to create colorful blooms by dropping another paint color into an already-drying wash.


