
10 minute read
Layering & Complementary Colors


FLORAL BOUQUET
LAYERING & COMPLEMENTARY COLORS
LESSON 10
IN THIS LESSON, WE’LL COMBINE OUR WET-IN-WET FLOWER-
blending skills with our point-pressure-point leaf work to create a bouquet—and
bring our skills and a complementary color palette together. We will also play with adding a new playful element—berries! Notice the triadic color scheme and the balance of using blush, yellow ochre, and pine green, and how lovely they look together. Within the petals of our main flowers, the colors are analogous and naturally flow together, much like you’d witness in a real-life flower from the garden. Watercolor is such a perfect medium to capture the variegated beauty in a petal, and by creating the magic sauce on your palette first, and using your brush to gently drop in color, you are merely suggesting where this or that color might be pretty. Remember to not overwork your piece. If you wonder if a petal is done or needs more color, I find it’s usually better to leave it and let it blend and dry at that point. Learning to walk away and let the paint do its thing can be the biggest challenge—but it often rewards you with surprises as it dries!
IN T TOOLS
Round watercolor brushes, sizes 4 and 1
140-lb. watercolor paper Colored pencils, in blush and gray Traceable “Floral Bouquet” worksheet (page 207) Light source for tracing (a well-lit window or a light box) Tape (washi or draft) An inspiring cluster of real flowers from your garden or the market 2 Mason jars of water (one for light colors and one for dark colors)
Paper towel
PAINT PALETTE
PEAcH RAW UMBER cRIMSON
YELLOW OcHRE PAYNE’S GRAY
c OLOR RE c IPES
PINE Viridian + Cerulean Blue + Yellow Ochre + Lemon Yellow
BLUSH Crimson + Yellow Ochre + Peach
MAUVE Yellow Ochre + Peach + Violet
TE c HNIQUES
Point-pressure-point
Wash Wet-in-wet
TIPS FOR THIS PROJE c T
Flowers done in this airy, modern style are
QUICK. You need to make decisions while everything is wet. Your strokes also need to be minimal. Too much fussing and touching of your flower petals can actually interrupt the fluidness of your watercolor.
Take a moment now to turn to page 105 and review the three observations of Flower Shaping.
AS YOU BEGIN
Tape your papers together to secure your watercolor paper to your tracing sheet. This way, you can move and reorient your paper while tracing without having to realign the marks every time.
Use a light source, such as a window or a light box, to view your traceable design through your watercolor paper as you trace.
Using your colored pencils, lightly trace your botanical shapes onto your watercolor paper.
The flower shapes with dotted lines signify those that you will paint in a light palette, so be sure to use your light blush colored pencil to trace the dotted lines. Trace the rest with your gray colored pencil.
BEGINNER
Trace the design lightly with colored pencils—light blush for the petals and berries and light gray for the supporting foliage—so you’re not worried about drawing the shapes as you are painting.
ADVAN c ED
Try not to trace beforehand; use your eyes to soak in the image and then freehand with the paint.
Try a different flower shape, perhaps a daisy or a rose.
Try a new color palette! Perhaps a different combination of analogous colors within the flower petals. For example: Mauve, Violet, and Blush. Or mix up the color scheme completely and perhaps try a Buff Titanium flower with petal tips of Blush/Magenta.
Play with your boundaries: try painting more flowers, overlapping more petals, adding more berries and leaves.
Play with the timing of your wash vs. your wet-in-wet additions, learning more control as your paint is slowly drying.
BRUSH: Round 4 PAINT cONSISTENcY: 80w/20p “soy sauce with wasabi,” moving toward 90w/10p “soy sauce”
FLOWERS: WASH
1Use your brush to bring clean water from your Mason jar to your palette and create your 80w/20p consistency of the Blush and Mauve color recipes. These flower petal boundaries will be light and airy, and you will add interest and dimension with Blush and Mauve, as well as the many colors and tones that make up these color recipes.
2Rinse your brush in the Mason jar of clear water and load up the bristles for your clear water wash.
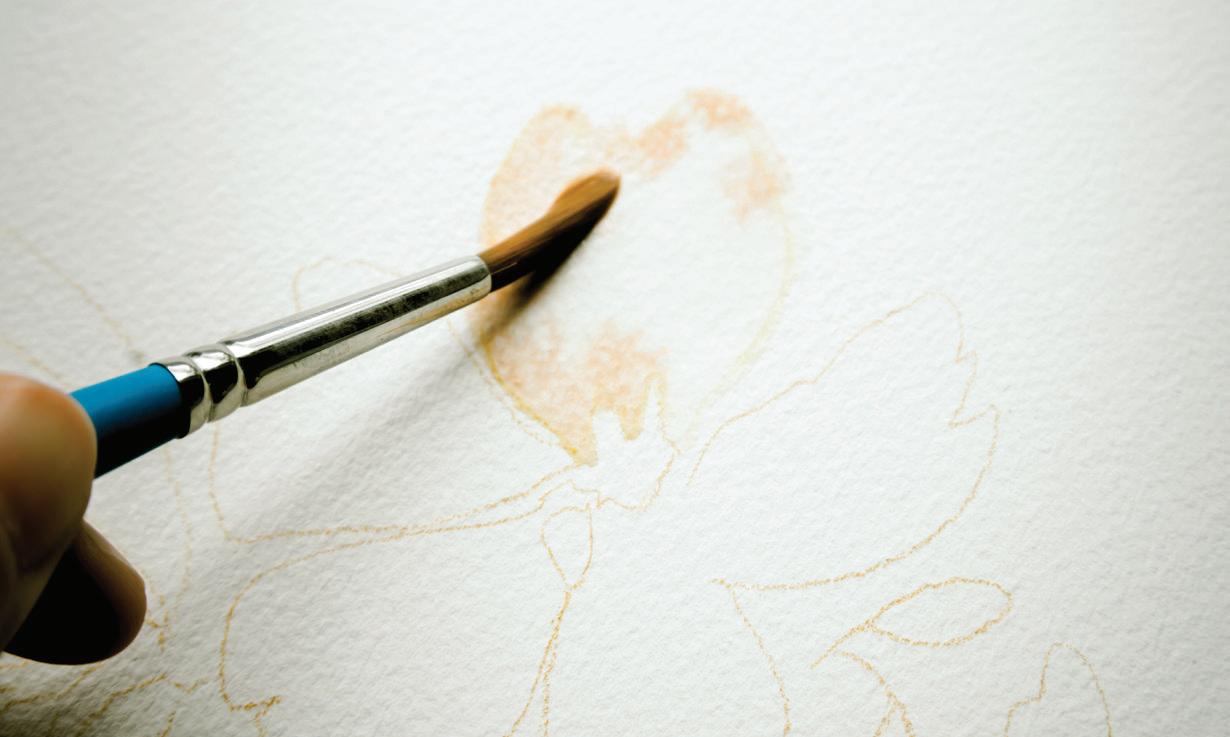
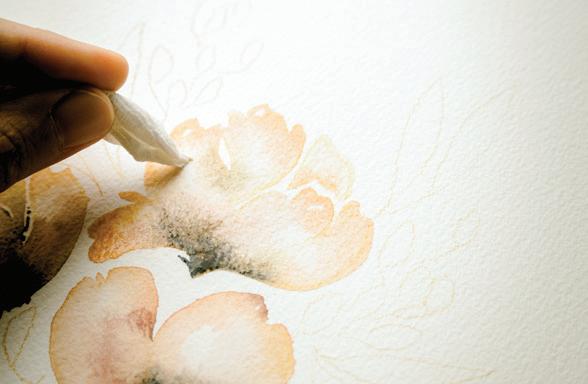
3Bring your brush to your watercolor paper and fill in your first petal boundary with a clear wash, working from left to right and using your paintbrush to “scrub” the paper texture in a back and forth motion until your first petal shape has a nice clear and shiny sheen. [A]
4Next, bring your brush to your palette and load it with your 80w/20p Blush recipe. 5 Take your fully filled brush to the wet boundary of your petal and use the wet-in-wet method to drop in the Blush color at different points of the boundary—around the edges and in parts in the center of the petal. [B]
6It is important to work quickly as you fill your petal boundary with color, so you can create seamless gradations of color within your petal.
9Don’t worry too much about the colored pencil lines; view them more as guidelines to help you leave interesting white space between petals and layers. Some of your colored pencil lines may show through your paint, depending on how lightly you traced and how much paint you add to your petal. Don’t worry about these—we are aiming for progress, not perfection! If you do see the lines you traced after you’ve painted over them, next time try tracing a bit lighter and they will blend in more easily with your paint.
10 Complete the rest of the flower petals by following the previous steps, being sure to drop in your complementary colors with the wet-in-wet method while your boundaries are still wet.
B
C
A


FLOWERS: WET-IN-WET
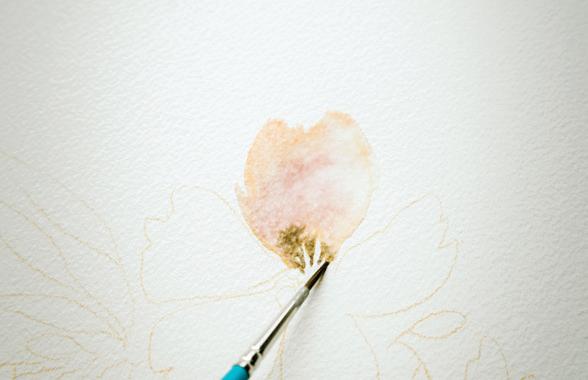
1Dip your brush in your Mason jar of water and bring it to your palette to create a 50w/50p consistency of Raw Umber. [A]
2Pick up the mixture with your brush and bring it to the wet boundary of your first flower. Use just the point of your brush with the lightest pressure to create small downward, delicate marks. Because the petal boundary is wet, the Raw Umber will blend, running up through your petal. [B] 3 Make delicate, short lines starting from the dry white paper center and moving into the petal, flicking them gently toward the wet petal boundaries. The dark colors will begin to bleed and blend into the light petals. Because you have painted these darker colors last, there will be less movement in their wet-in-wet effect, as the wash on the petals is beginning to dry. This will ensure your petals keep their light Blush hues, while still blending with the center stamens.
4Now it’s time to add the color gradation that will be unique to every petal in your flower.
5Dip your brush in your Mason jar and use it to add more water to the pure paint color dabs of Payne’s Gray, Yellow Ochre, Crimson, and Peach on your palette until you have a 50w/50p consistency.
6Be mindful of your two Mason jars, keeping them separate as you dab colors of light, then dark, into your petals.
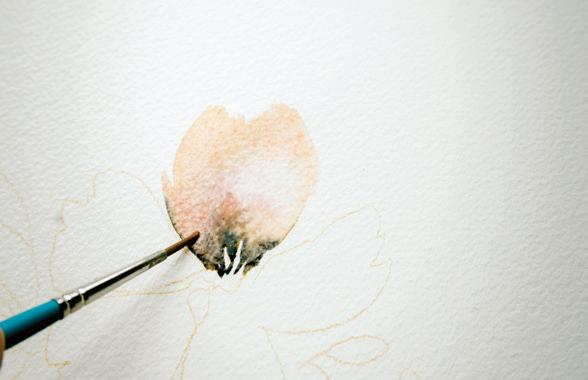
7In this petal, I dropped in Payne’s gray, Raw Umber, Mauve, and a touch of Peach while the boundary was still wet. [c]

8These colors will become little fireworks within the petal boundaries, mixing amongst themselves, making each petal unique and one of a kind.
9With a small paper towel, or a thirsty brush, you can use the blotting method to lightly blot out the color or excess water. I tend to add colors to the borders or corners, and or lift or blot away from the centers of the petals. But remember, the less you touch these minimalist flowers, the better. Let them do their watercolor thing. [D]
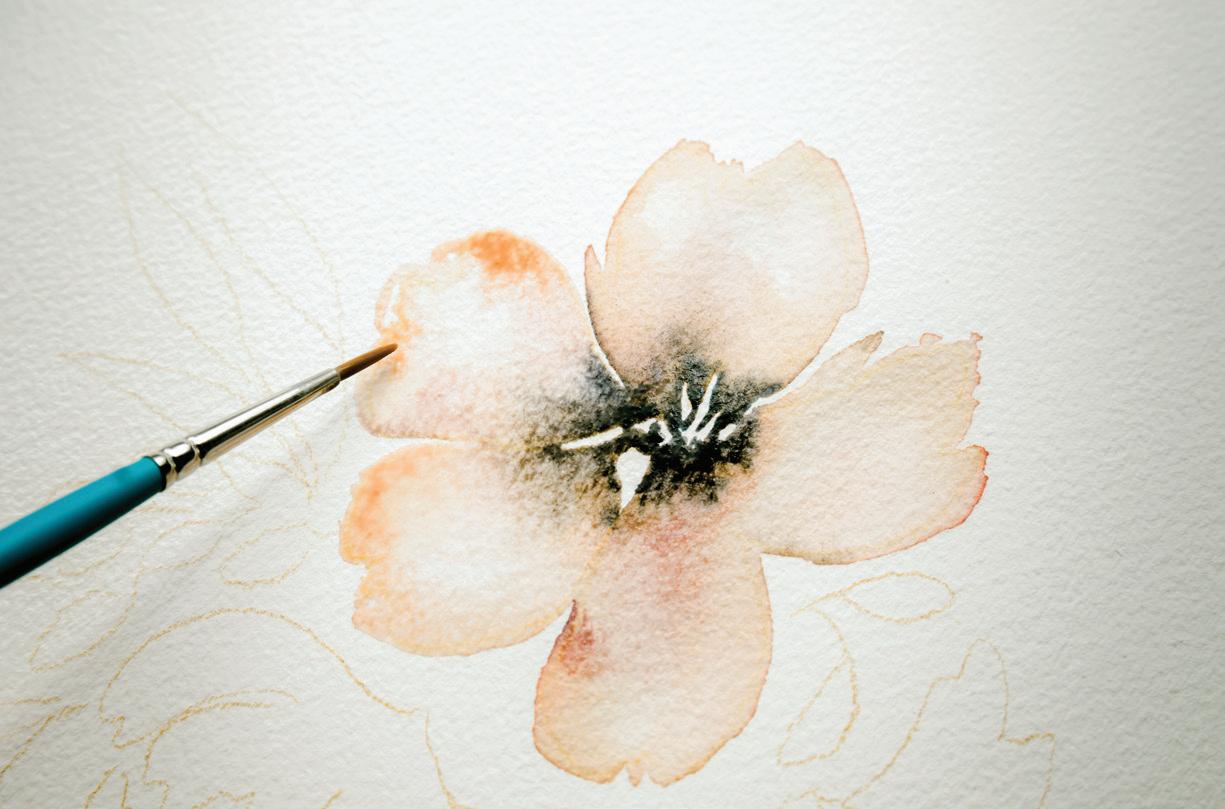
10 Here is where you can hide your colored pencil tracing lines, in case a few are still showing through, by saturating any visible lines with paint as you work wetin-wet. [E]
A
B
continues on next page
E
C D


11 As you paint each flower, follow the previous steps to paint your petals. Experiment with washing multiple petals at once to see what the timing is like as they
dry. [F, G]
12 For this flower, I washed the entire boundary (all three petals) with a clear wash of water, and then used the wet-in-wet method to drop in the extra colors. [H, I]
13 For this final flower, I washed the first half in clear wash, and then used the wet-in-wet method to drop in colors. I quickly washed the second half of the flower, and continued the wet-in-wet coloring, then used a paper towel to blot excess color and water out of the centers of the petals. [J–M]

F

G J


L H
I
K
M
BRUSH: Round 4 PAINT cONSISTENcY: 50w/50p “heavy cream,” moving toward 80w/20p “soy sauce with wasabi”
WATERCOLOR LEAVES
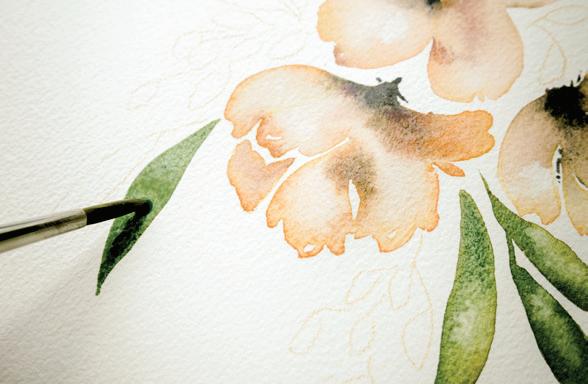
1To paint your long, slender leaves, use your Round 4 paintbrush to add more water to your Pine recipe on your palette until you have a consistency of 50w/50p, moving toward 80w/20p. 2 Bring your loaded brush to your watercolor paper. Using the point-pressure-point technique, pull down your paint in a fluid motion to complete your leaves. Add your dark points of wet-in-wet color and your lighter blotted spots while each leaf is still wet.
BRUSH: Round 4, Round 1 PAINT cONSISTENcY: 50w/50p “heavy cream,” moving toward 10w/90p “mustard”
WATERCOLOR BERRIES & STEMS
1To paint your berries, use your Round 4 brush to bring water to the pure Yellow Ochre paint on your palette and mix until you have a consistency of 50w/50p. Do the same for your Raw Umber. I use my larger Round 4 to bring water to my palette, and then switch to a Round 1 to actually paint the berries for better control. Load your Round 1 with your 50w/50p mixture of Yellow Ochre.

2Bring your loaded brush to your watercolor paper and paint in the oblong round berry shapes. I like to paint them in small clusters, completing the Yellow Ochre shapes, blotting out small points of light with a paper towel. [A]
3Then, rinse your brush in your wash water, bring your brush to your palette, and pick up your 50w/50p Raw Umber, which you will use to draw the most delicate lines. Bring your brush to the short lines leading to the berries and pull your brush from the dry white paper toward the wet boundaries of the berries. The darker pigment of the line will begin to bleed and blend into the lighter Yellow Ochre of the berries.

4Remember to keep rotating your paper so you have the most control of your brush and best access to the area you’re painting without running your hand through the still-wet parts. [B]
5Once your piece is completely dry (I like to wait twenty-four hours), erase your penciled-in flower numbers. Now put your piece on display for all to see—you’ve done a beautiful bouquet!


