
7 minute read
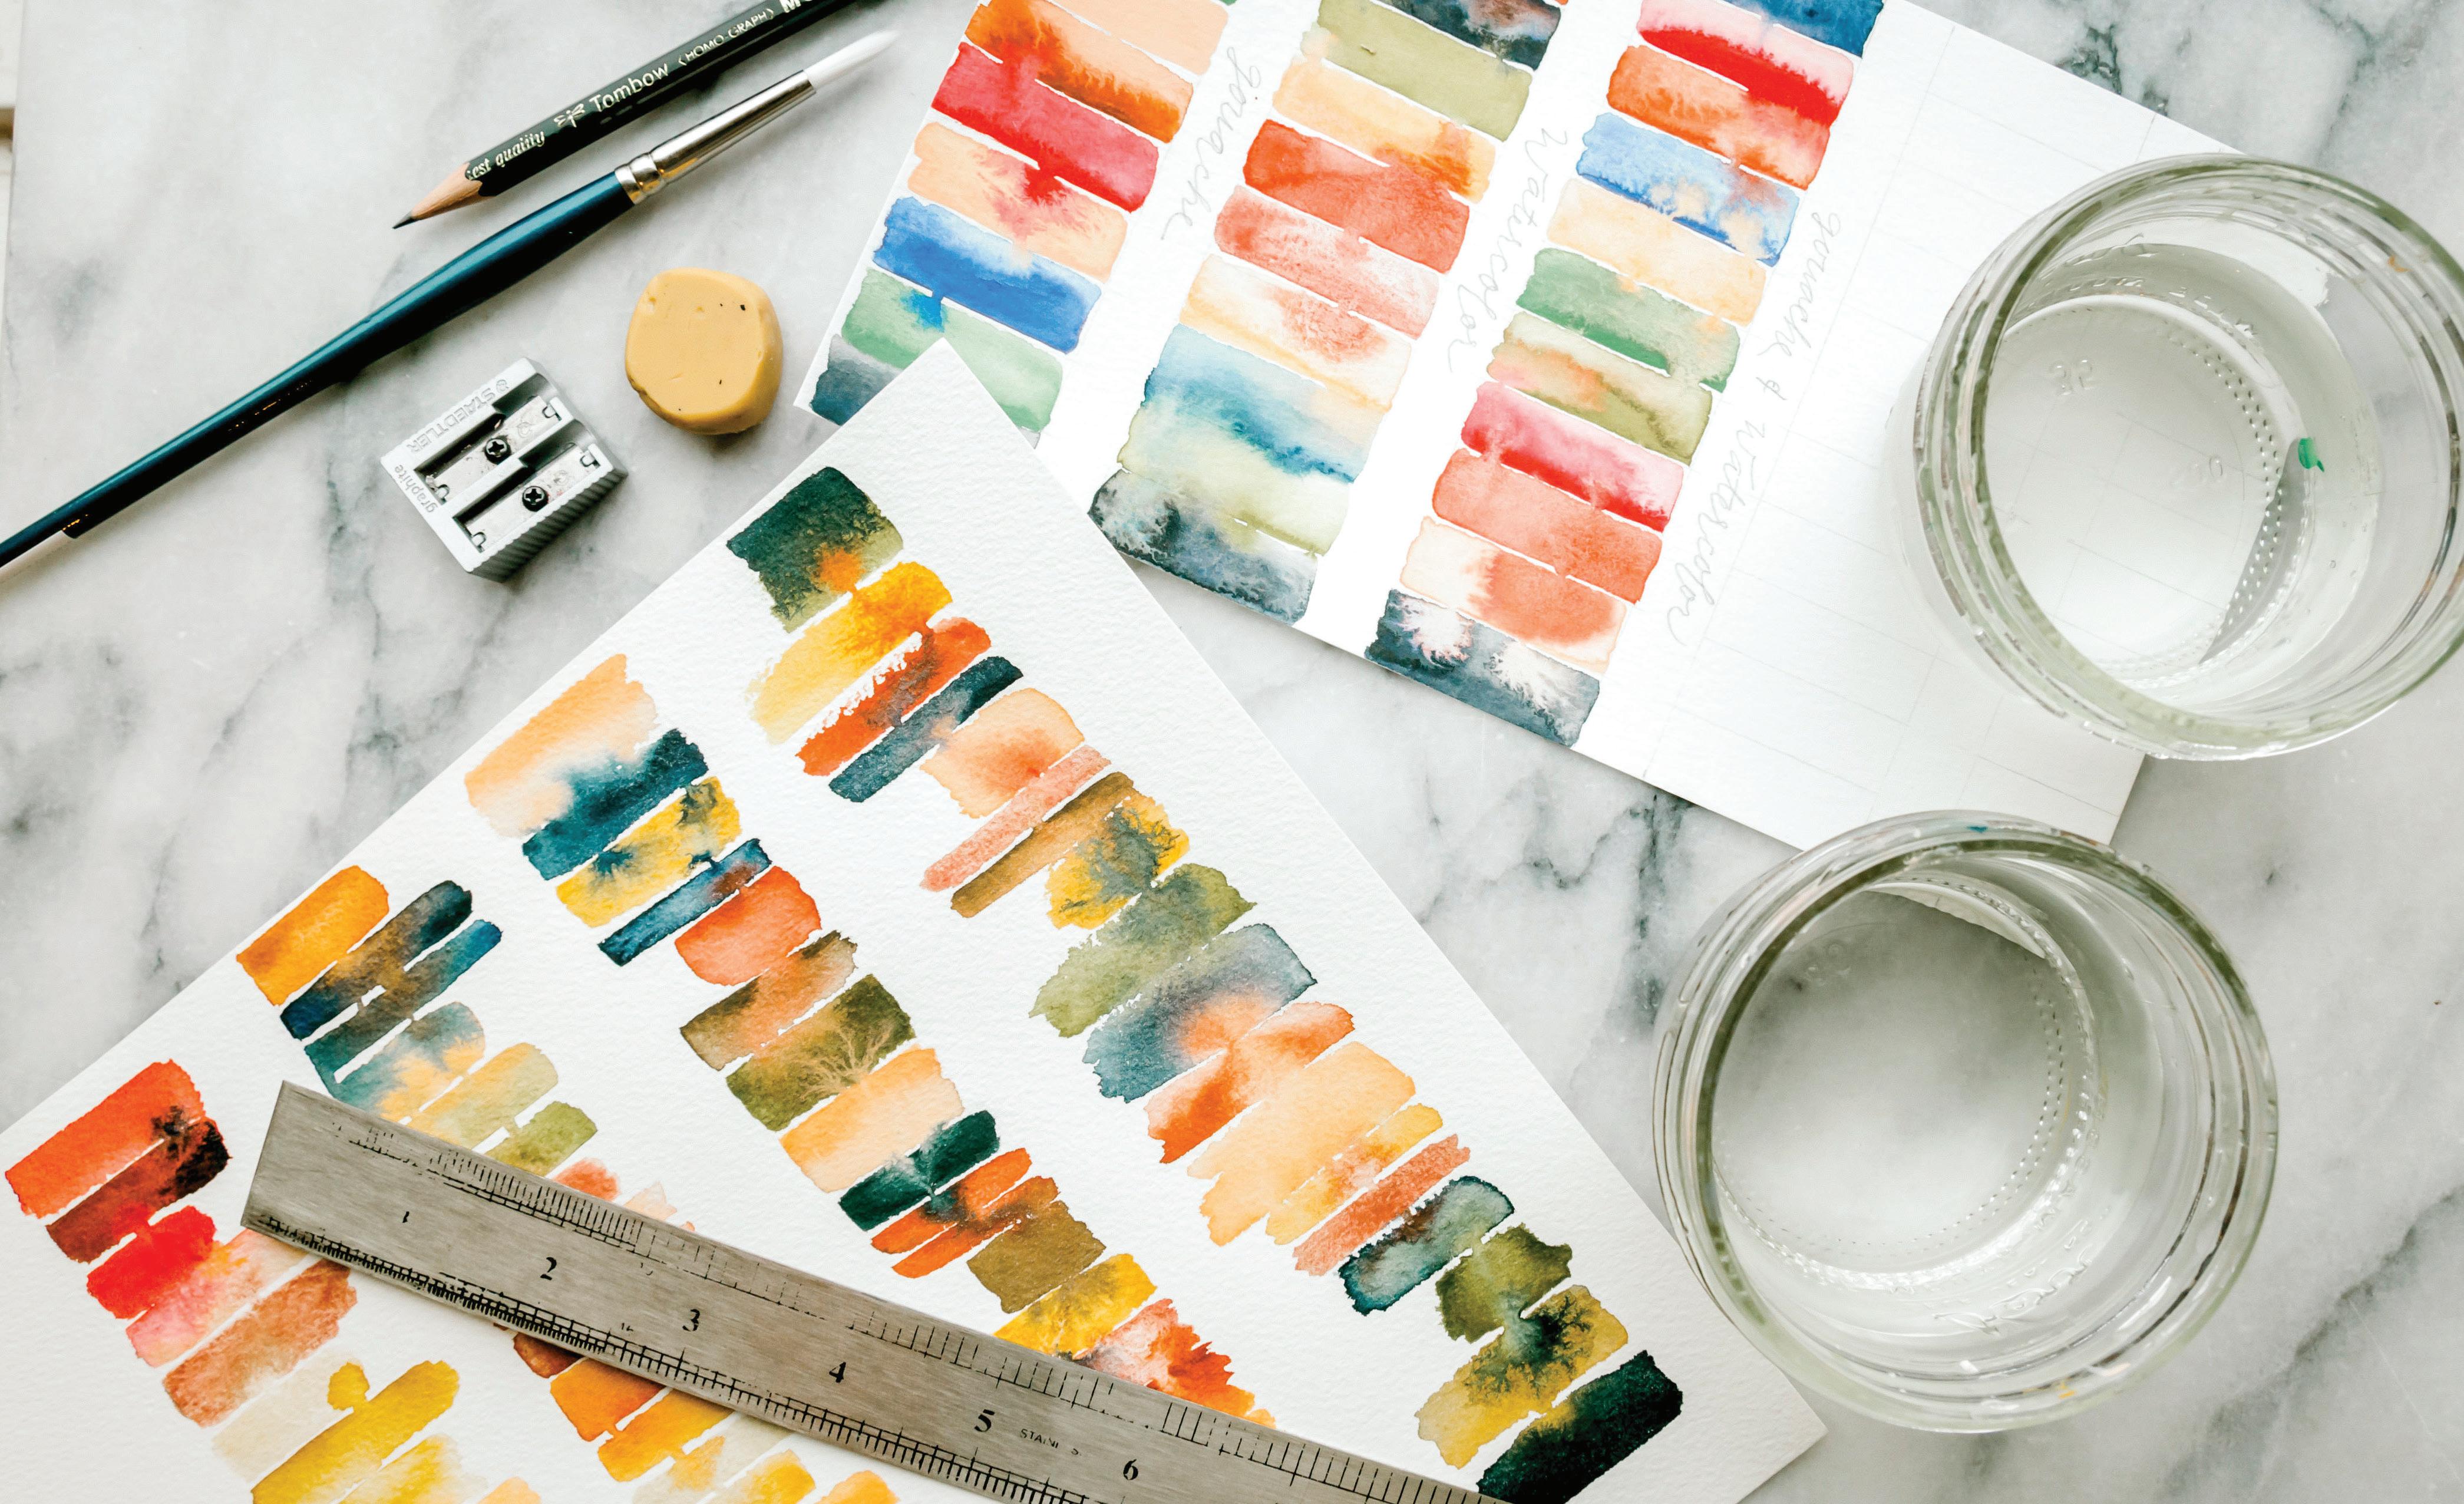
Watercolor Blocks


BOUNDARIES & BLENDING
WATERCOLOR BLOCKS
LESSON 4
IN THIS LESSON, YOU WILL PLAY WITH THE COLOR RECIPES YOU JUST
created and do some exploring with boundaries, seeing how watercolor paint
moves from one color to the next depending on how dry or wet a boundary is. I like to think of this blending between boundaries as the paints talking to each other. With the right amount of water, the colors begin to blend and hang out, making some beautiful friendships that you started with your very own brush! color in abstract play allows you to learn technique without worrying about creating a recognizable botanical shape yet. I love removing obstacles so you can just enjoy the beauty of watercolor! At the end of this lesson, you will have a lovely piece that will also serve as a reference.
TOOLS
Round watercolor brush, size 4 140-lb. watercolor paper (I like to use the very best watercolor paper I have for this lesson, as it shows off all the amazing bleeding and veining properties that make watercolor so lovely. Hahnemühle 140-lb. rough or cold press is my favorite. If you opt for nicer paper, cut the paper in half, since you won’t need all of it.)
Paper towels 2 Mason jars of water Ruler
HB pencil
TE c HNIQUES
Wash Boundaries
Wet-in-wet
TIPS FOR THIS PROJE c T
You will paint small rectangular boundaries, one right next to another, with thin lines of dry watercolor paper between each rectangle. This is excellent practice for your hand, as you learn control of your brush and its capabilities to bring paint and water to your paper.
Notice that the first line I paint is straight, and the rest of the box is rather jagged. Don’t worry about making a perfect rectangle; the point is to see the effect of one color on another, and what happens when one wet boundary bleeds into another. We will do the first row together, but please, fill an entire page (or half a page . . . or four pages) if you’re in the groove. I find this to be one of those meditative, calming lessons I return to again and again for testing out new colors or just as an act of creativity for the day.
This is also an excellent way to play with mixing gouache and watercolors, learning how they communicate with one another and how they differ in opacity and texture.
AS YOU BEGIN
Using an HB pencil and ruler, lightly draw two lines across the width of your watercolor paper, roughly 2 inches apart, like you see in the picture.
You will create rectangle boxes in similar widths along the right-hand pencil line.
Ready your Mason jars of water and prime your brush.
Use your brush to bring water to your palette to reanimate the following colors, adding more water until you have an 80w/20p “soy sauce with wasabi” consistency of each of these colors on your palette:
· Gouache Blush (recipe on page 68) · Payne’s Gray (pure pigment color) · Gouache Sage (recipe on page 68) · Mauve (recipe on page 68) · Yellow Ochre (pure pigment color)
PAINT PALETTE
PAYNE’S GRAY YELLOW OcHRE
c OLOR RE c IPES REANIMATING YOUR c OLORS
To return to a palette that has dried from a previous painting session, just add water to reanimate your colors. You’ll notice a difference in the vibrancy of your colors when working with reanimated paint versus paint directly from a wet tube. Reanimated paint, compared with wet tube paint, is more like working from cake watercolors. To get a thicker consistency of paint, and thus more saturated pigment, you need to brush water directly on the dried dab of paint. Don’t be shy—pile that water on so you can get the same raindrops of movement on your palette. Your colors will activate and eventually be true to color.
MAUVE Yellow Ochre + Peach + Violet
GOUAcHE BLUSH Crimson + Yellow Ochre + Peach + White
GOUAcHE SAGE Sage Recipe + White
GOUAcHE & WATERcOLOR
WATERcOLOR
GOUAcHE

c HALLENGE YOURSELF
Try adding in a few new colors using the wet-in-wet technique. For example, introduce Crimson by dropping it into a wet boundary to see how it moves and bleeds. Observe what this does to the coloring of your rectangles.
Once the washes have begun to dry, drop in a new color (or pure water) to create some lovely watercolor blooms!
Try this lesson with new color palettes, arranging different color combinations to see how they look.
Play with color patterns: analogous only, monochromatic only, complementary next to each other only, or make up your own!
WATERCOLOR BLOCKS
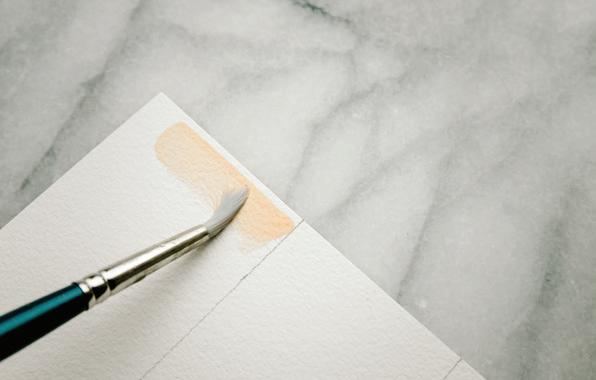
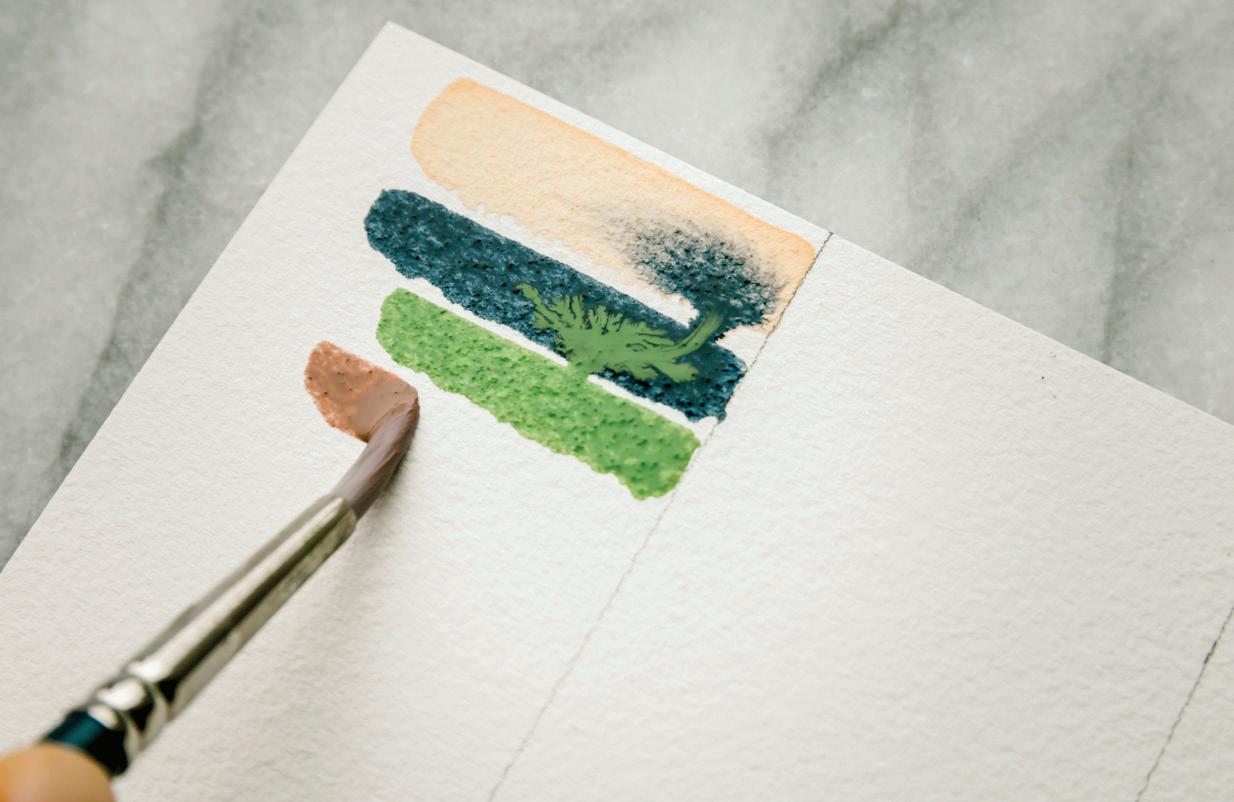
1Use your brush to pick up the 80w/20p Gouache Blush mixture on your palette and bring to your watercolor paper.
2With your brush, create a rectangle boundary of the Gouache Blush, stroking your brush from left to right.
3Because this is a narrow boundary, your second stroke can be all water. Dip your brush in your Mason jar and bring it back to your watercolor paper. Apply a water stroke to complete the boundary of your first rectangle, squaring off the bottom neatly. [A, B, c]
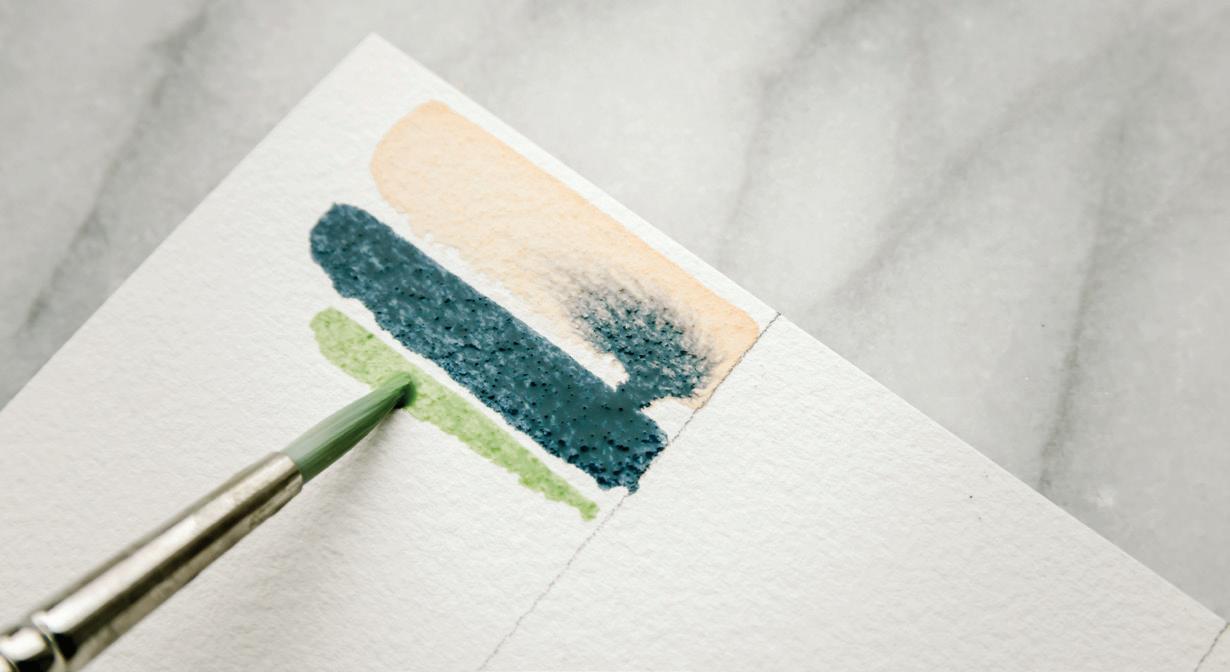
4To create the second rectangle, bring your brush to your palette and pick up the 80w/20p consistency of Payne’s Gray. Bring your loaded brush to your watercolor paper and stroke your brush from left to right to create your next rectangle. 5 Once your second rectangle of color is created, it’s time to blend your boundaries. Using the lightest pressure, and just the point of your brush, gently drag your brush from the dark Payne’s Gray rectangle into the light Blush rectangle. Since both of these boundaries are very wet, let them do their magical watercolor blending! Let them blend and move on their own as they dry. I call these small lines between boundaries “bridges.” [D]
6Try adding a bit more Payne’s Gray with the tip of your brush to the bridge point to watch the bleeding increase. [E]
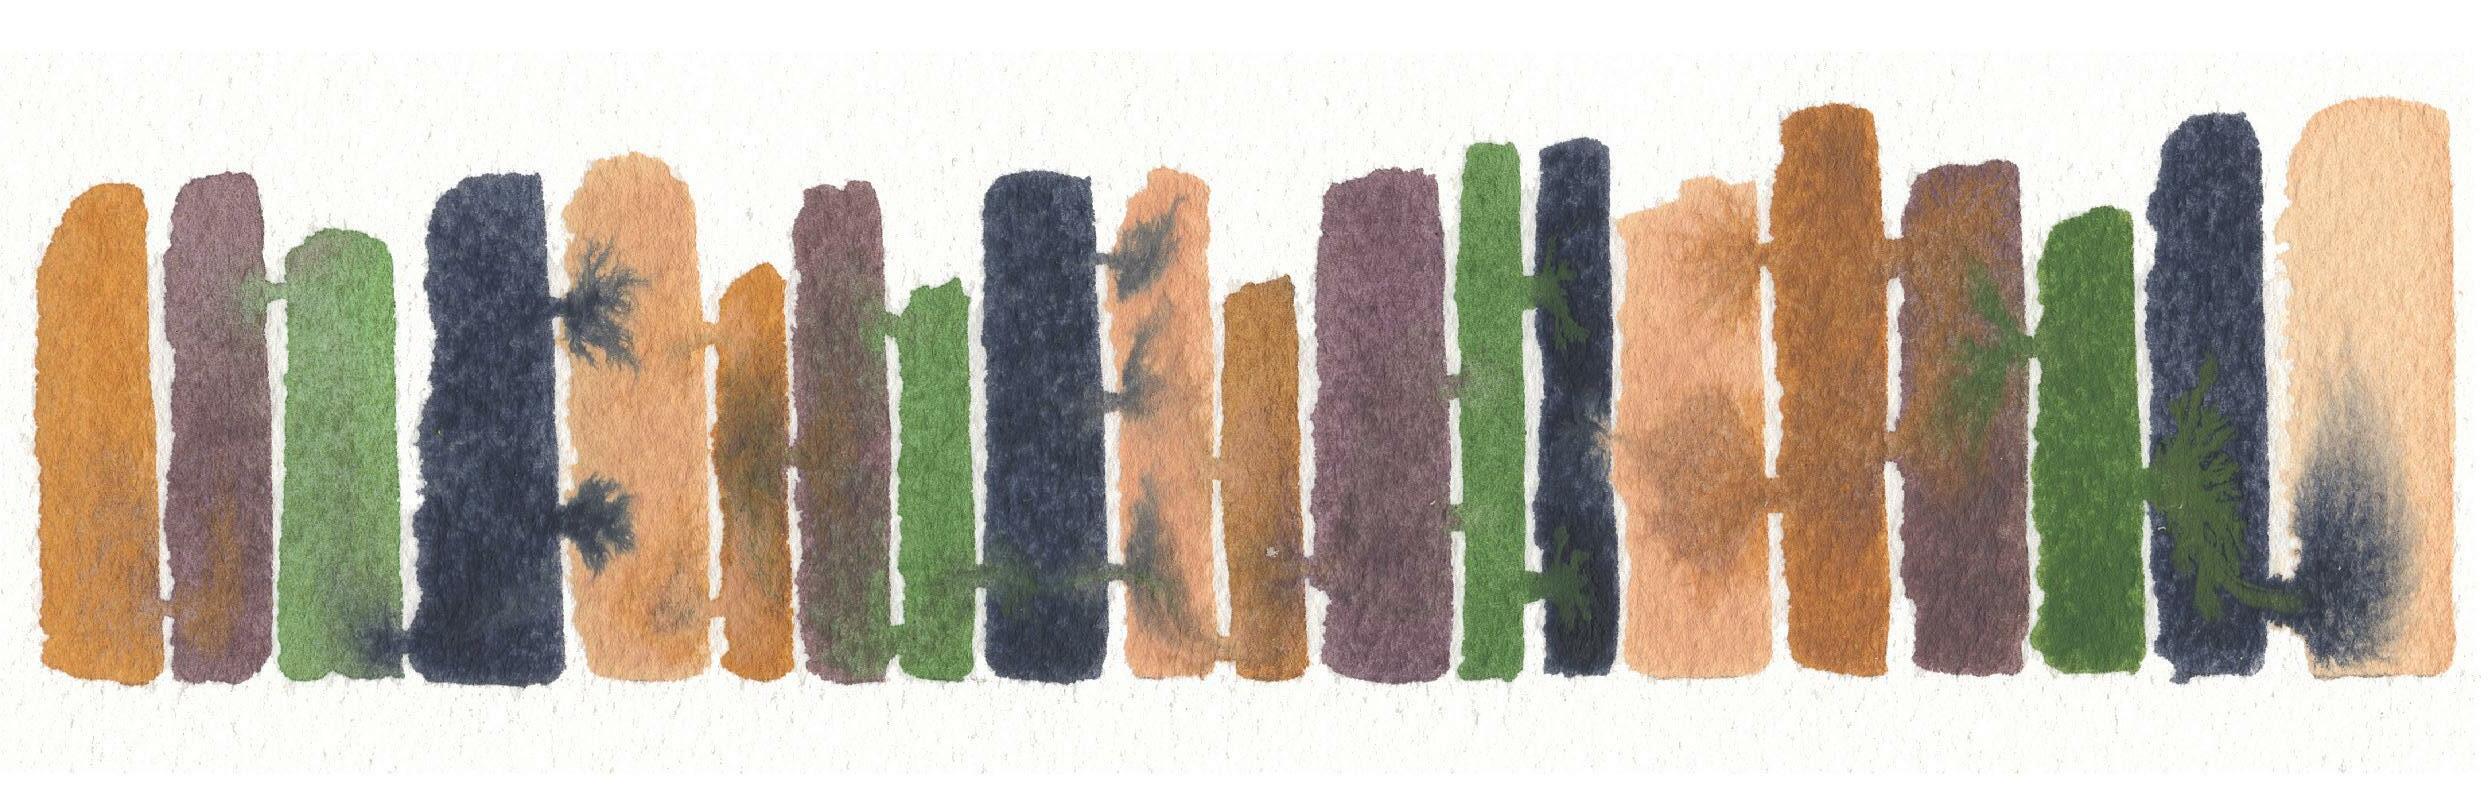
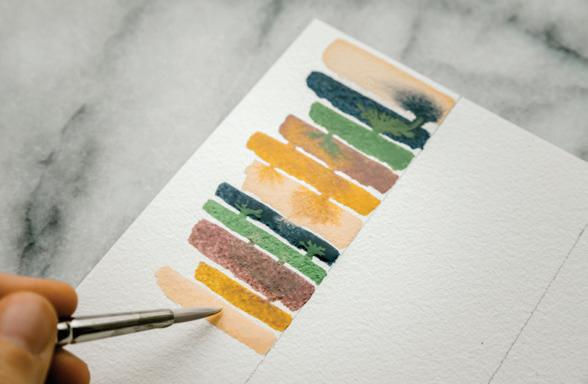
7Continue down the line following this color pattern: Gouache Blush, Payne’s Gray, Gouache Sage, Mauve, Yellow Ochre, and then back to Gouache Blush. Remember to leave thin lines between your wet watercolor rectangle boundaries as you paint, and only create small bridges where the boundaries collide. Too many bridges, and the colors may muddy too much. [F]
8Feel free to alternate the heights and widths of your rectangles. This makes the collection of boxes appear abstract but balanced, adding more visual interest and helping improve your brush control skills. [G–P]

E
F
A

C B


D
PROBLEM SOLVE
Colors not blending? Don’t worry! Your washes just need more water. Try adding a bit more water to your second wash and see if that does the trick.
Are you dealing with some crazy biodomes from too much water? Because these are small boundaries, it’s easy to get a bit overzealous with the water. I encourage you to leave these and see how they dry and settle. But if they are really wet and look like they might spill over your boundary, use the corner of your paper towel to blot and lightly remove excess water from the corners of your boundary (see page 50). Try not to over-blot! Resist the urge to continually touch your wet or drying boundaries, and just MOVE ON to the next rectangle and see what happens as things dry. Watercolor done right is full of sure strokes, left alone to mingle and swirl. If you’re blotting and fretting constantly, not only are you killing your joy with worry, but you’re stopping the paint from its full artistic expression.
G

J


N H


K
L

O I


