
VARUN THAUTAM & ASSOCIATES, LLP
school of planning & architecture, bhopal
jan 16th - jul 02nd 2022
shobhan venkatesh
about the practice
Varun Thautam & Associates,LLP is founded by its principle architect, Ar. Varun Thautam. He is a graduate of IIT Roorkee and has a Masters degree in urban design and housing from Mcgill University, Canada. He runs a humble ‘design build’ practice in Yelahanka, the North of Bangalore. The practice solely adheres towards natural building techniques and ecological building principles such as ‘Permaculture’ I was fortunate enough to be introduced to various of these aspects and widen my exposure towards sustainable buidling practices.
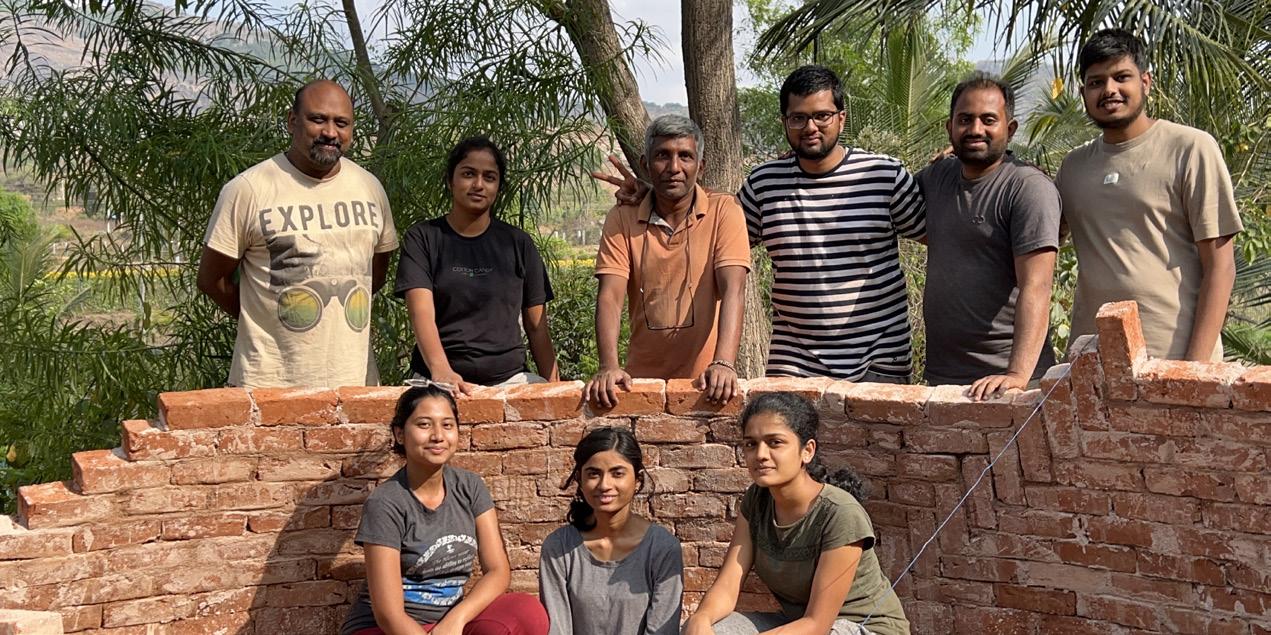
Interning here for 6 months has given me so much eperience with materiality and techniques of construction and execution. I was involved in almost every stage of the process from start to finish. It was a wholesome experience as I got to see what happens in a professional practice and how things are handled. The firm relys on freshers and begginers in the feild because it has a teaching side to it too. They call it - Vanamu. An educational, research and outreach initiative which focuses on documentation and researching on such ecological practices. I did have an opportunity to work on that side of the spectrum too.
architectural practice
01 02 03 04 02 03 04 05
bhaskar’s weekend house mukund’s residence
Sathankal | Hosur
Rampalya | Bengaluru
sreeram ramamoorthy’s farmhouse
Anjanapura | Bengaluru
office interiors + brick oven
Vanamu | Yelahanka | Bengaluru
workshops & curations
01
rammed & poured earth workshop
Vanamu | Yelahanka | Bengaluru
natural plasters & techniques workshop
Vanamu | Yelahanka | Bengaluru
catenary dome building
Mayavadi | Nandi Hills
timbrel vaulting natural paints exploration
Suratkal | Mangalore
Malleshwaram | Bengaluru
contents
21 1 5 9 15 23 25 27 29
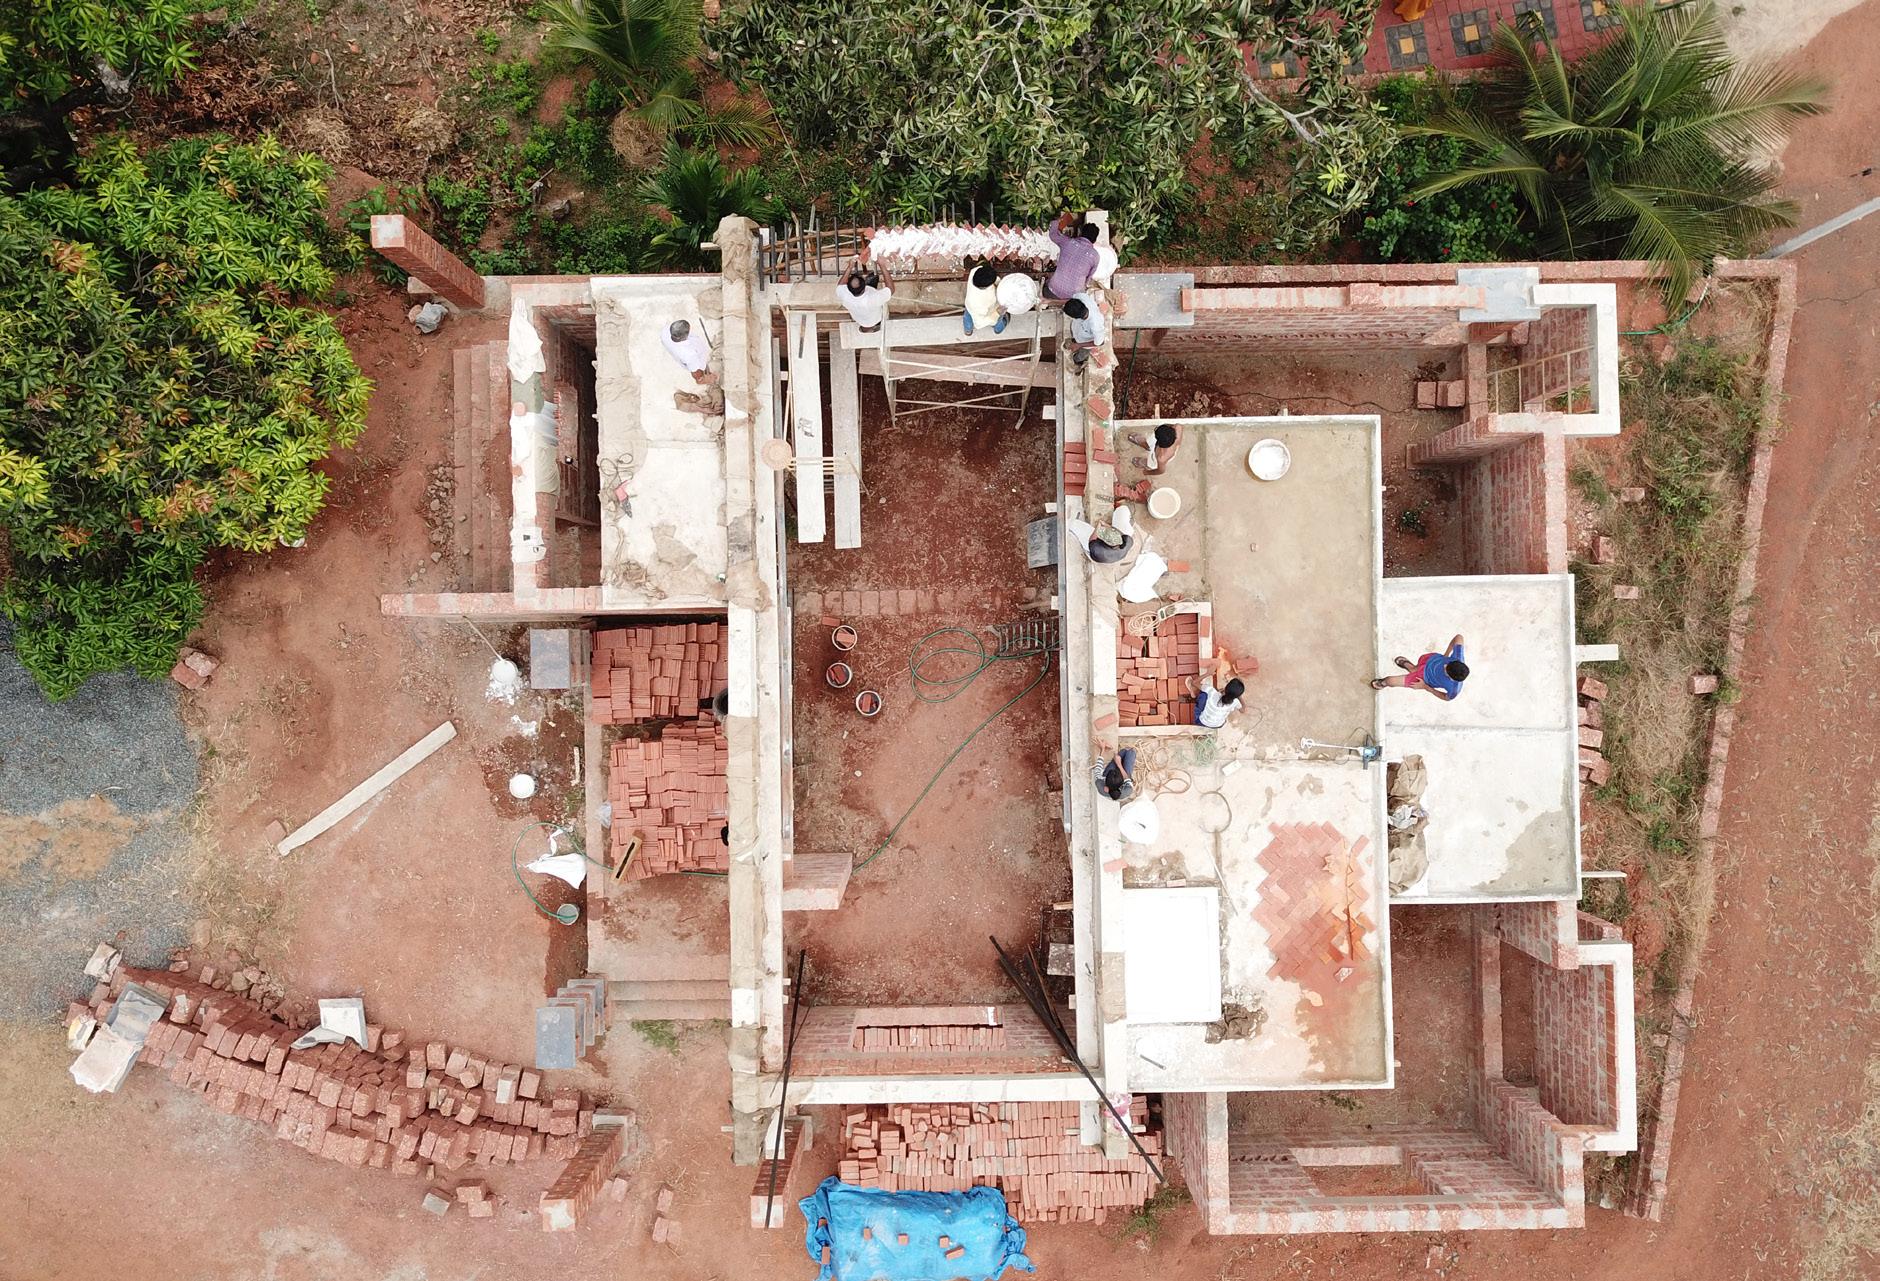
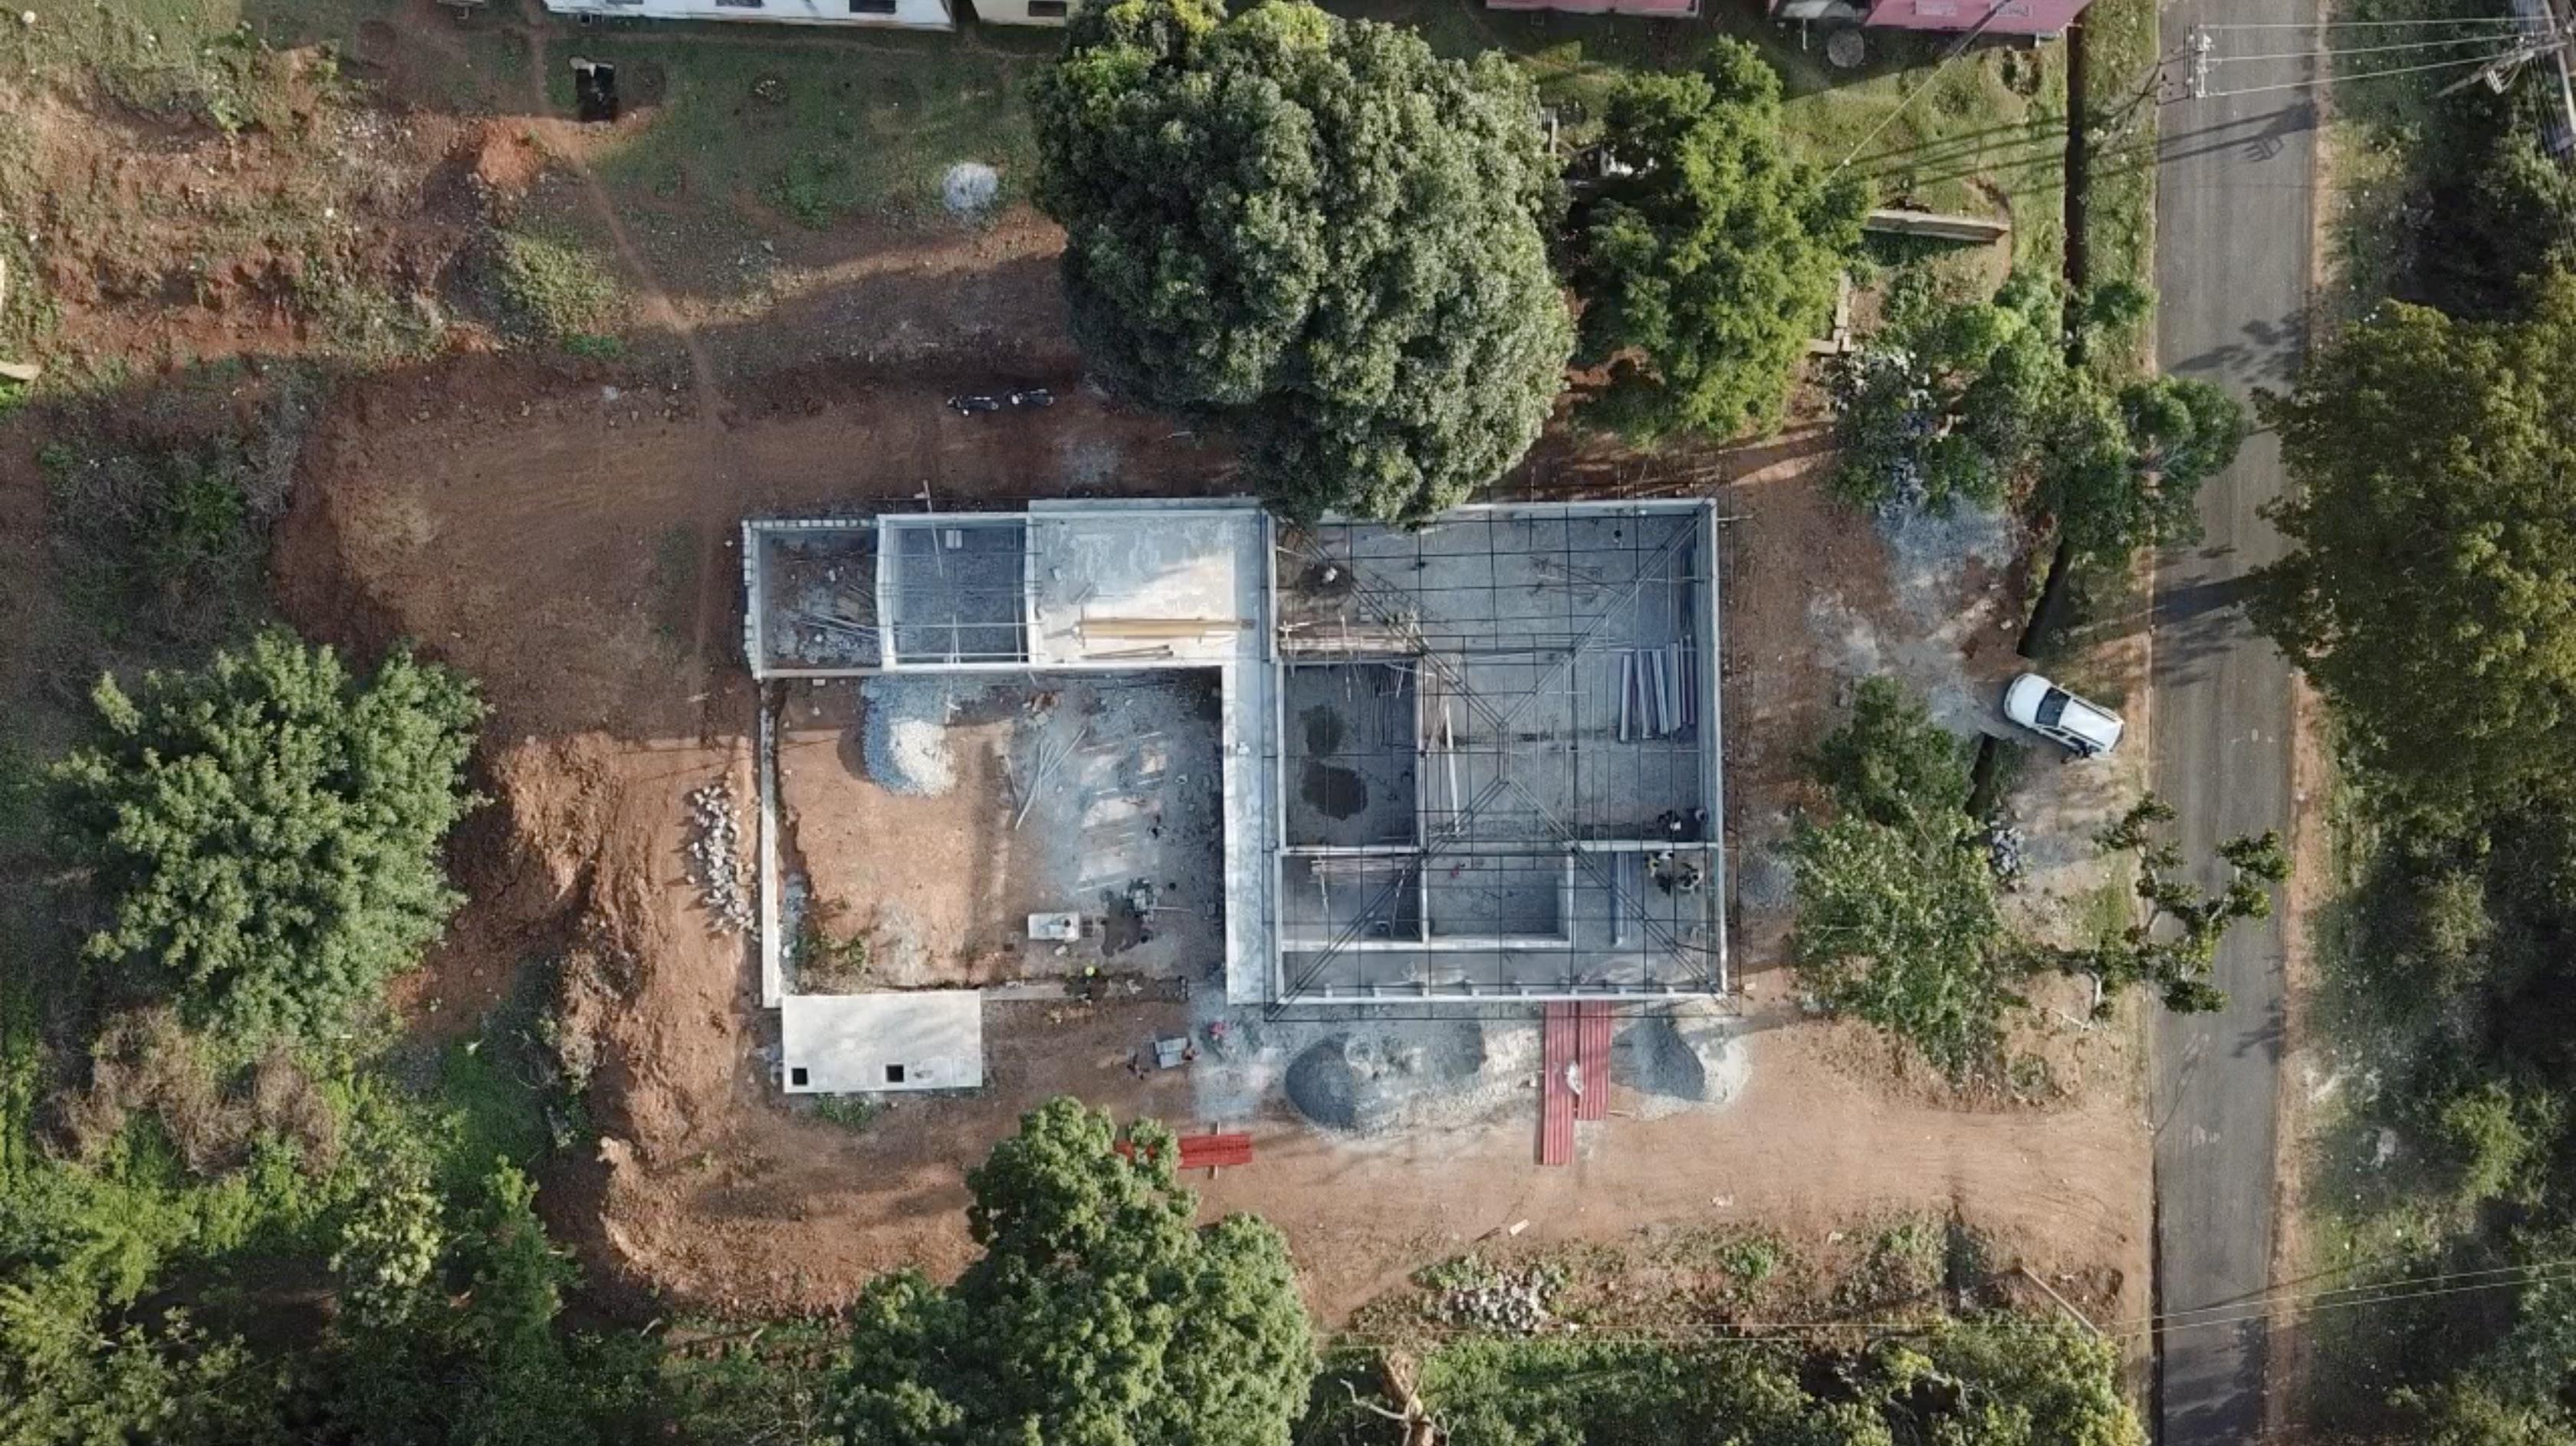
architectural practice varun thautam & associates
I present you, a compilation of the architectural works I had done during my tenure of internship at Varun Thautam & Associates, LLP. I was majorly involved in designing, visualizing and administrative works such as presentations, documentation, etc. Below are 4 major projects that I had an opportunity to work for. My journey starts with Visualization (bhaskar’s weekend house), followed by co-designing and modelling (Mukund’s residence) and finally getting to design a full fleged farmhouse (Sreeram Ramamoorthy’s farmhouse). The architectural segment ends with an add on project that I helped design and execute during my last days at the internship.
roles assigned conceptual design tender drawings estimate client presentations
3D modelling & visualizations
Sathanakal | Hosur
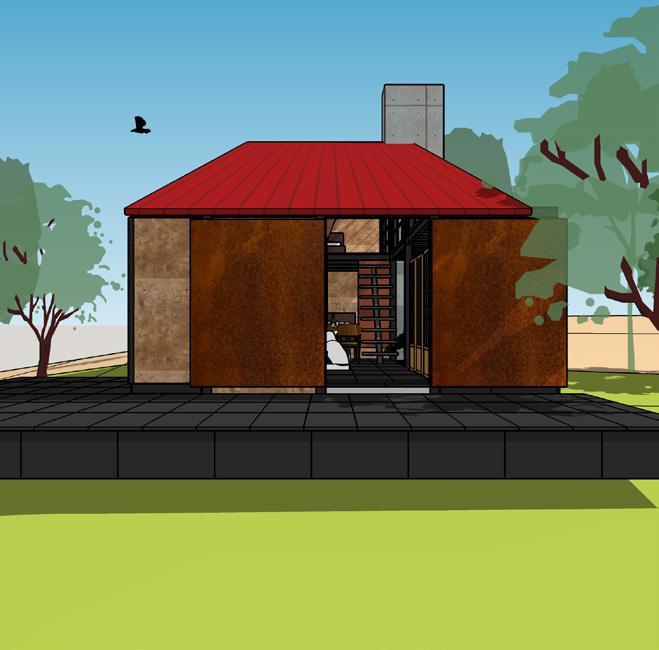
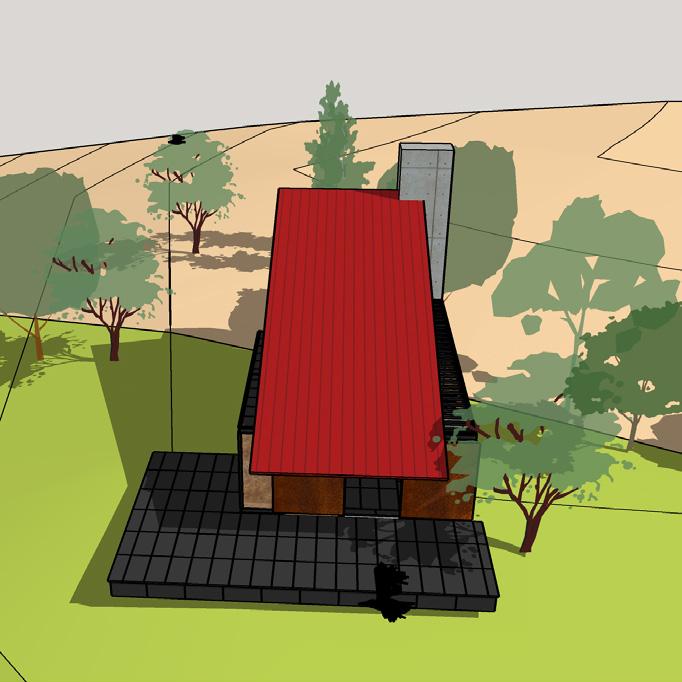
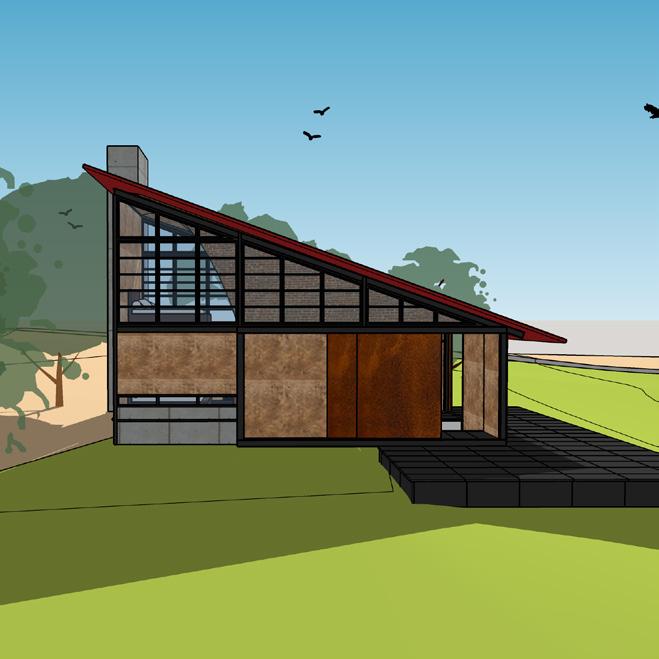
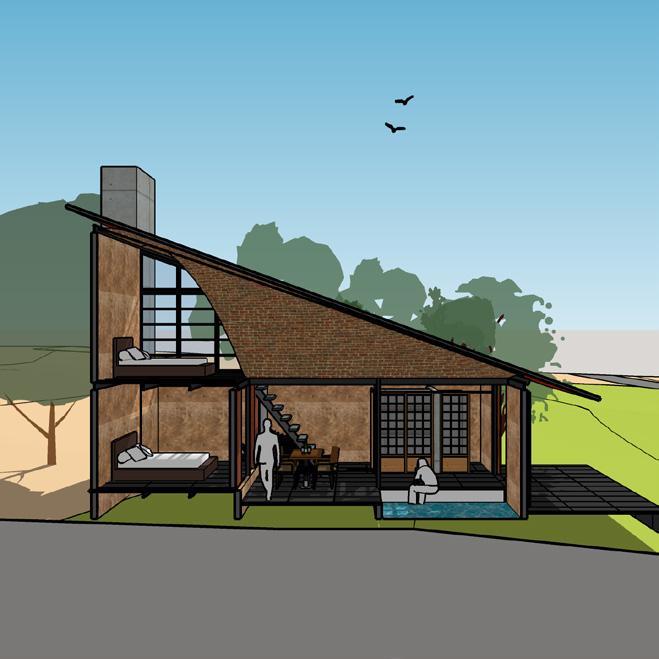
01 bhaskar’s weeknd house
about the project
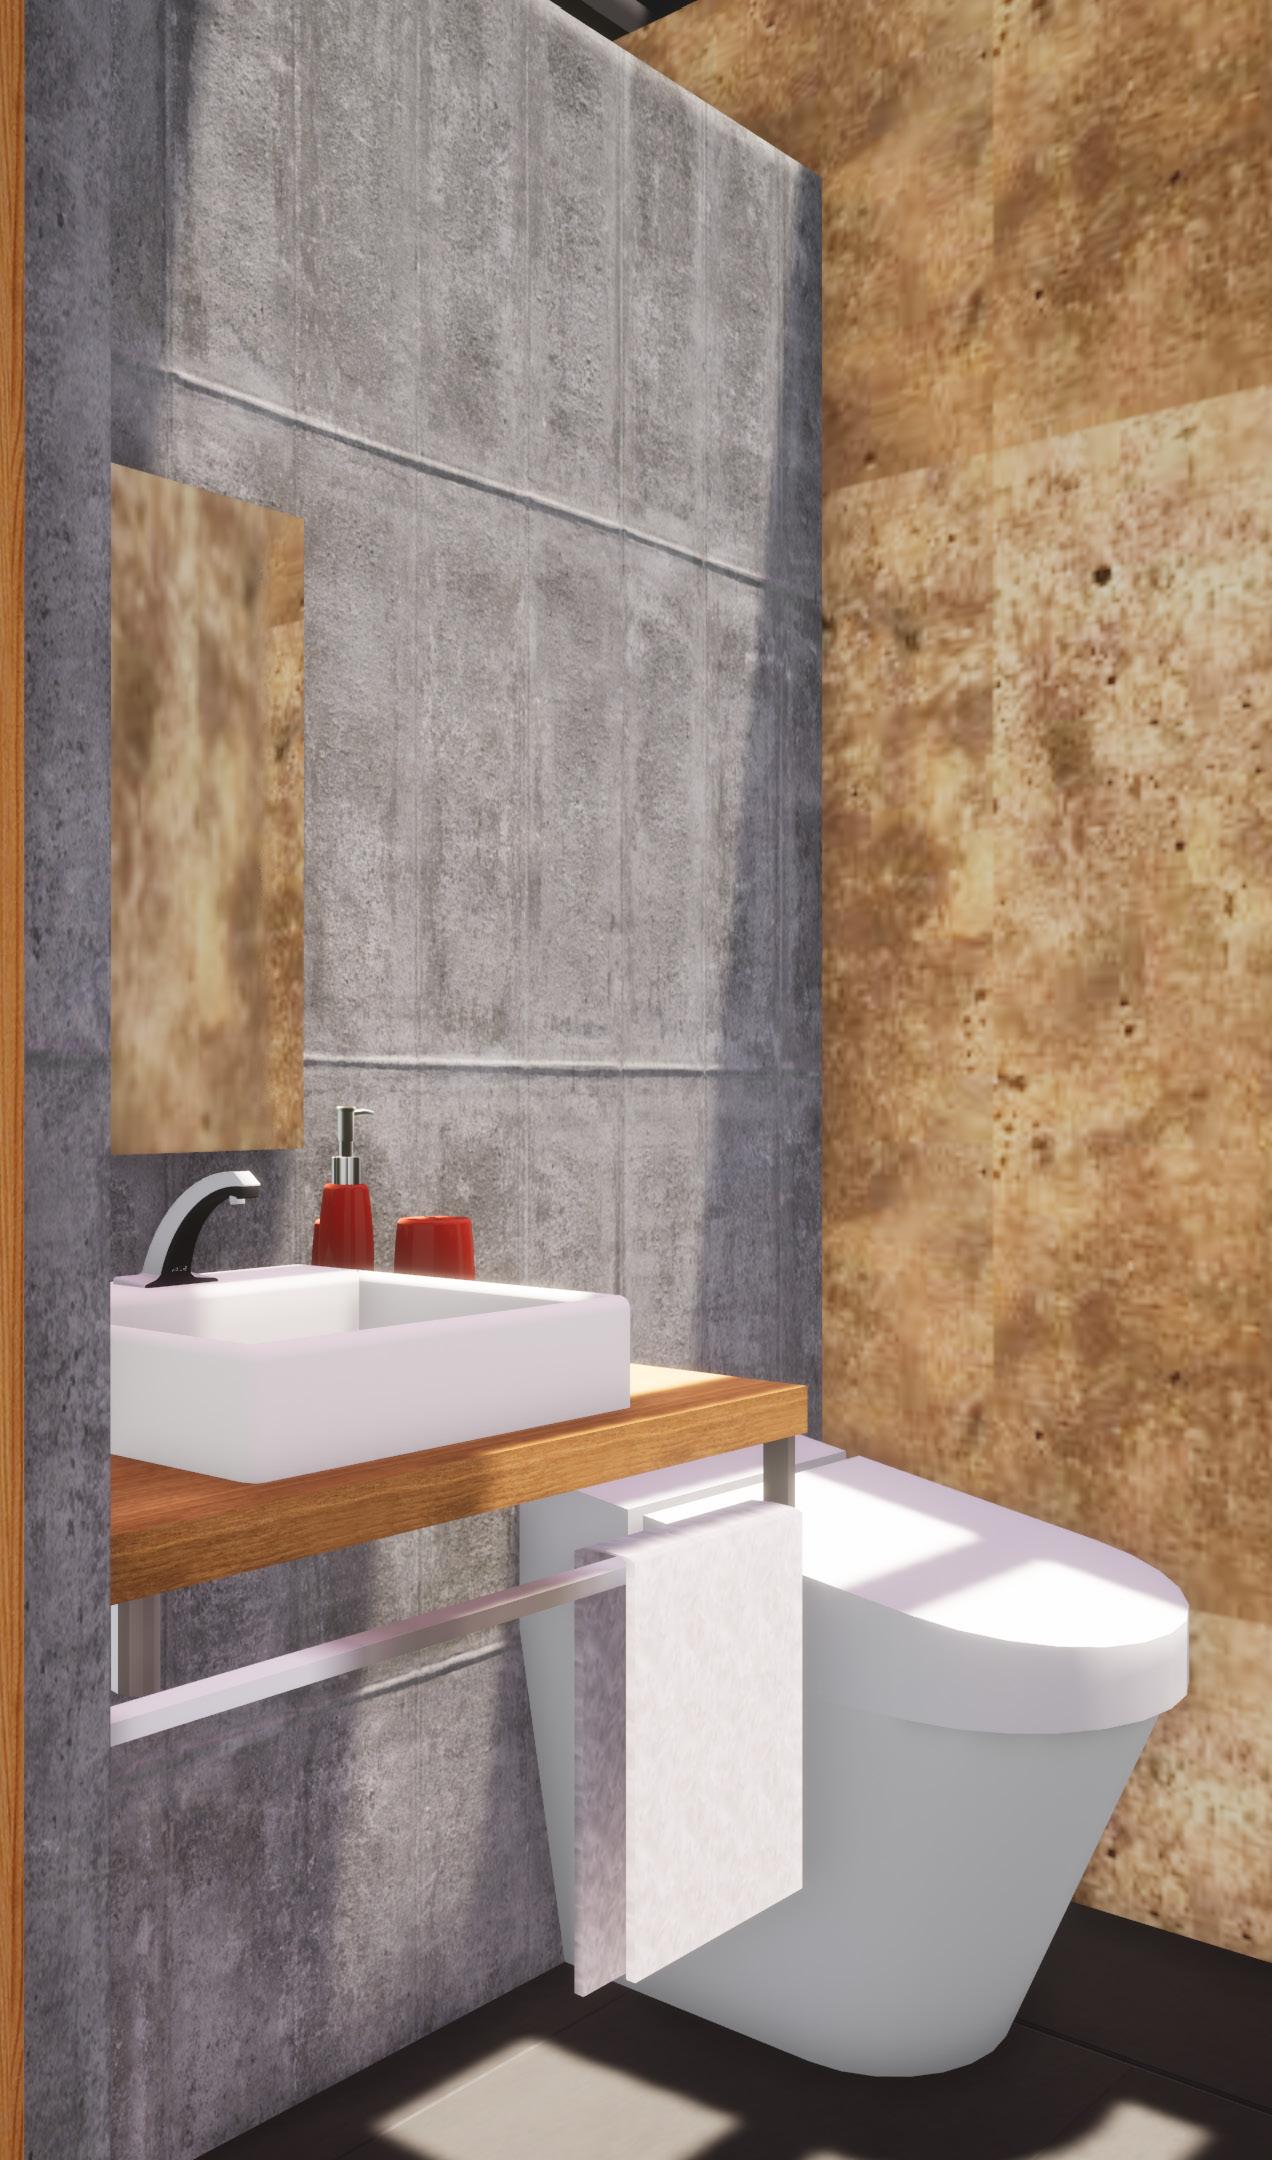
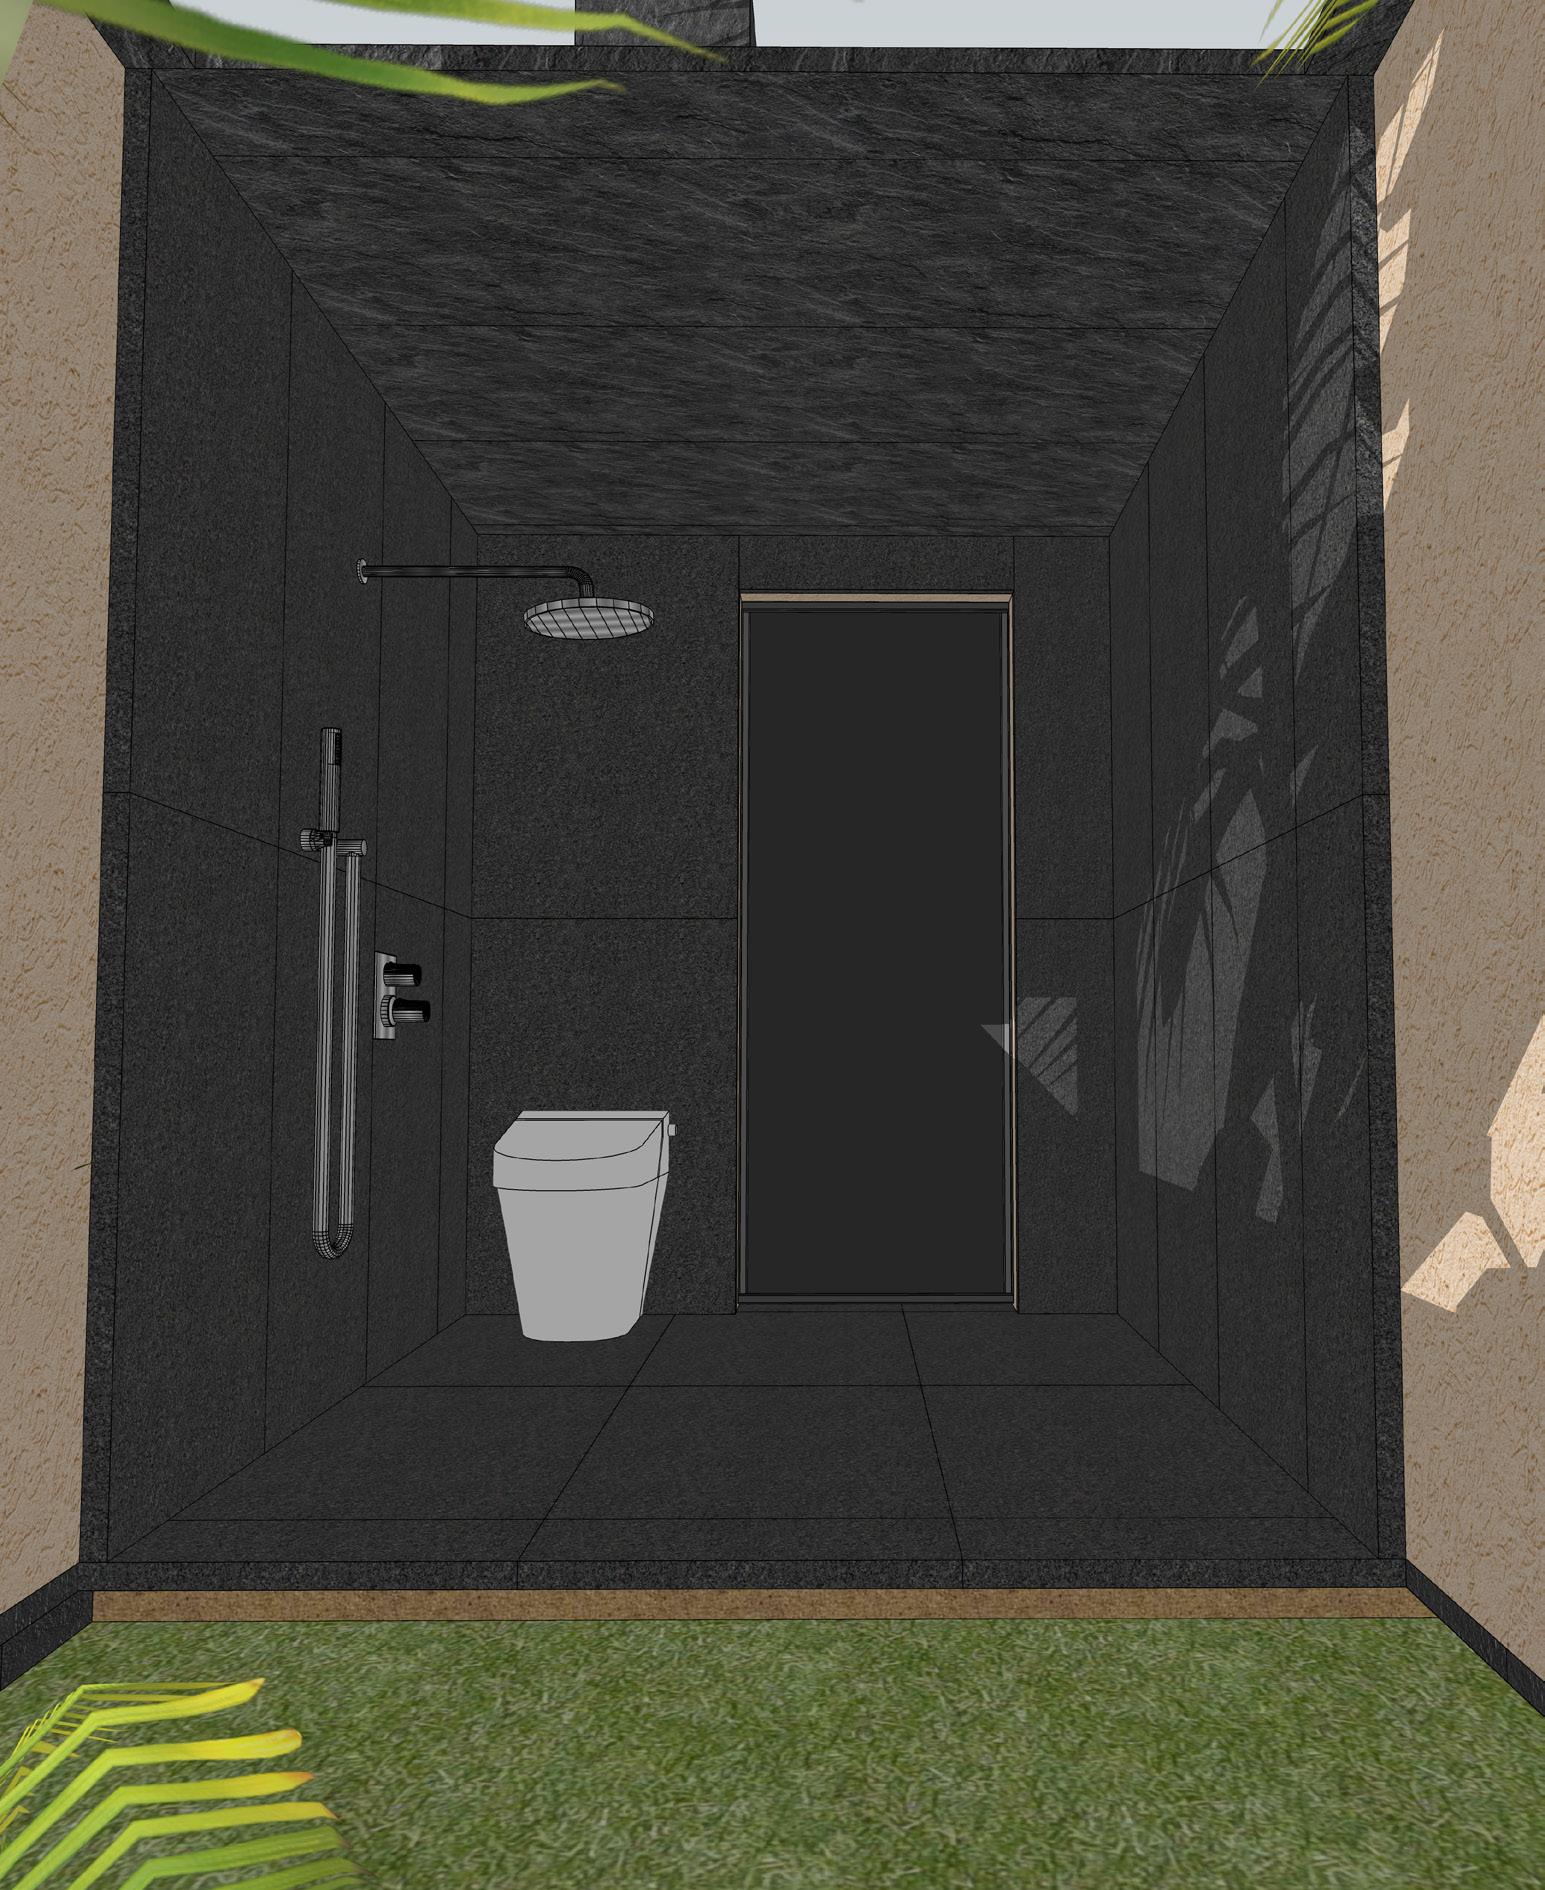
The project was basically a getaway residence in Sathannakal, Hosur. It falls under the typology of ‘microhousing’. The client had a budget of roughly 22 lakhs in which he wanted a compact 1 bhk with a mezzanine study cum bed. I was involved in the final stages of the design and was assigned the role of visualization and modifying the floor plan.
steel poured earth glass stone kadappa


1

2

3
4
mukund’s residence

about the project

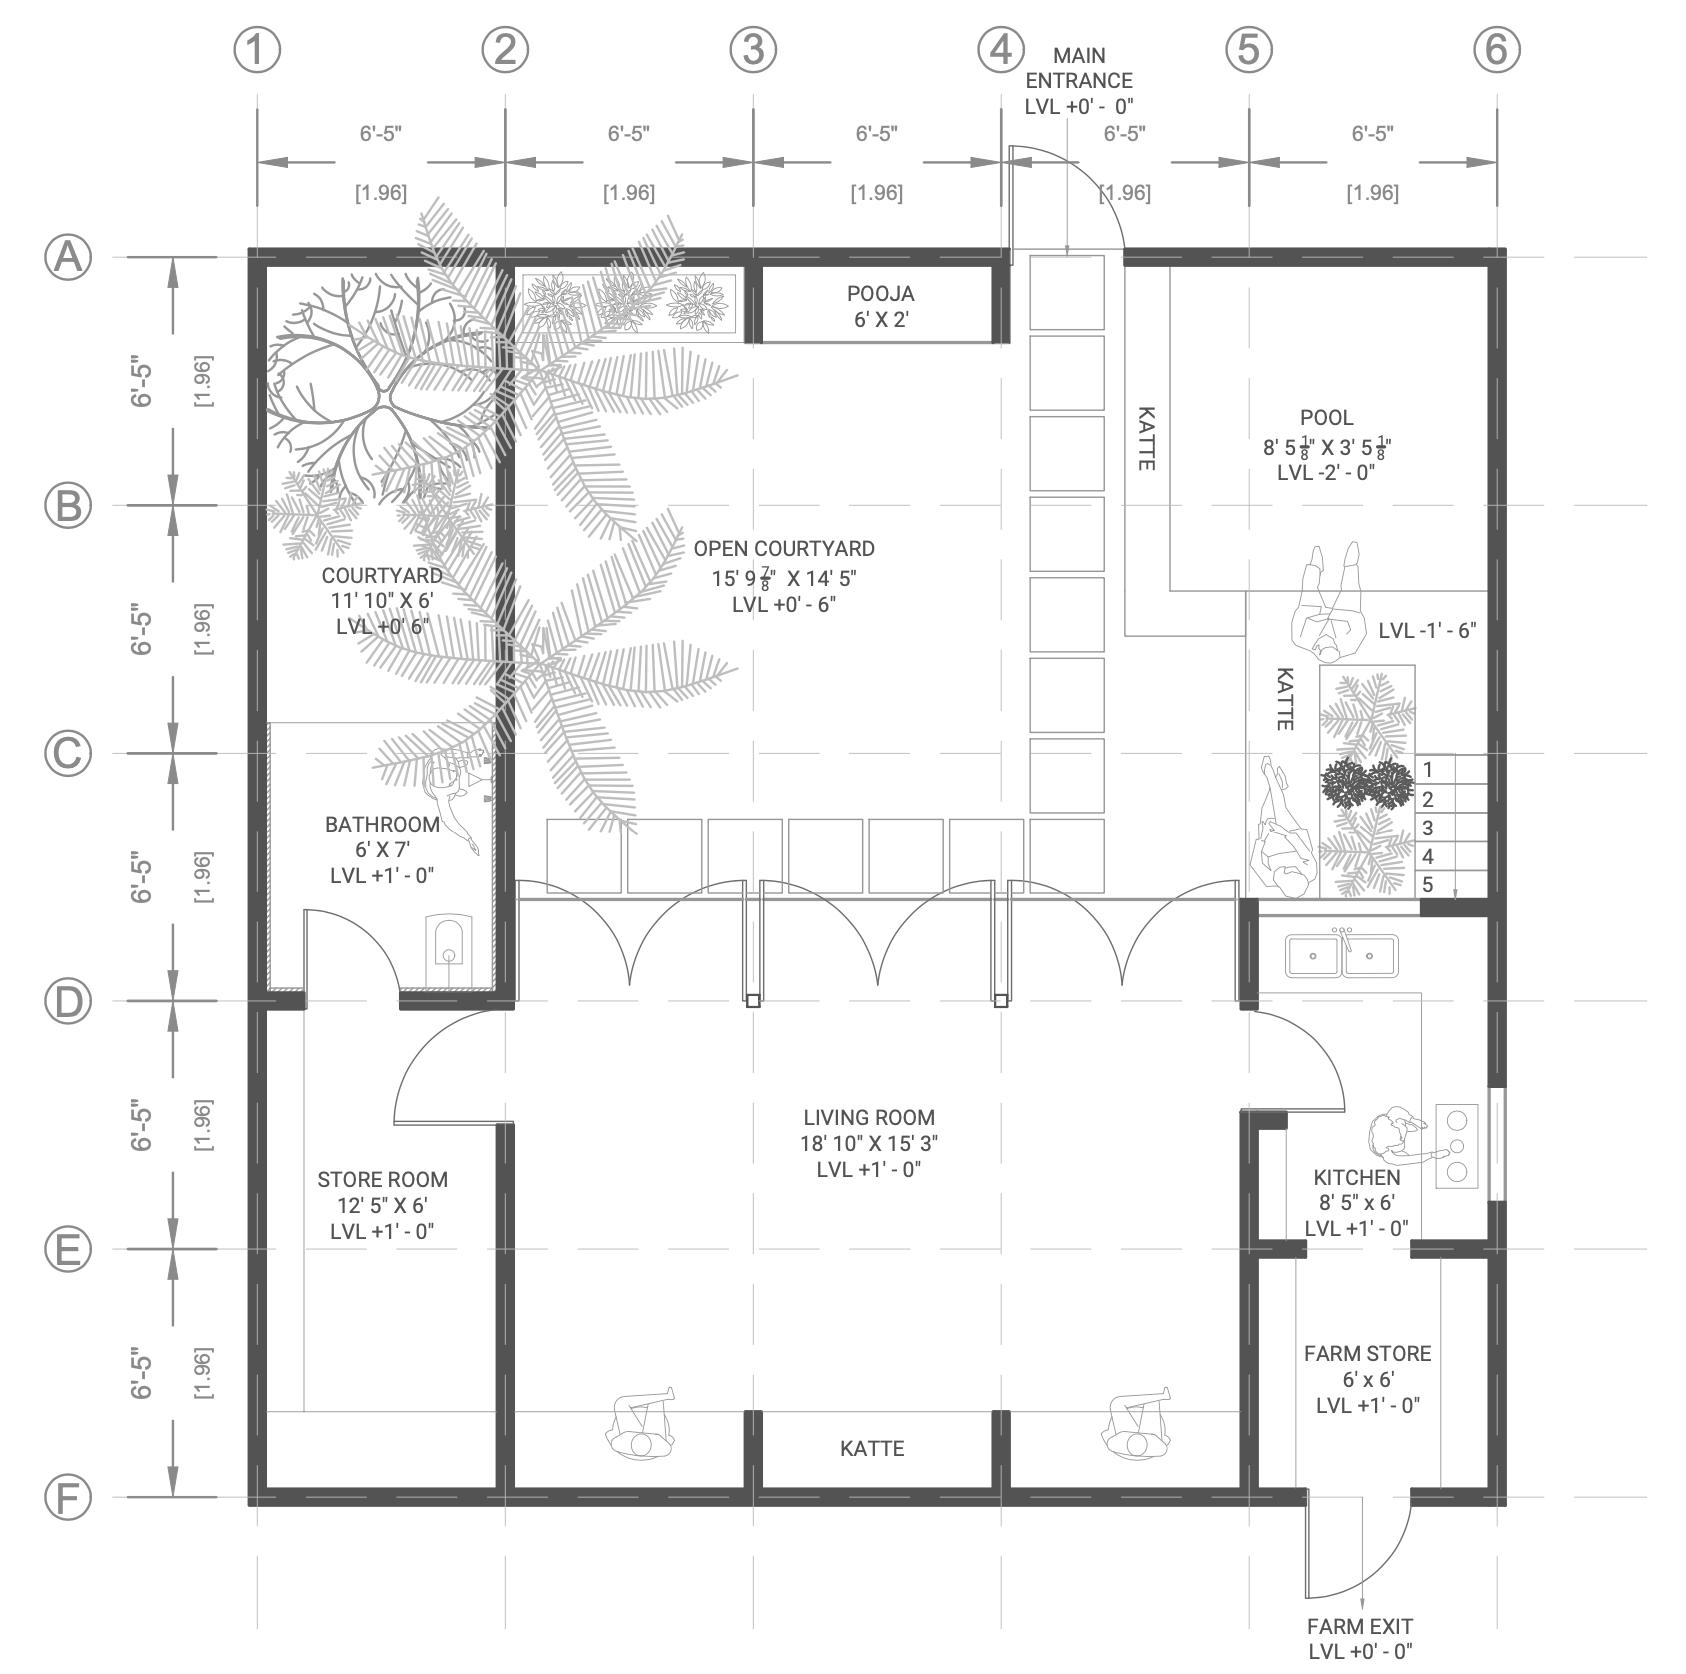
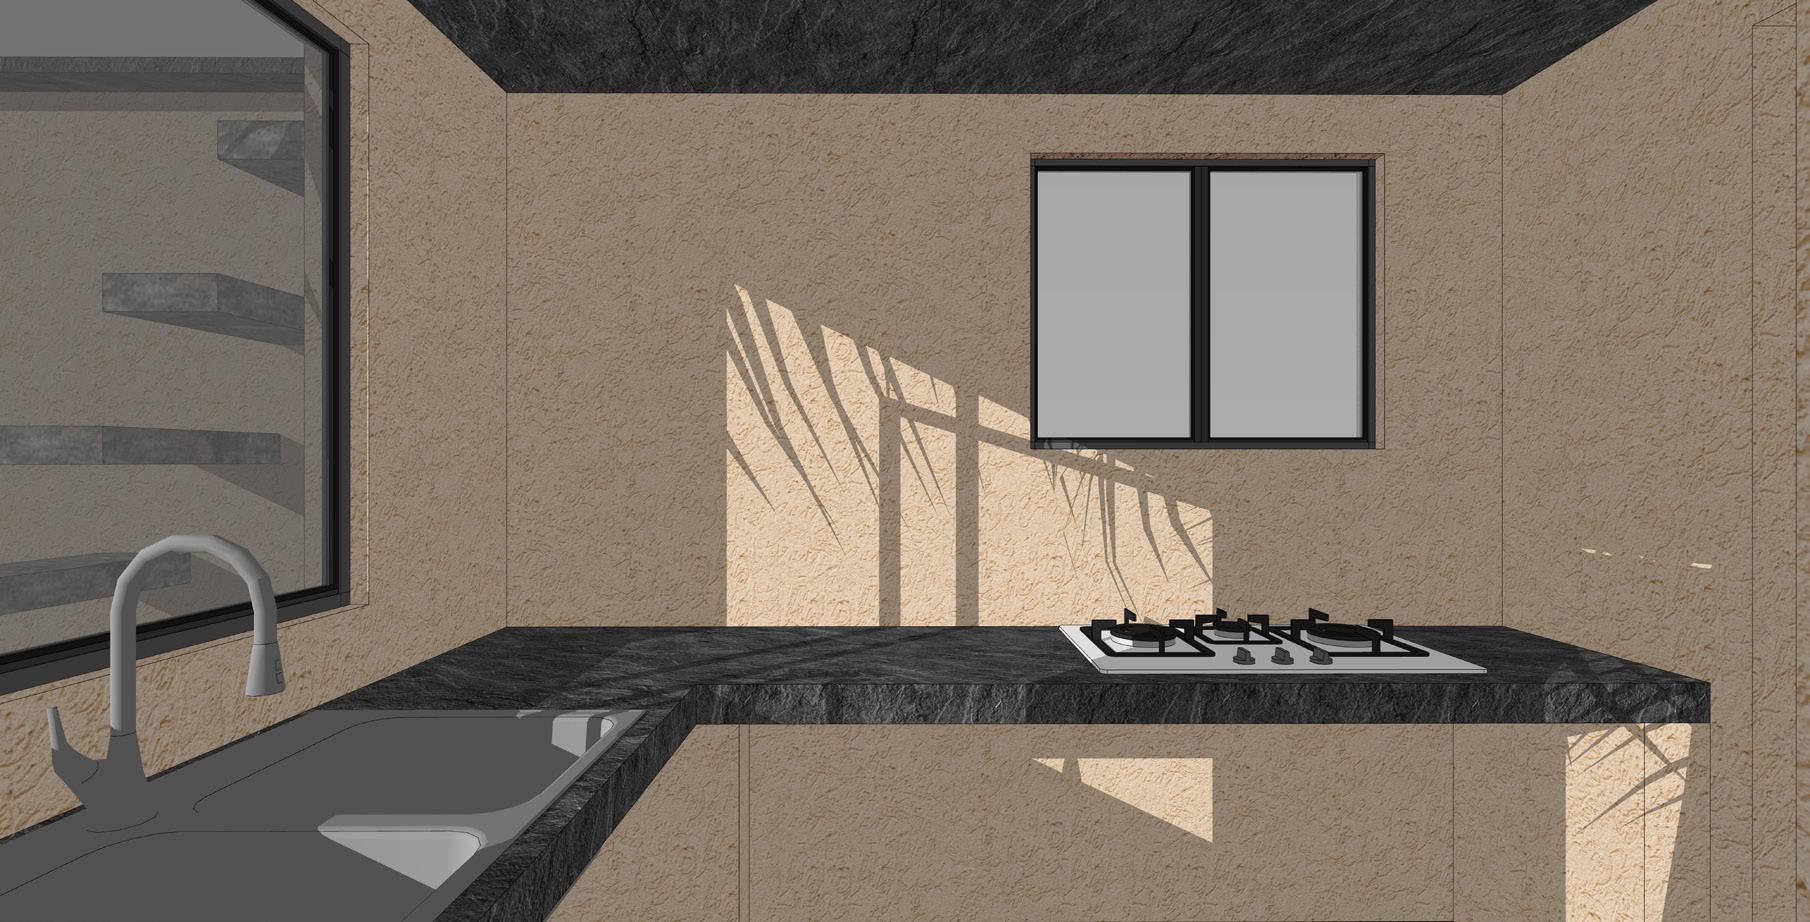
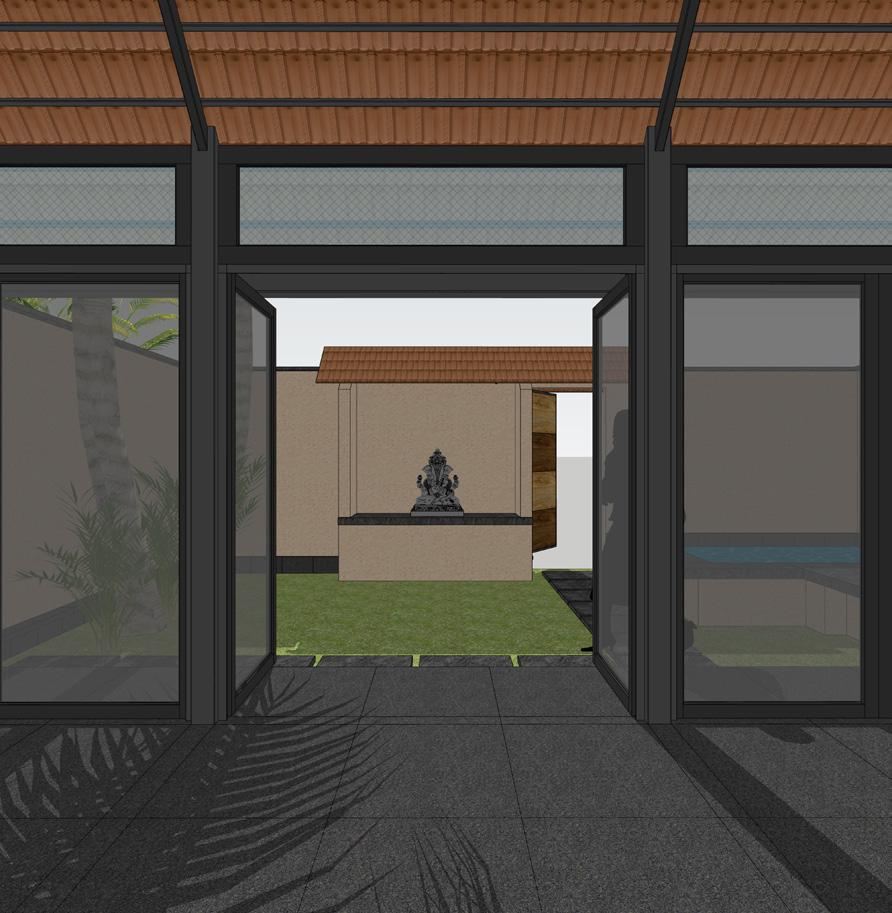
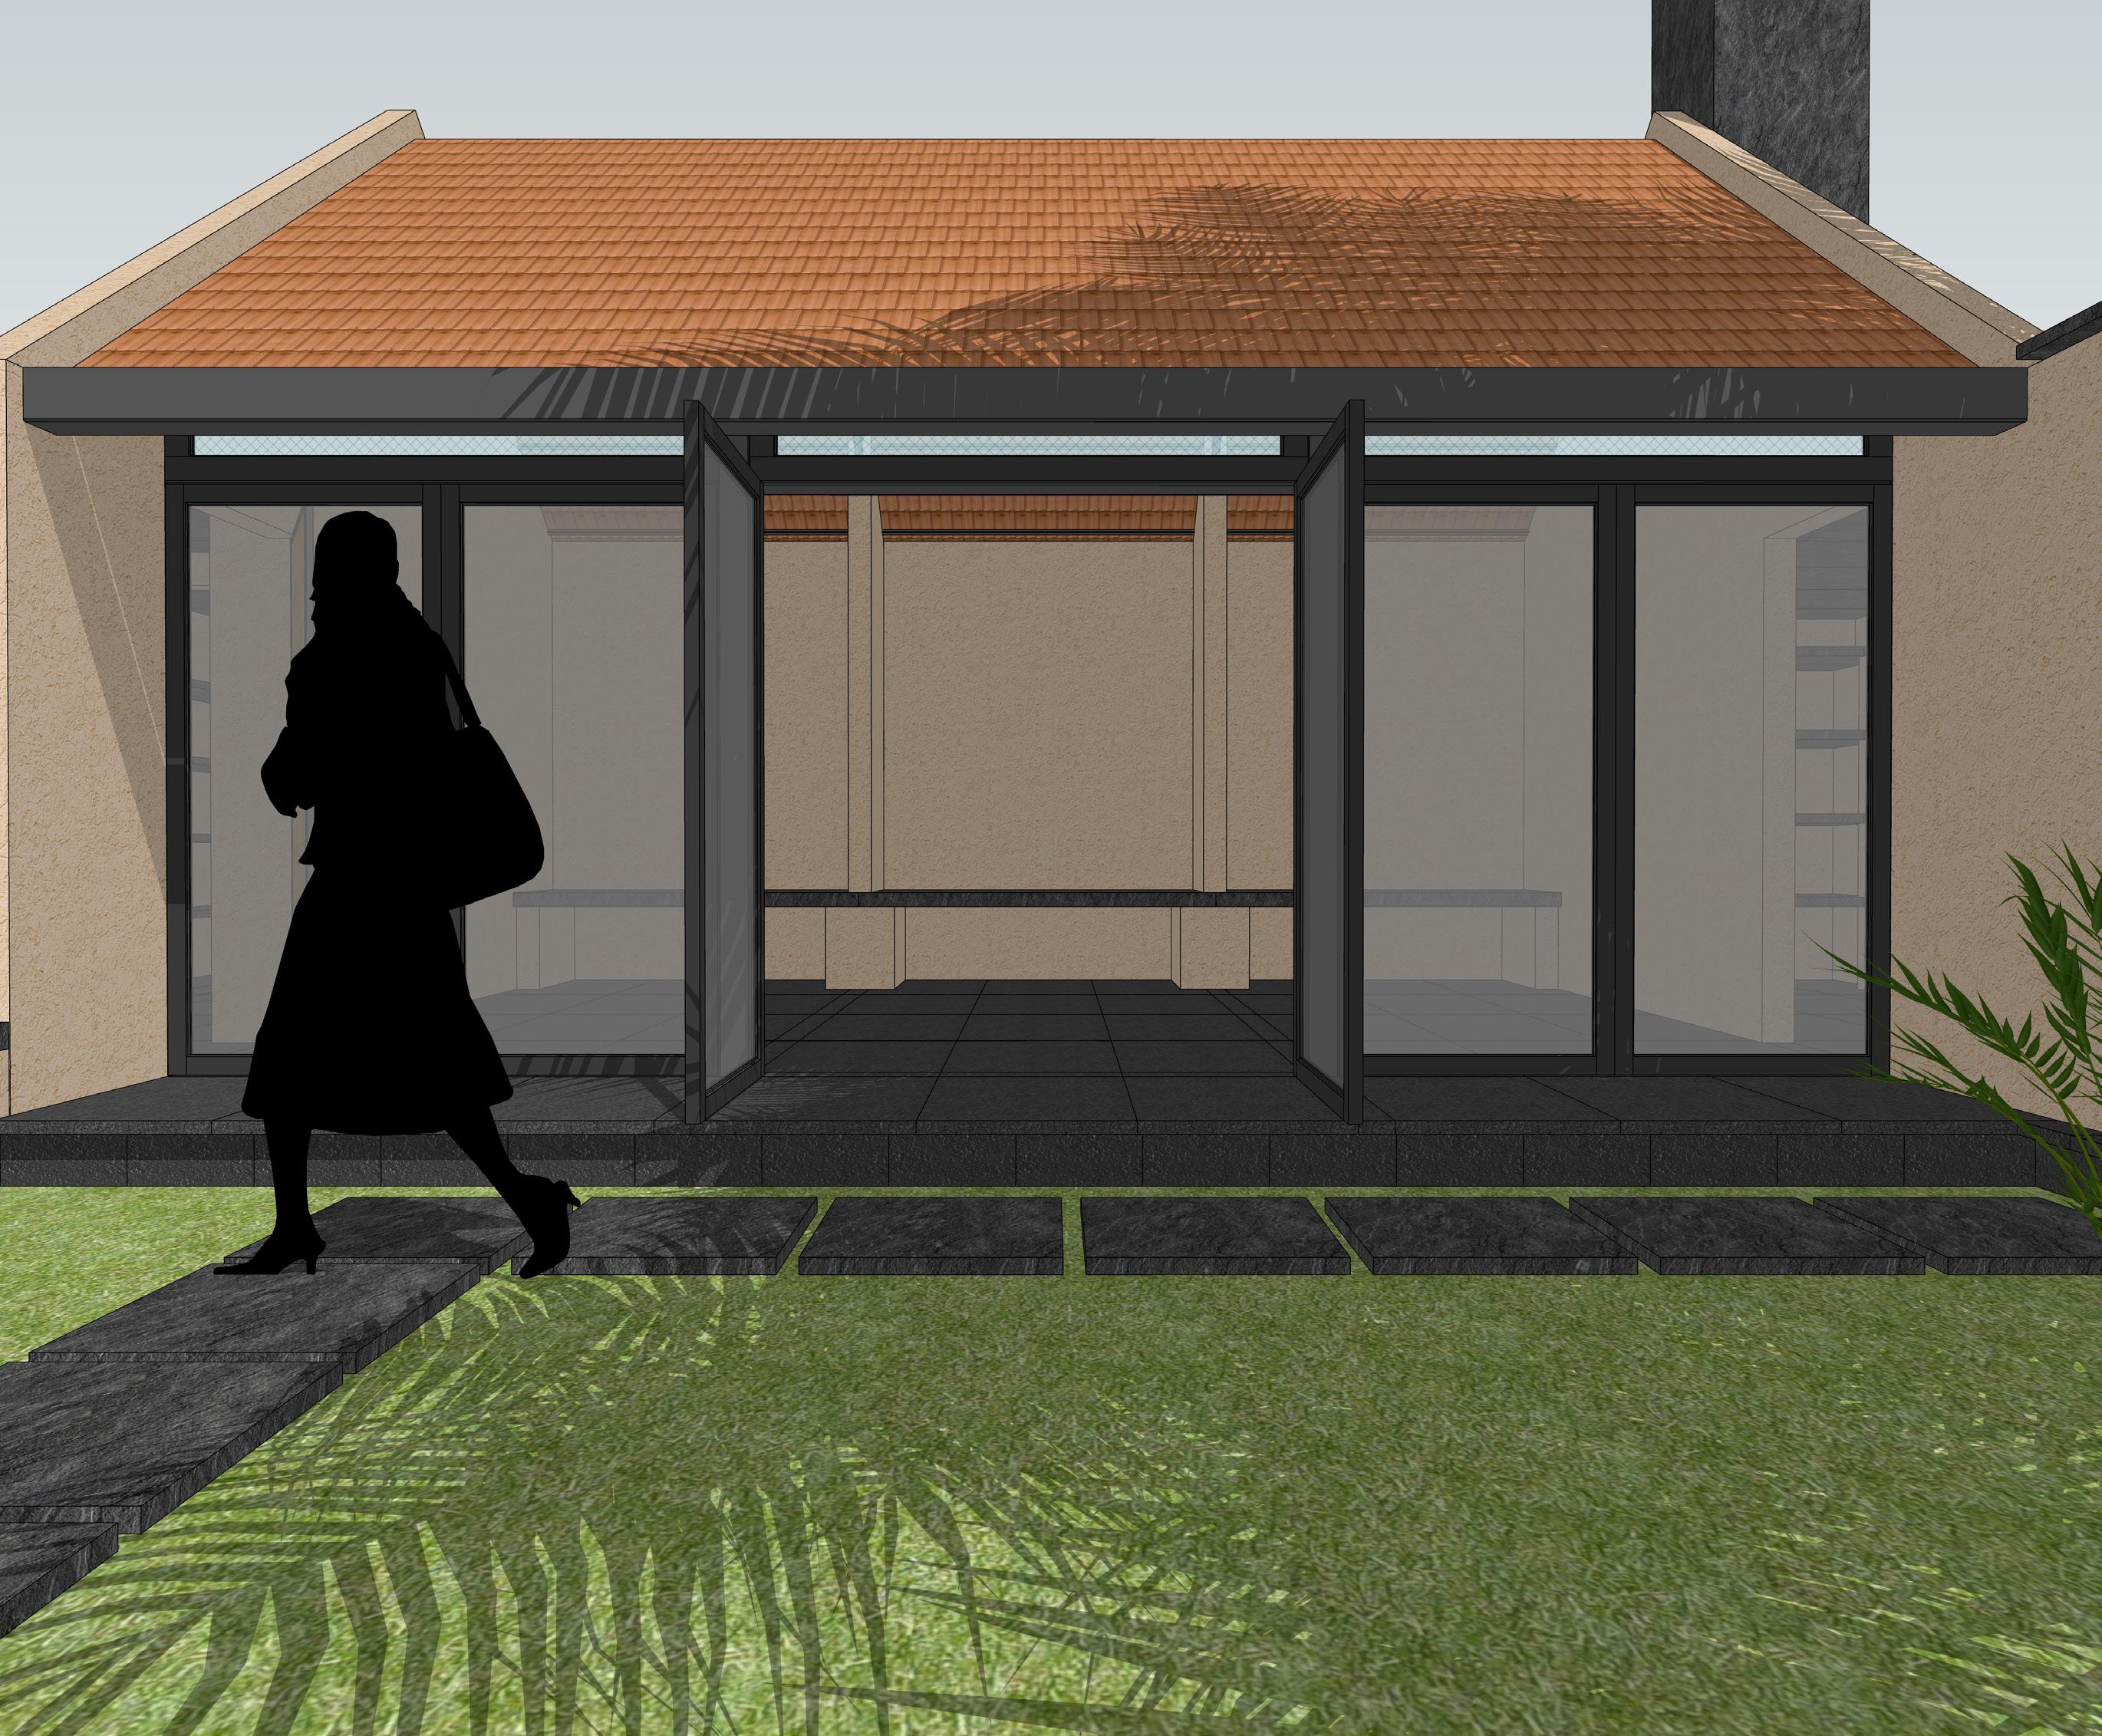
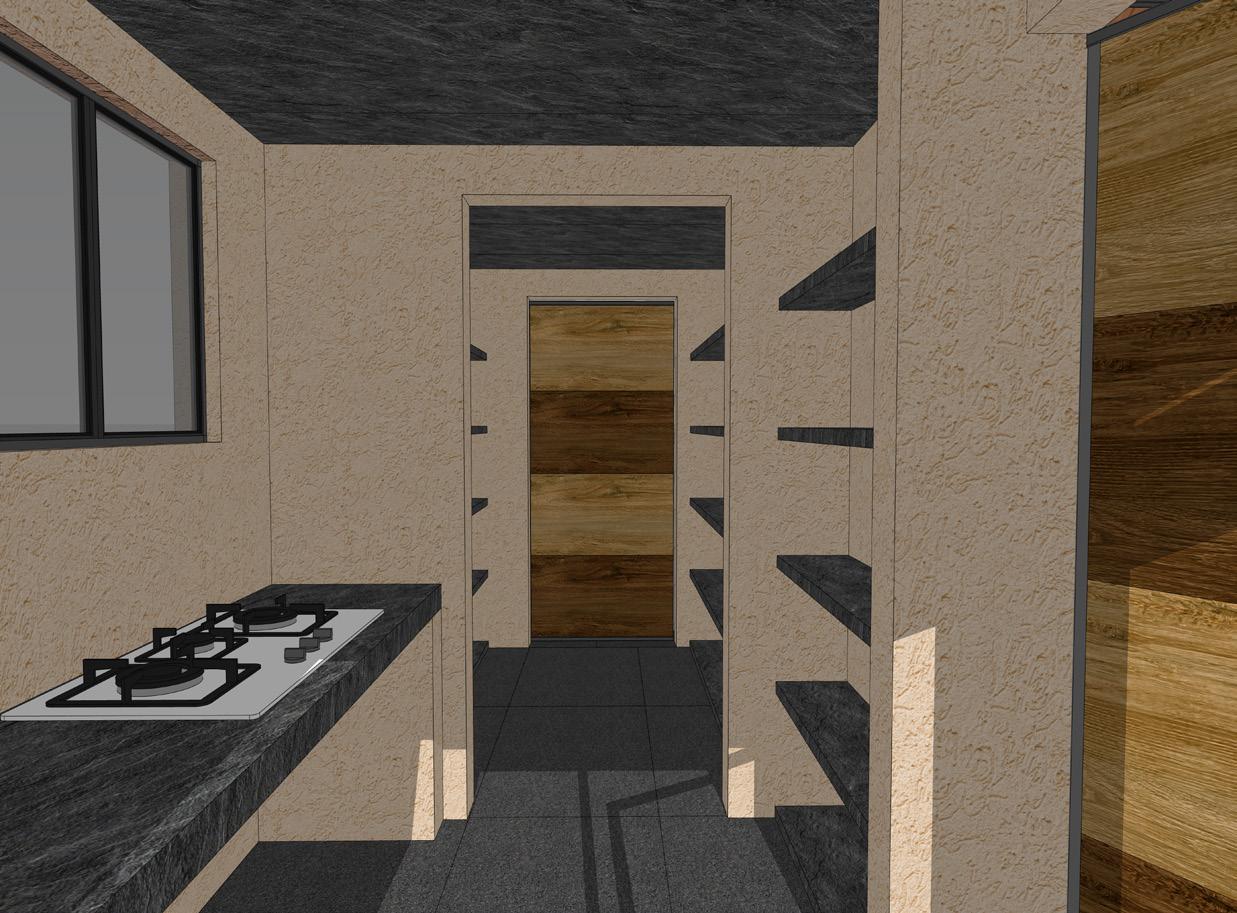
The client, Mukund wanted a simple home with one multipurpose living space overlooking a courtyard which includes a pooja space, a store room and a small kitchen. It was basically a unit attached to his farm and he wanted it to be as grounded as possible because he led a simple life.

02
Rampalya | Bengaluru
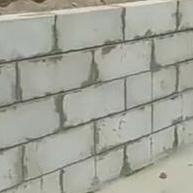
AAC Blocks lime surkhi
5
kadappa steel
concept
The client came from humble backgrounds and the site being a farmland, demanded simplicity. We went ahead with what we call as an ‘introverted’ approach where the entire house is enclosed from all sides as though it is inside a courtyard.
This made accessibility and security way easier. Because of the courtyard system, locking one access would ensure the entire property to be secure. Also, despite an introverted approach, the interior feels spacious due to the open to sky courtyard in the front and views from the built form towards the courtyard. It is also enhanced in sensorial ways by having different natural elements, for example, the plunge pool.
6


7


8
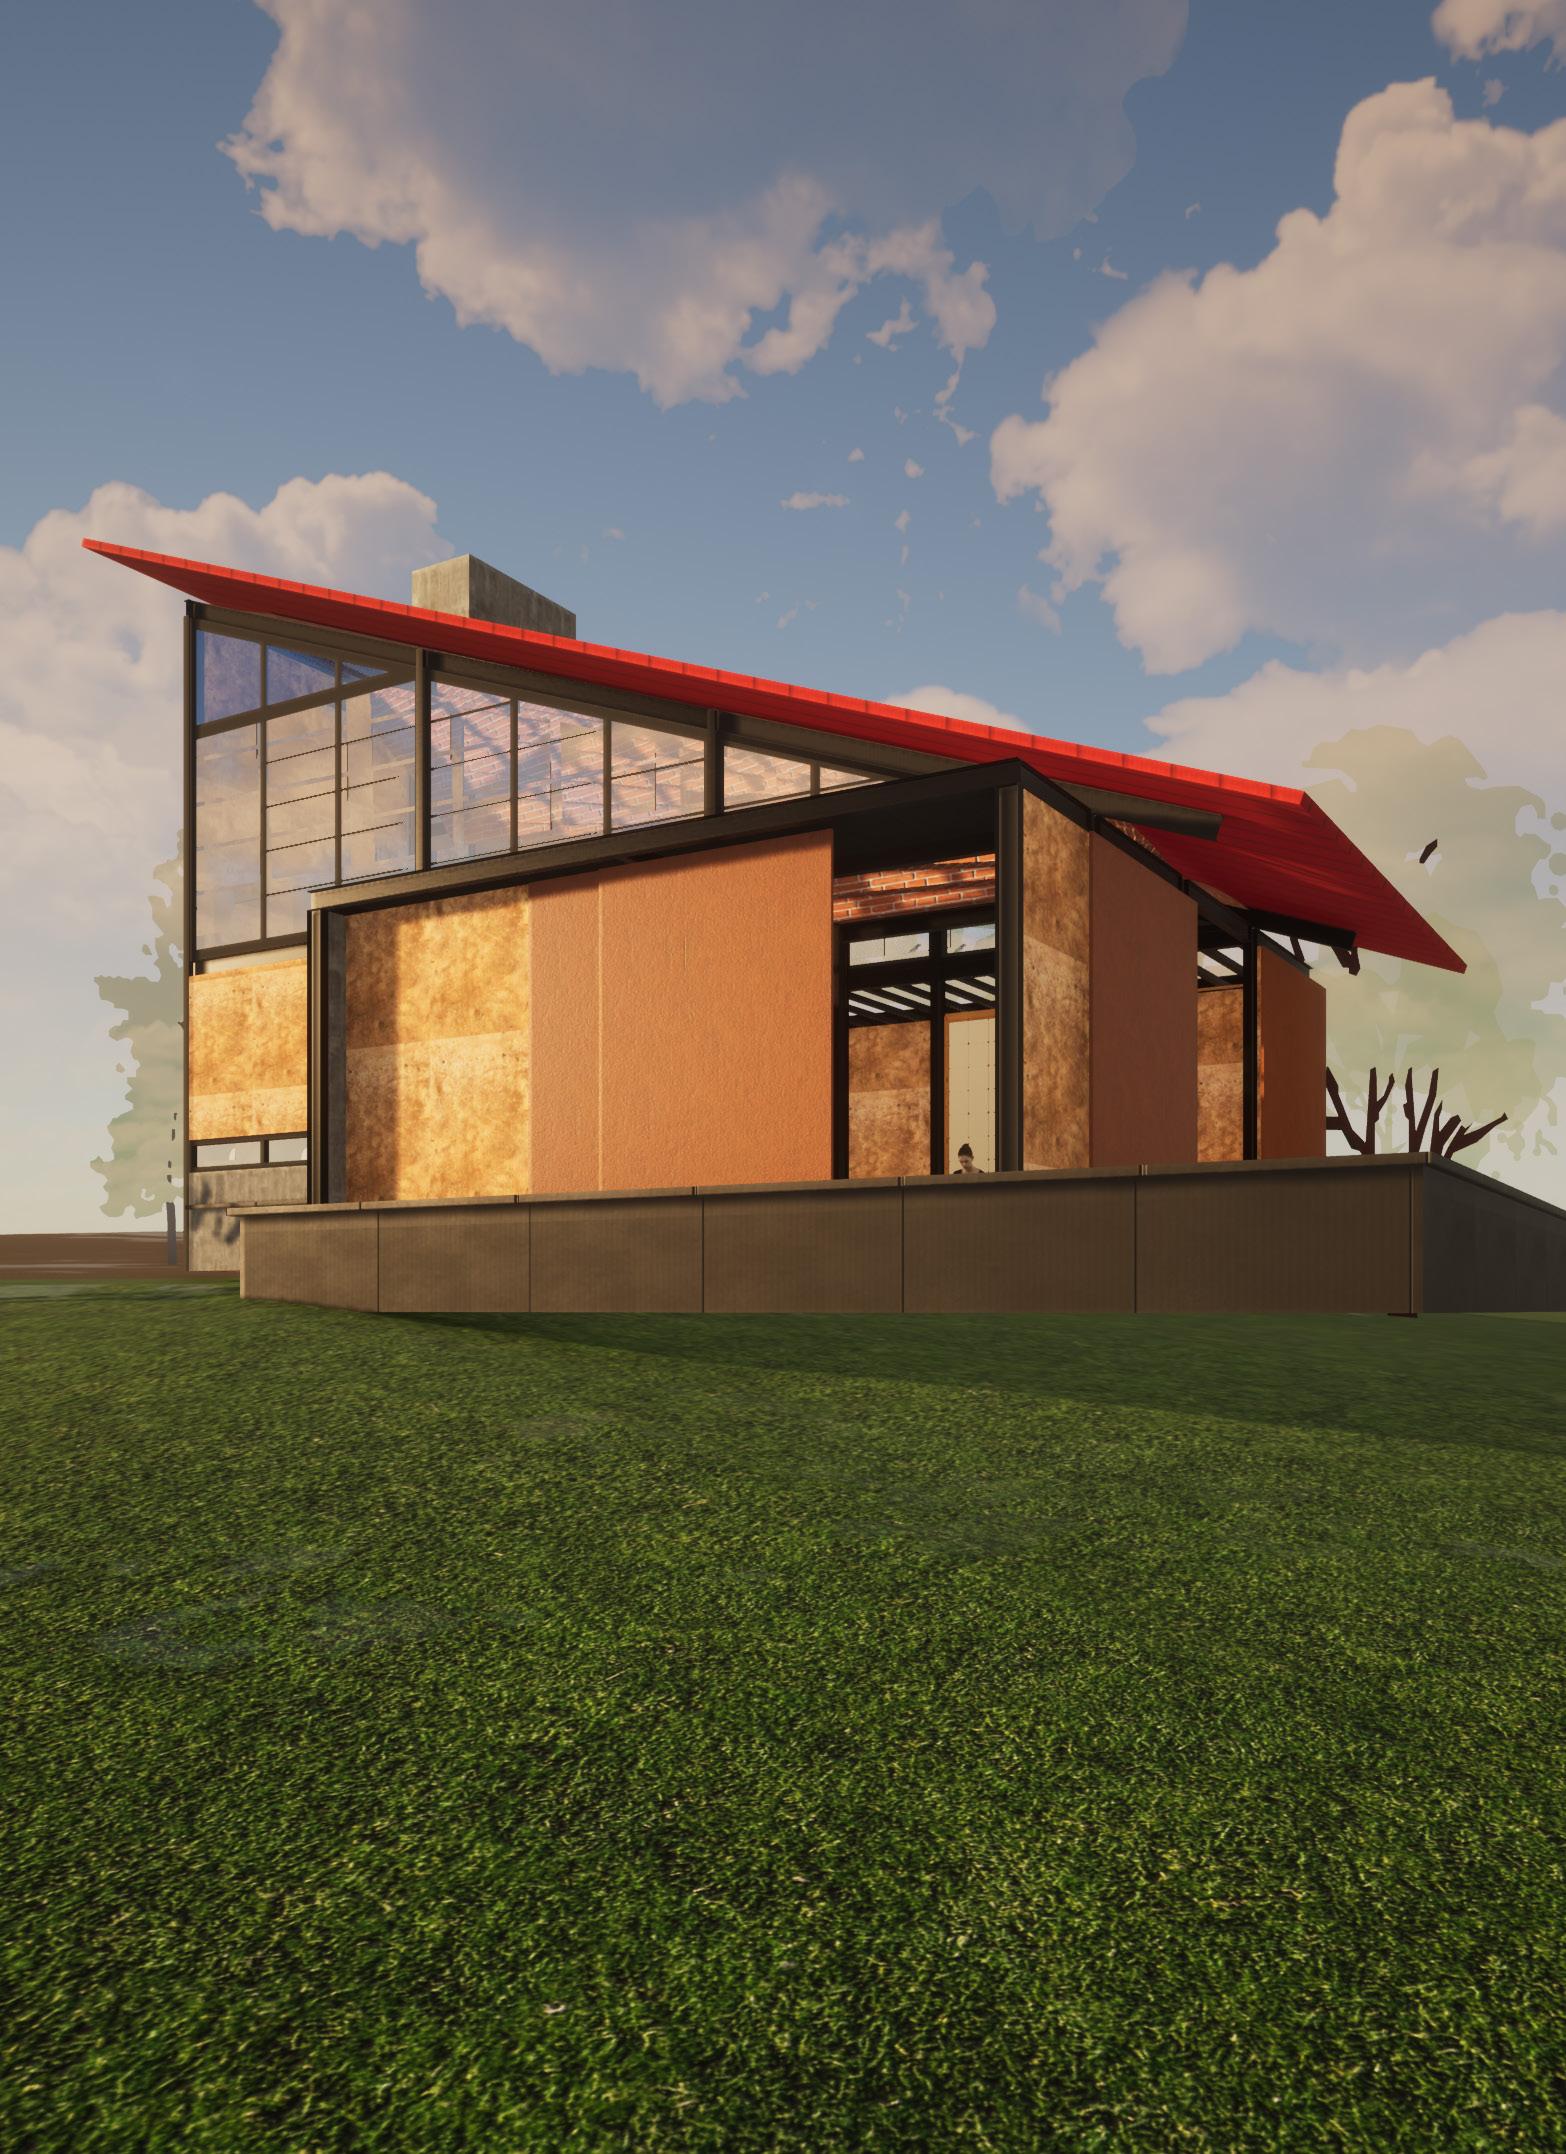
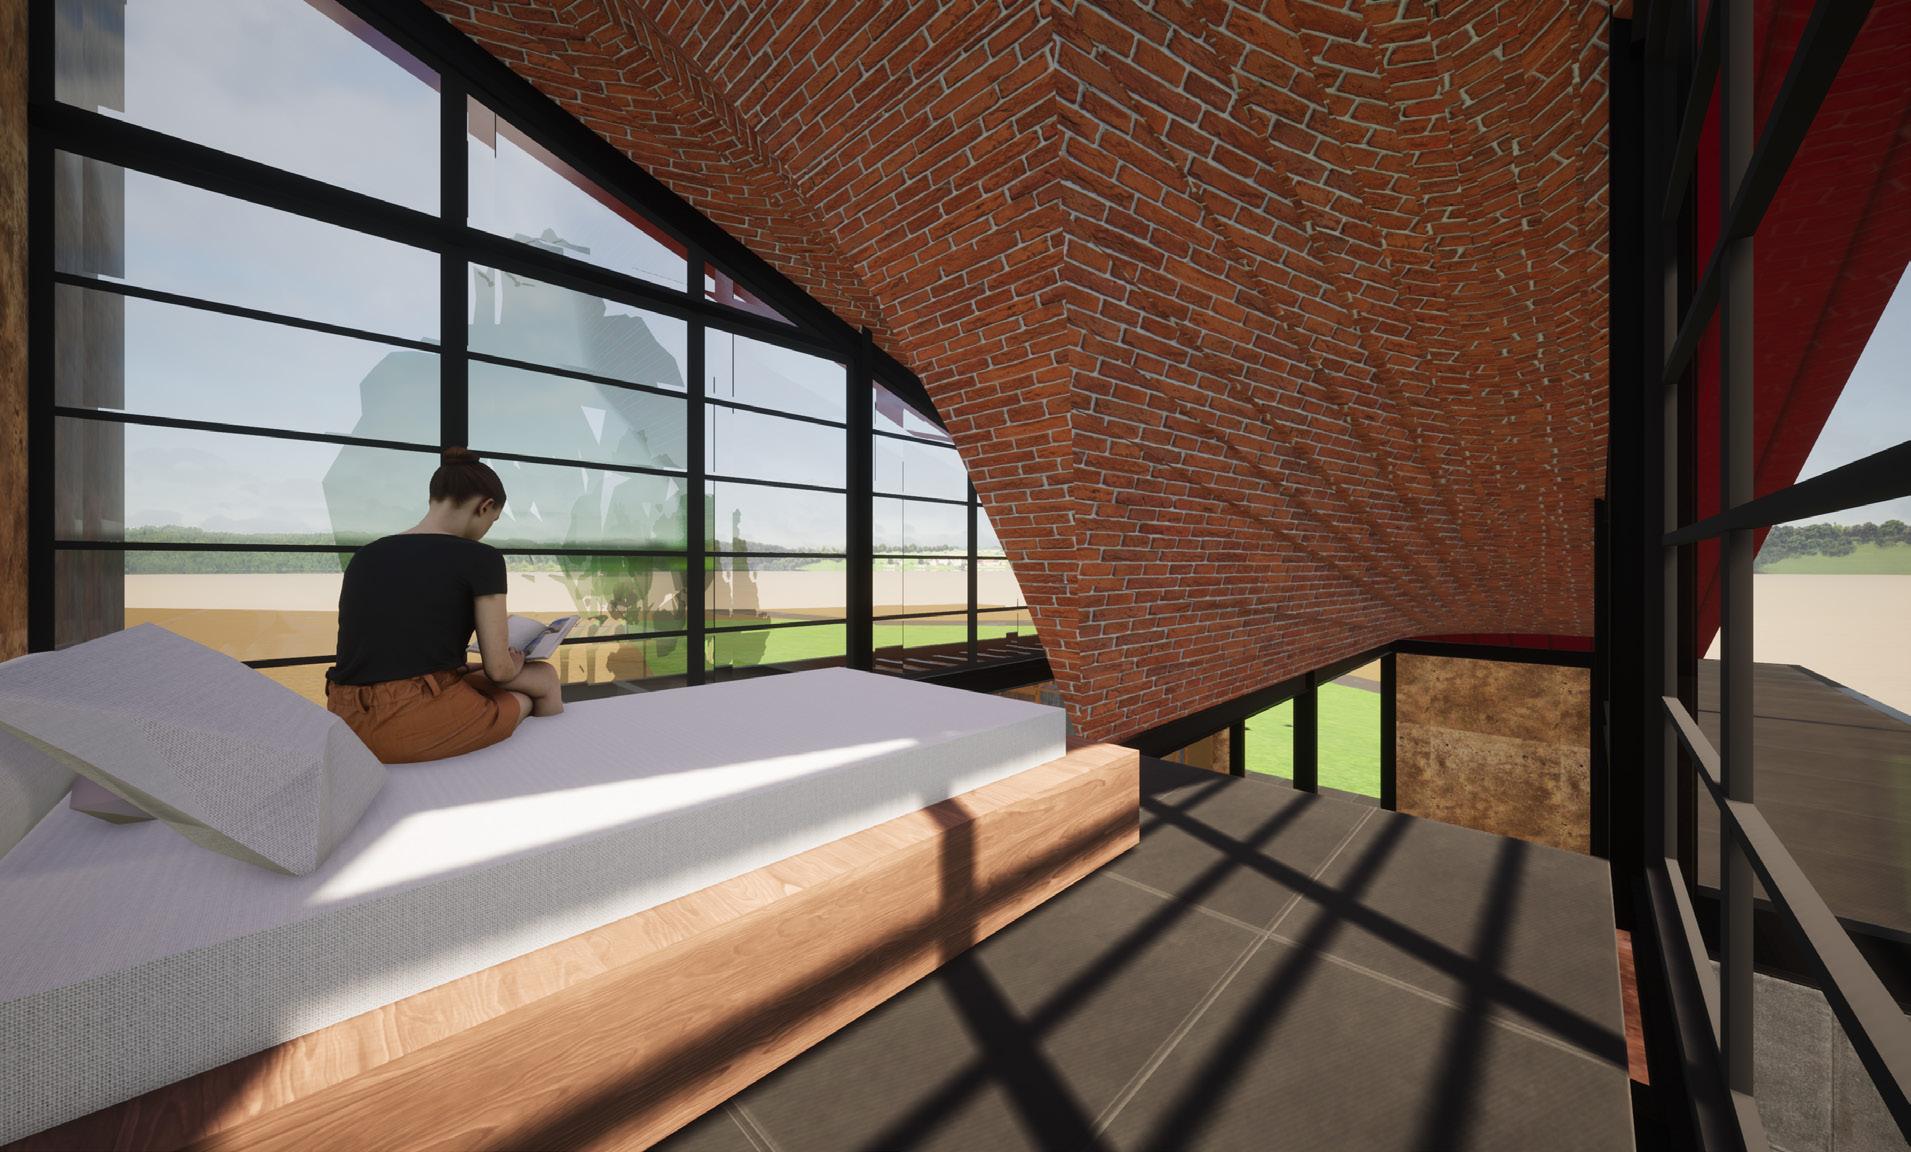
sreeram farmhouseramamoorthy’s Vanamu
| Bengaluru
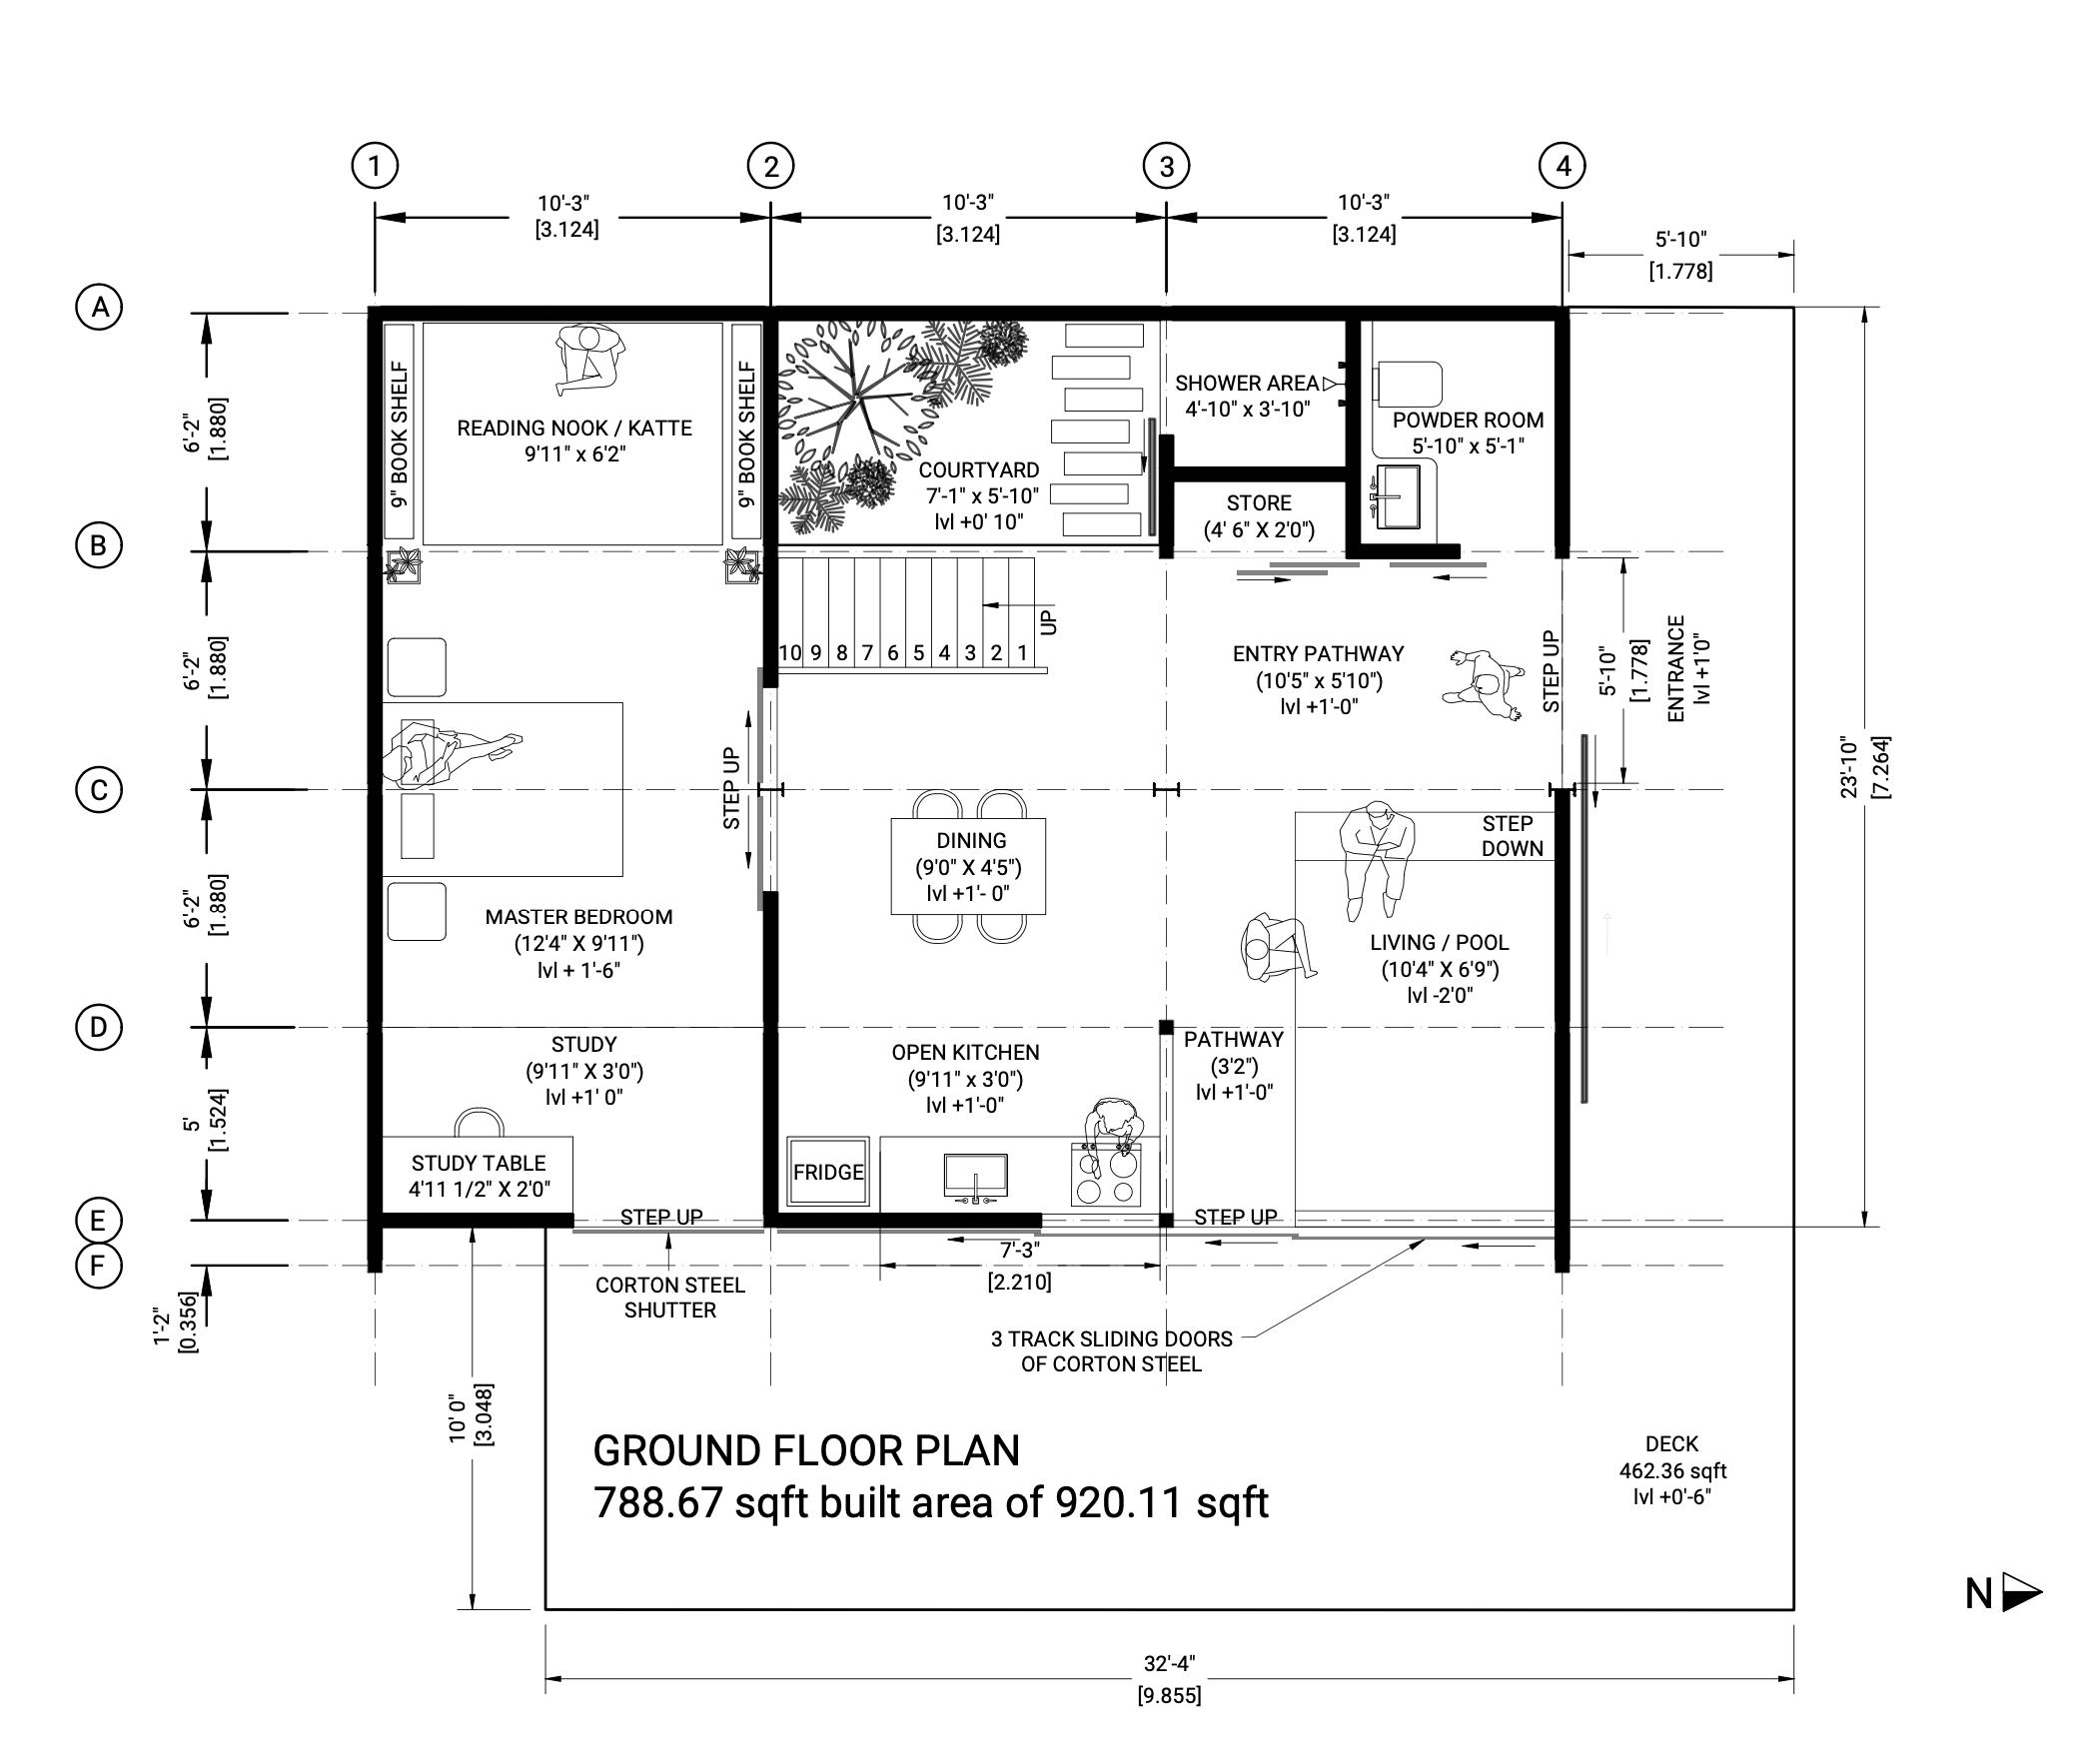
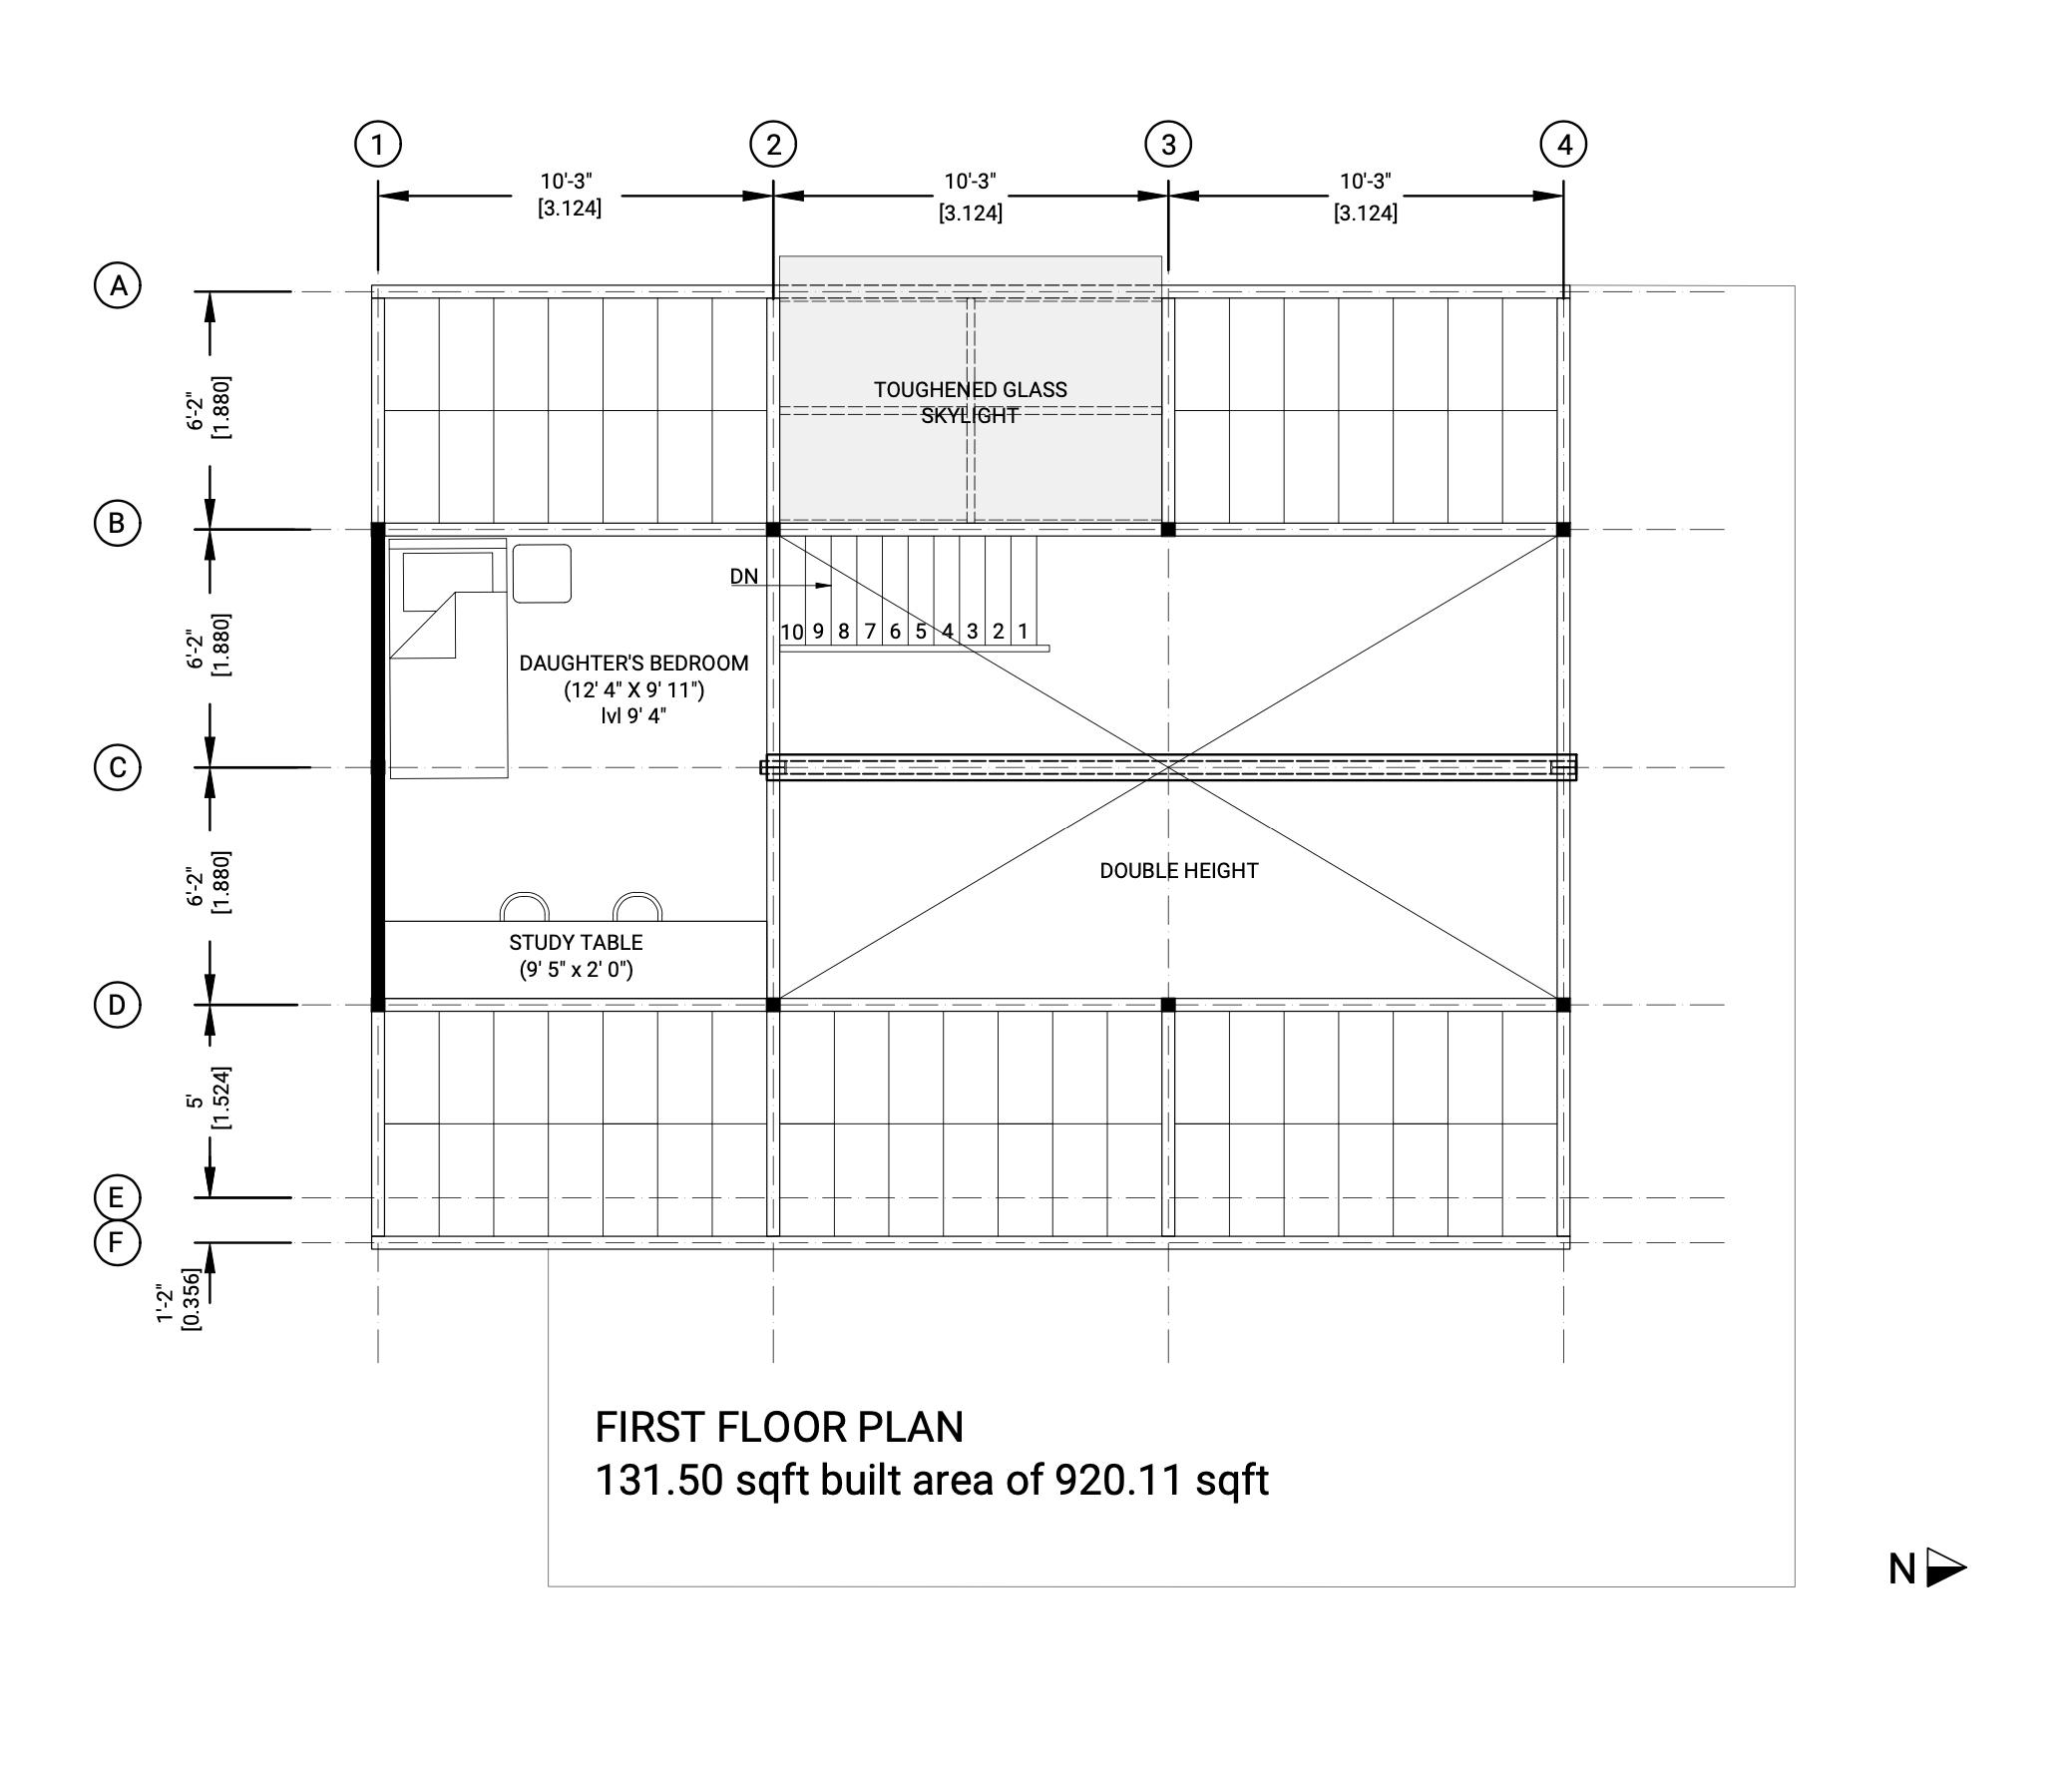
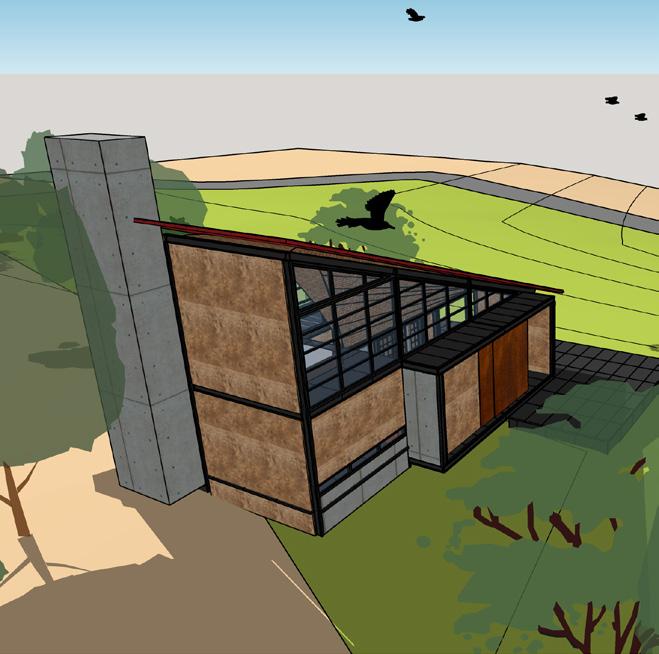
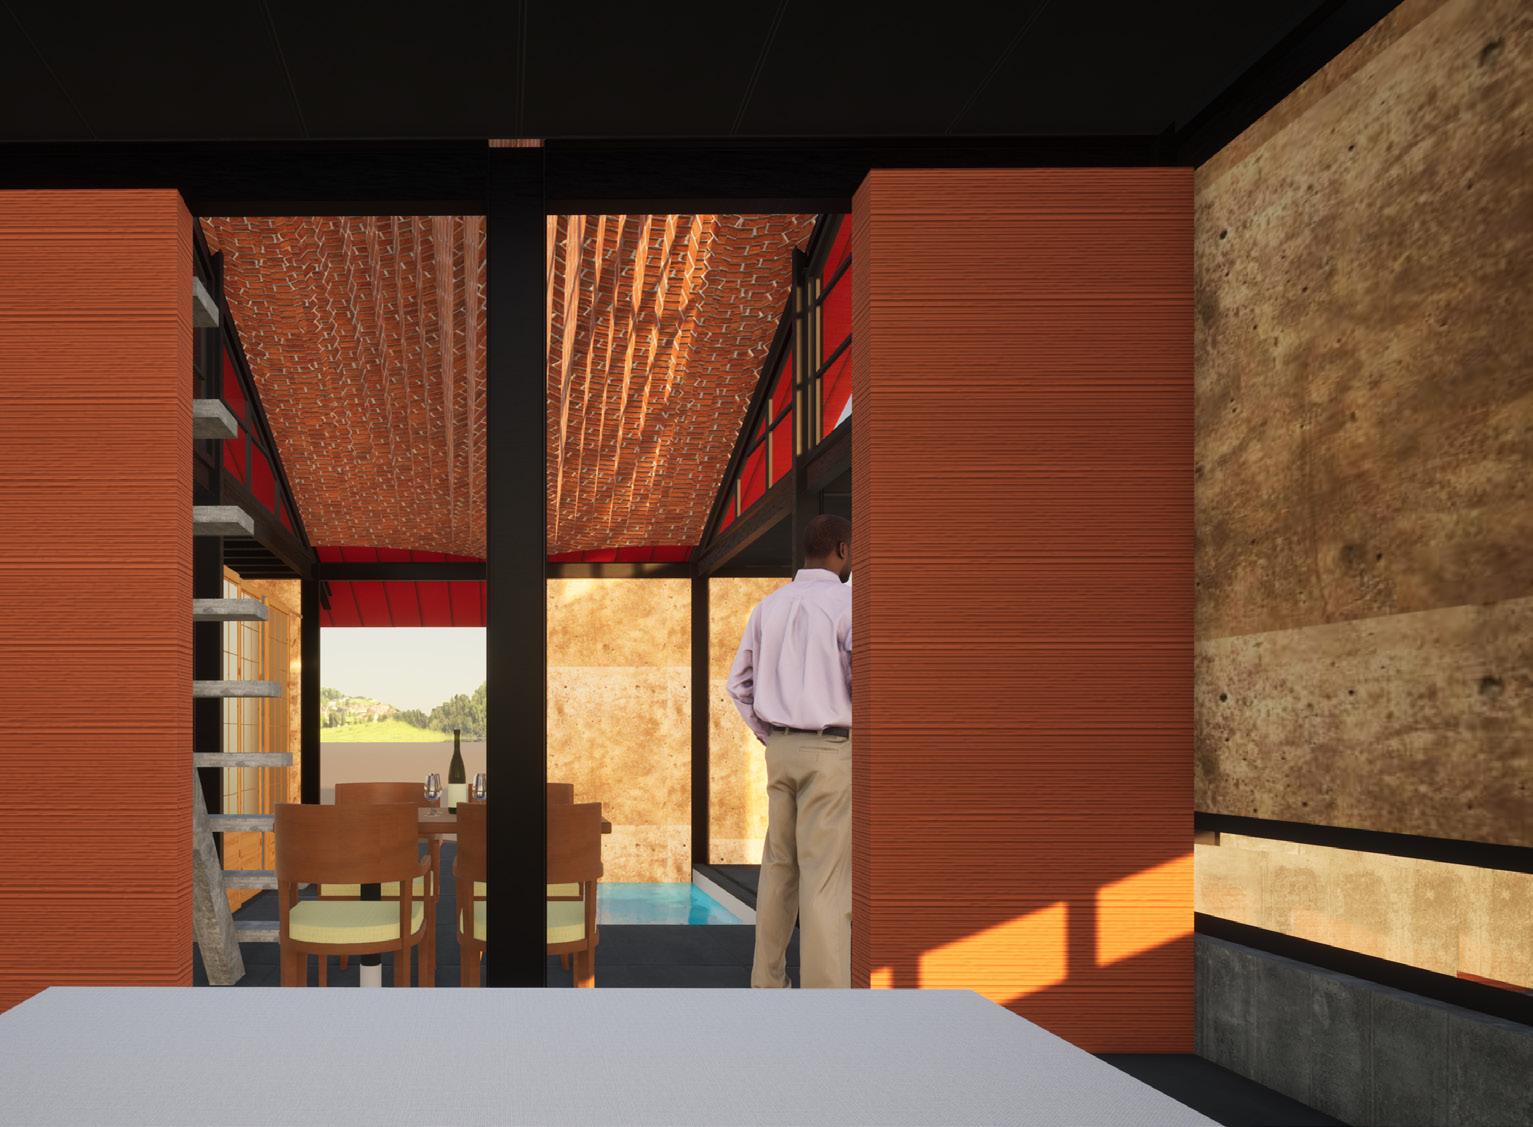
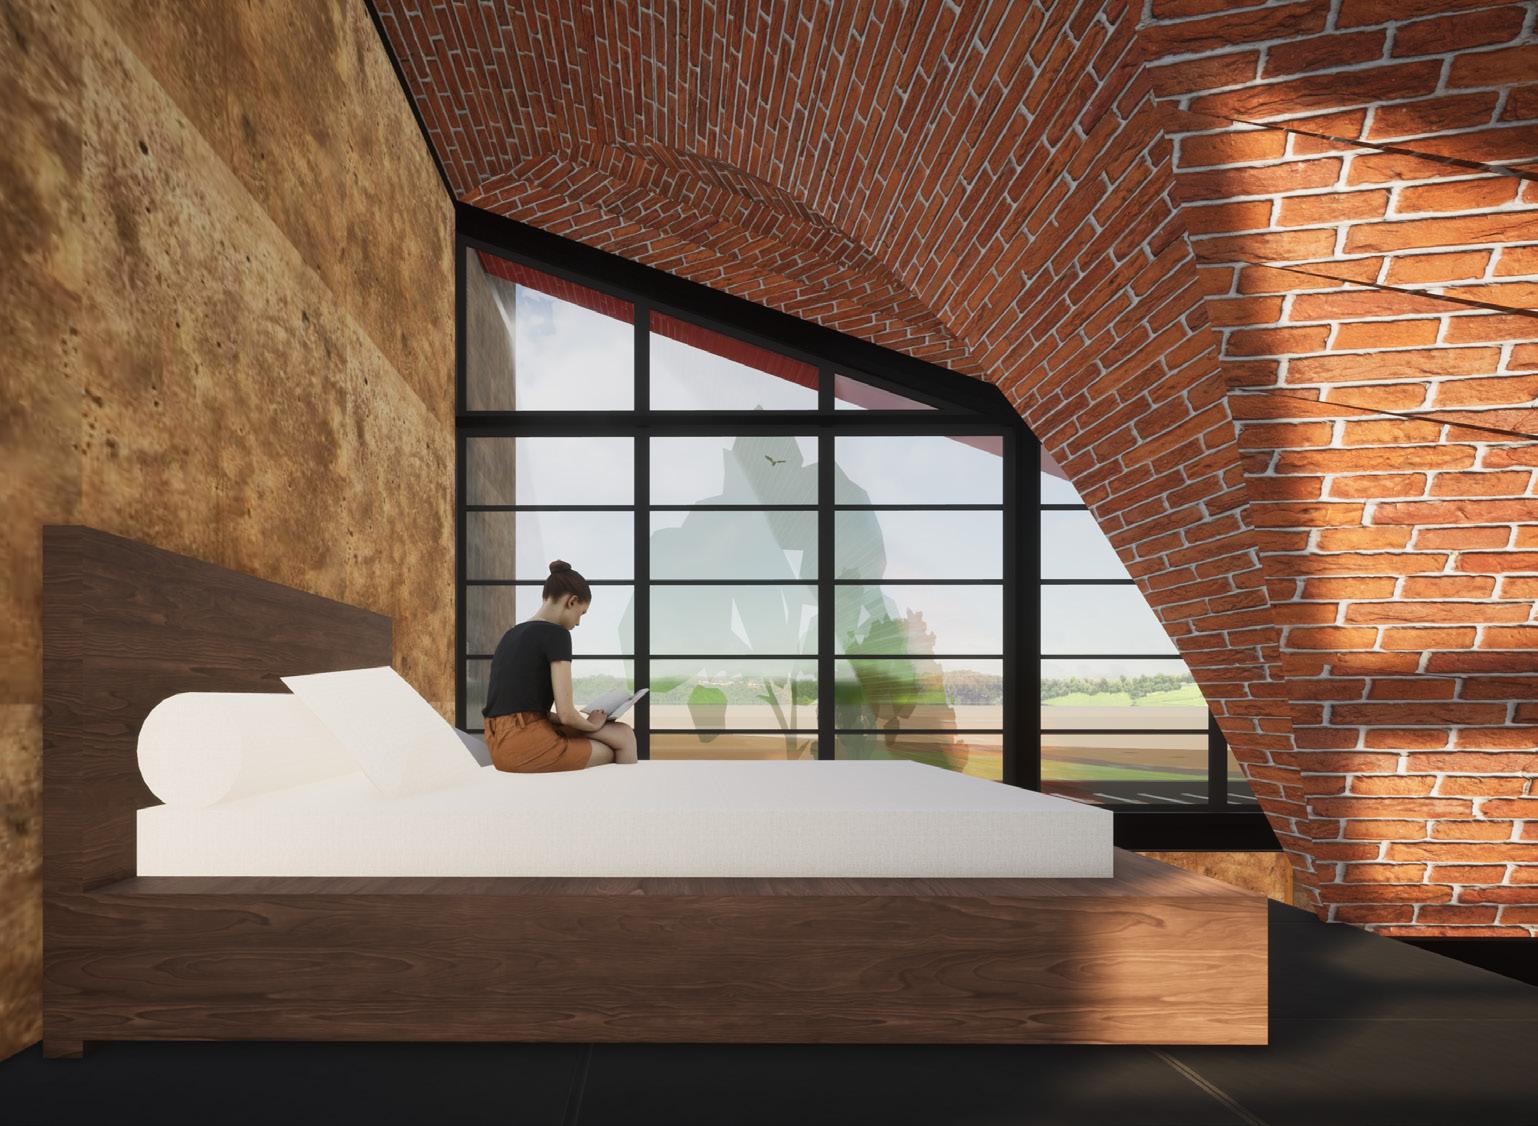
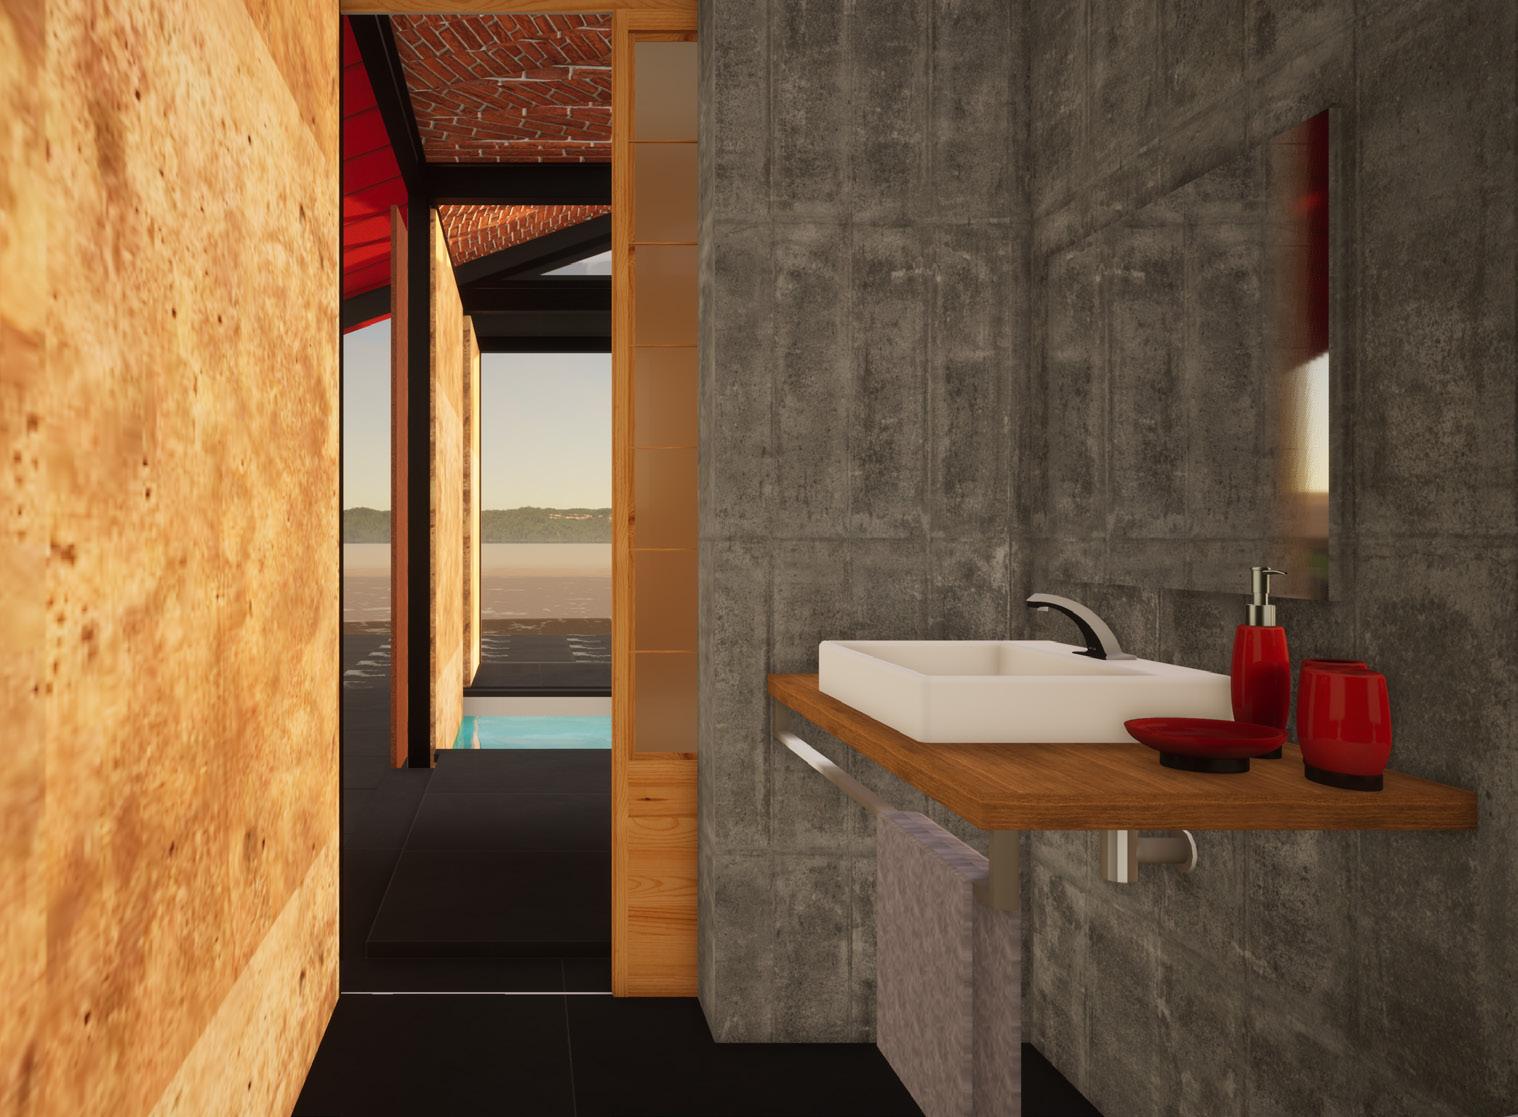
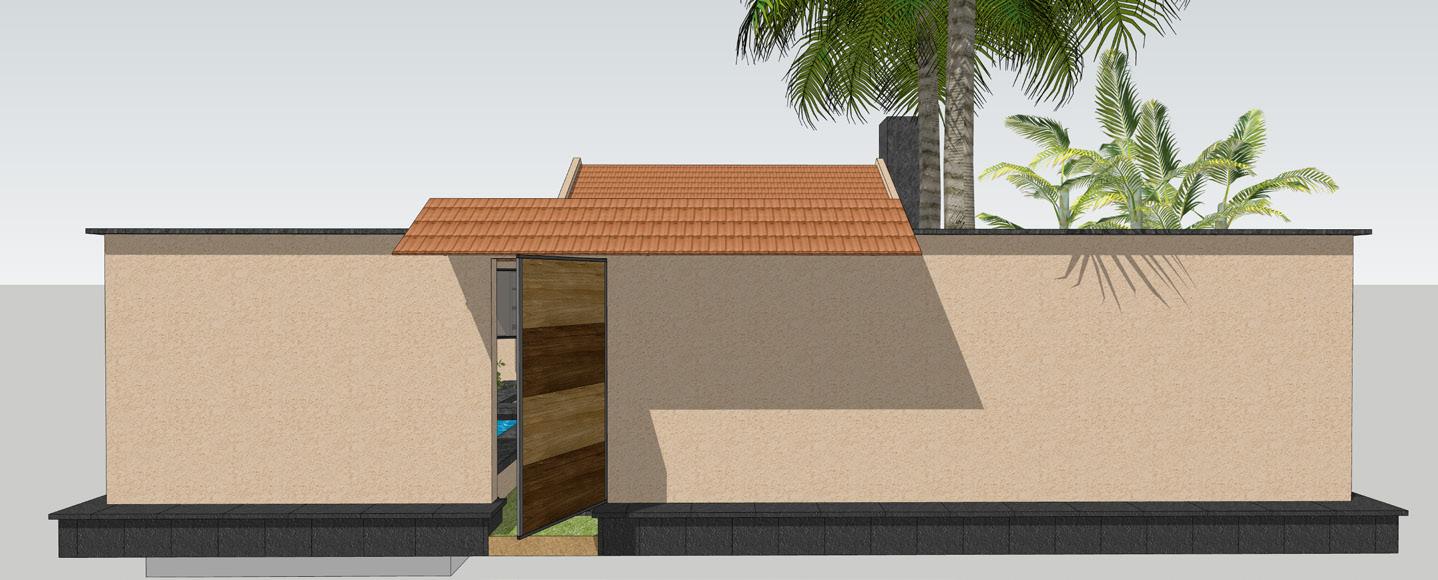
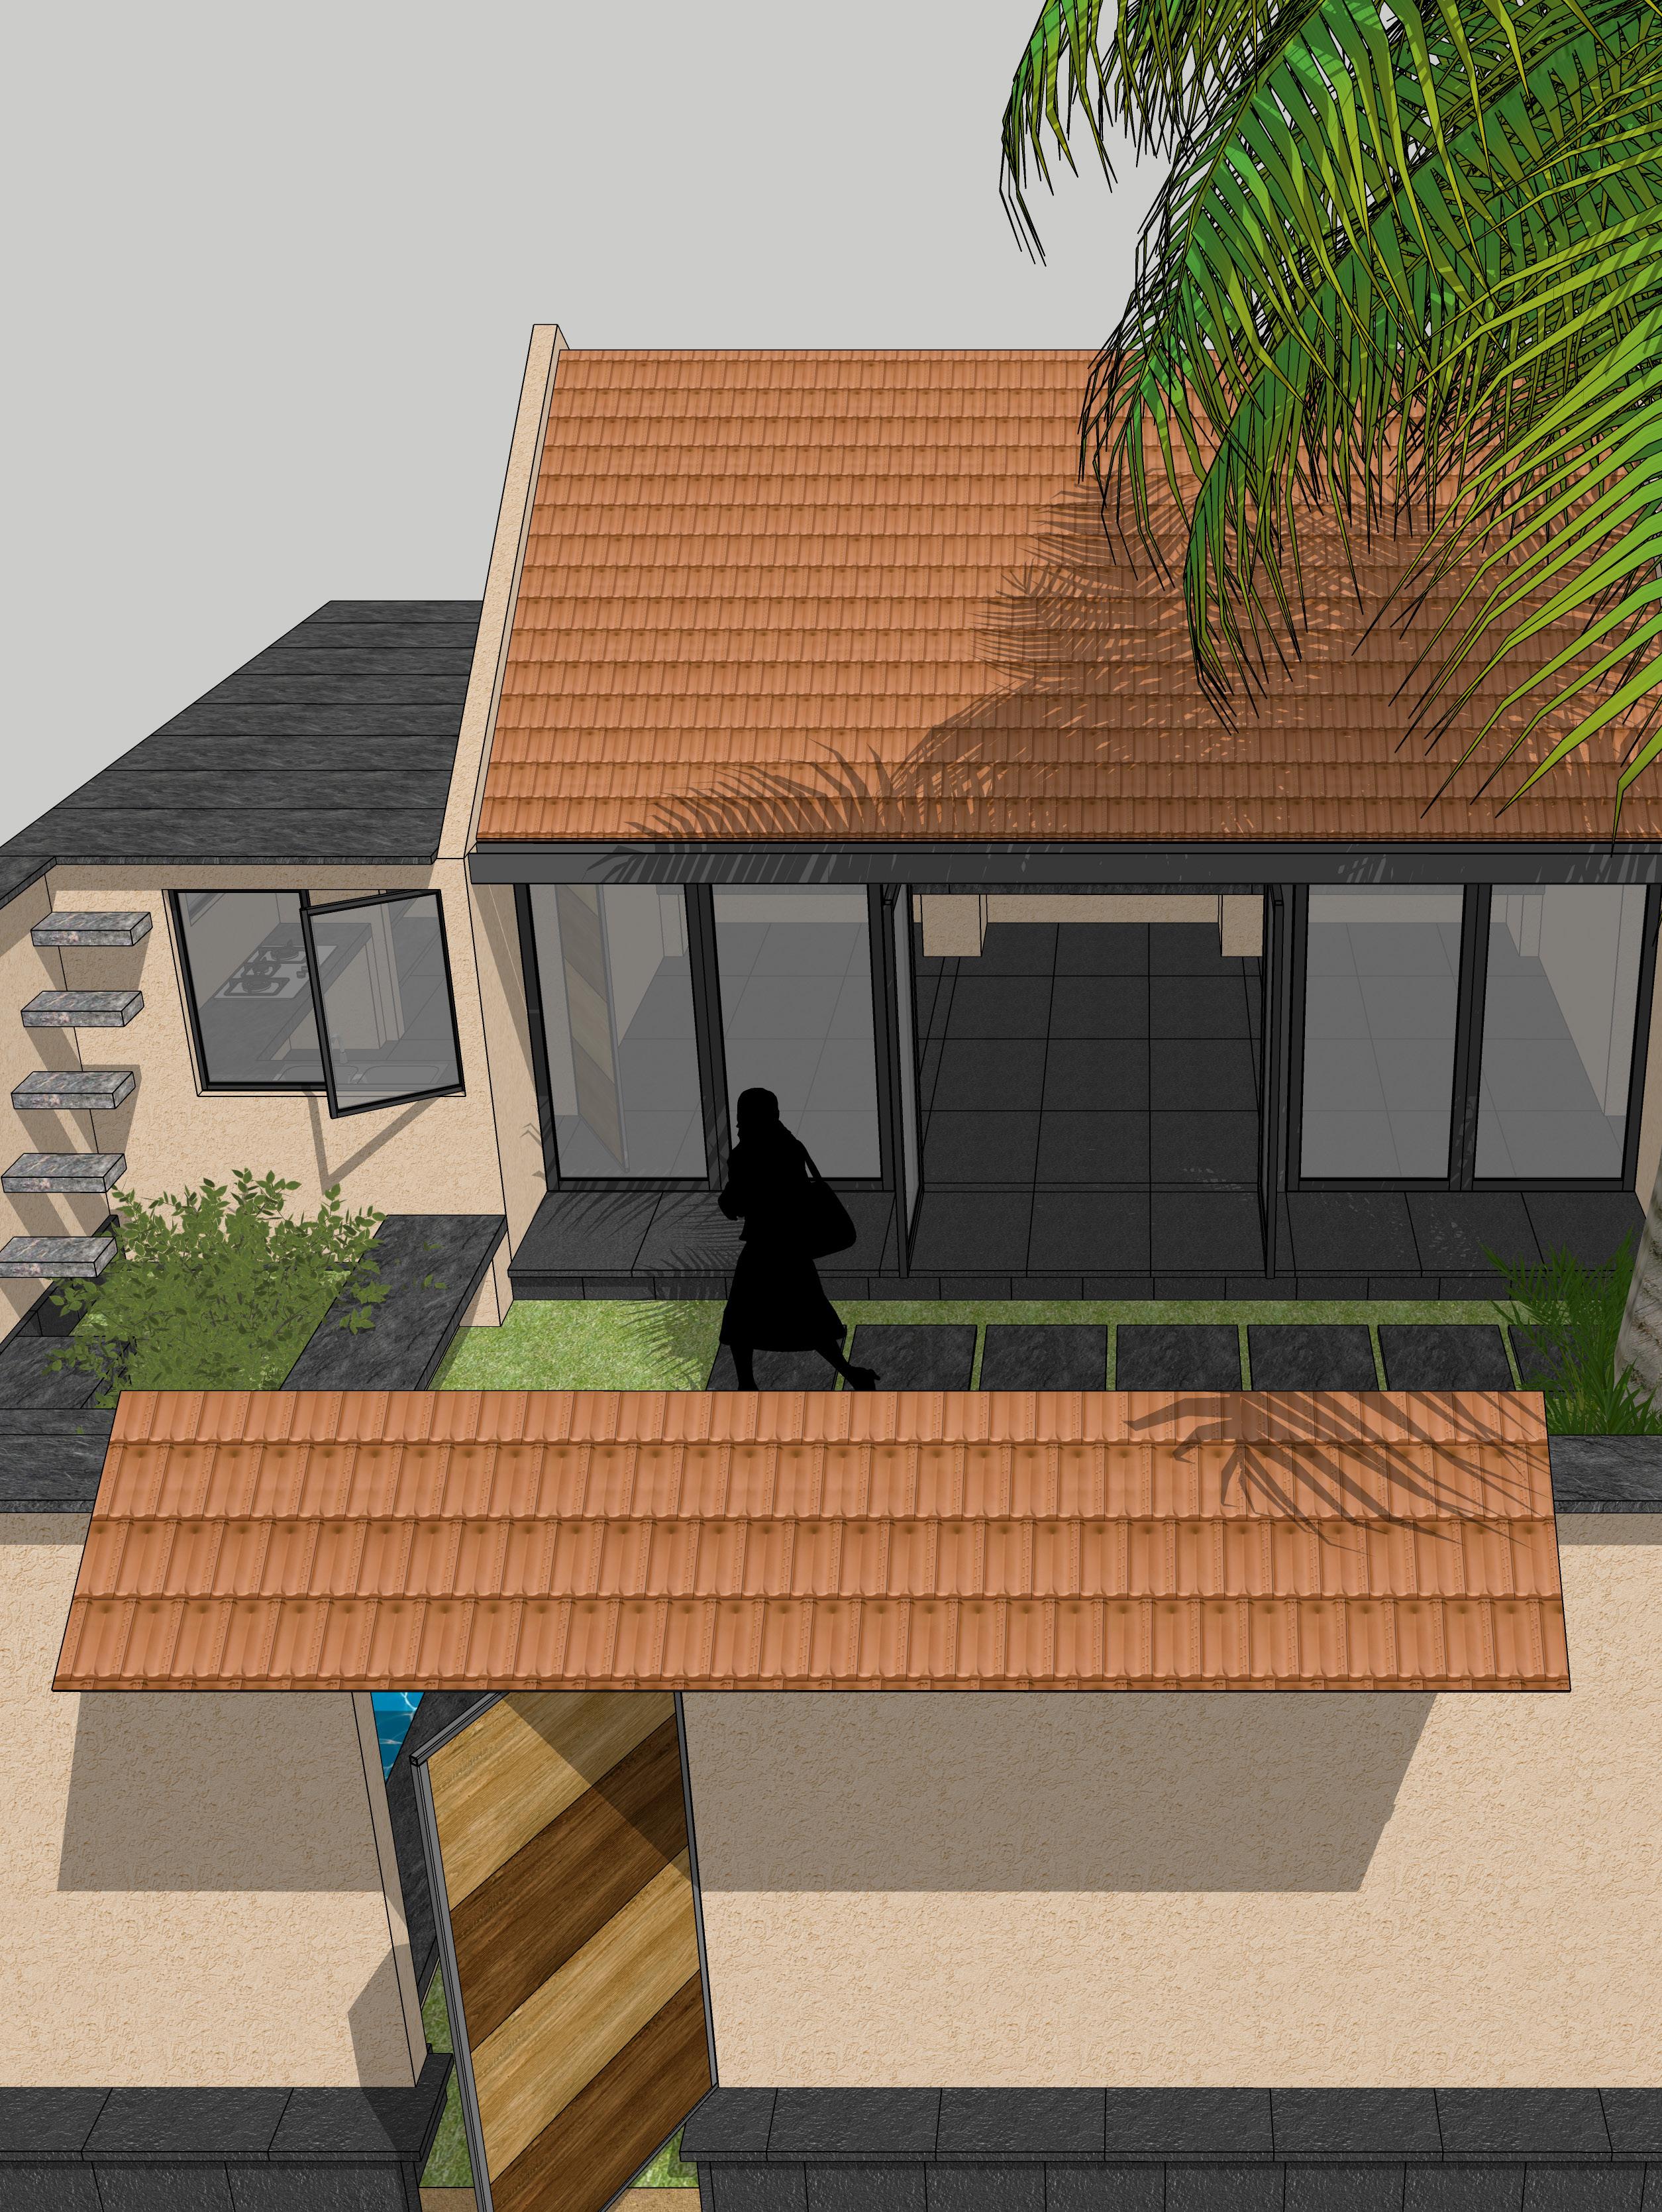
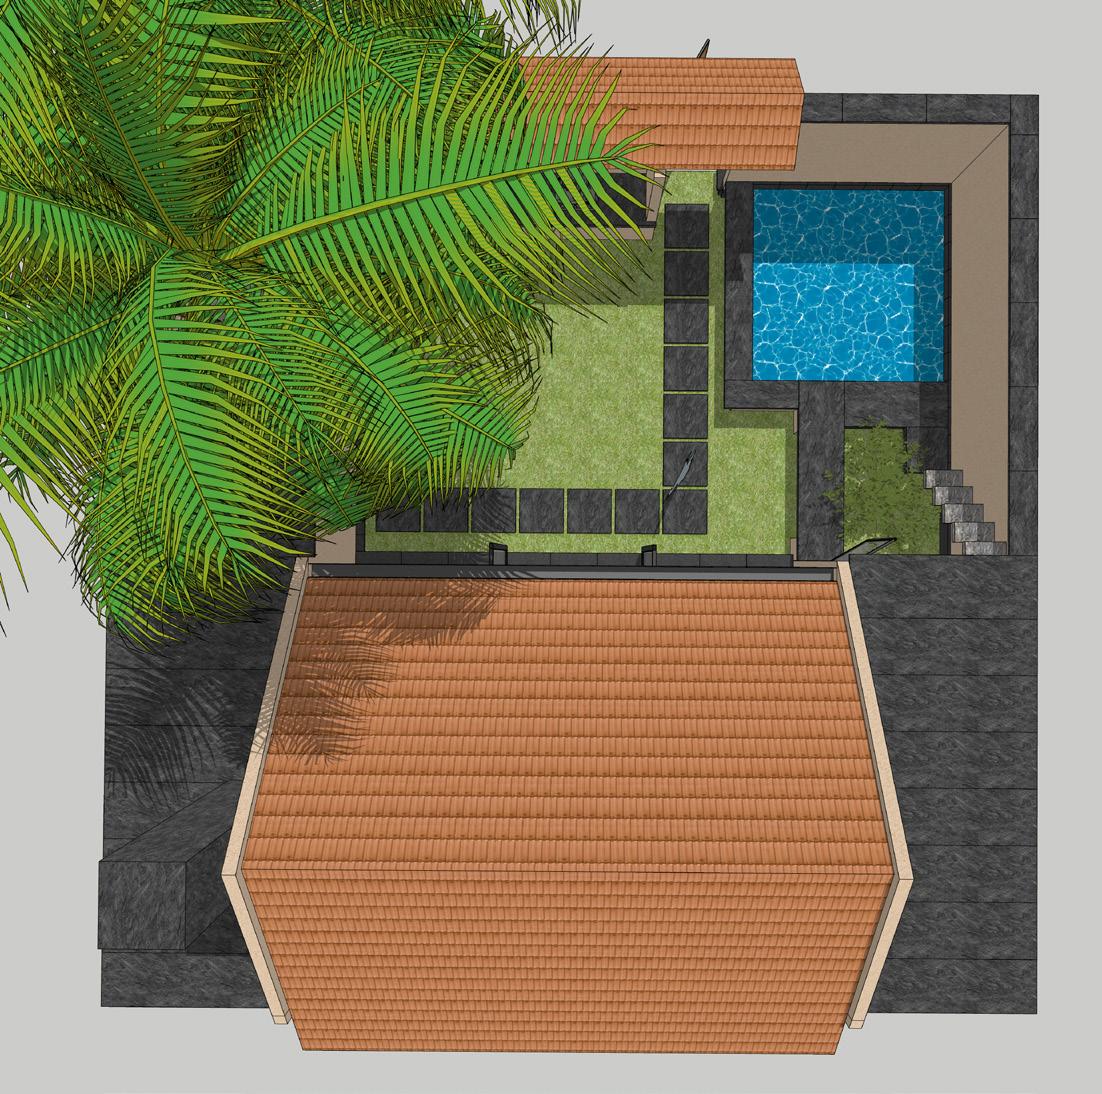
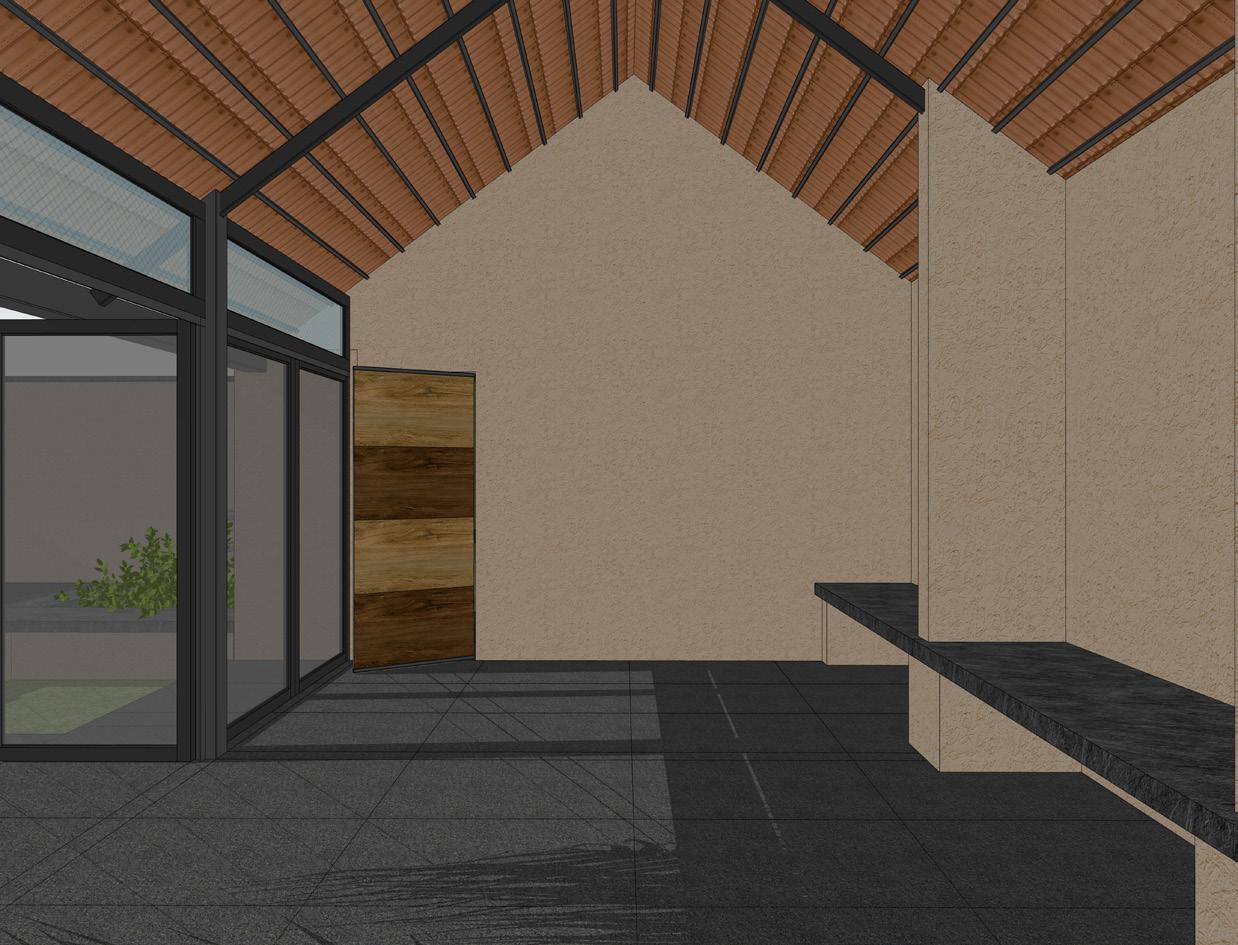
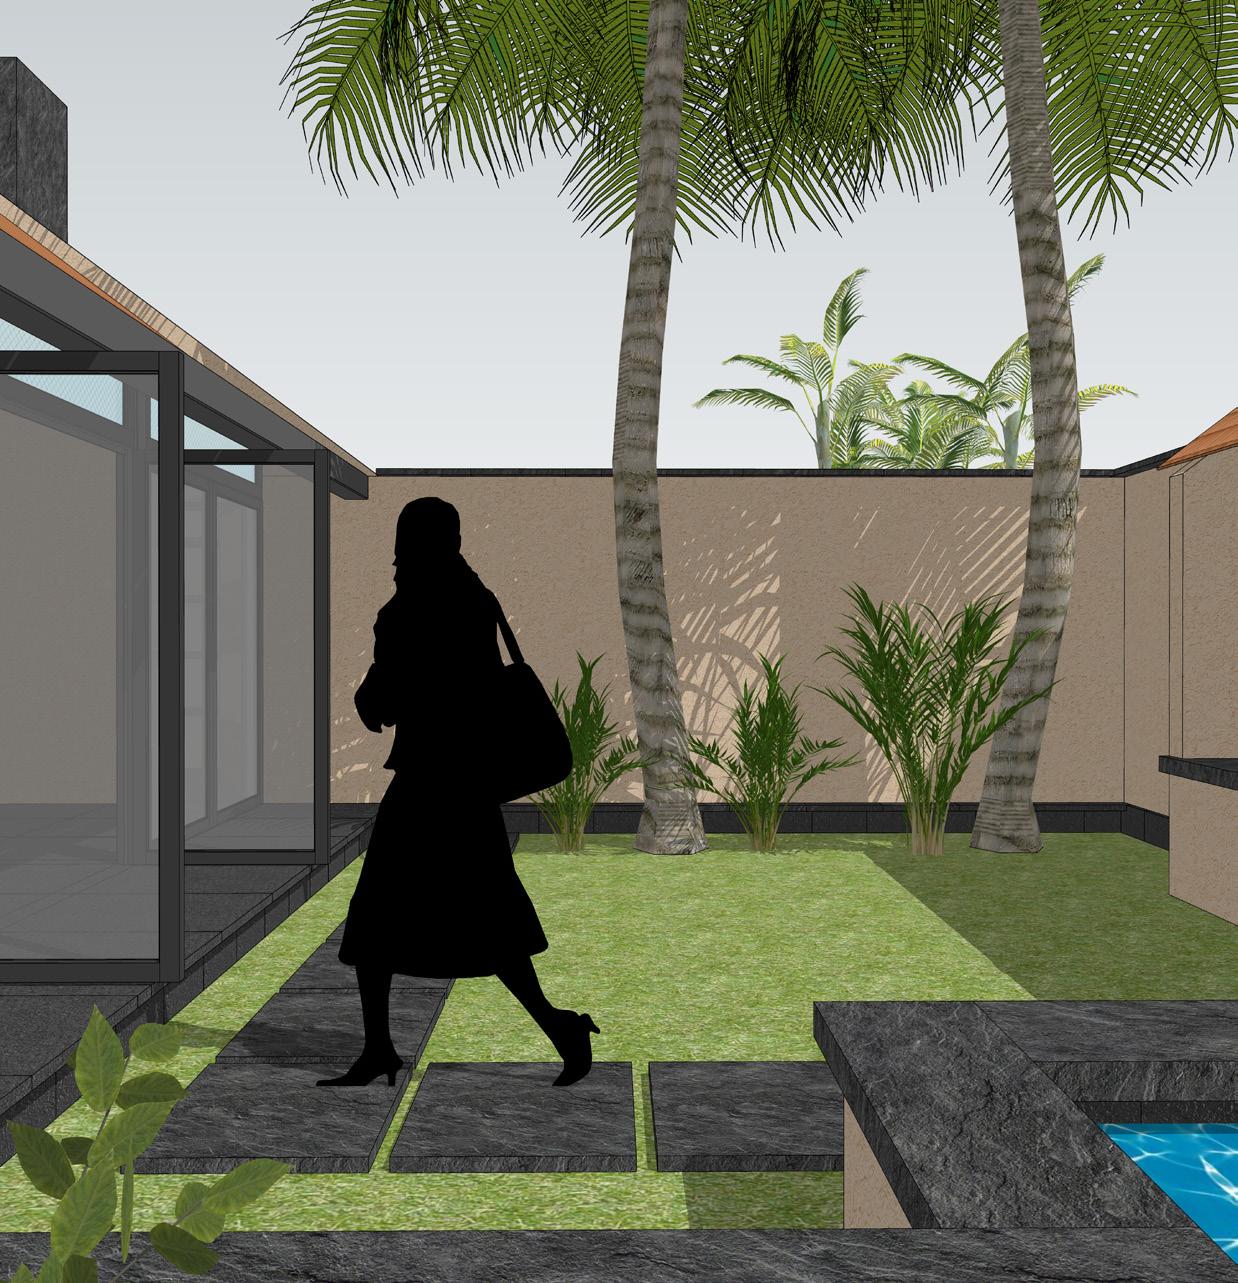
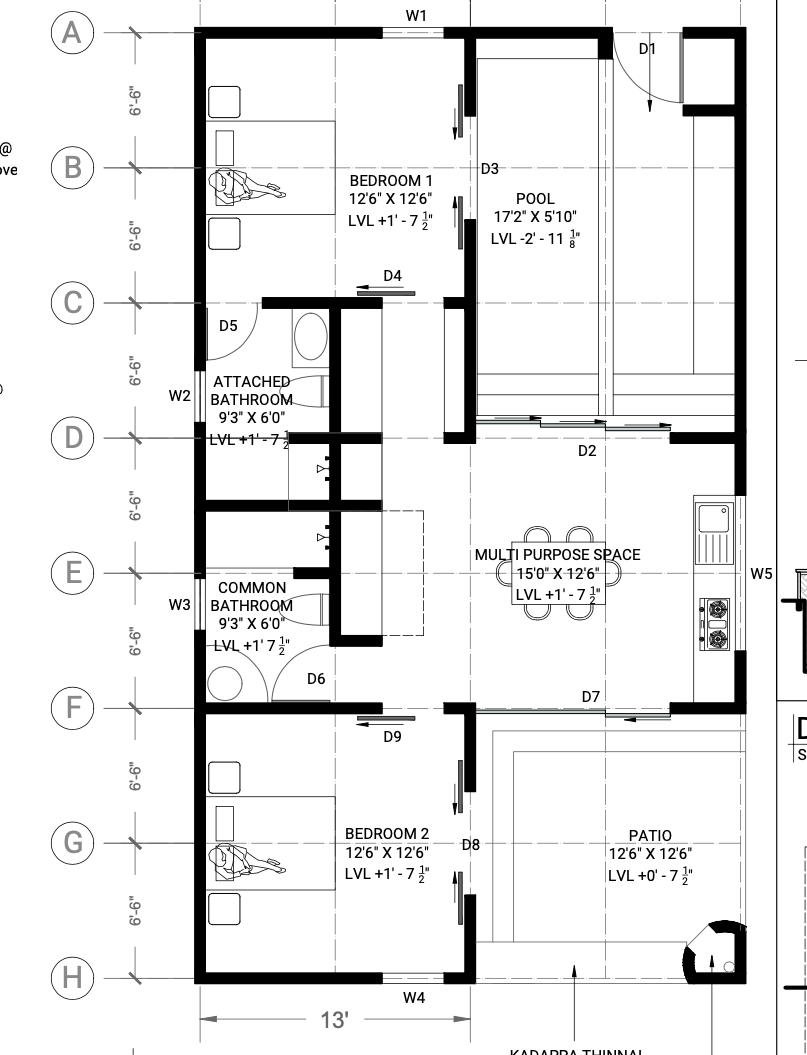
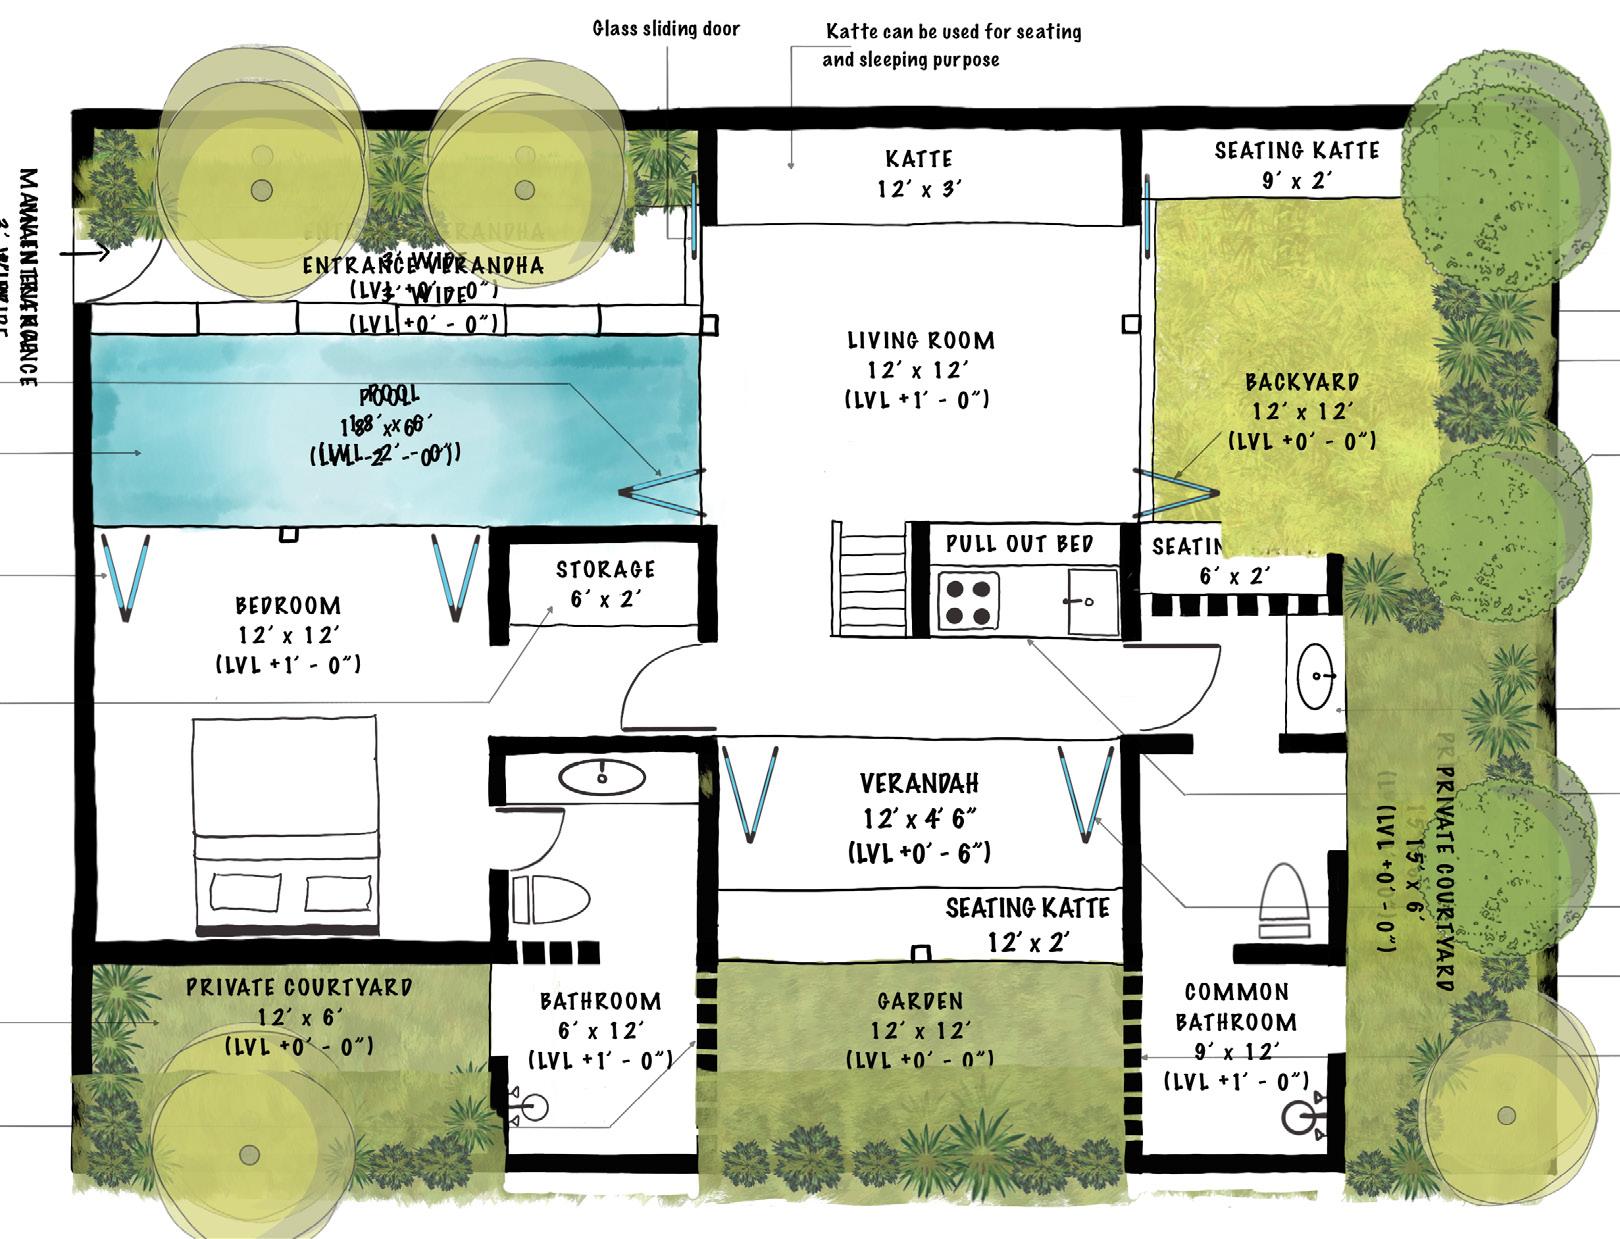
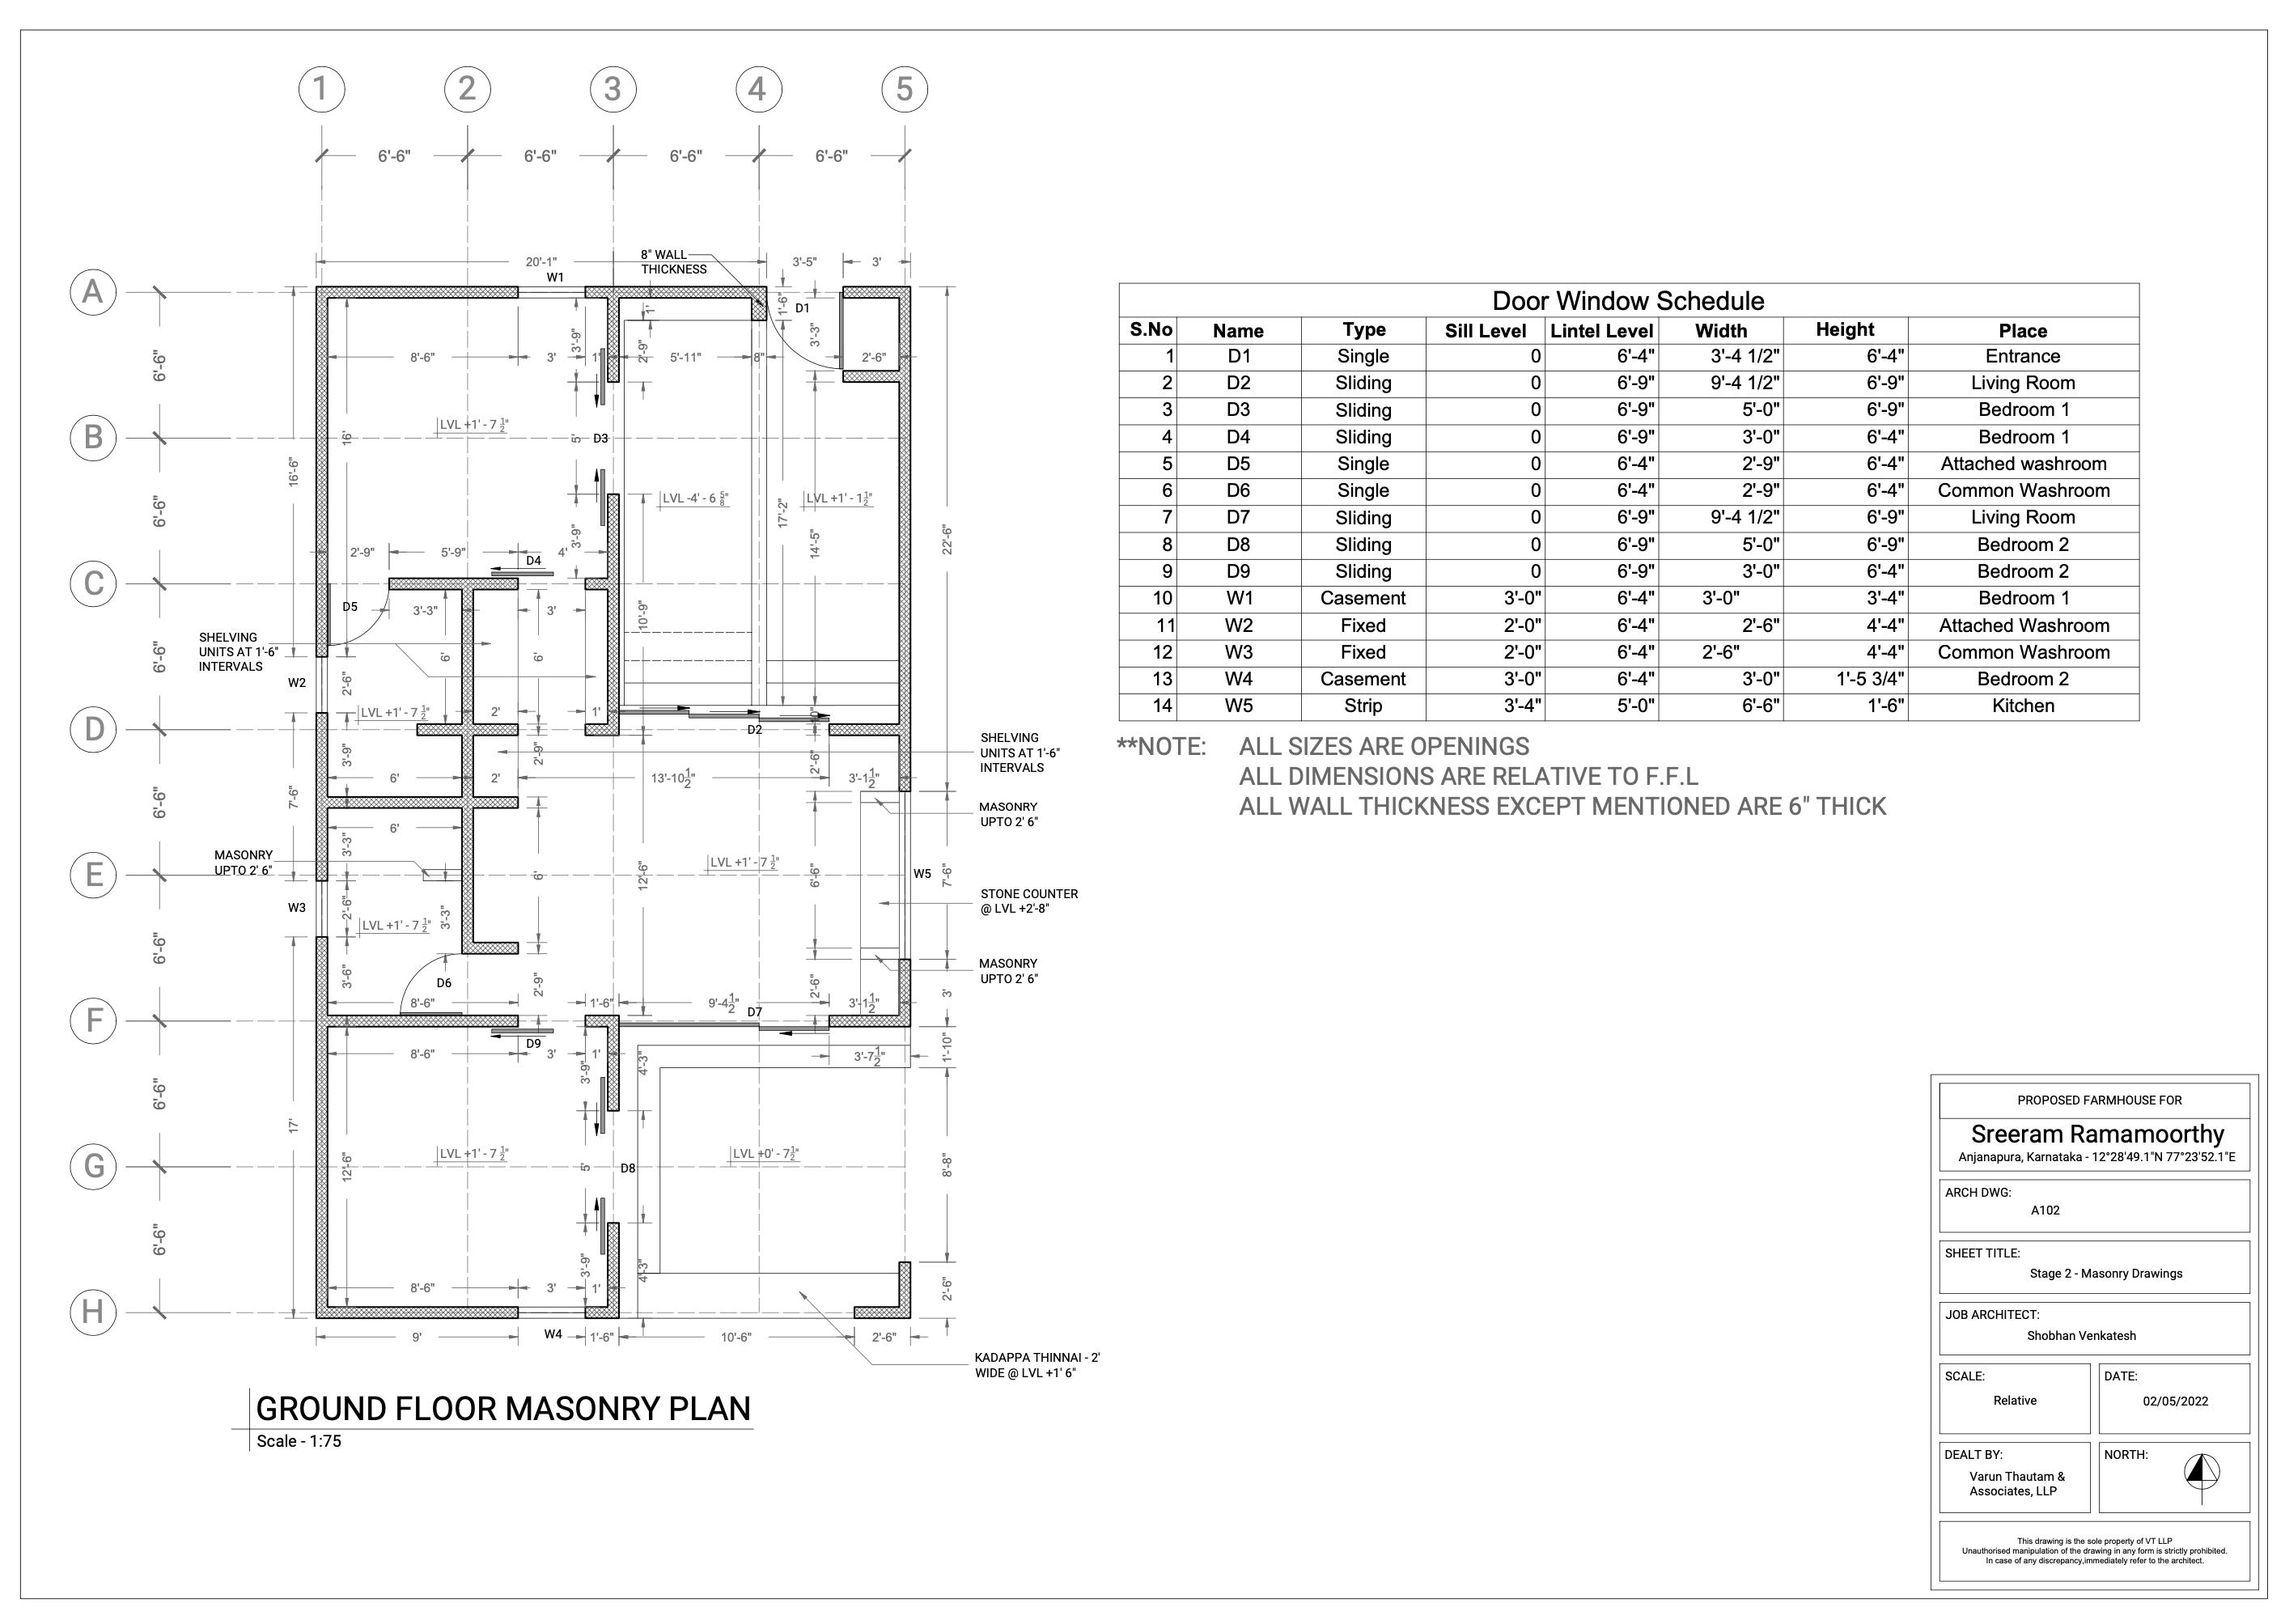
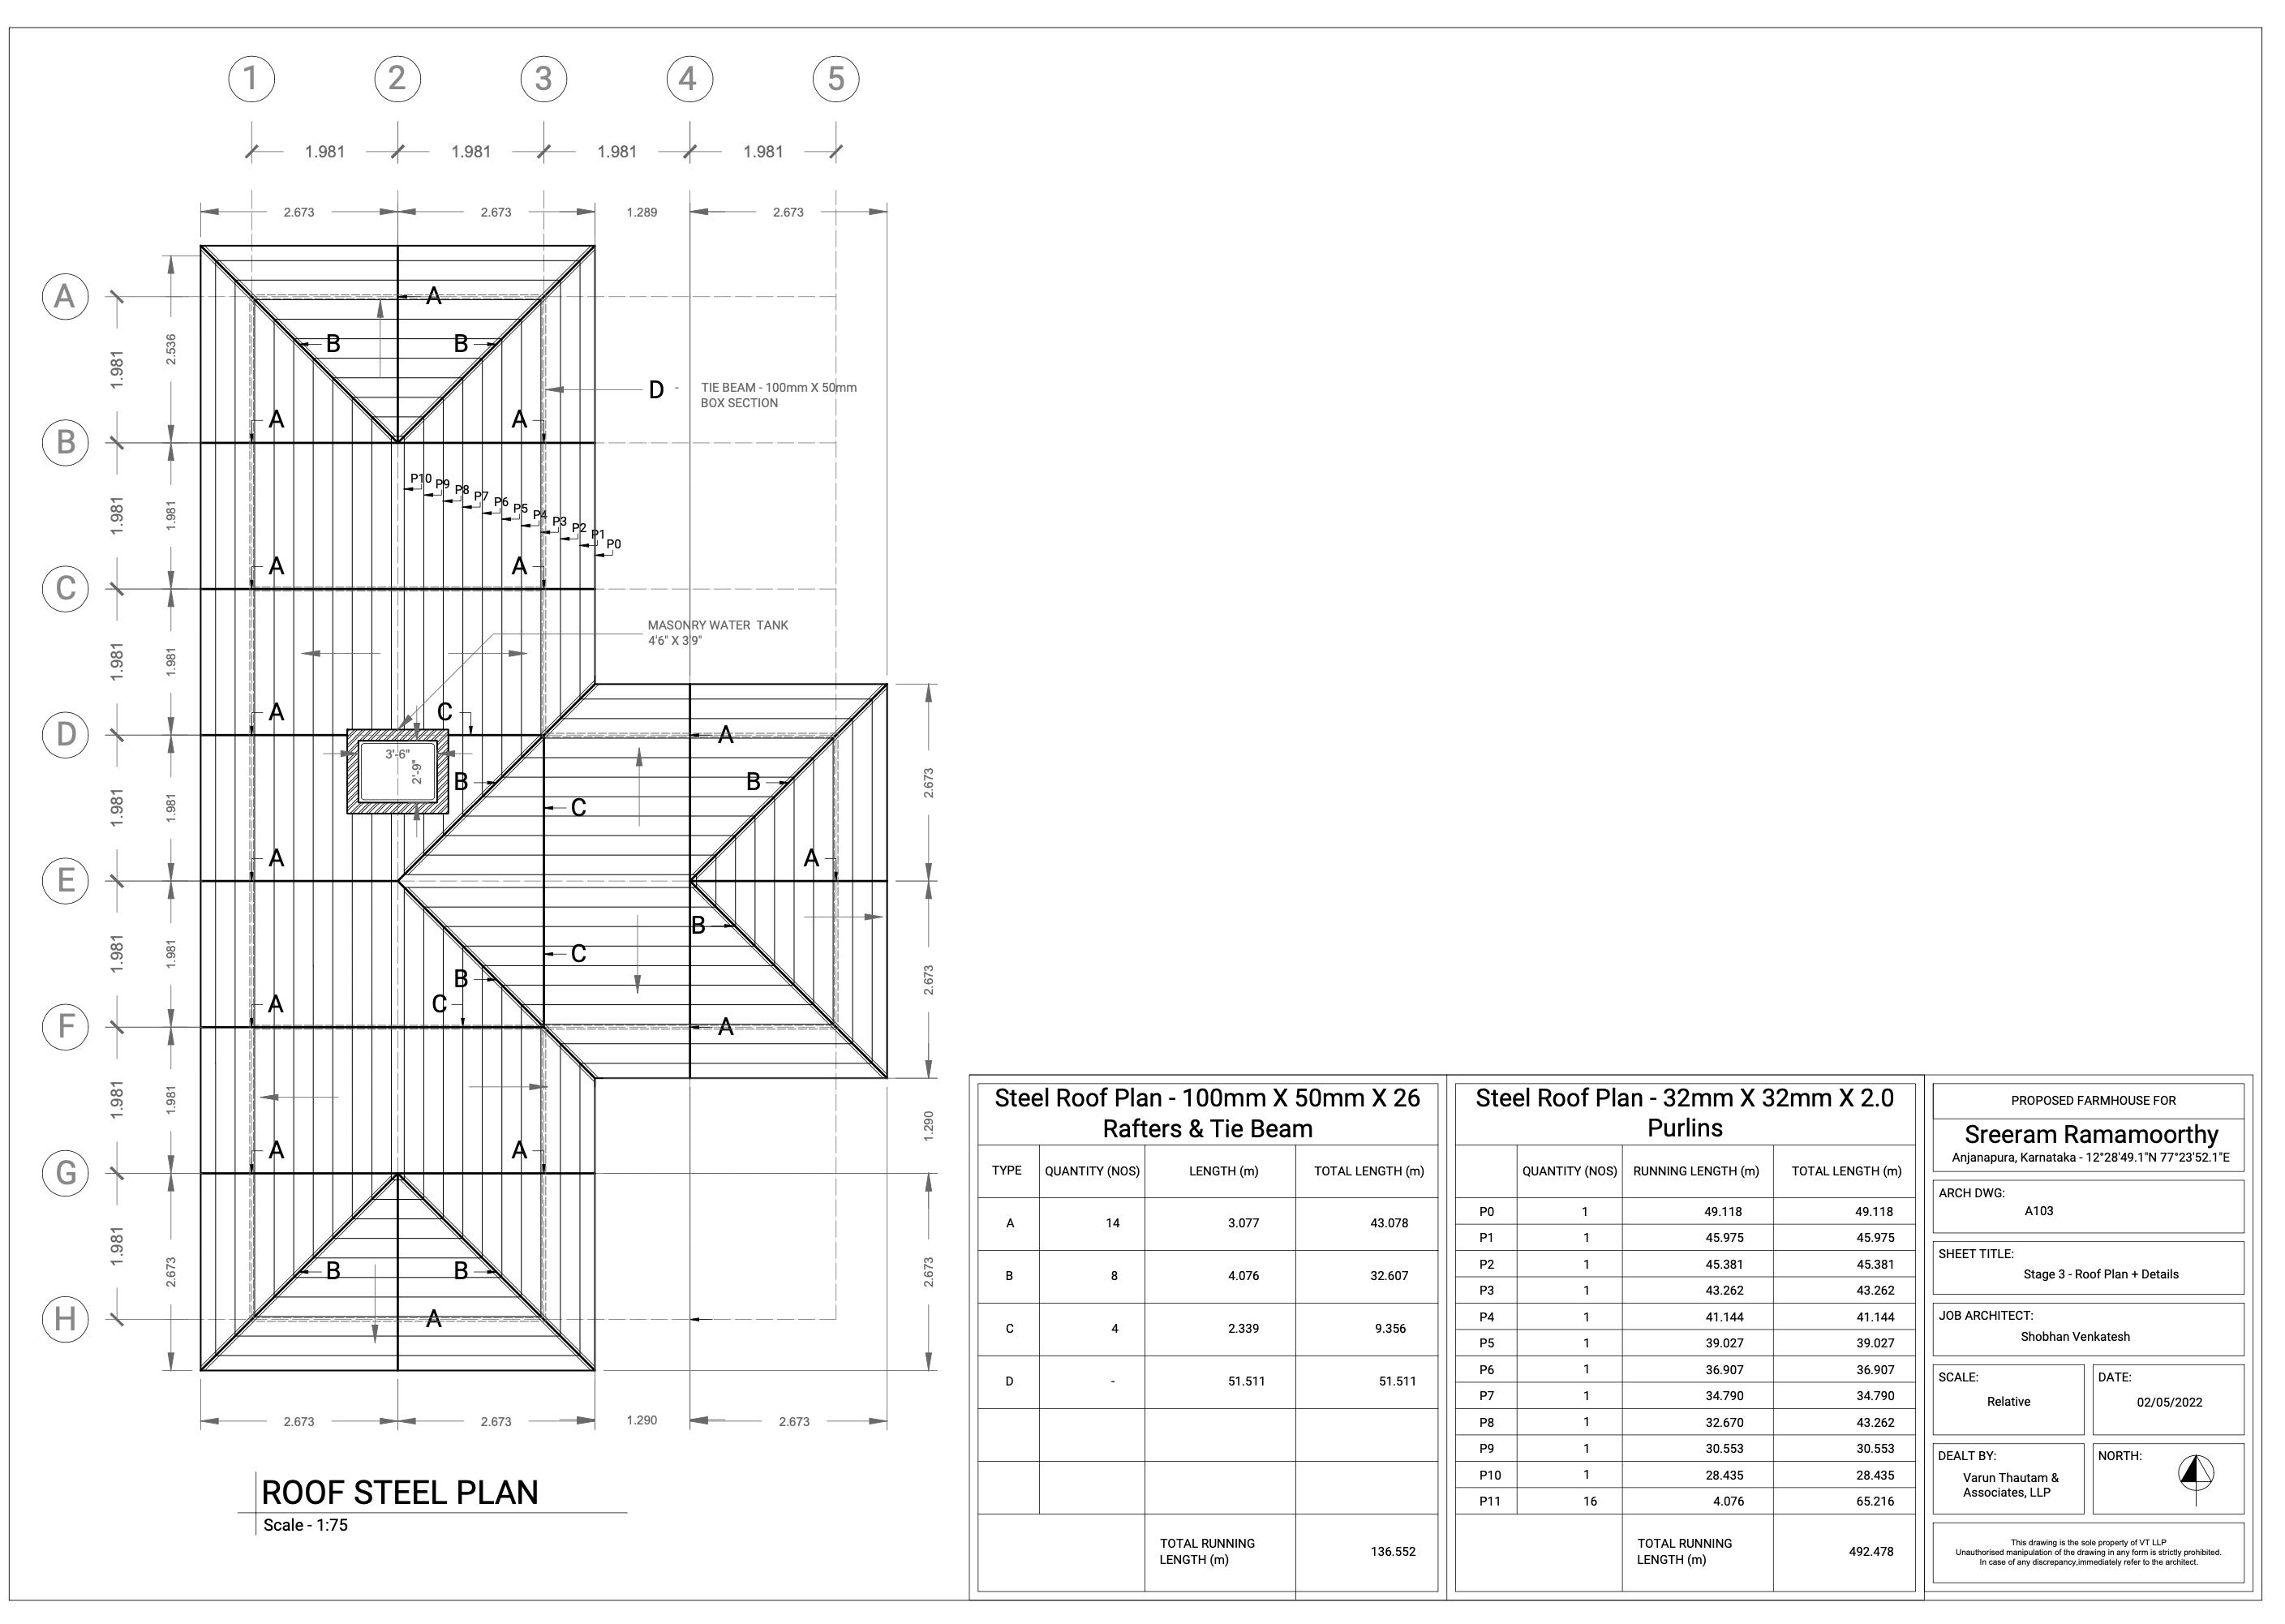
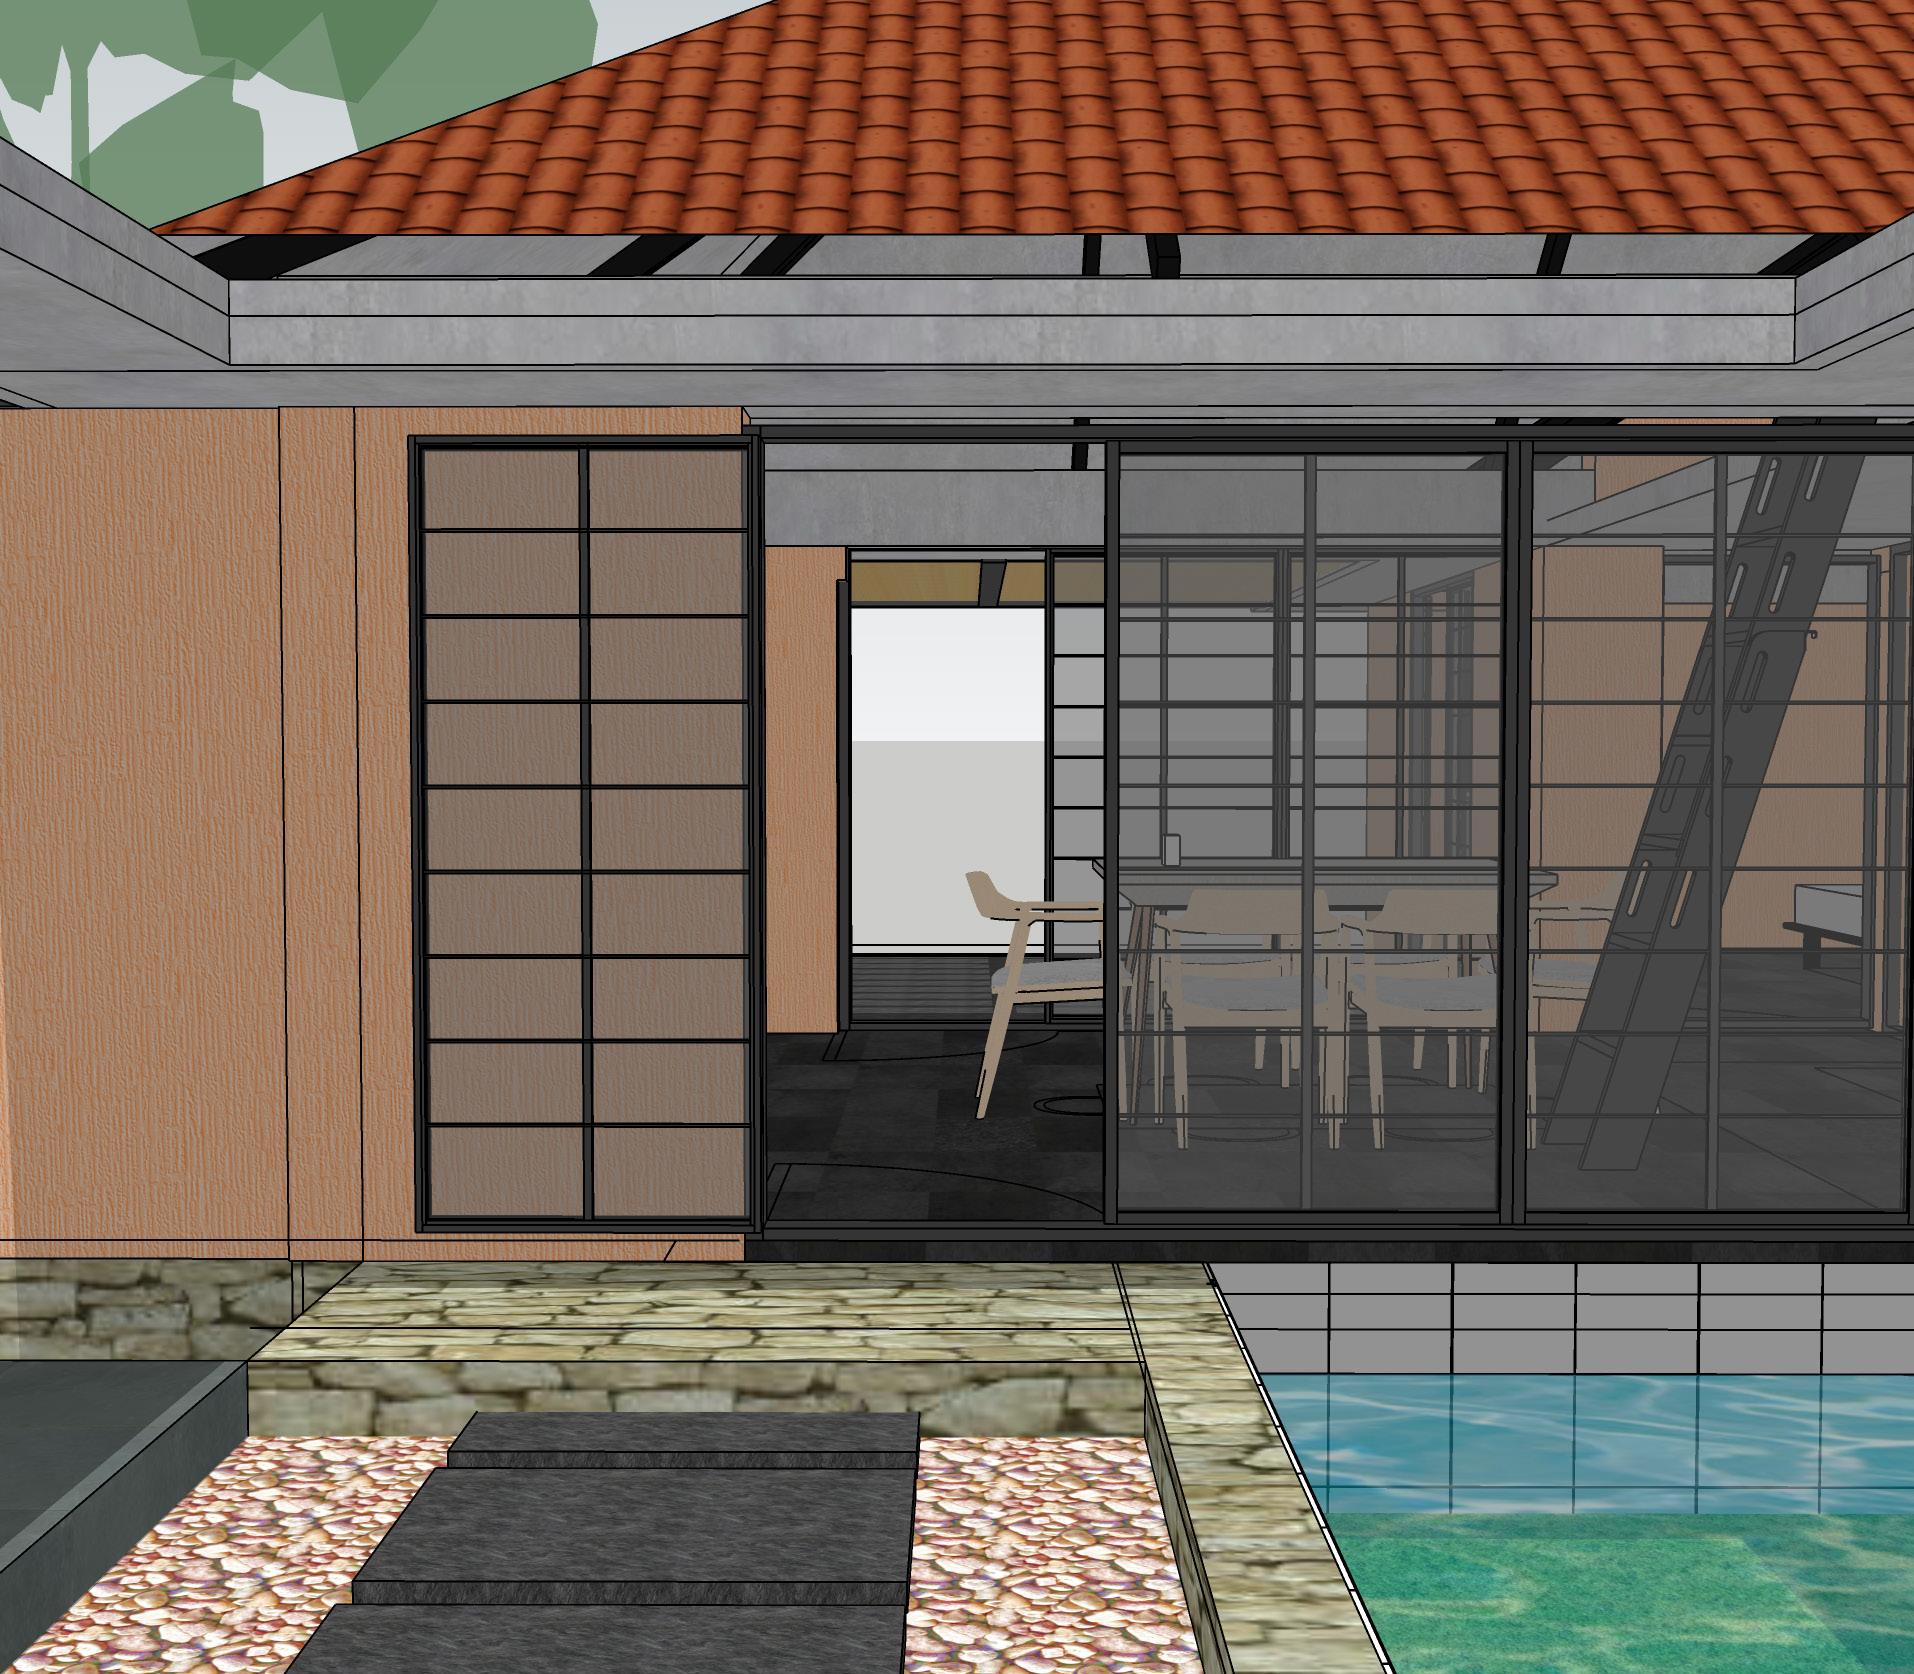
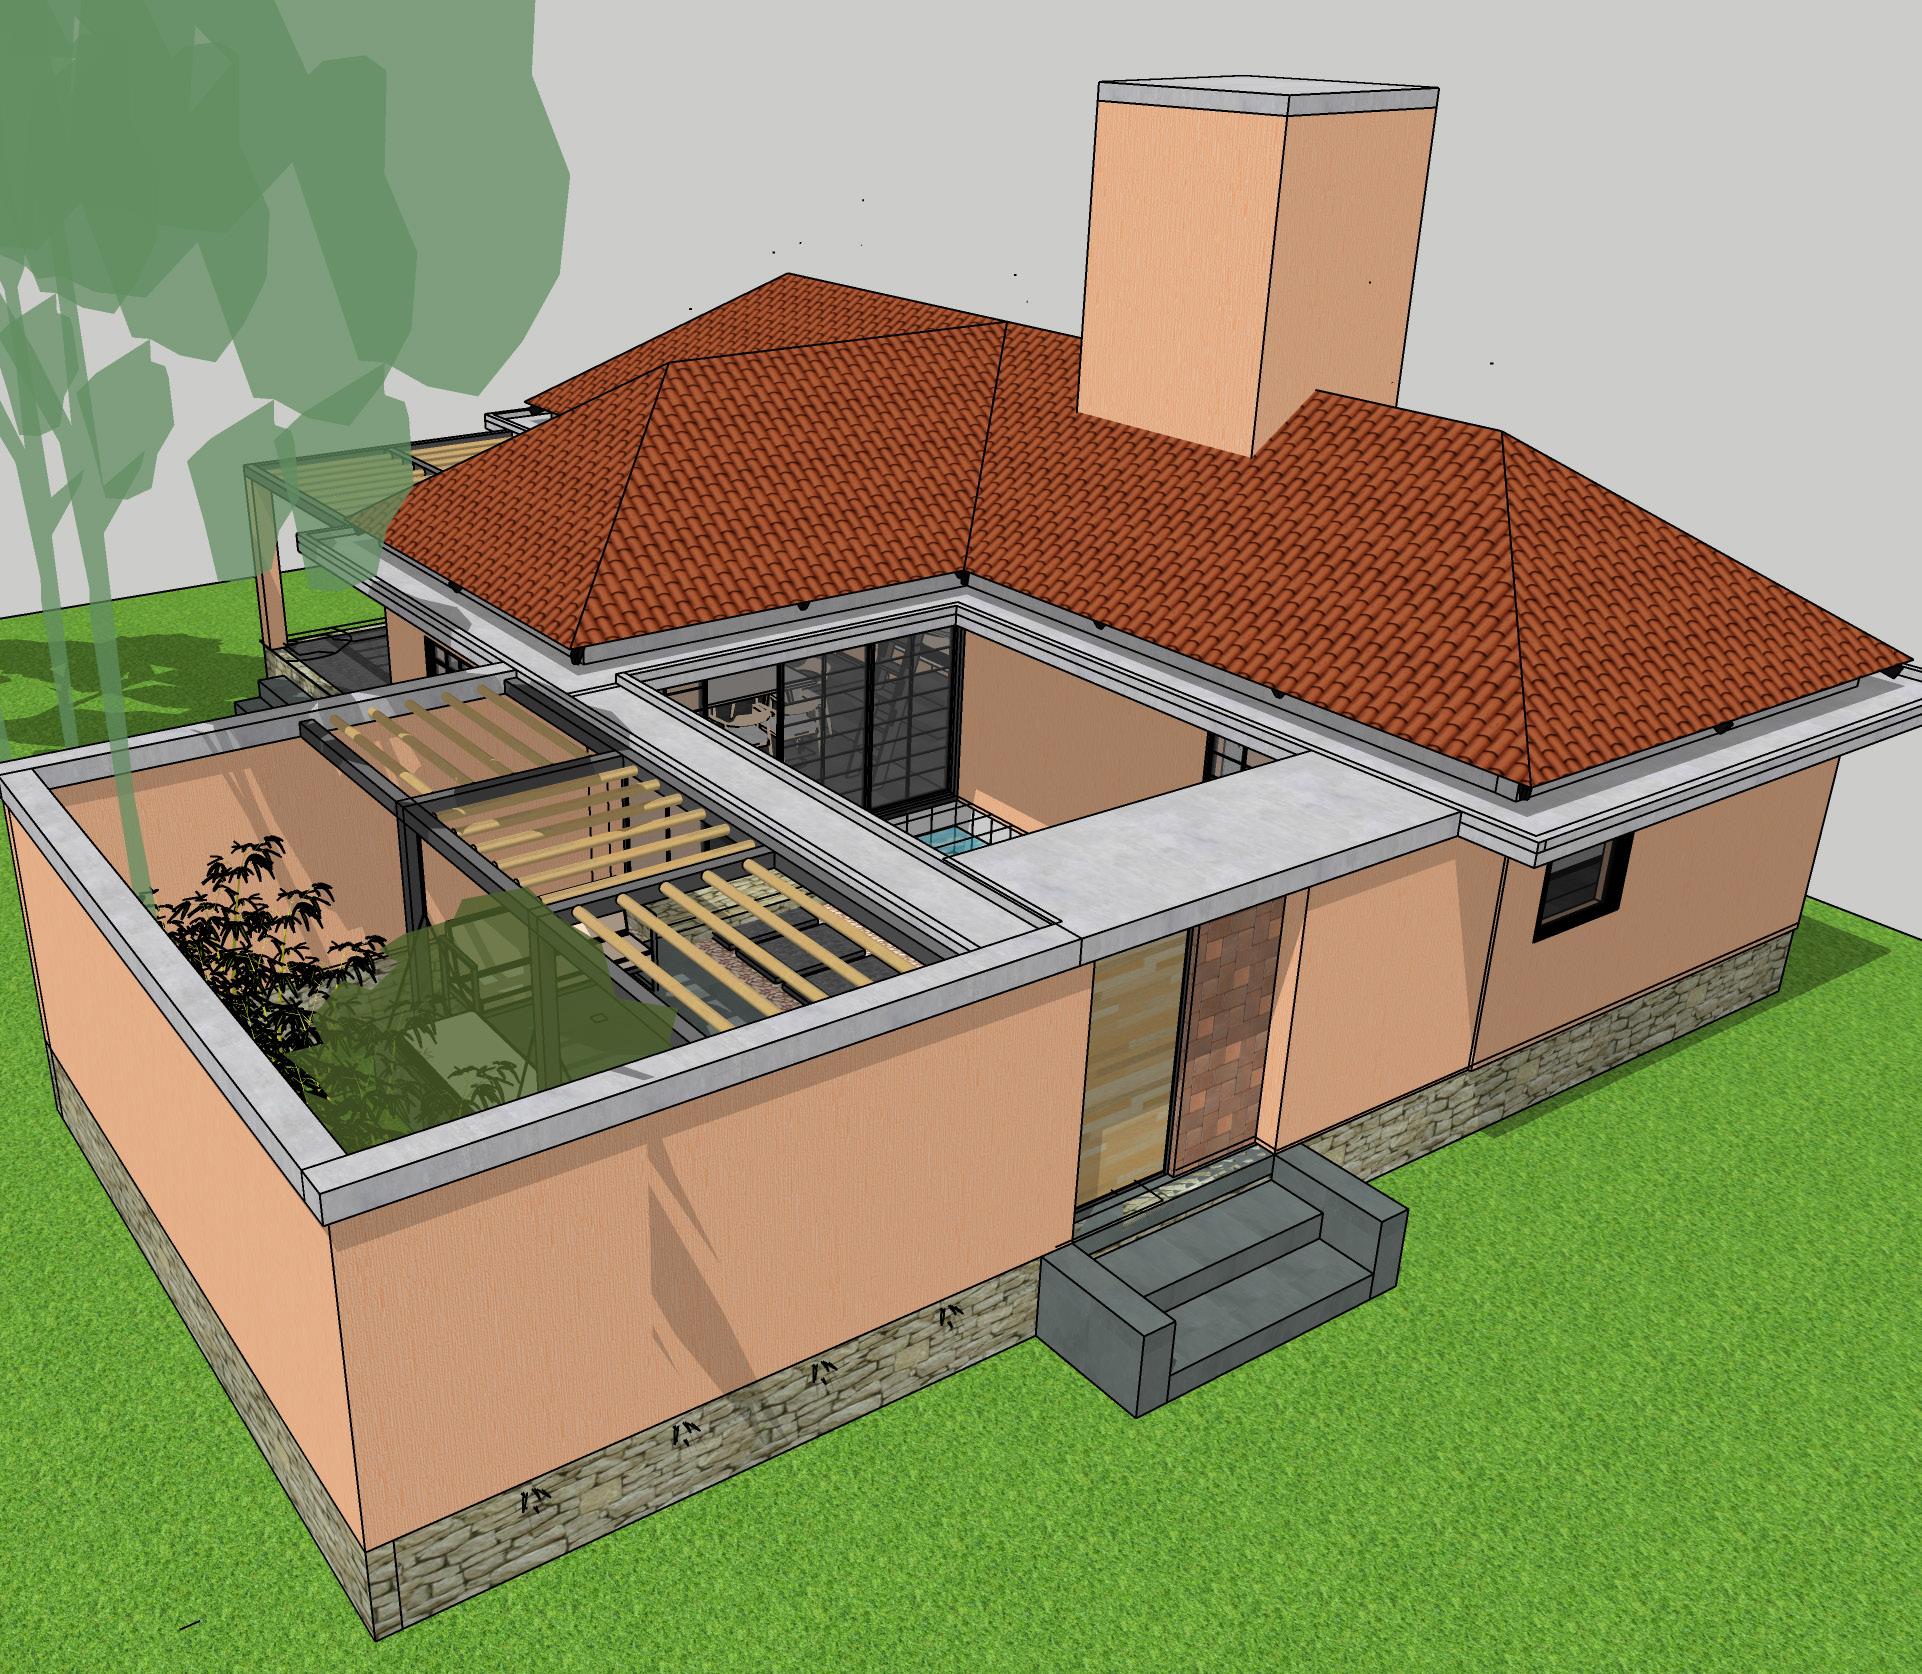
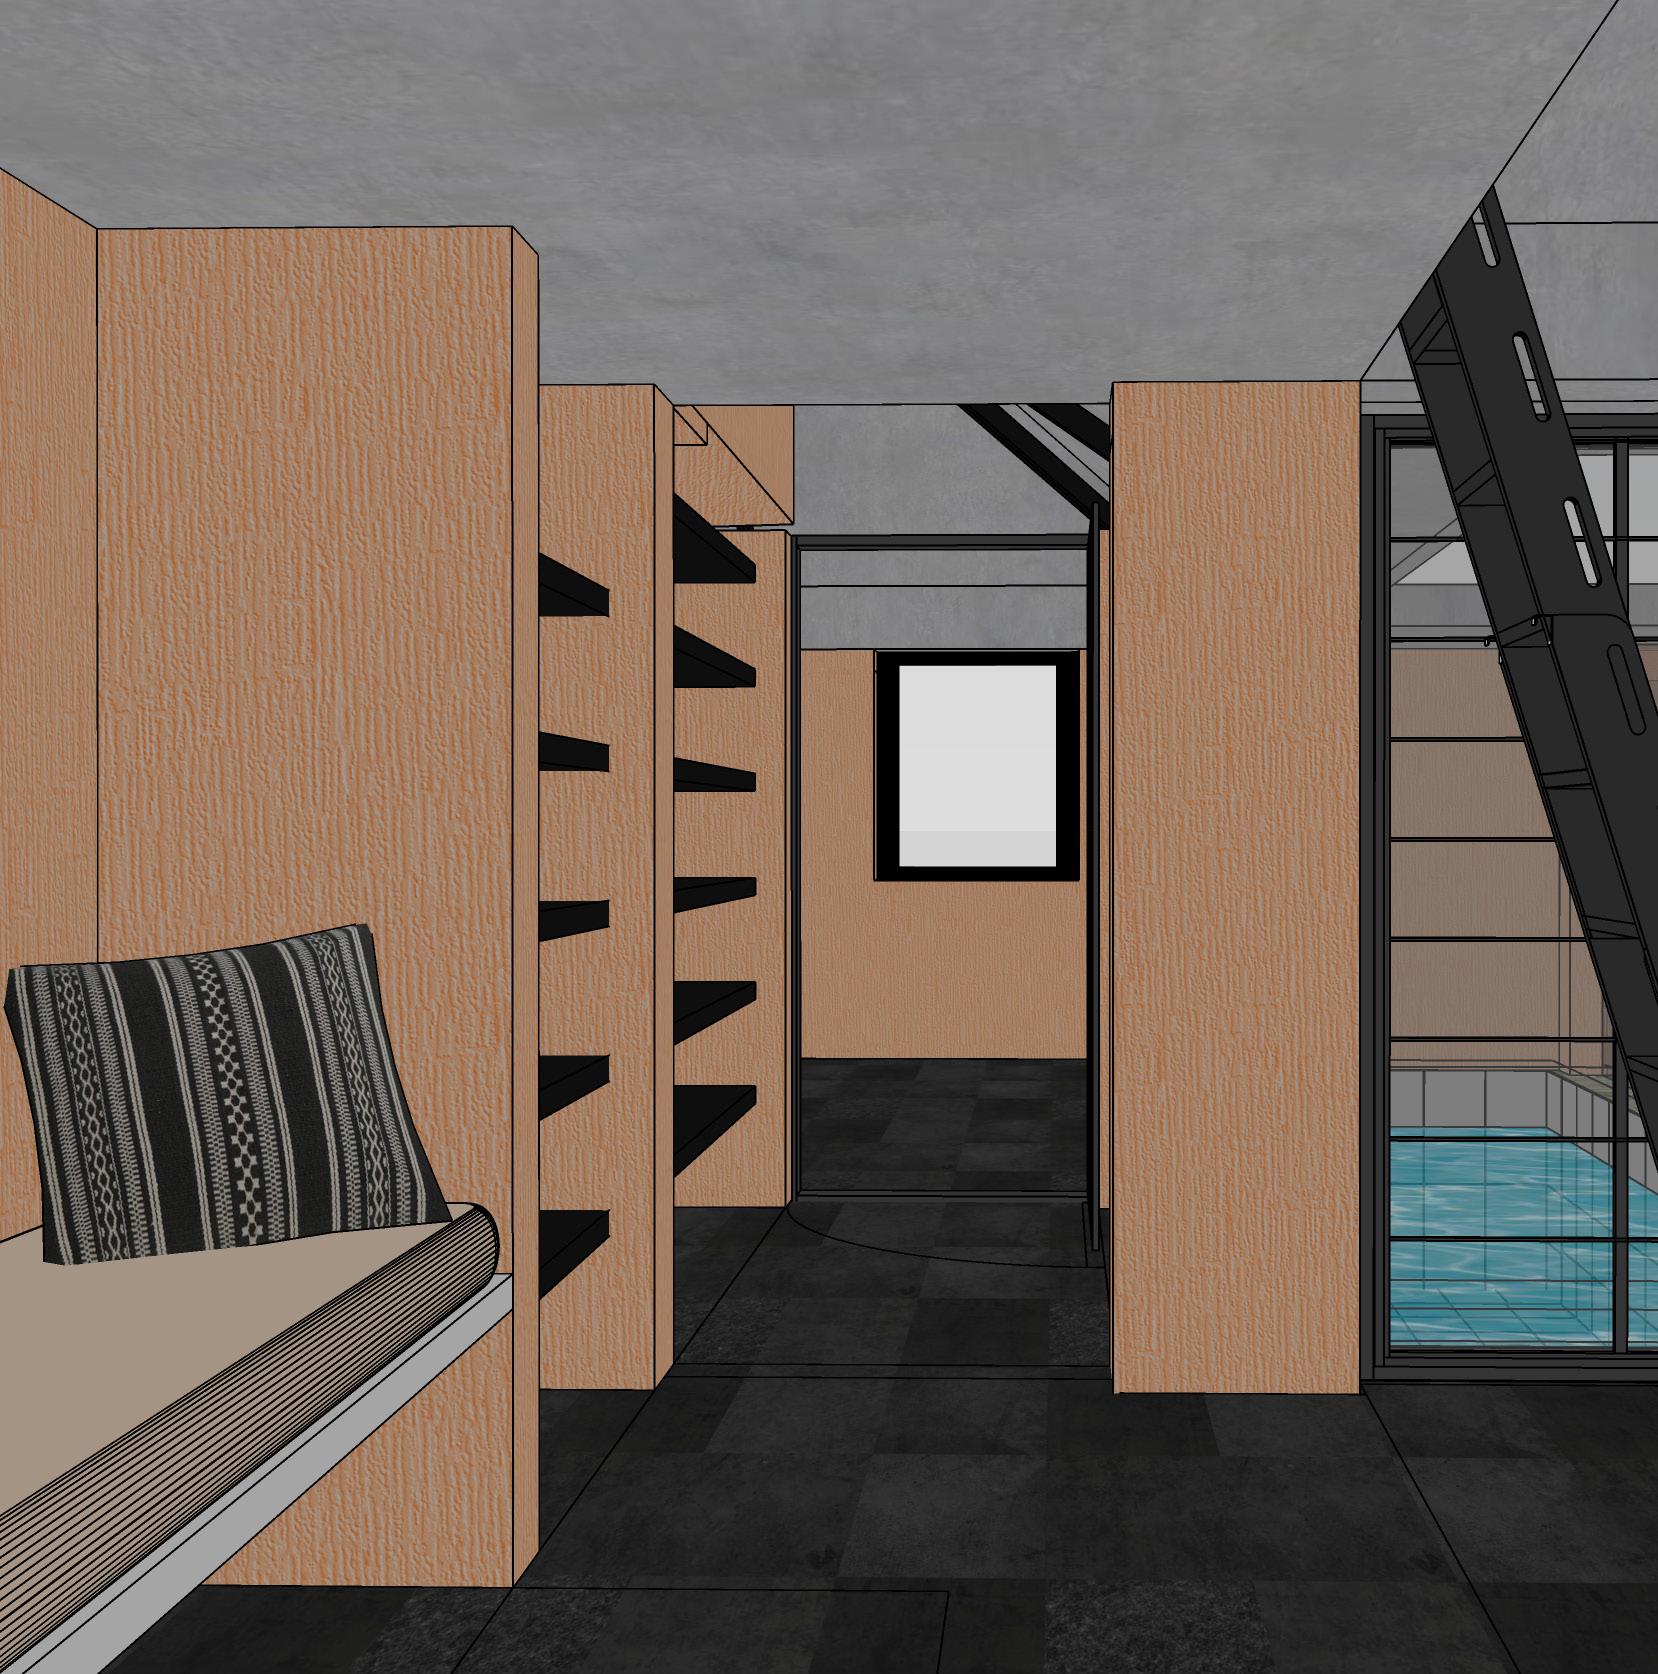
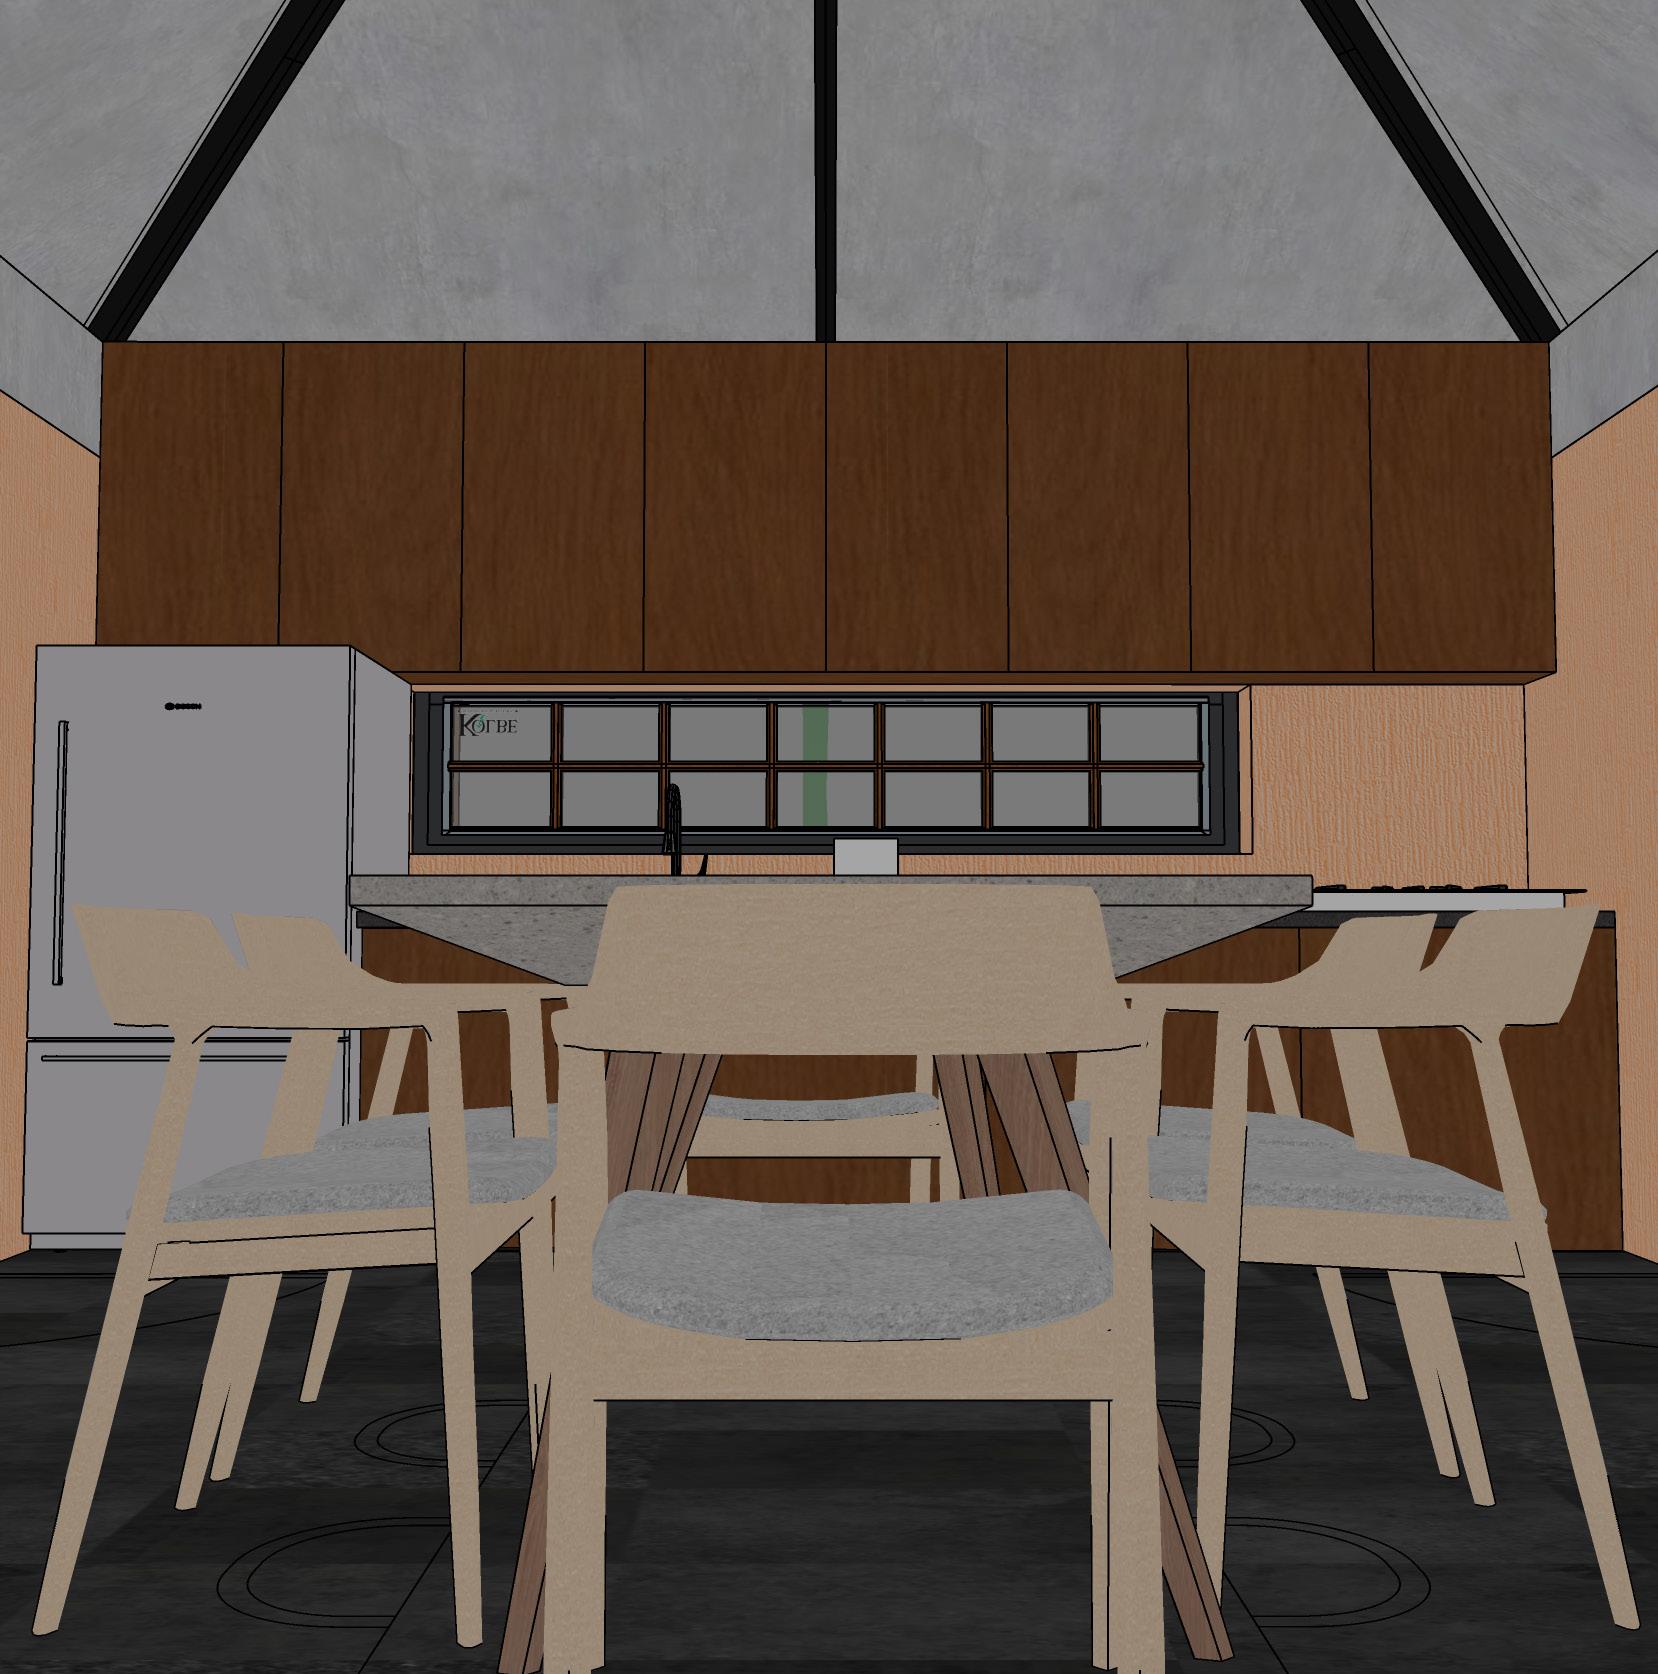
about the project
This was a farmhouse in Anjanapura, Karnataka for a family of 6. The client needed a compact yet cozy home. The project initially started with 1 bedroom, a multipurpose space and a small kitchenette, but evetually the client and us kept improvising the requirements and the design evolved. My major role in this project was a designer. I also got the opportunity to work on the construction drawings and 3d model as well.
concept
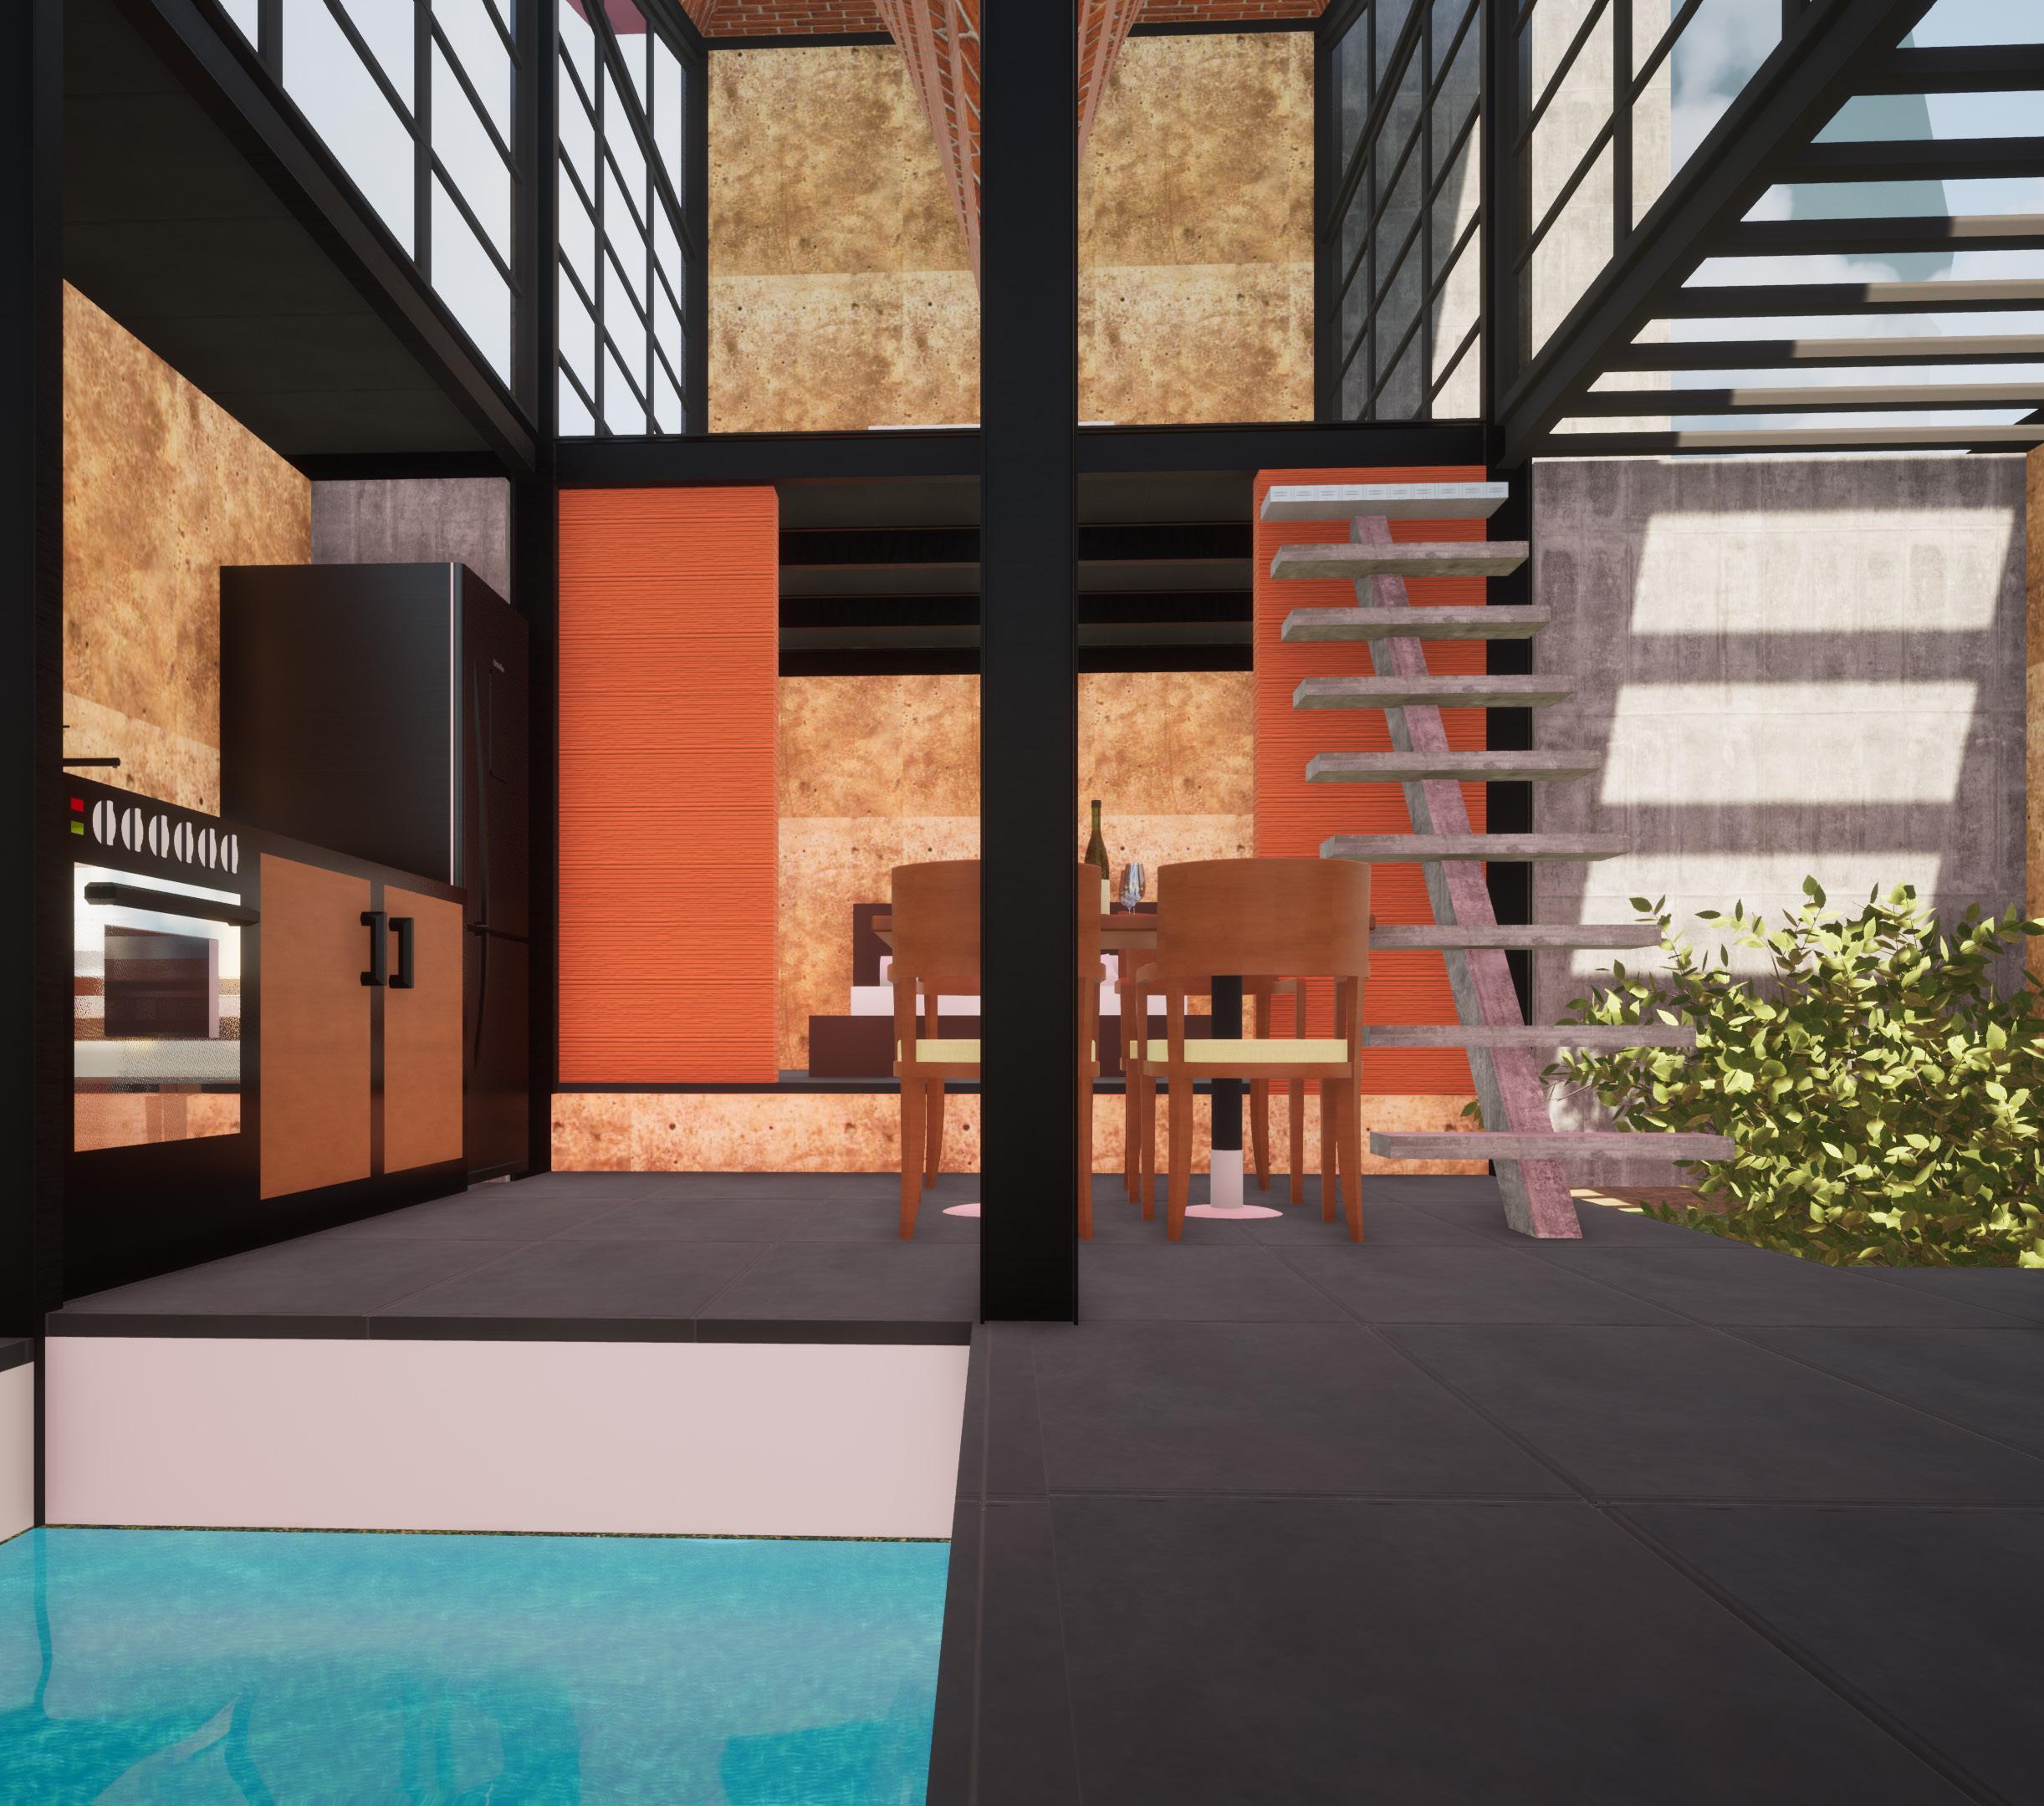
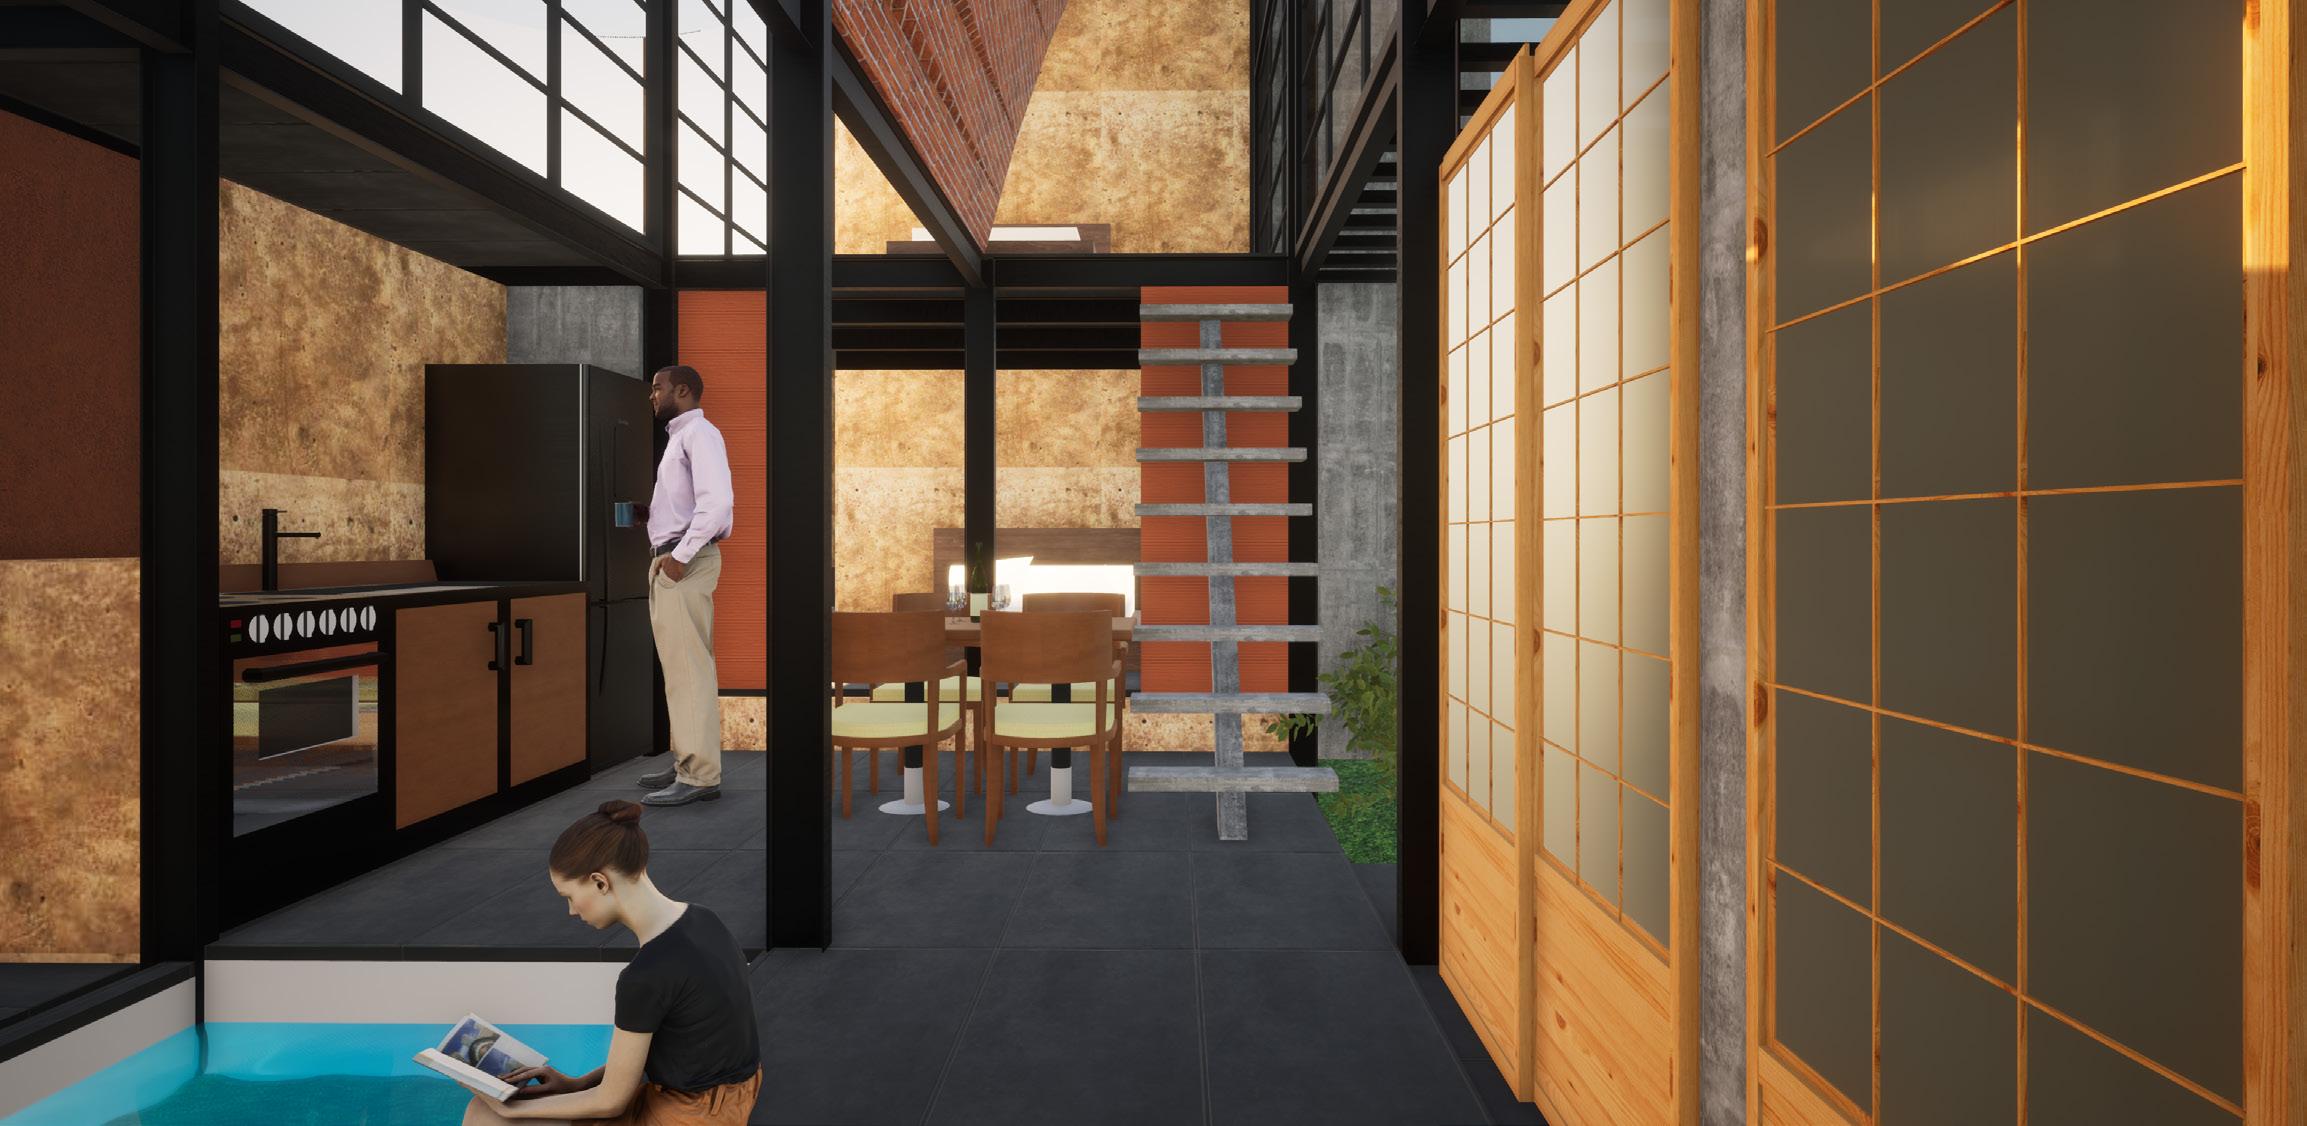
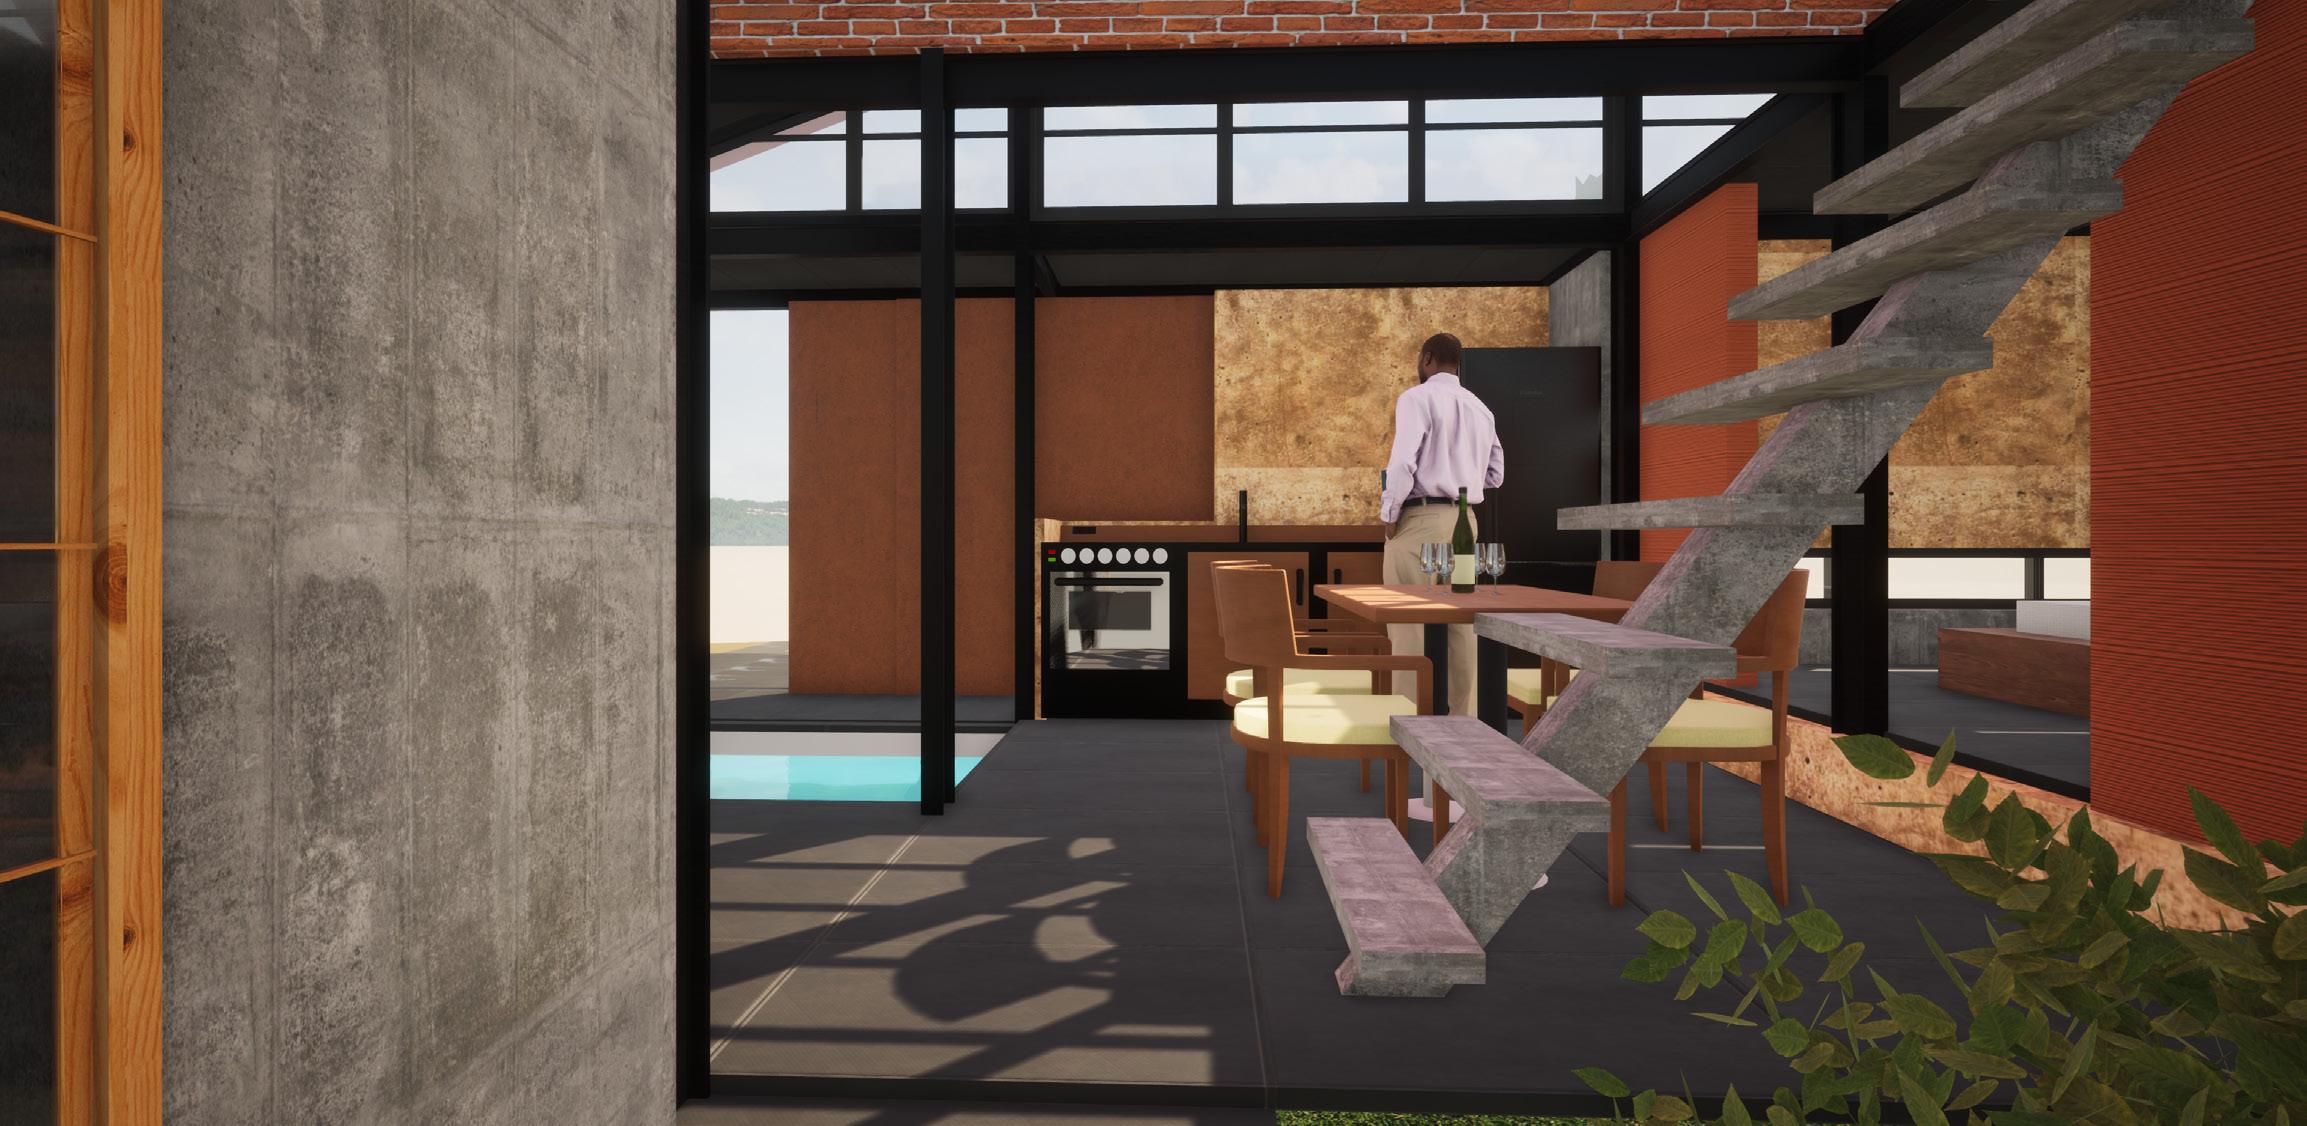
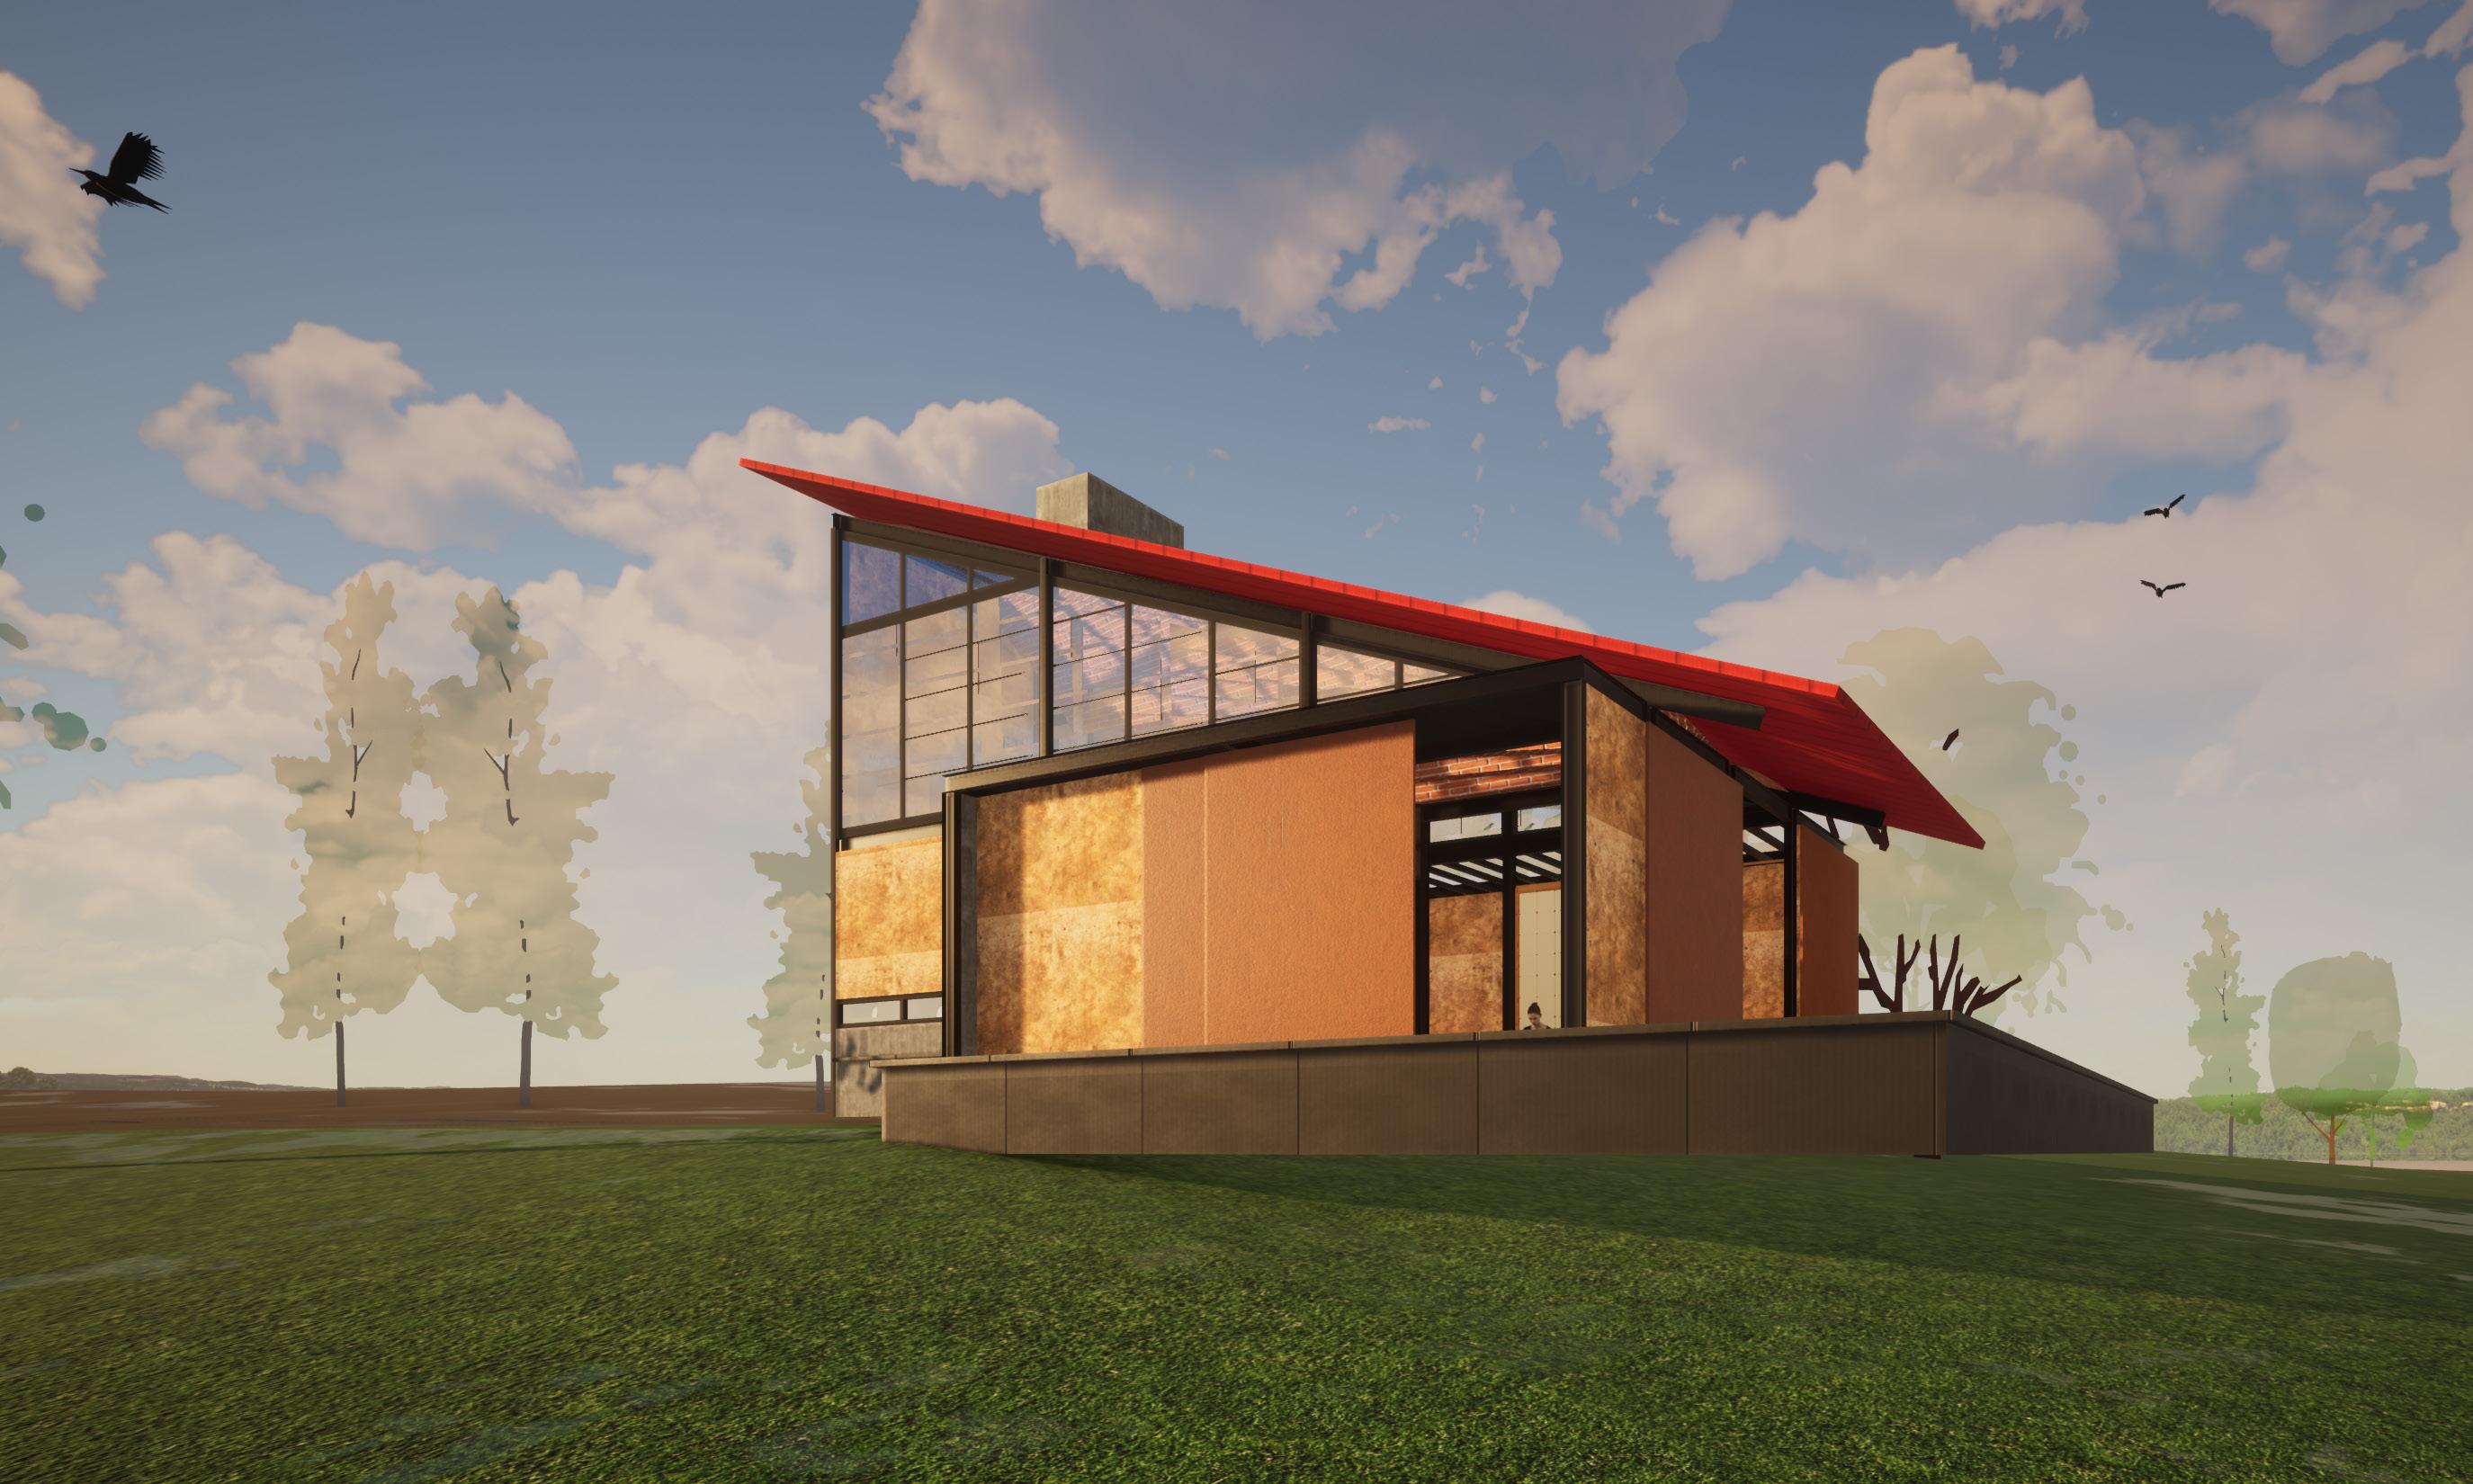
The farmhouse was initially conceptualized as a courtyard house or an introverted house. But with evolution of design and changes in site constraints, the client and us arrived at an ambiverted solution. The design was inspired a lot from the famous Srilankan architect, Geoffrey Bawa. The core of the design lies in its simplified circulation routes and how spaces branch out from it.
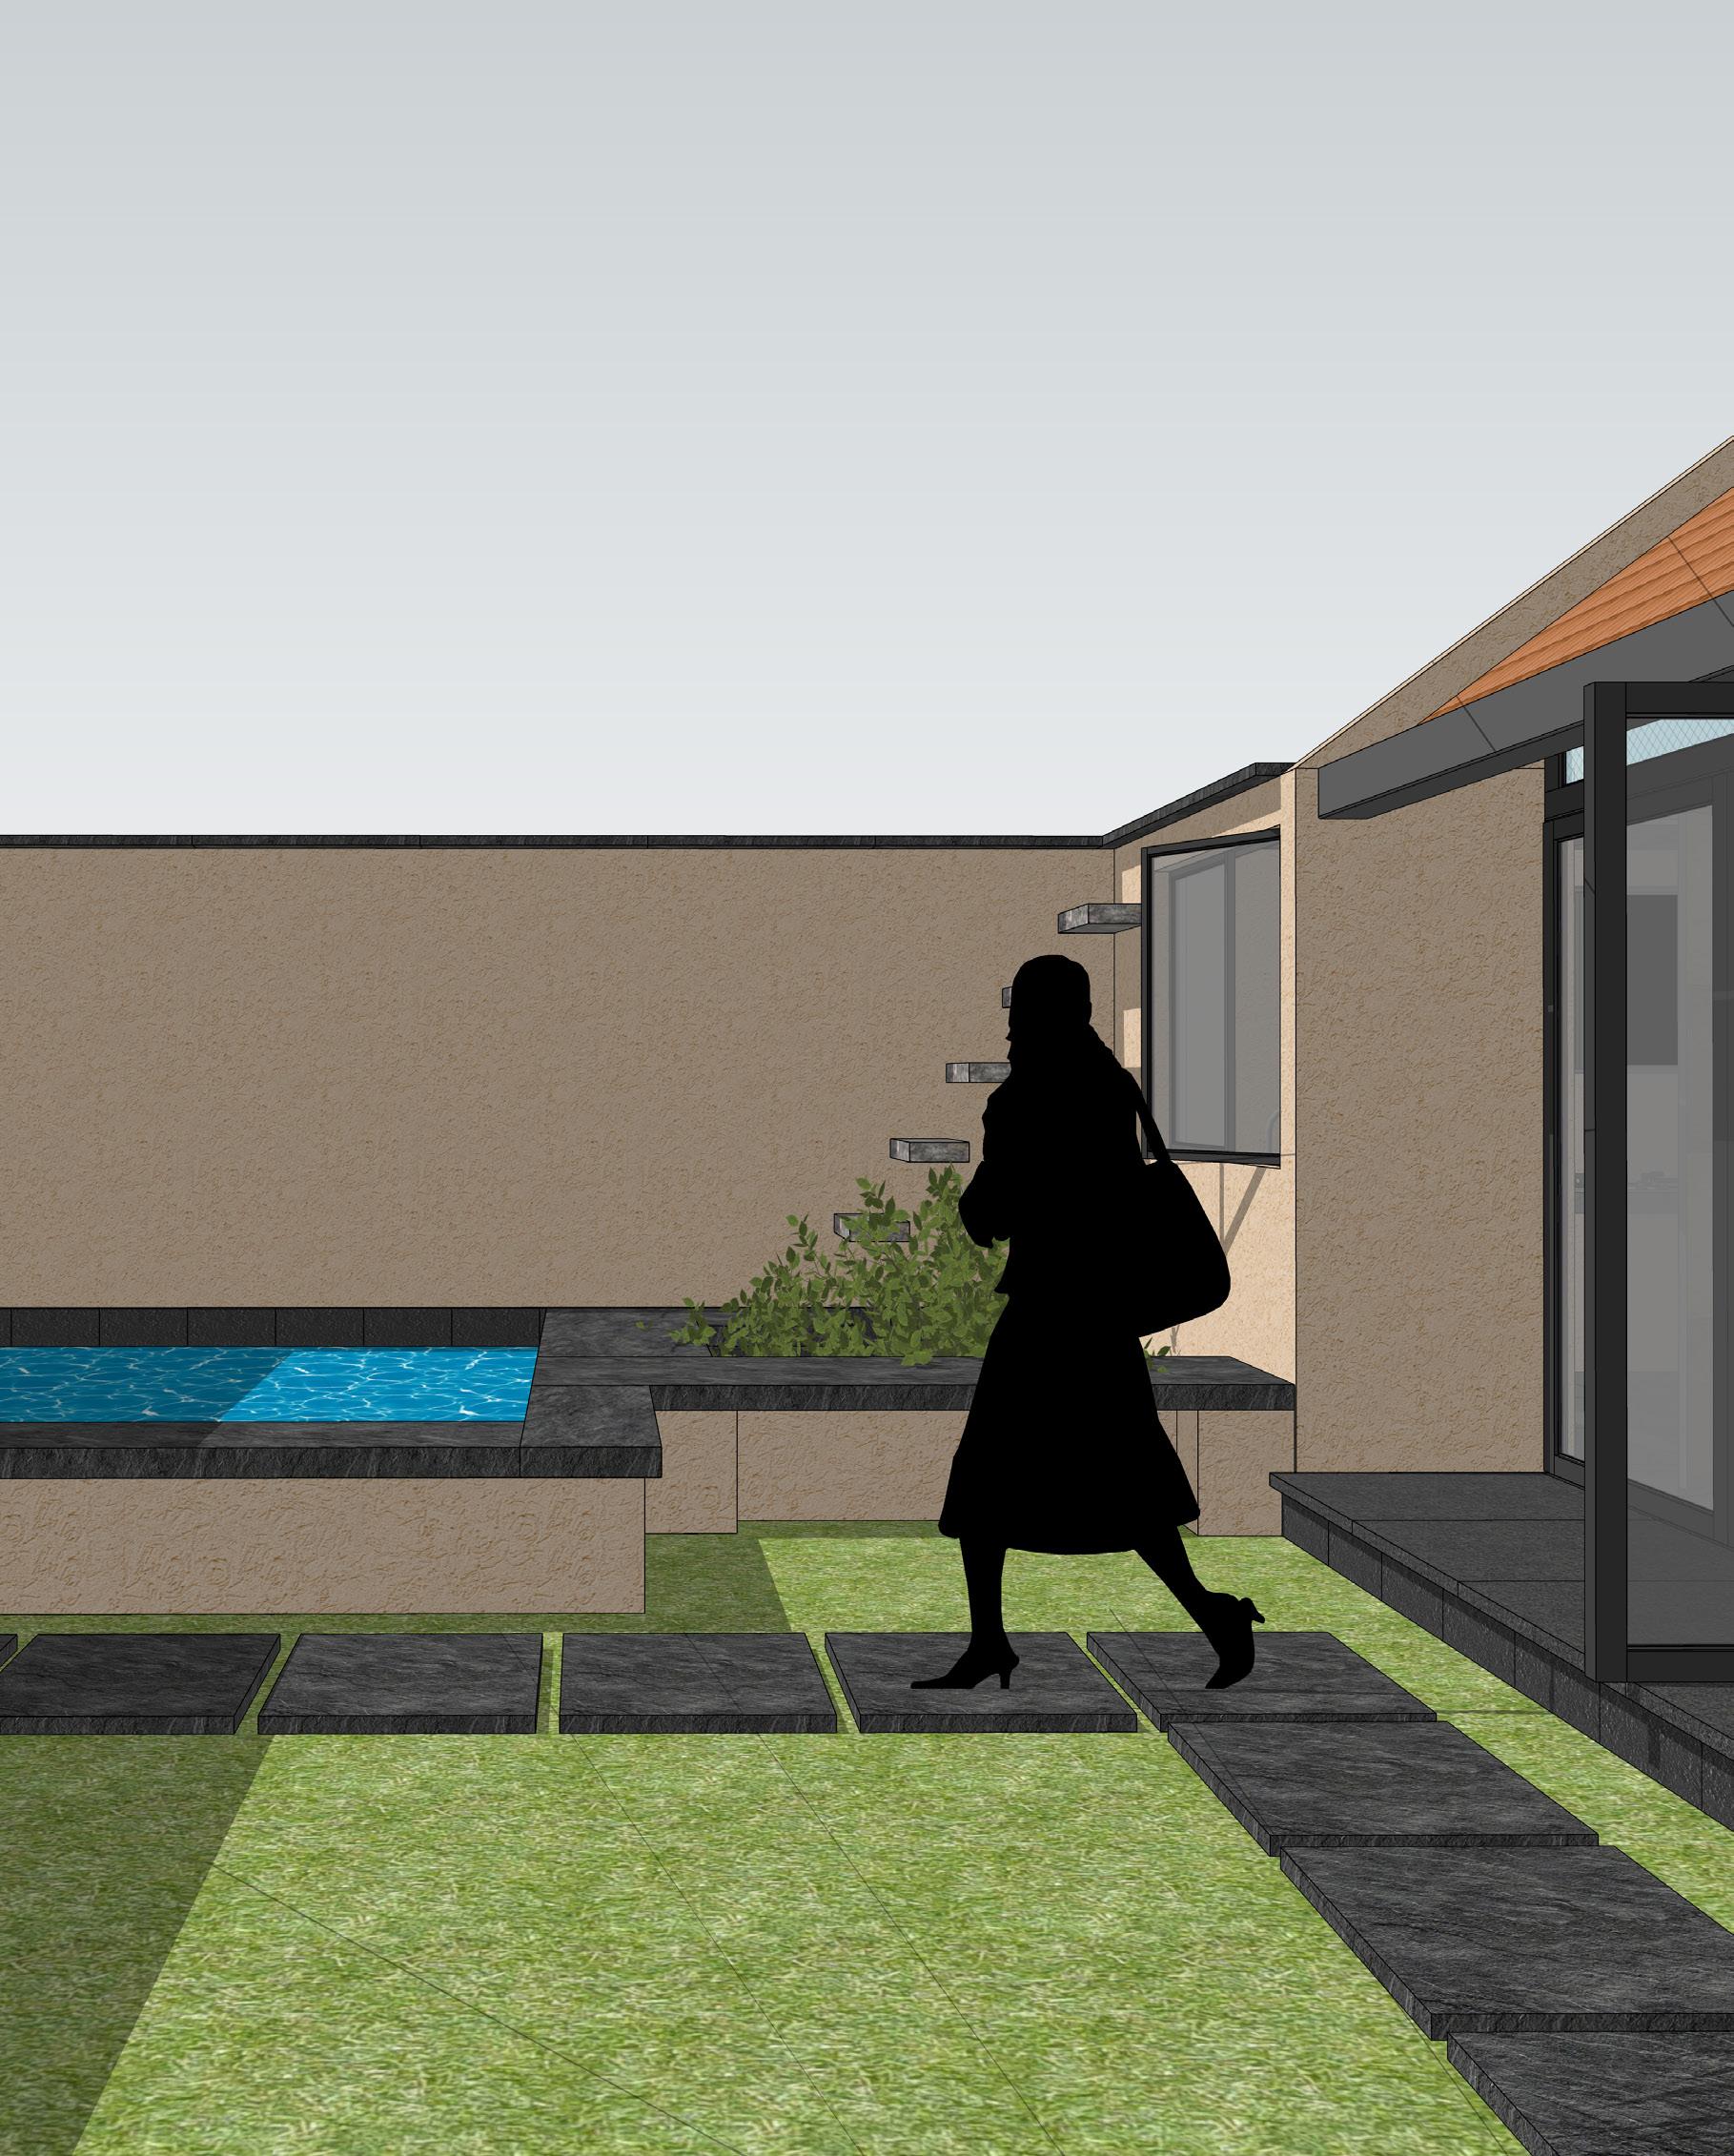
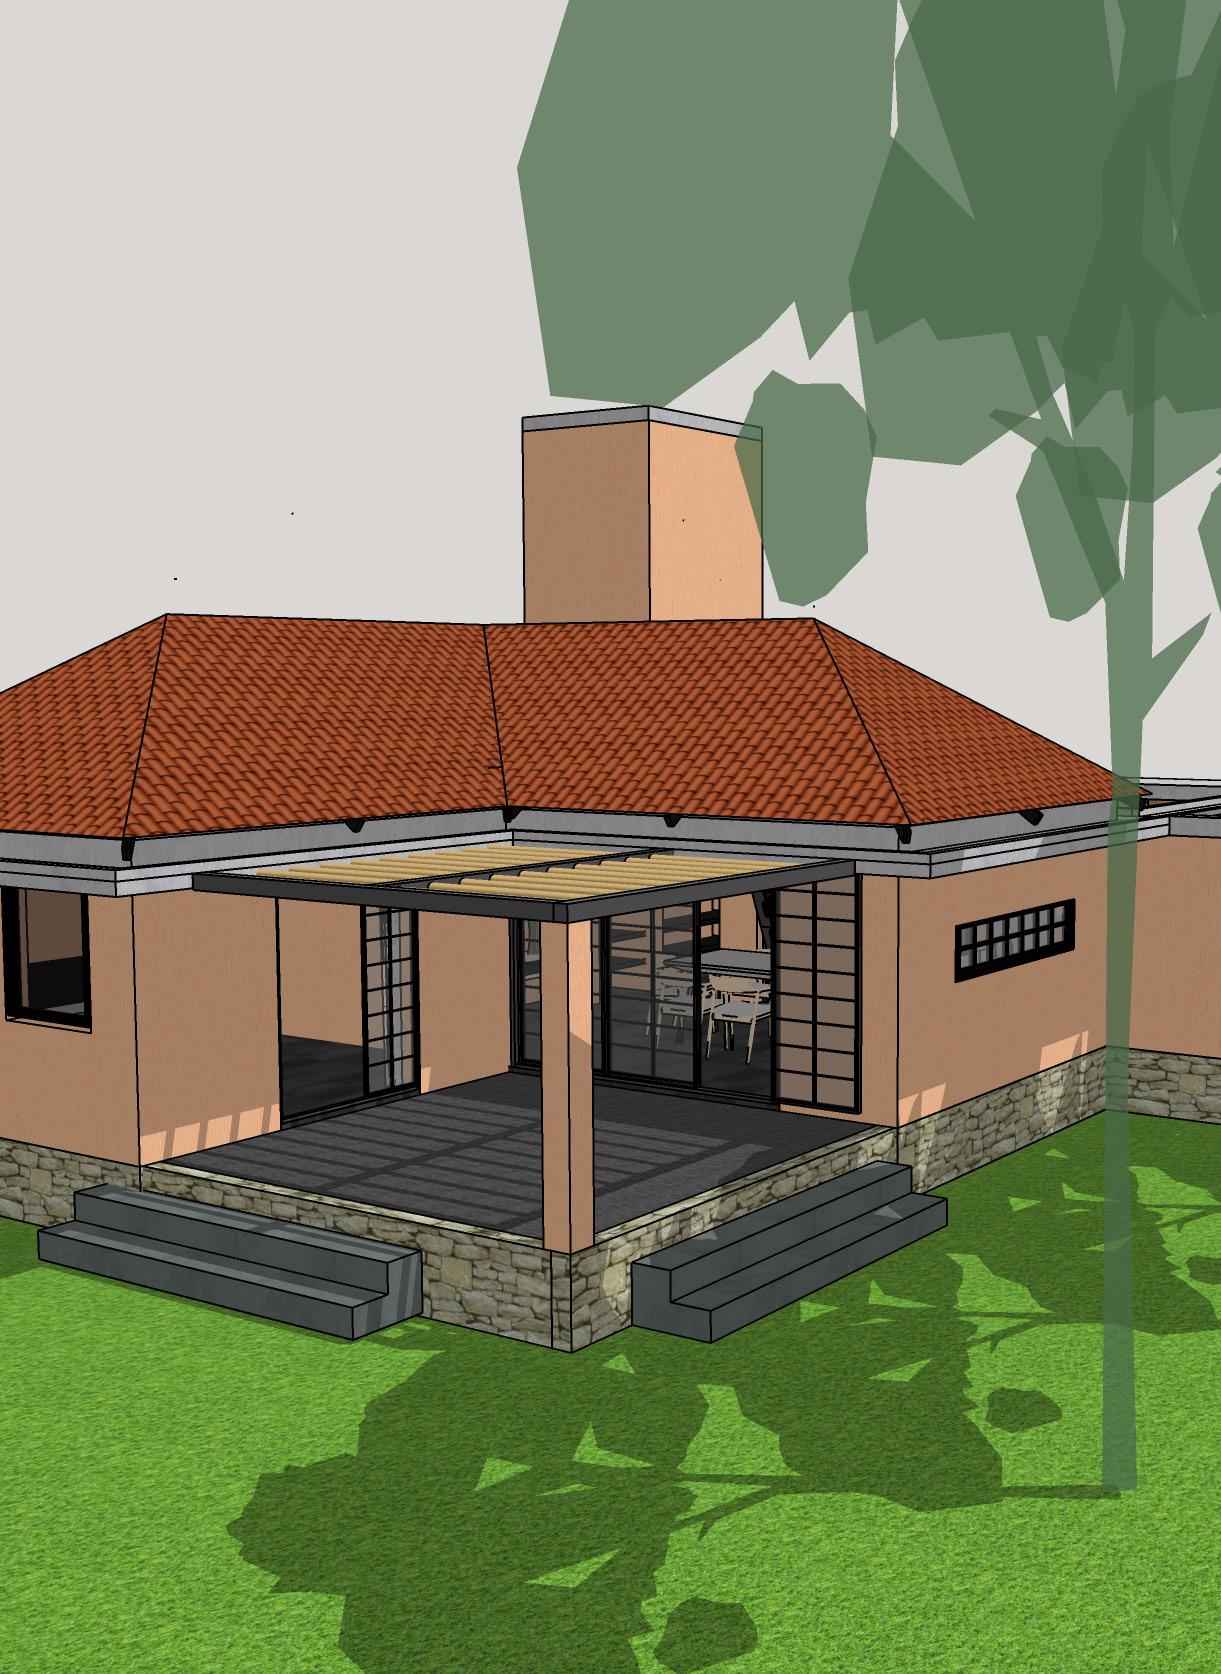
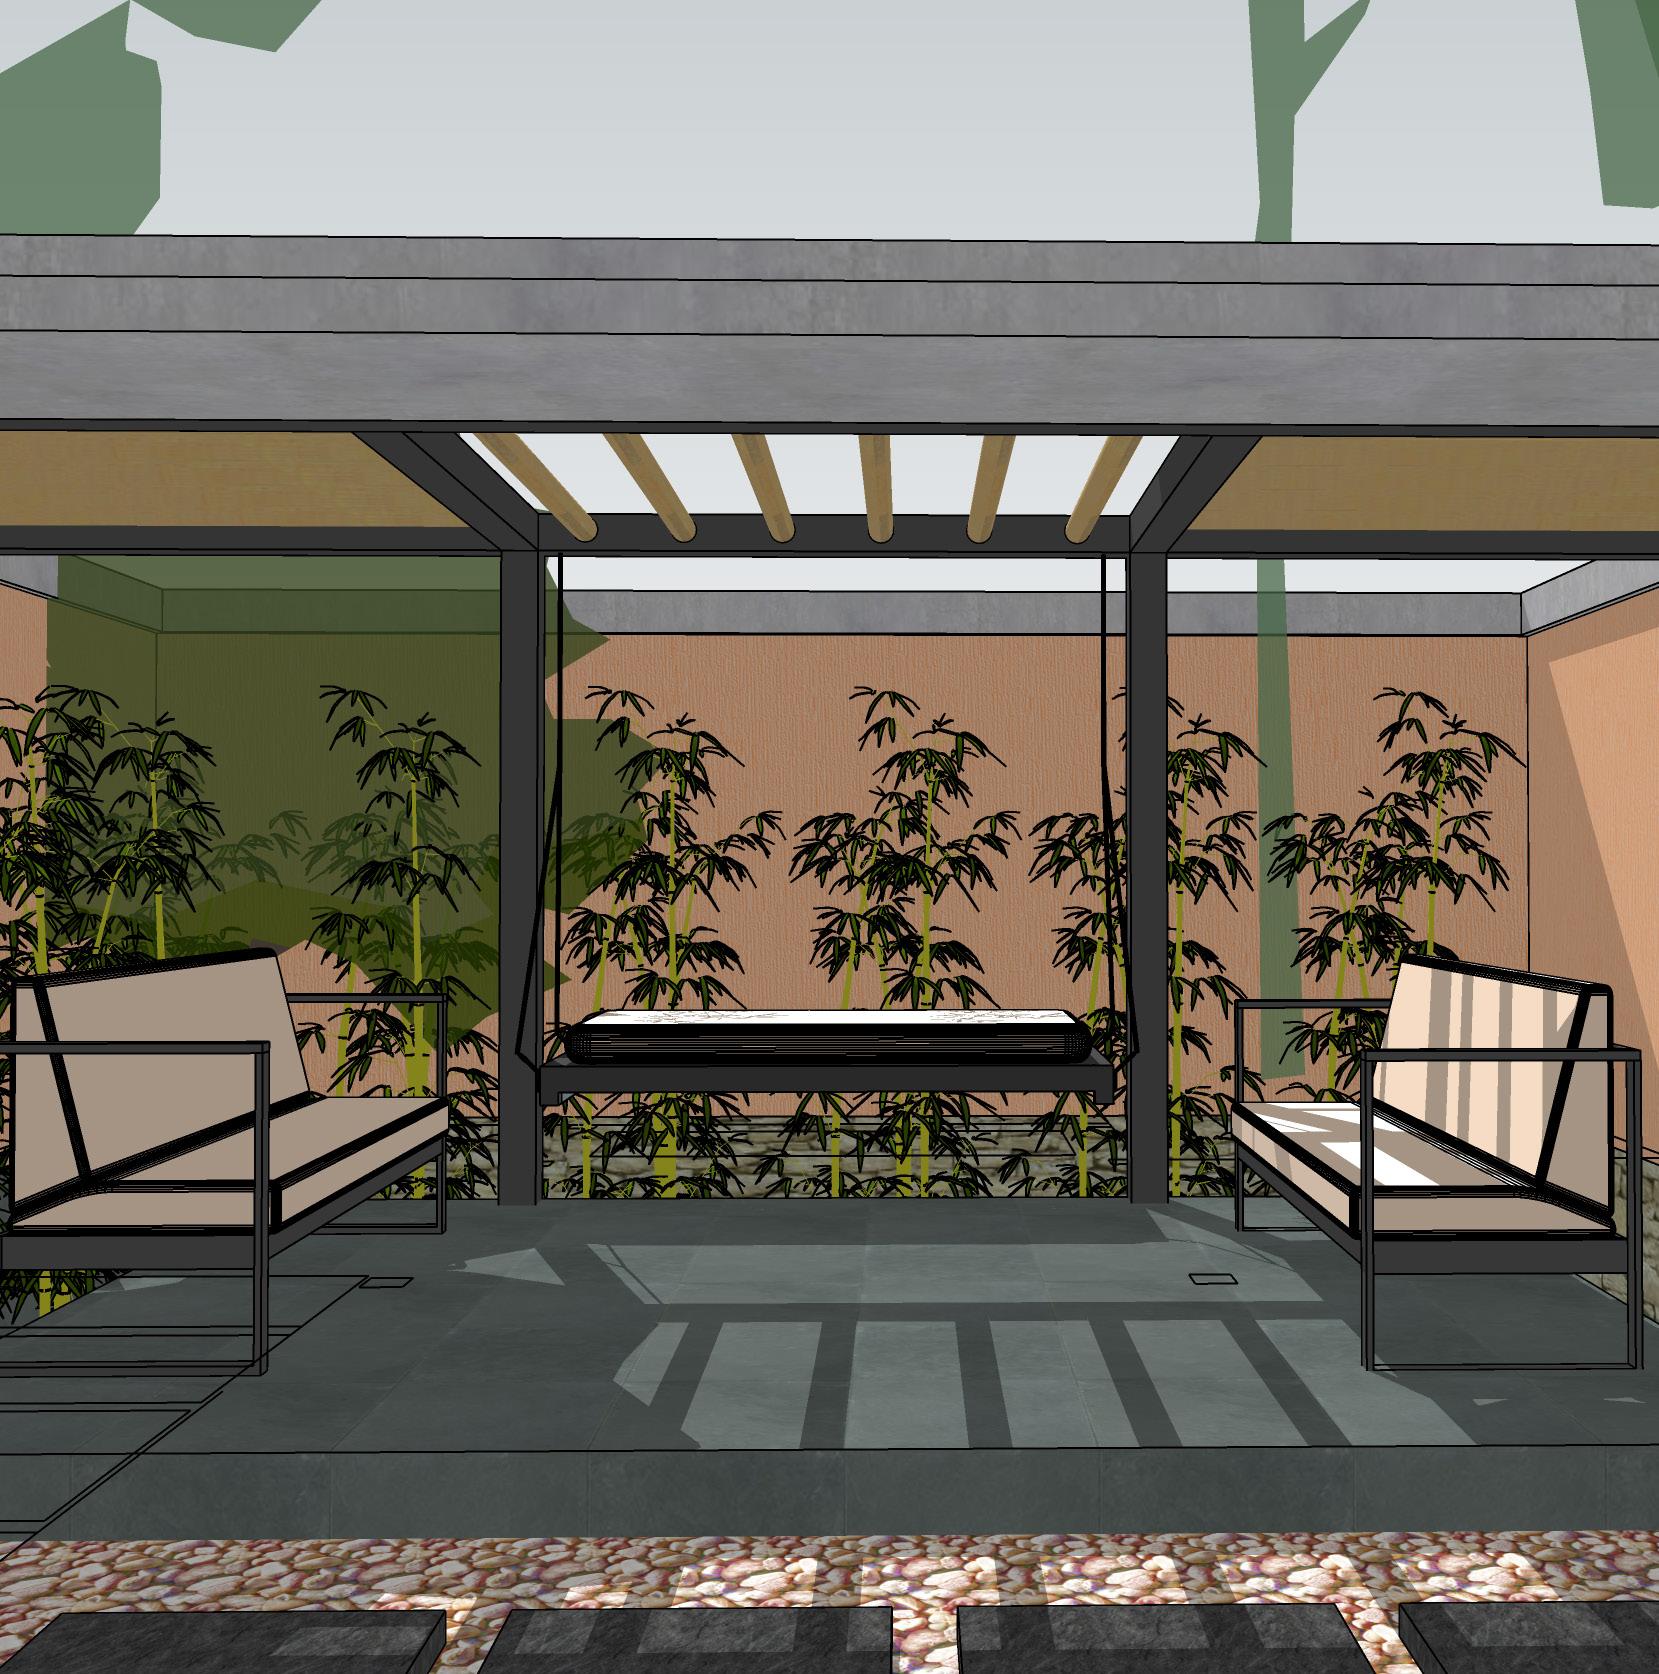
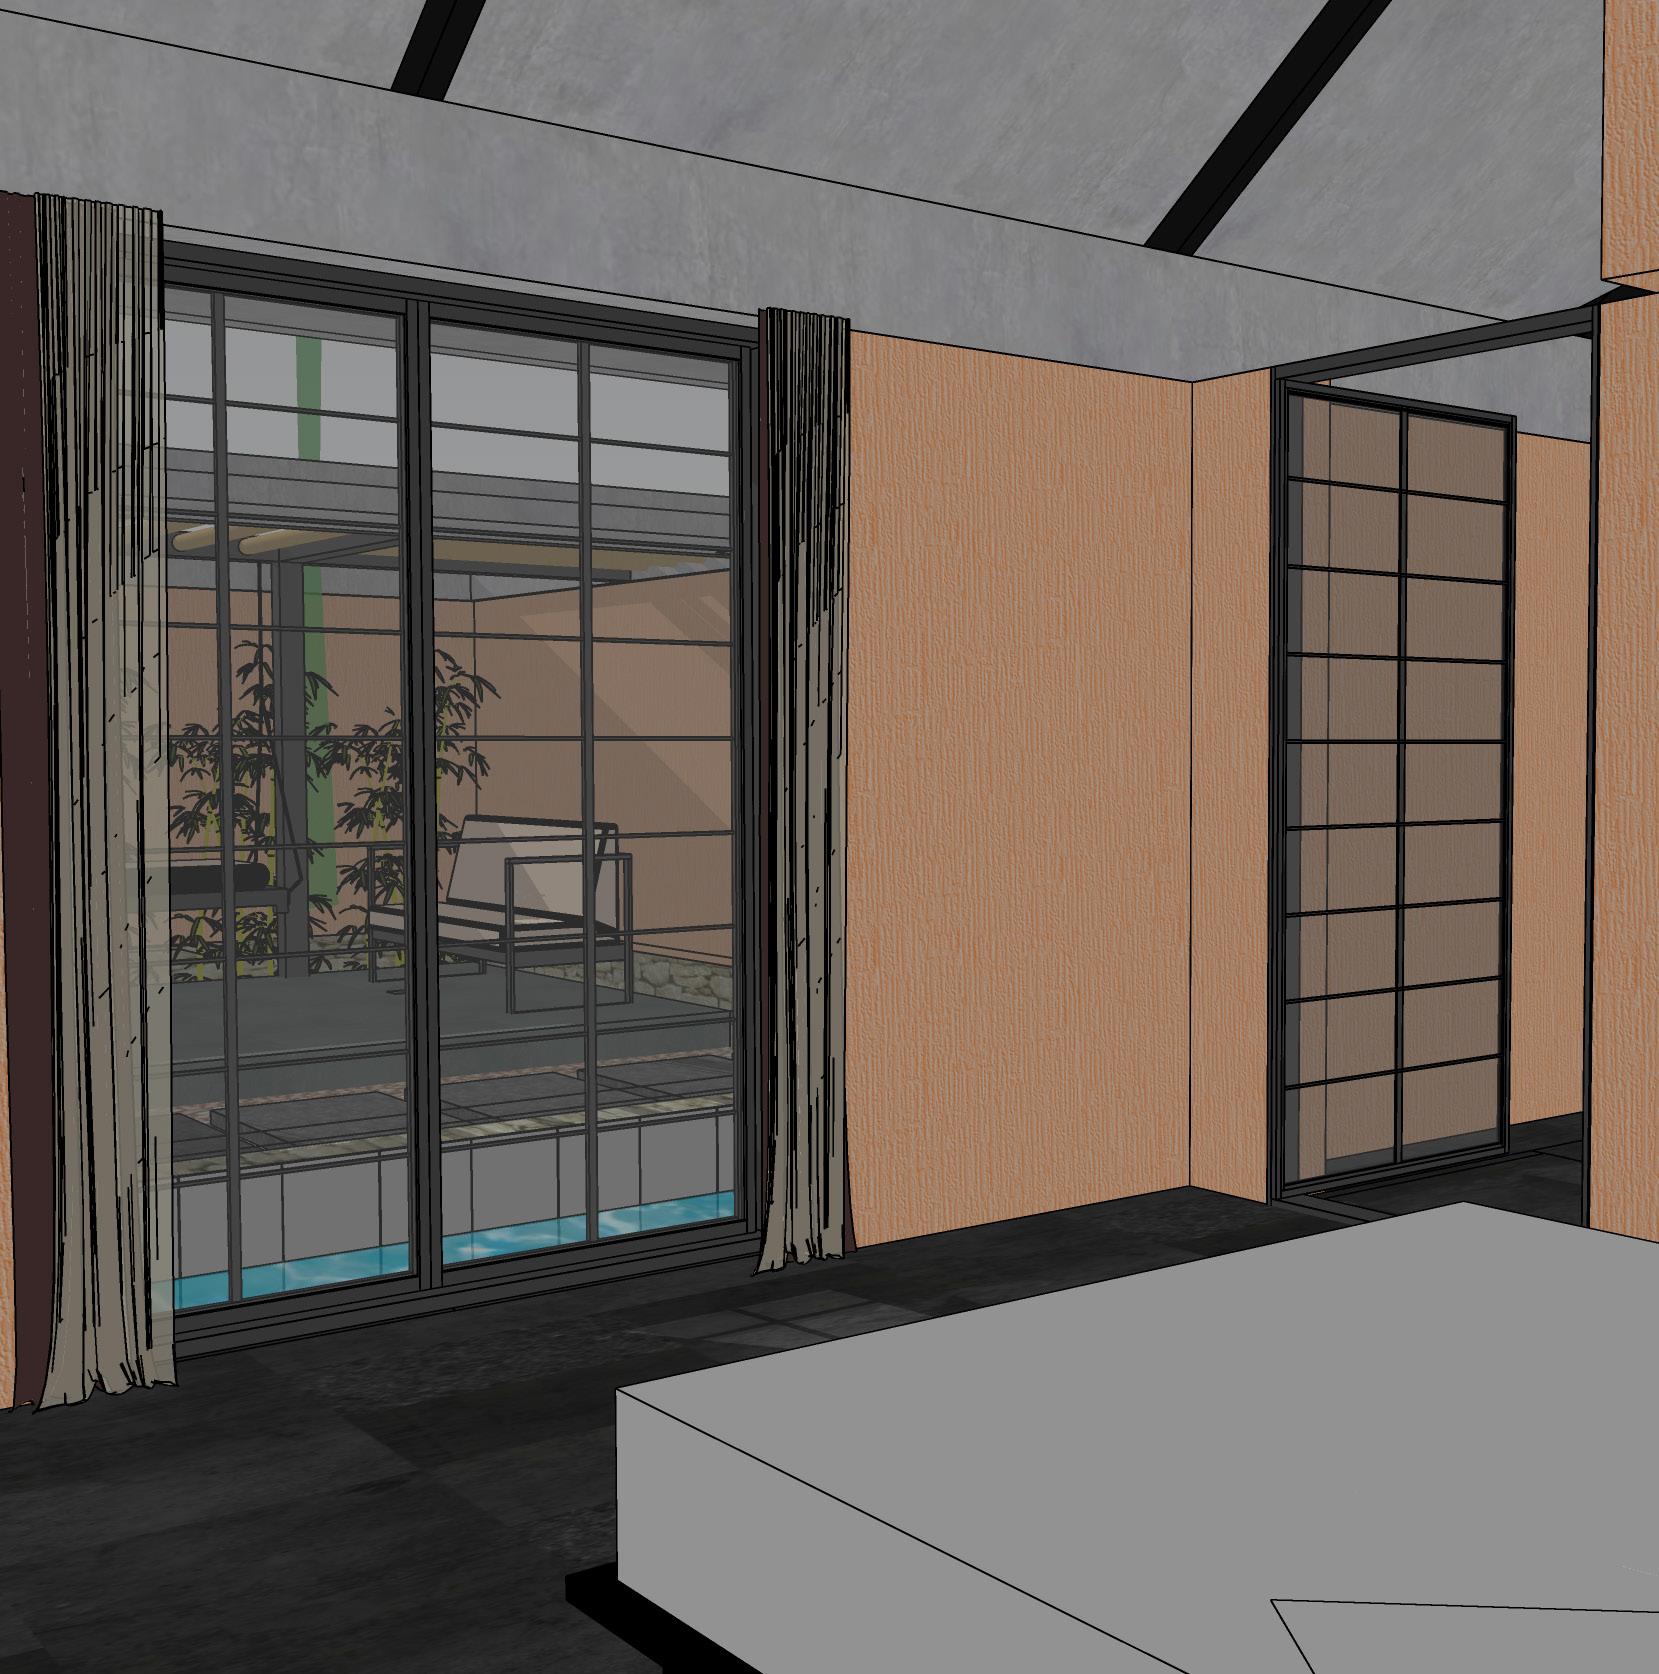
The house welcomes you into a courtyard cum pathway alongside an 18’ plunge pool. The placement of the pool is the USP of the design as it is connected with both the living and one of the bedrooms such that providing direct access from both of them. With the expansion of the design, newer spaces were added on such as a patio at the rear side of the house, yet keeping the circulation simple.
This expansion was primarily due to a budget revision and change in spatial requirements from the client. The roof profile was inspired from Bawa himself with linear sloping roof spanning across the length of the house. The design represents a humble approach towards making a home, yet invoking a sense of serenity and calmness both within and around the space.
03
AAC Blocks Steel lime surkhi kota stone
9
estimate summary of sreeram

evolution
of the design w.r.t floor plan


The tender estimation for sreeram’s project as you can see below was derived from various stages of construction such as earth works, PCC, masonry works etc. Our firm followed an ‘open costing approach’ where in we had quoted the rates as per the ‘Schedule Of Rates’ or ‘S.O.R’ of Karnataka, along with an assumed area weightage based on the site location. This estimate is then pitched to various contractors as per the client’s choice and who ever quotes similar or reasonable, or in some rare cases, lower than this is given a go-ahead. Each of these headings/ rows in the below estimate summary has a detailed estimation associated with it according to the S.O.R. 10

11
12
13
14
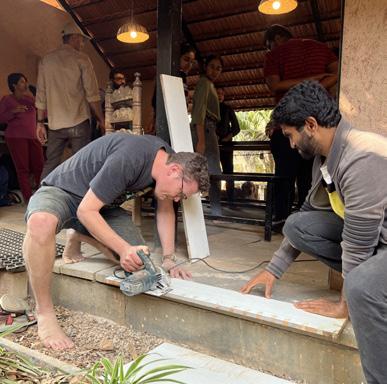
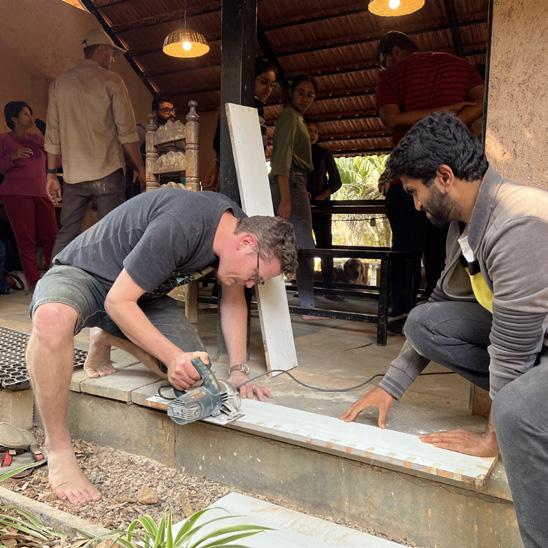
office interiors + brick oven
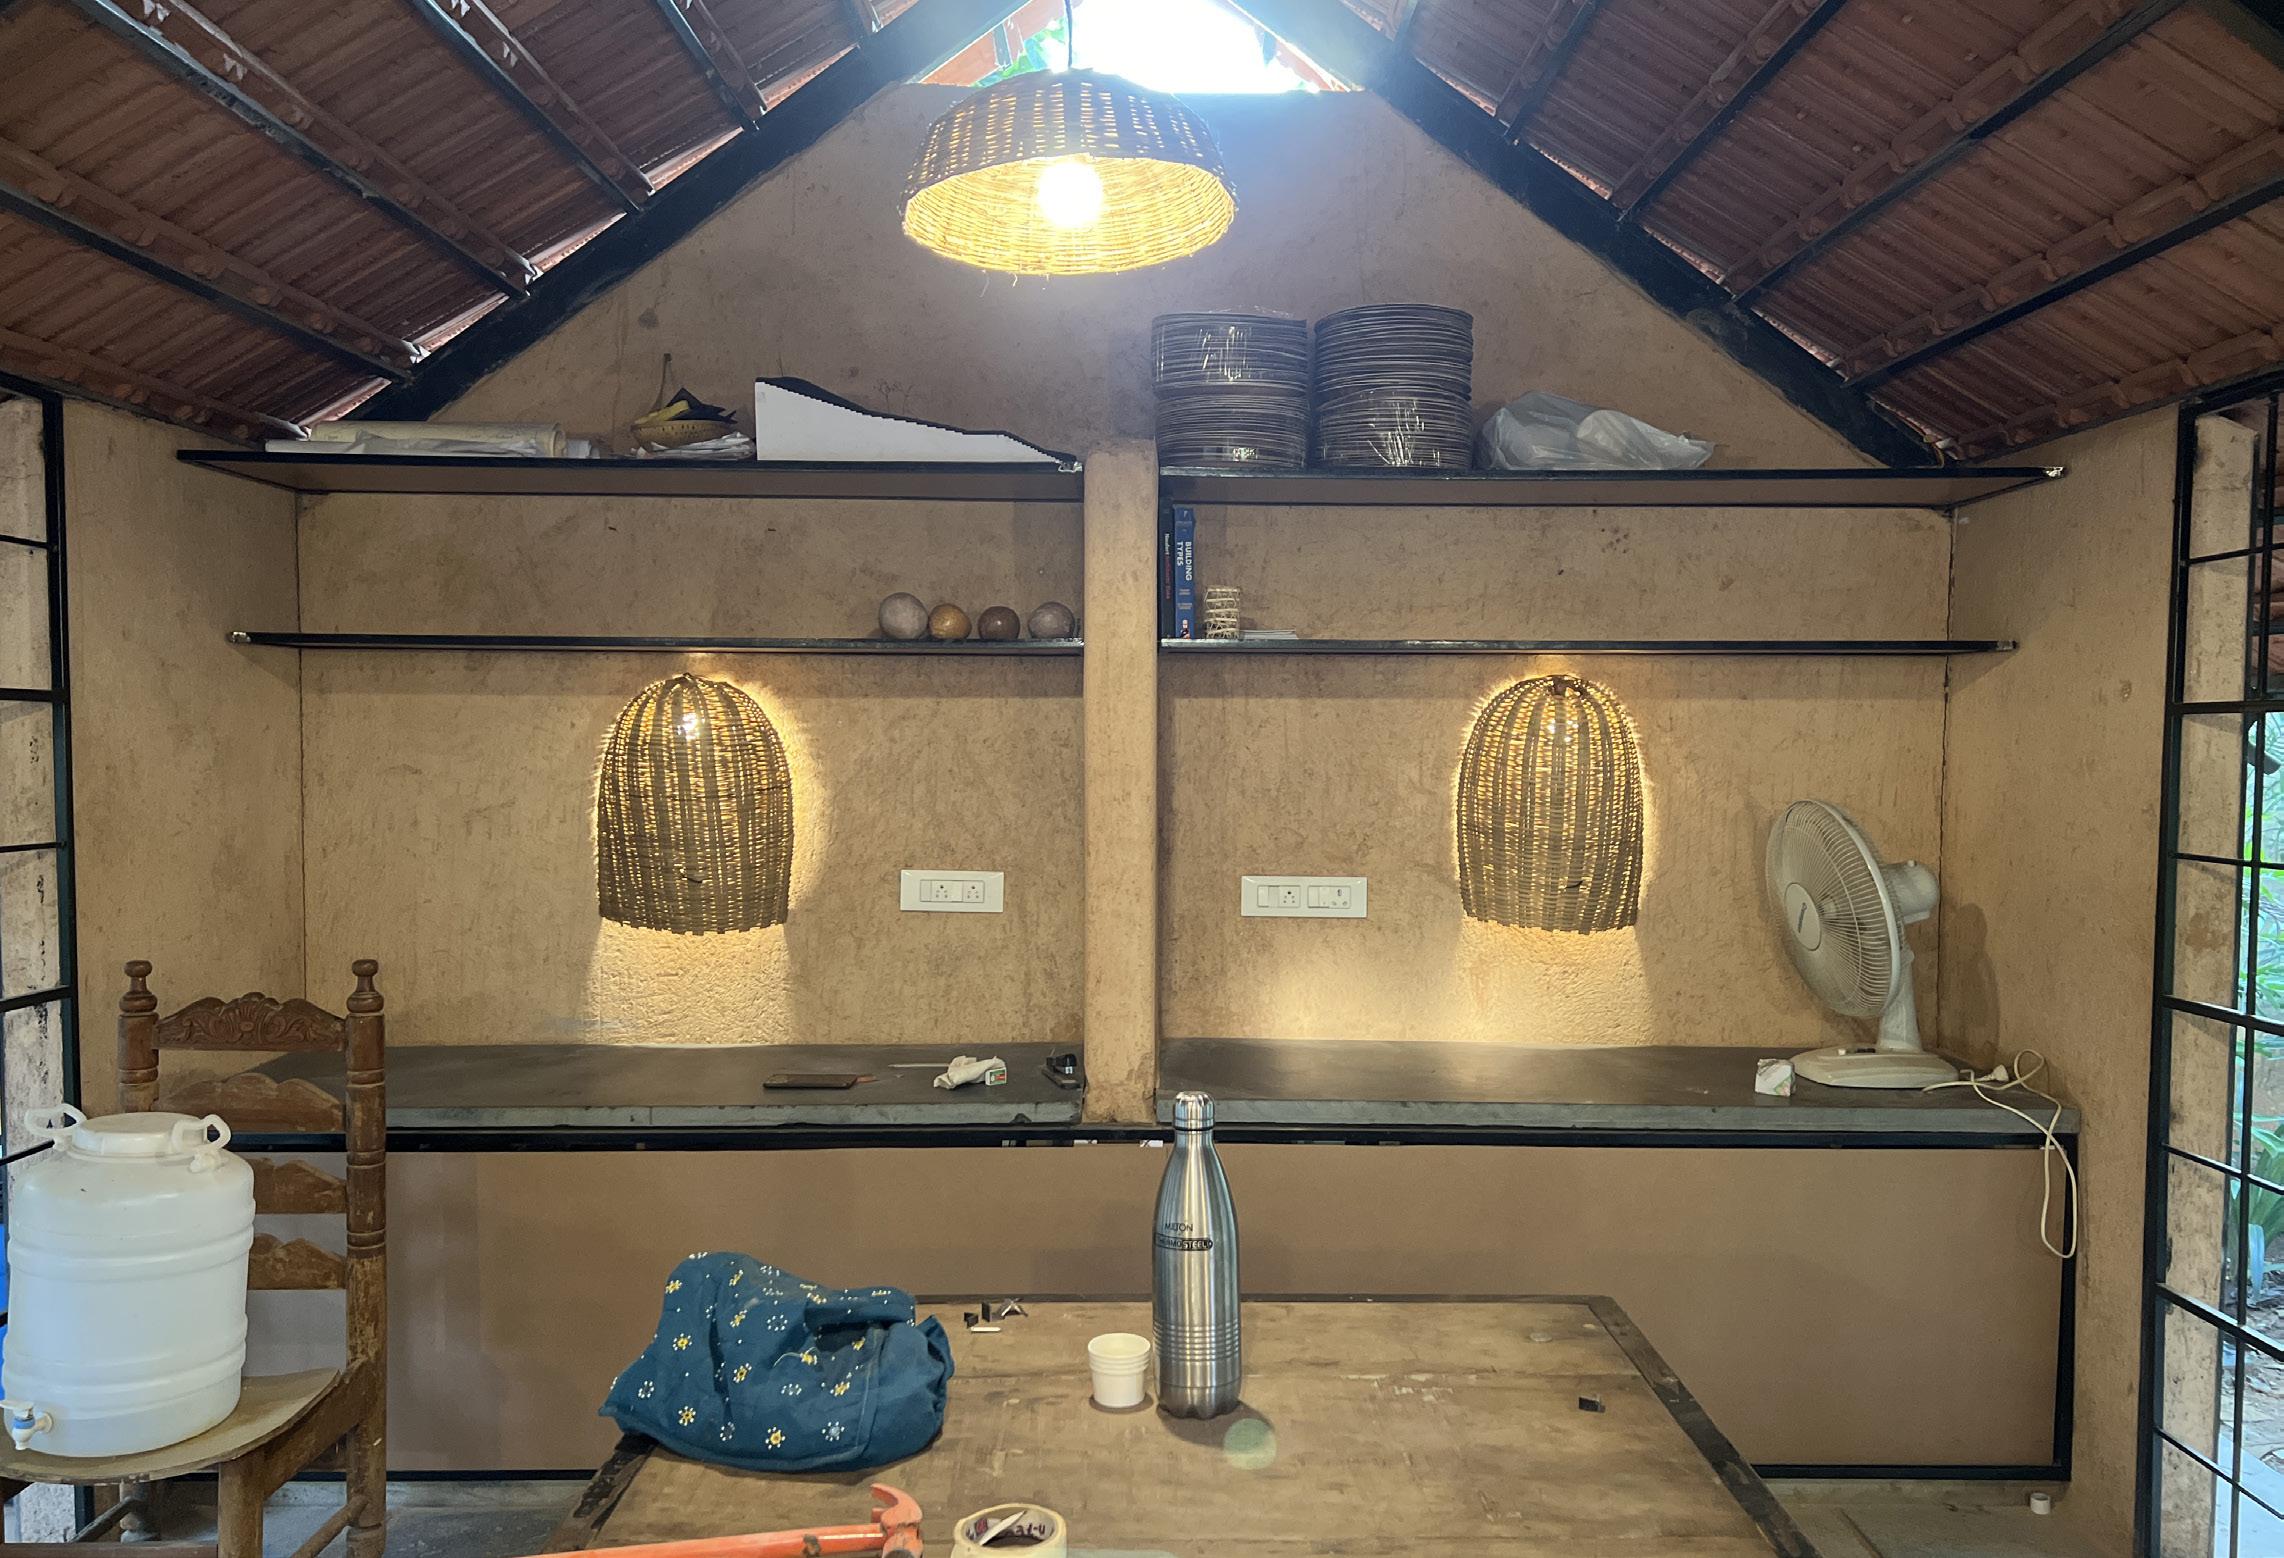
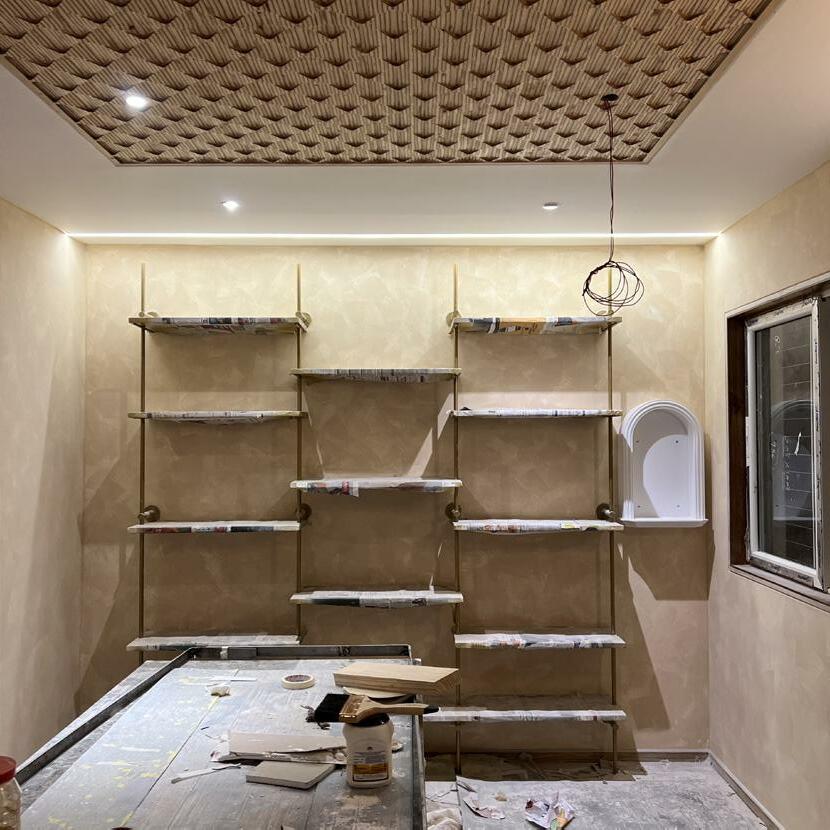
Vanamu | Bengaluru about & intent - office interiors

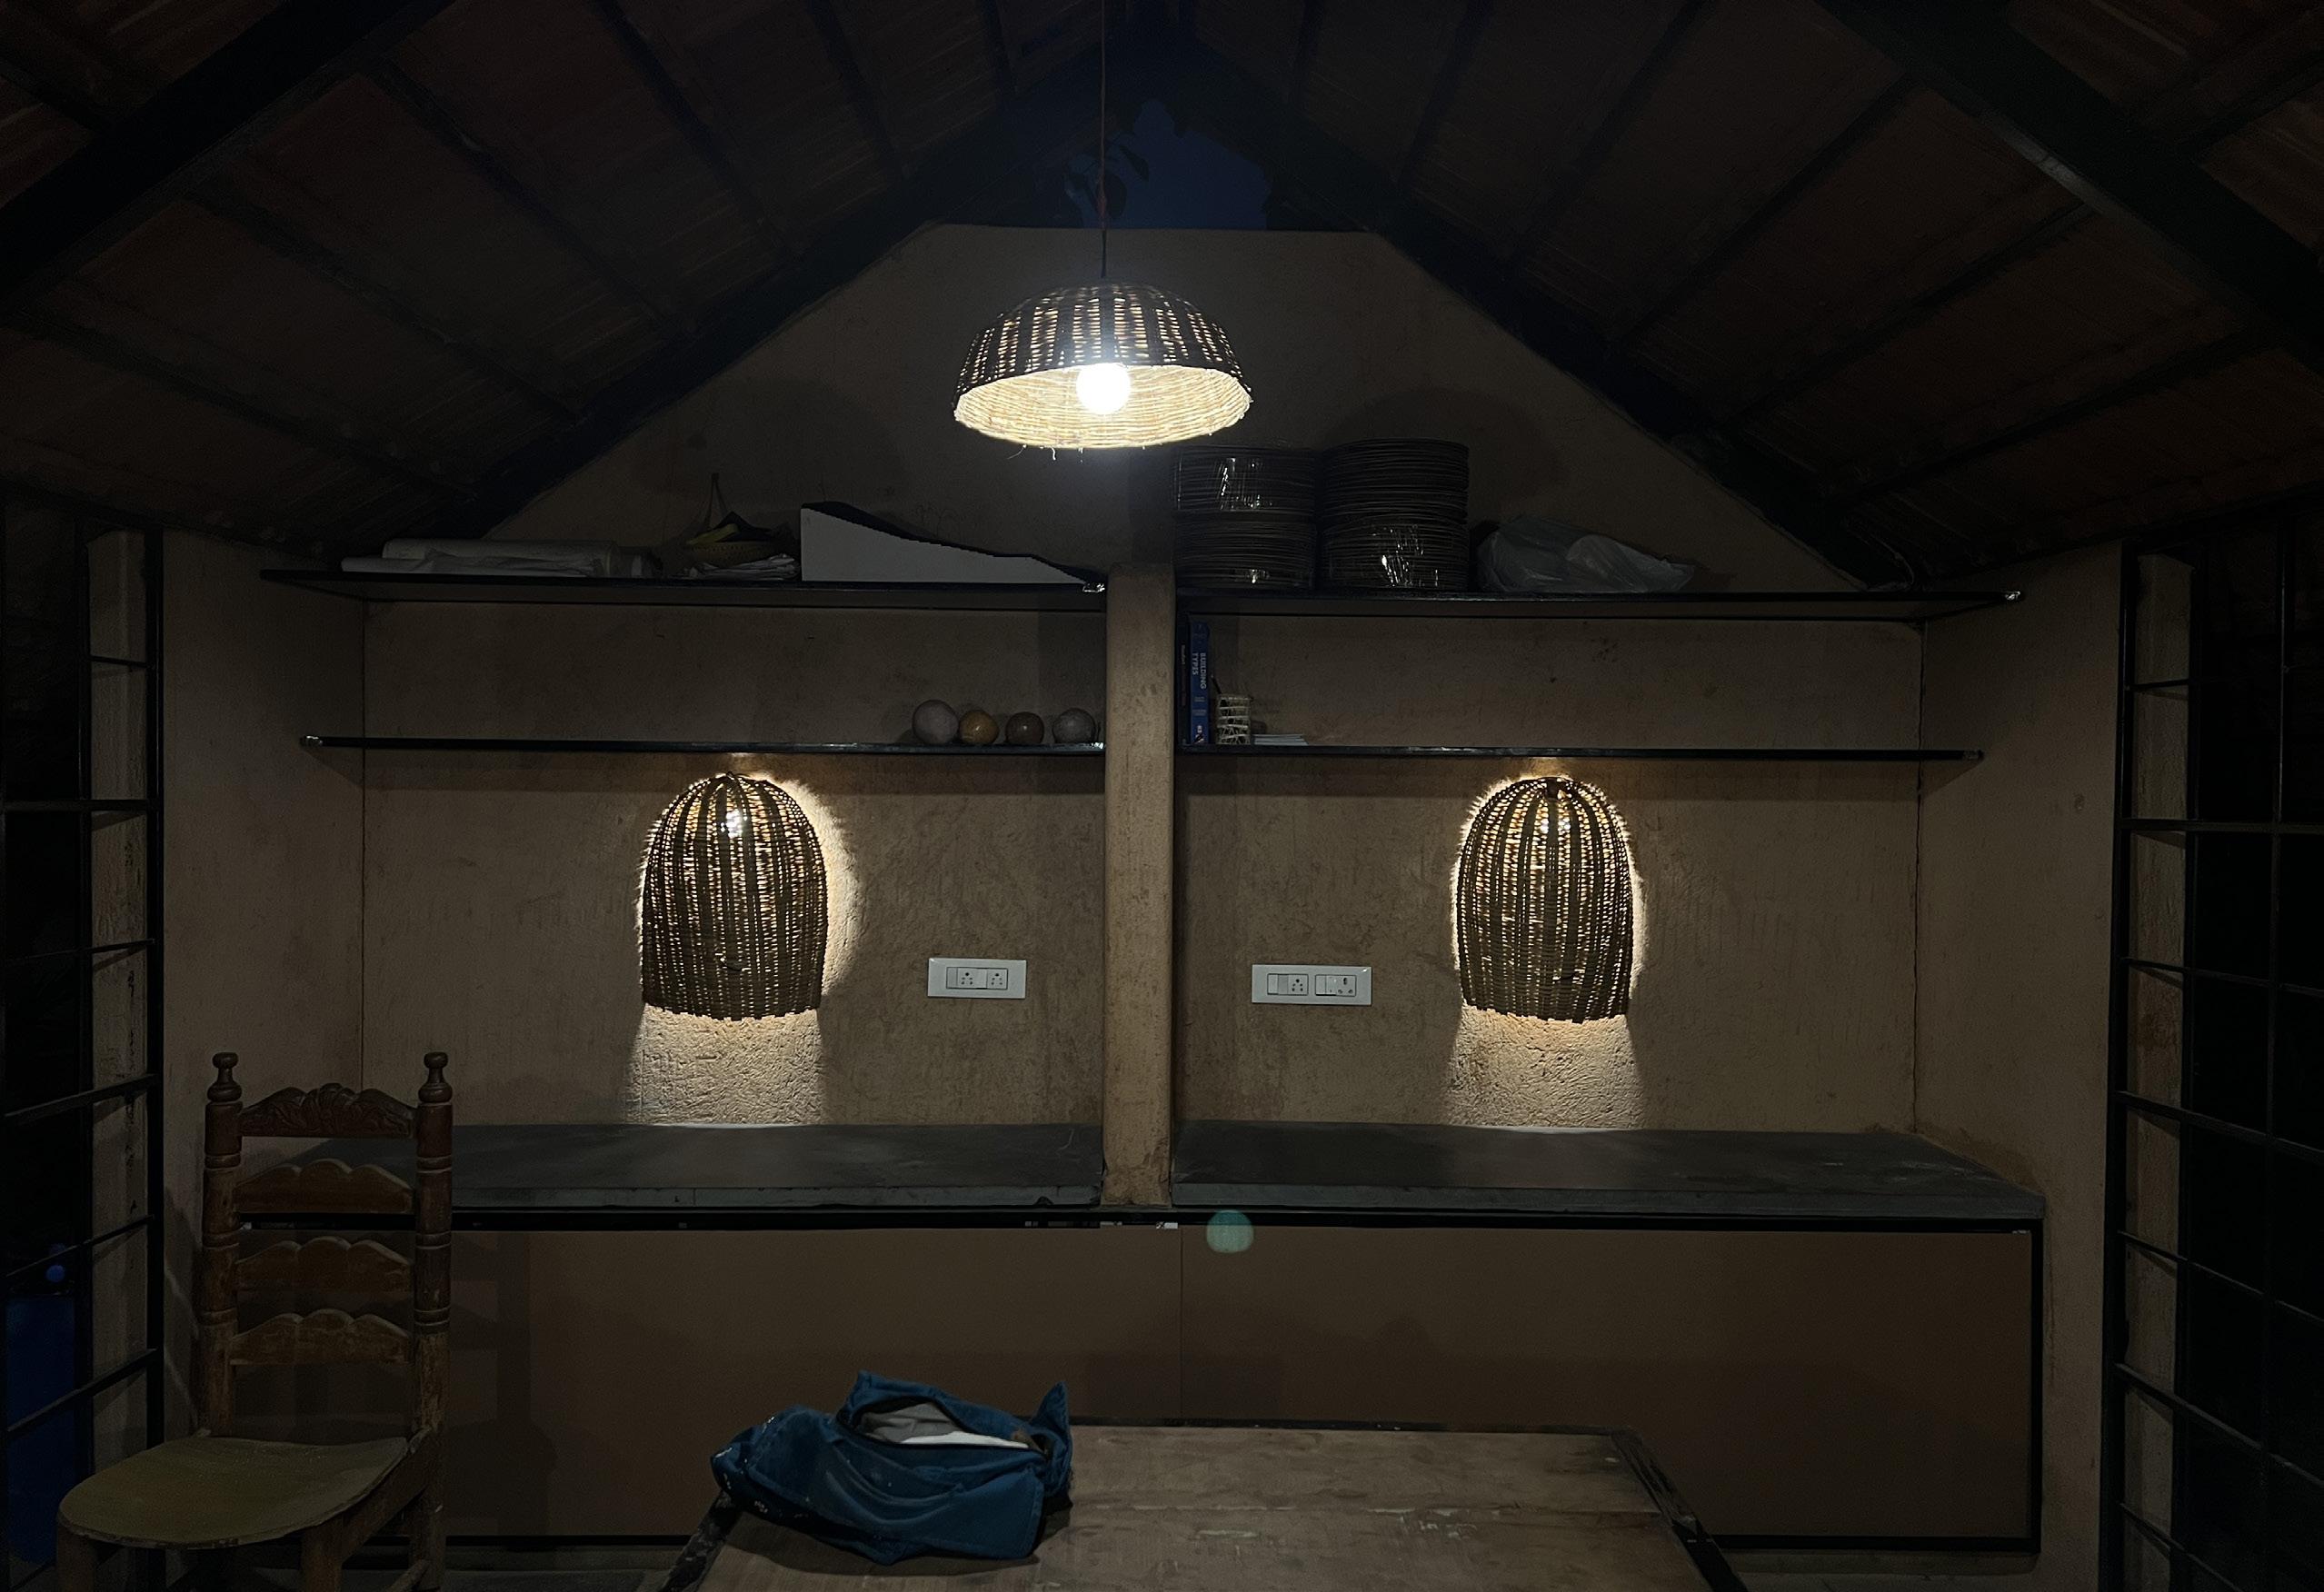
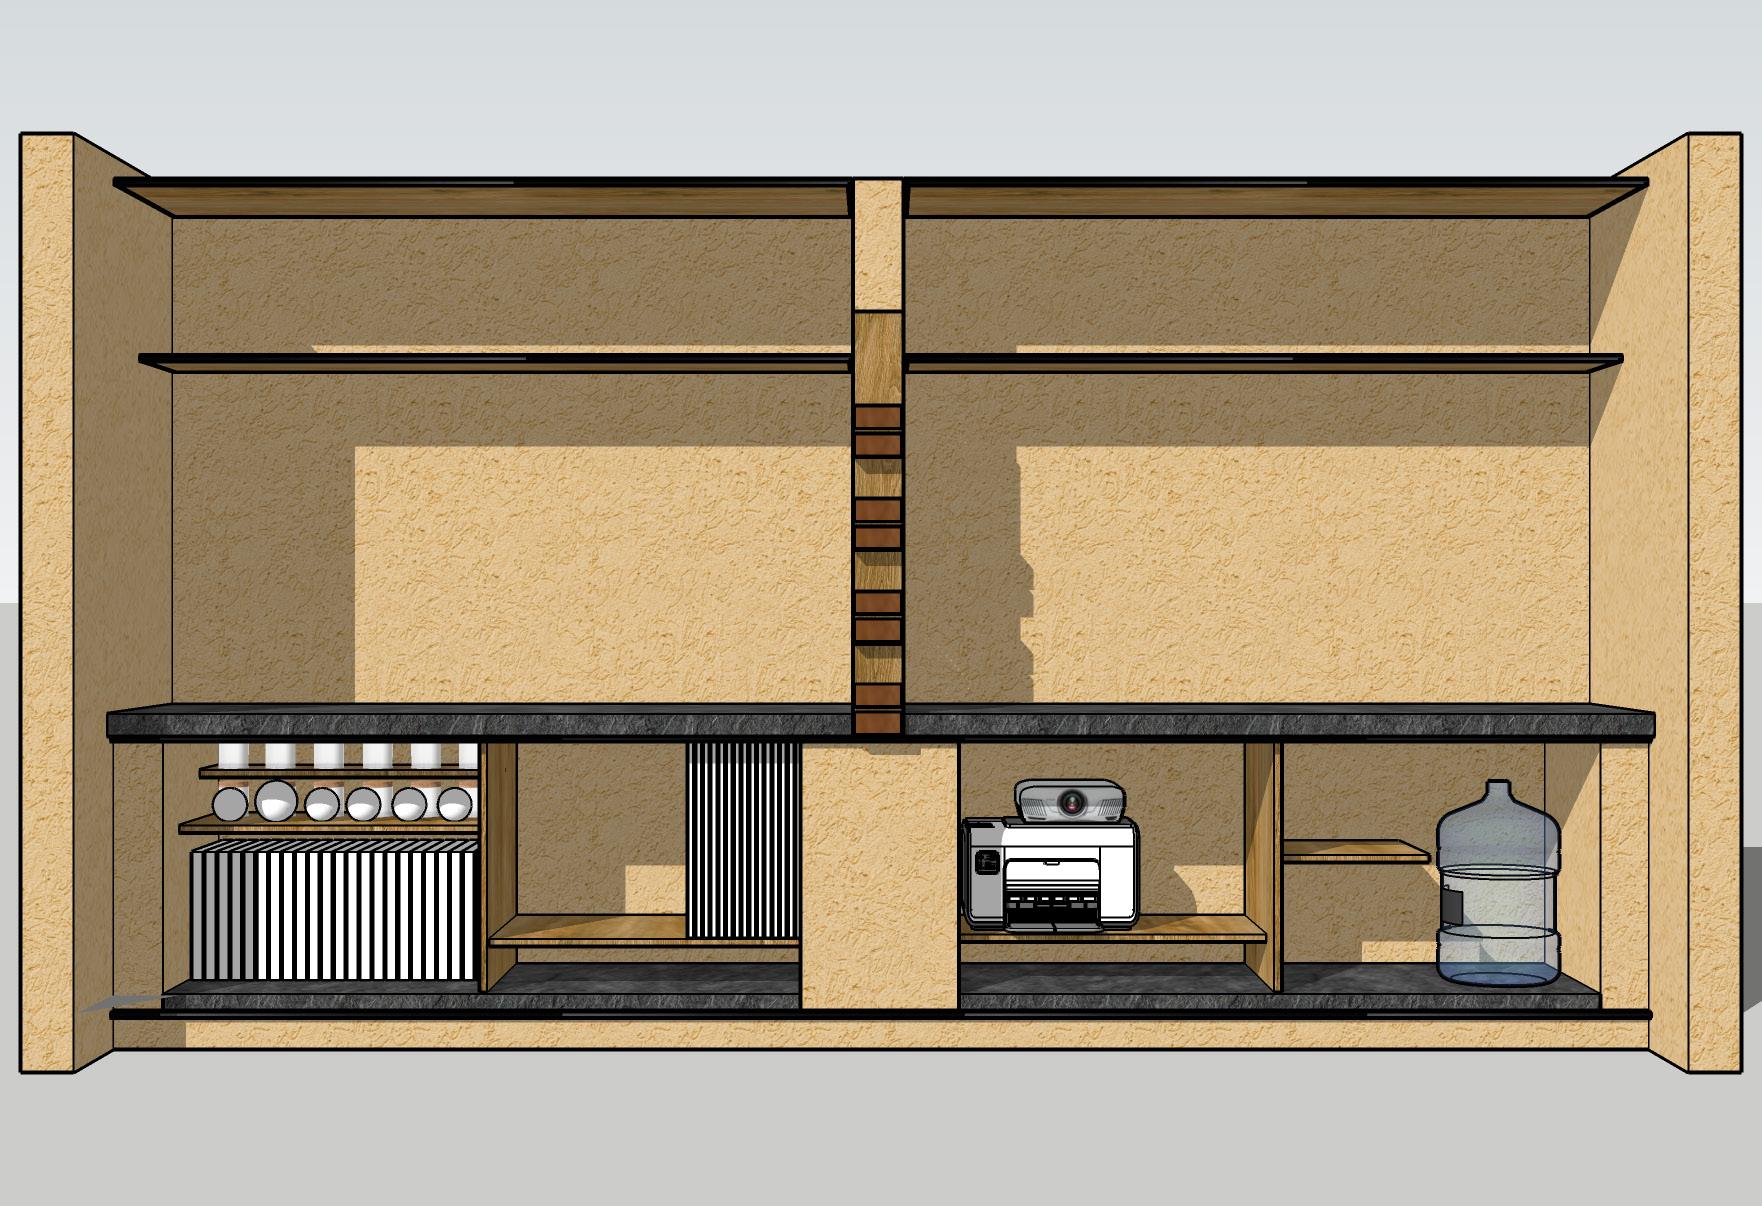
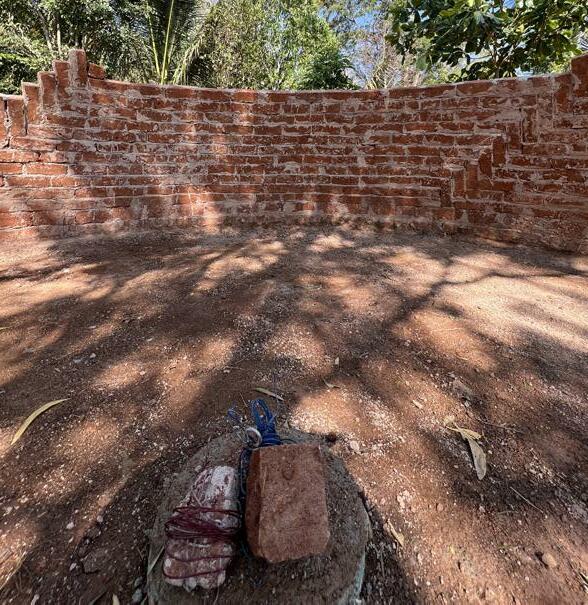
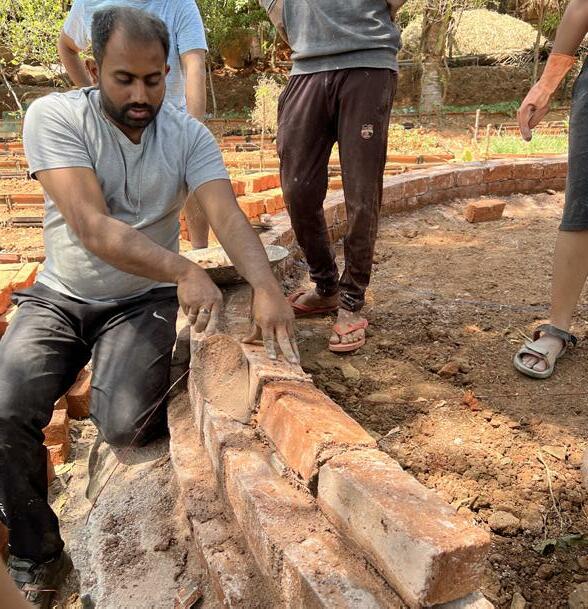
This was an interior project focused on our studio. There were talks of renovating our studio since the time I had joined and it so happened that the right time and opportunity arrived during my last days at the firm. The main intent of the project was to create organized, efficient and modular storage spaces within the existing elements in the studio.
The western side of the space had a counter top separated by a fin wall in its median. There were 2 prospects of efficient design that was visible. Firstunderneath the counter can be seggregated in ways accouding to the office needs. Second - the walls can be utilized to have wall storages so as to make shelving space for an office library and additional loft storage.
04
15

16
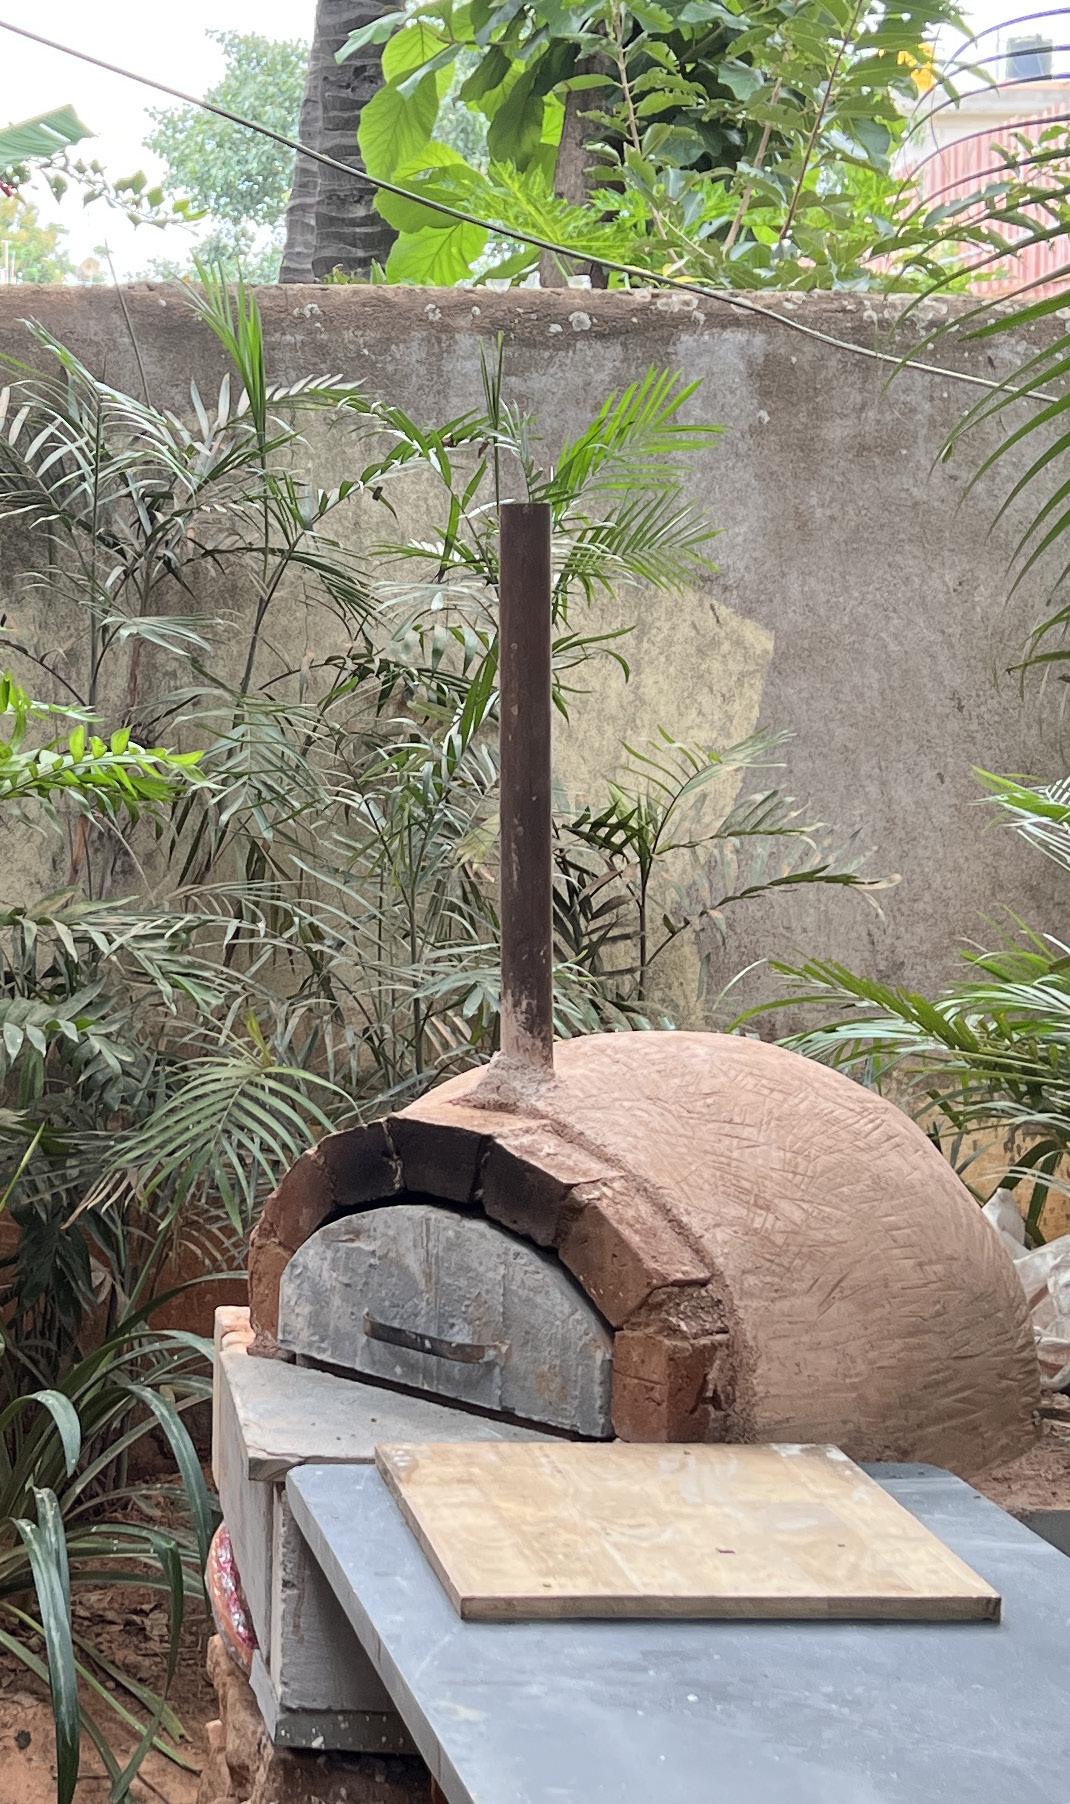
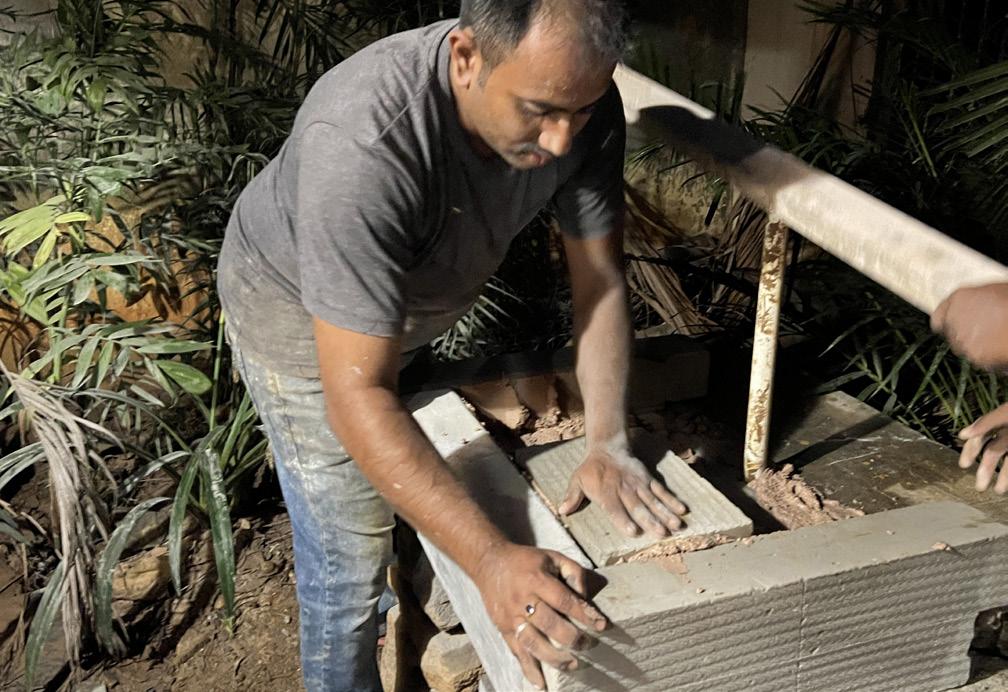
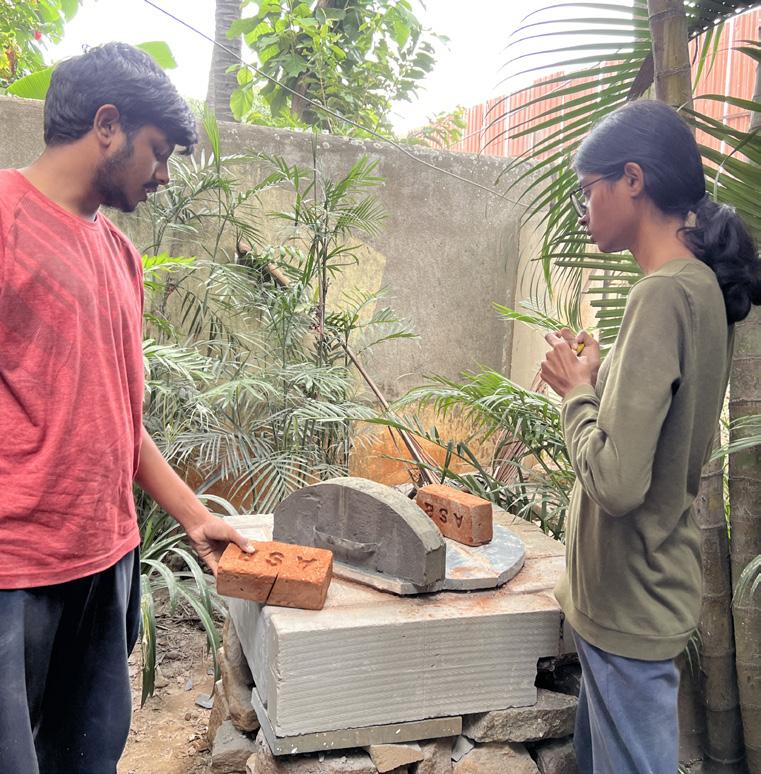
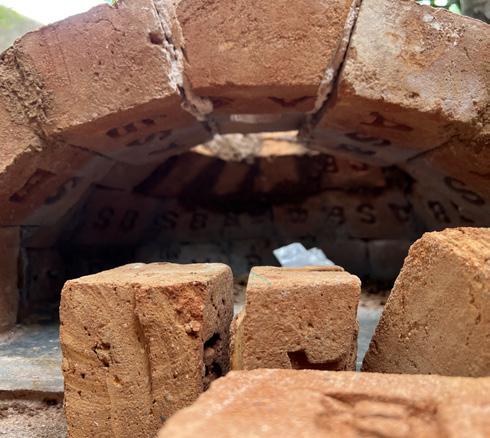
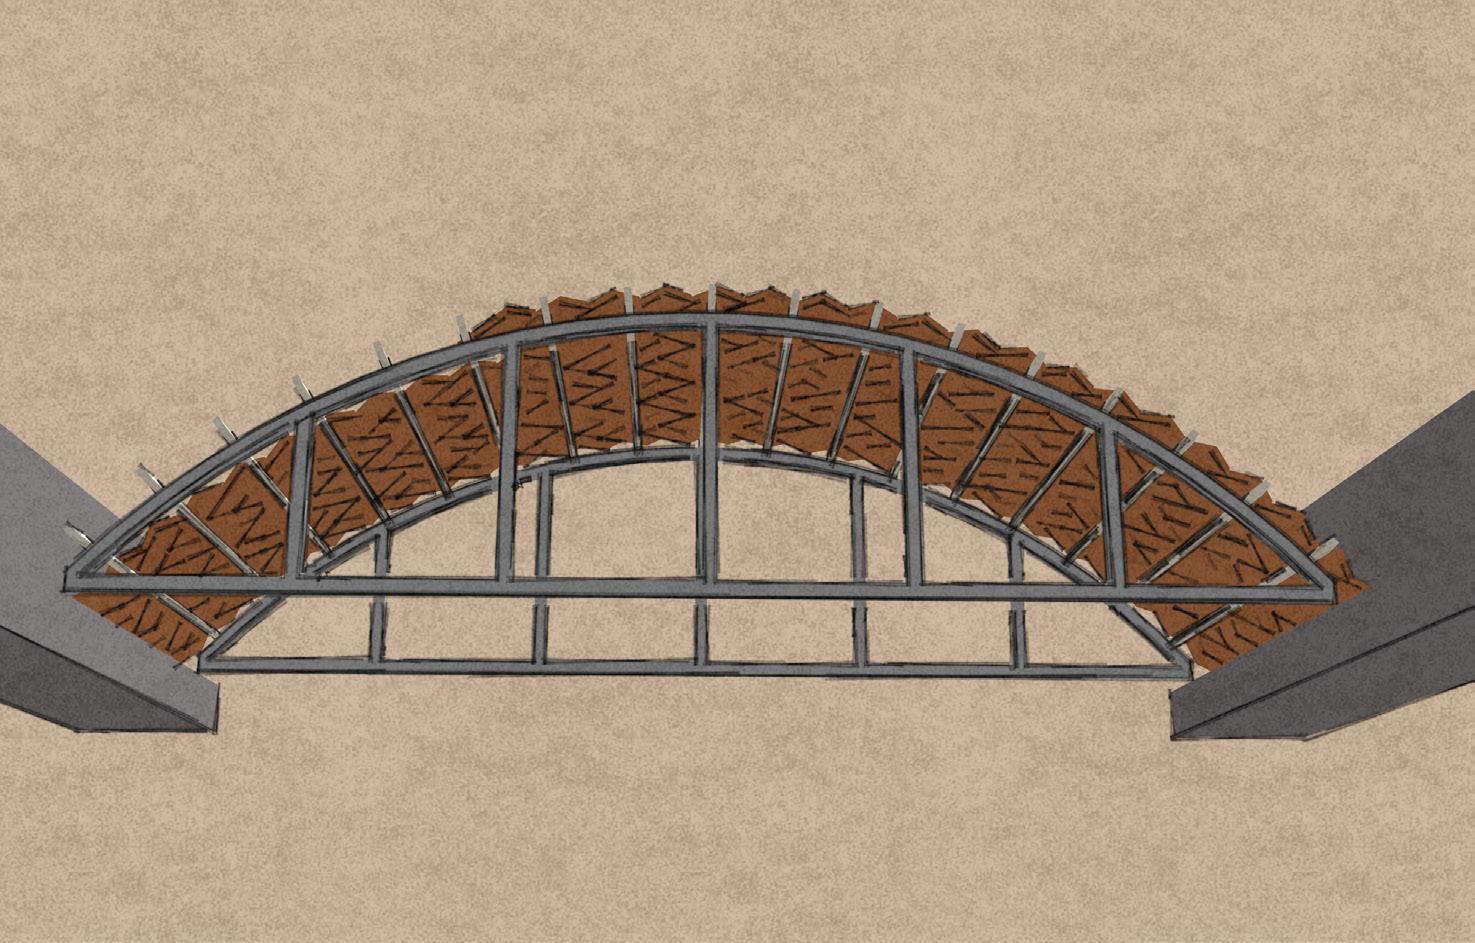
about & intent - brick oven
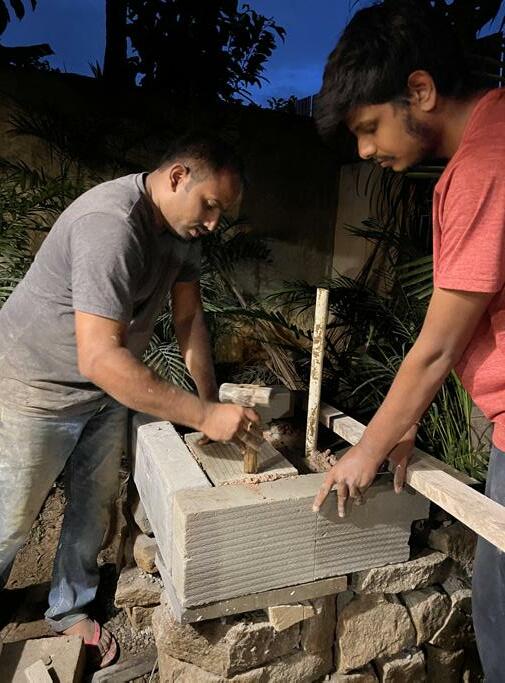
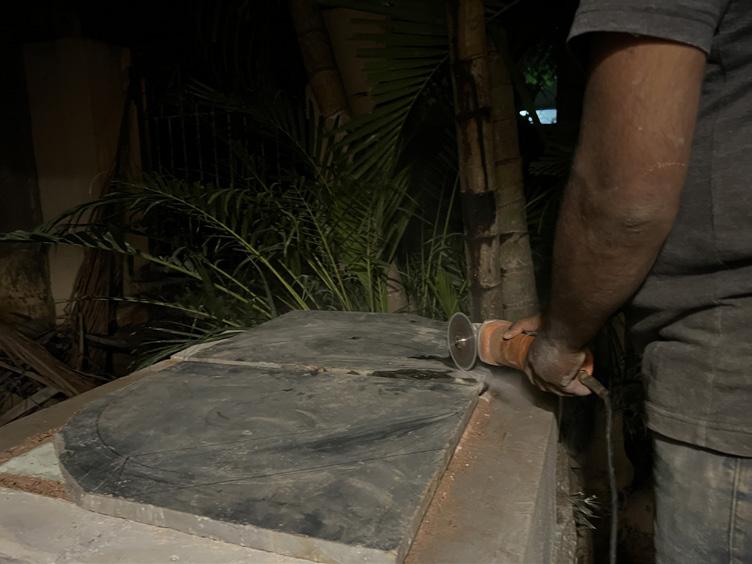
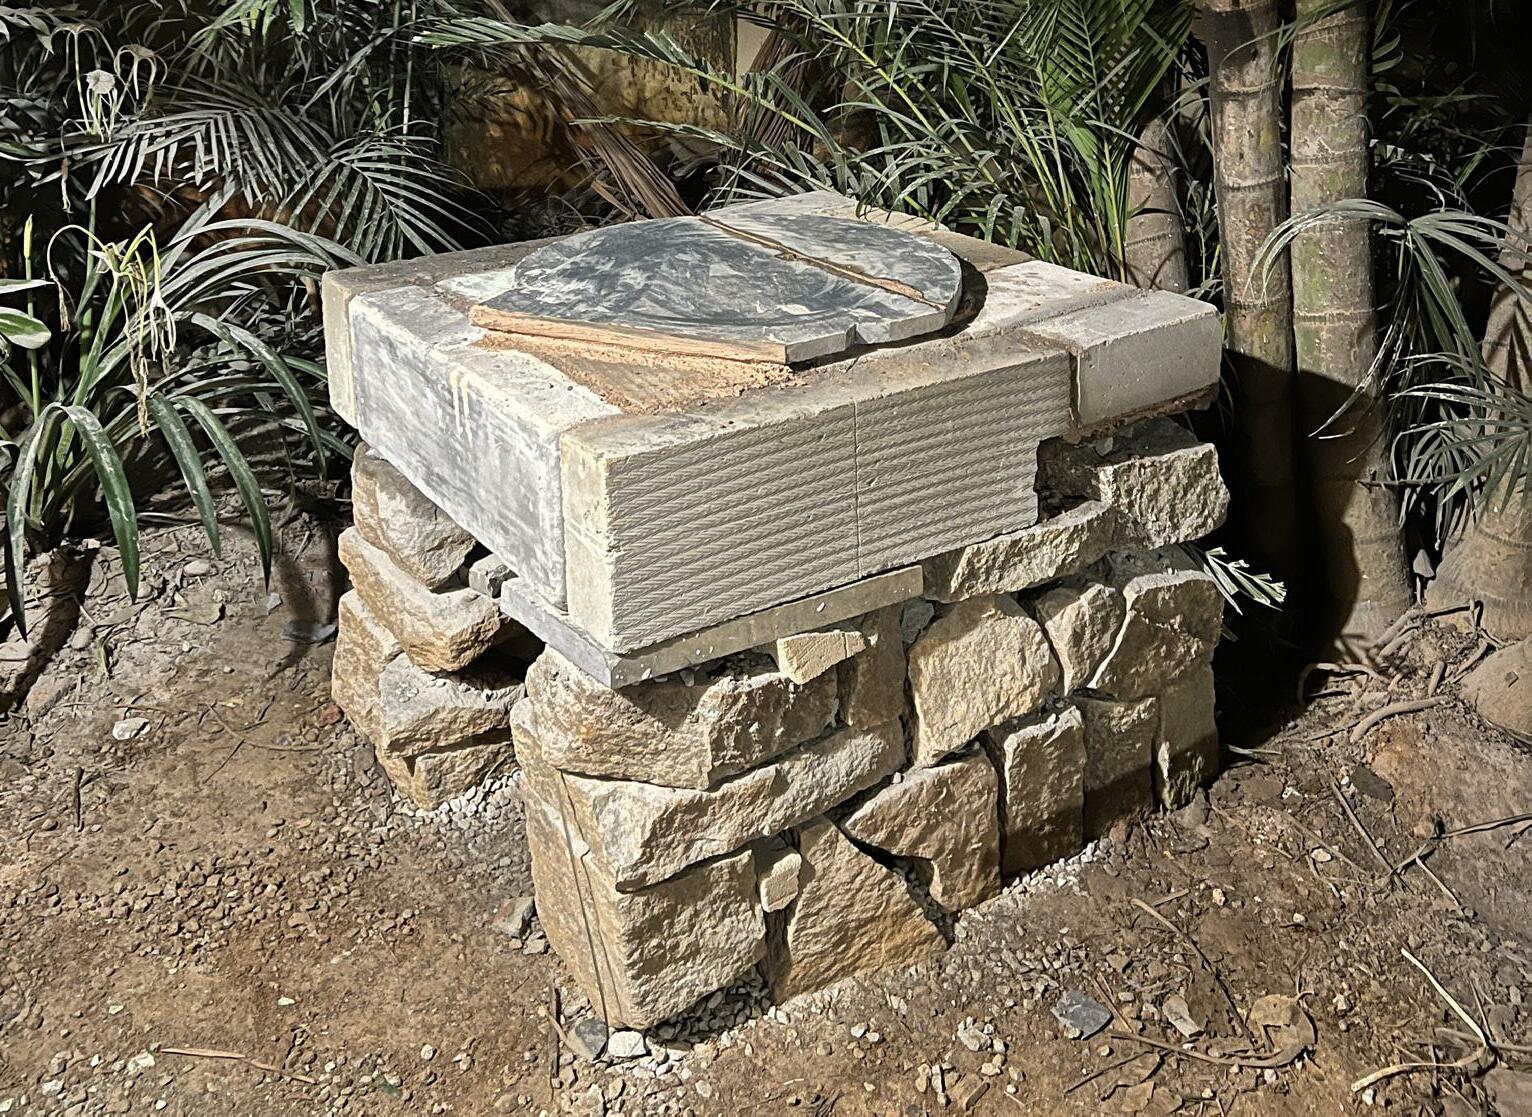
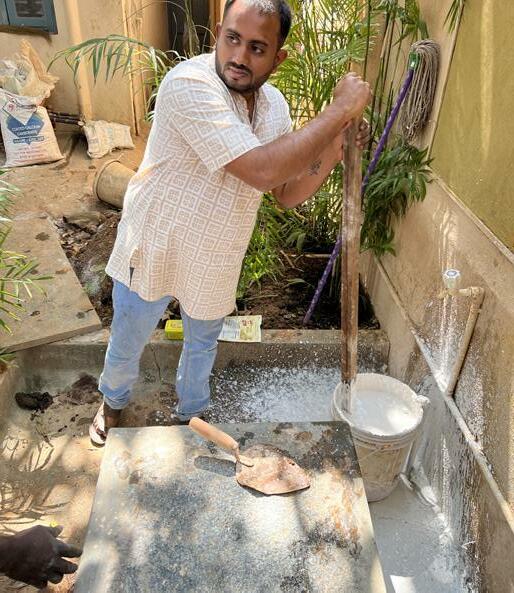
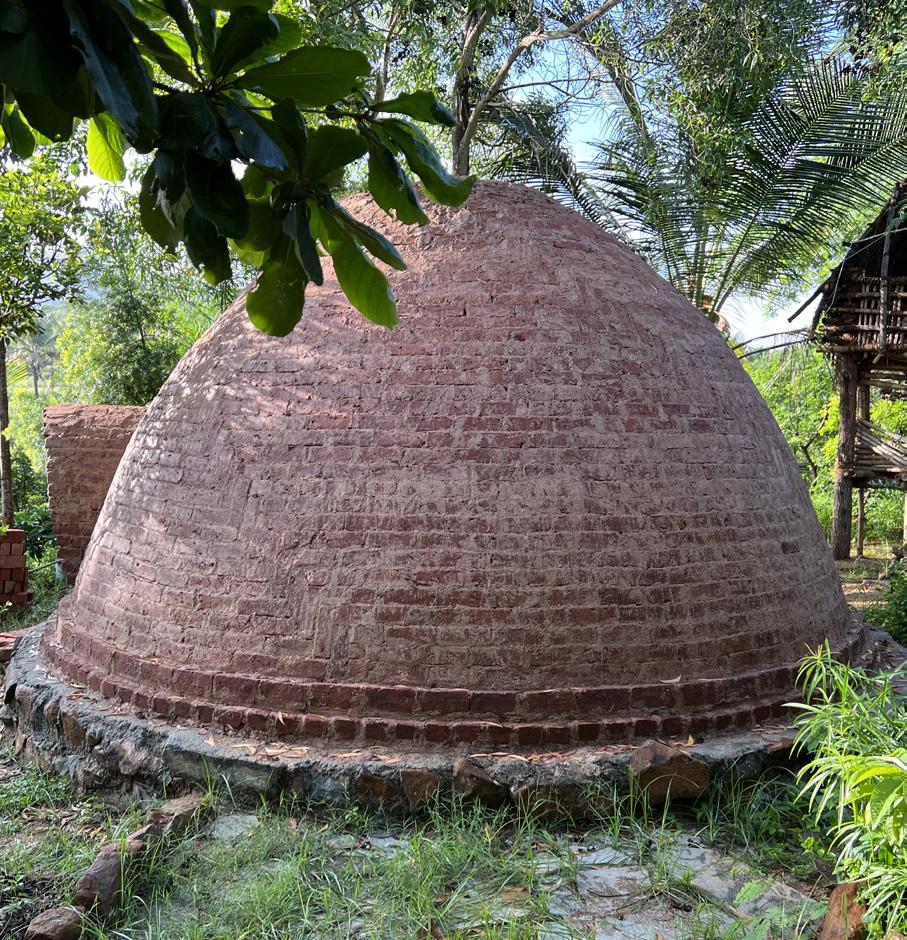
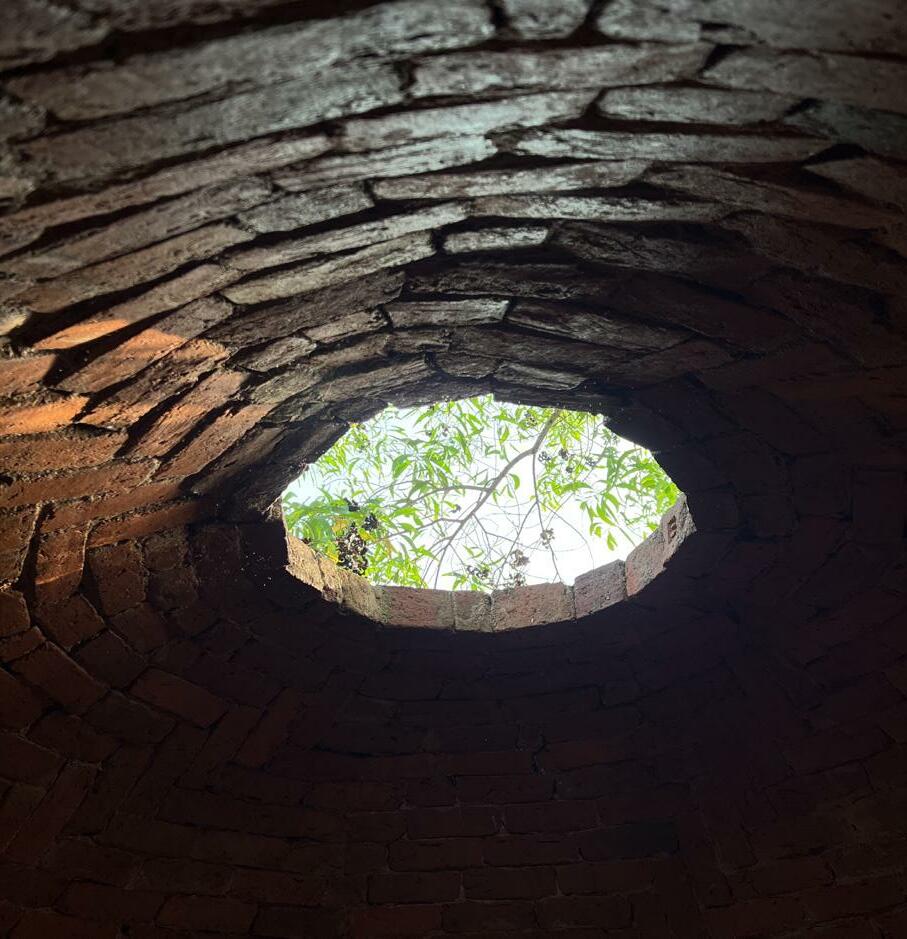
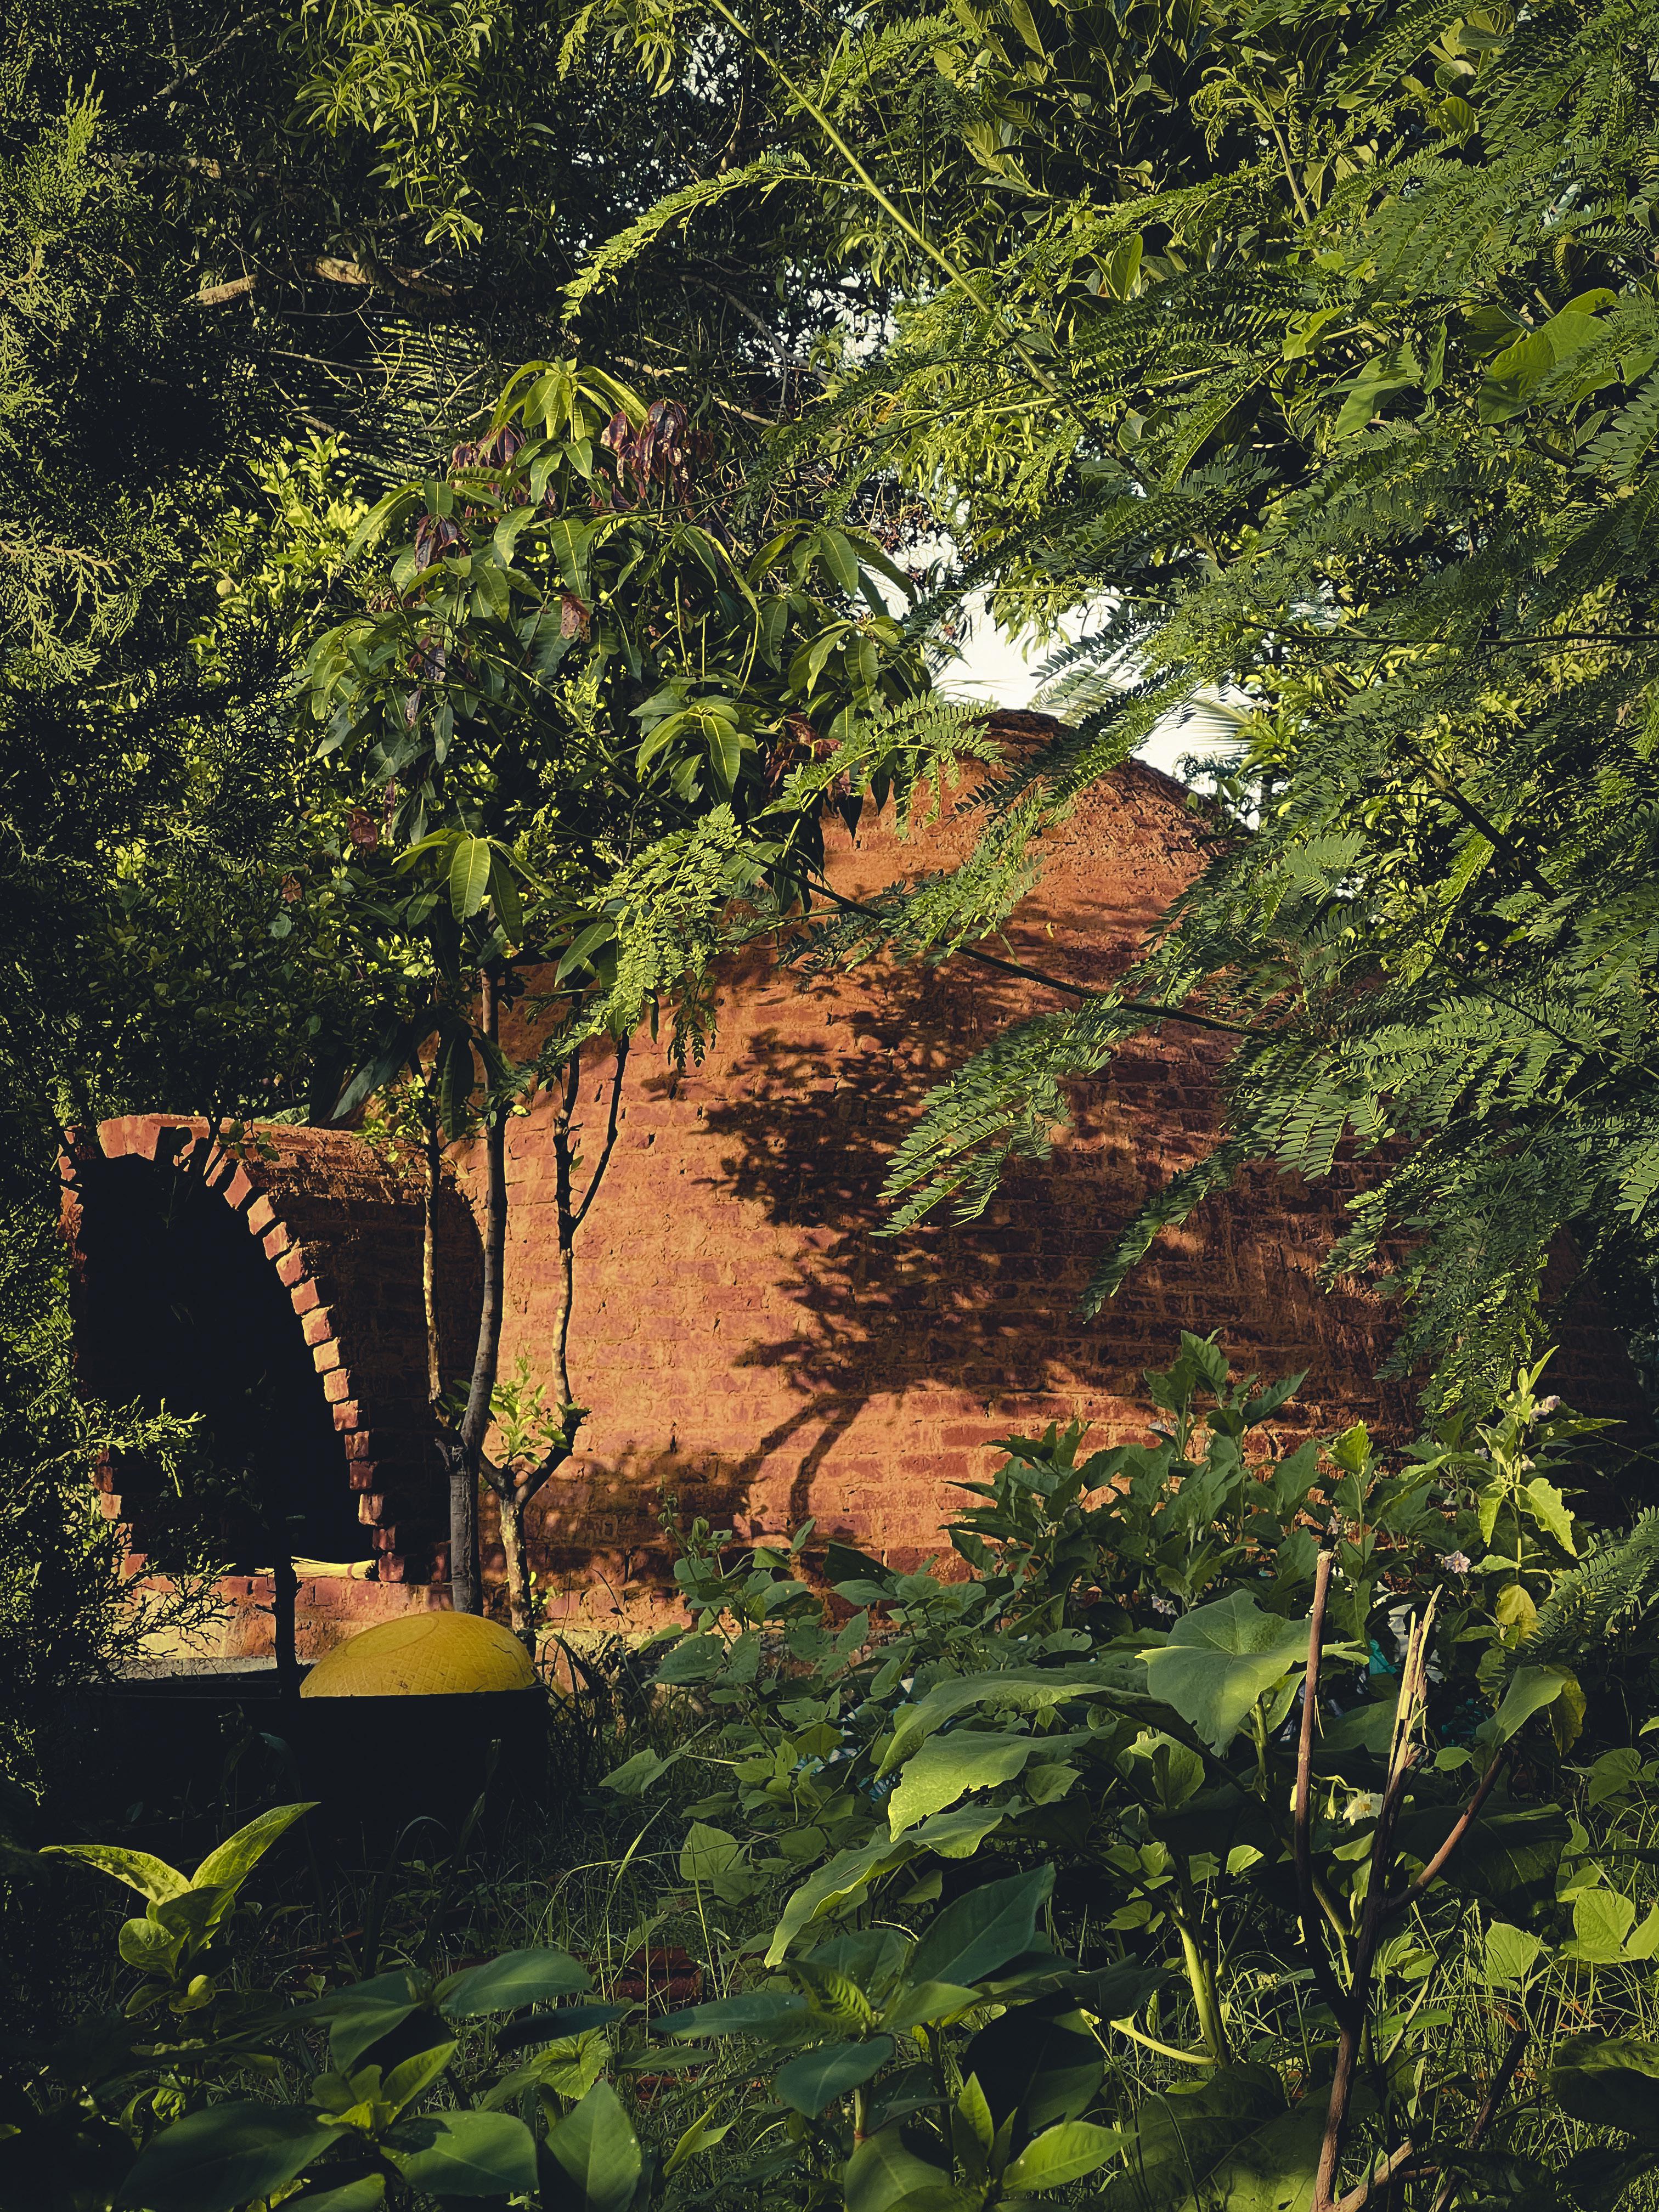
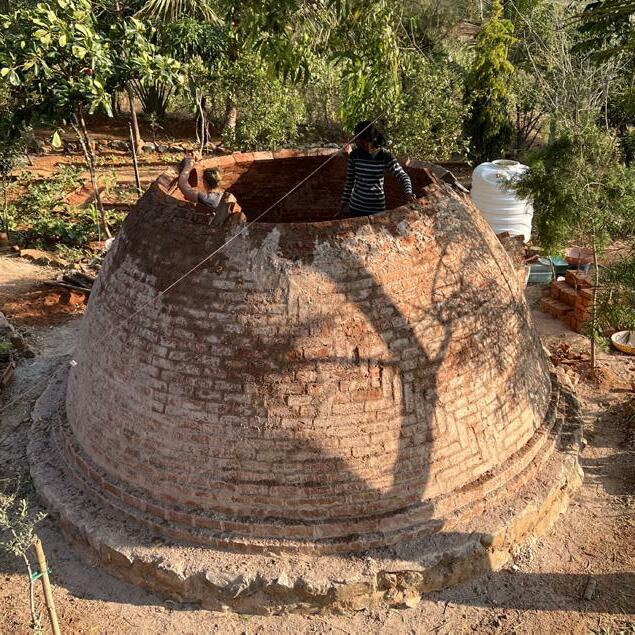
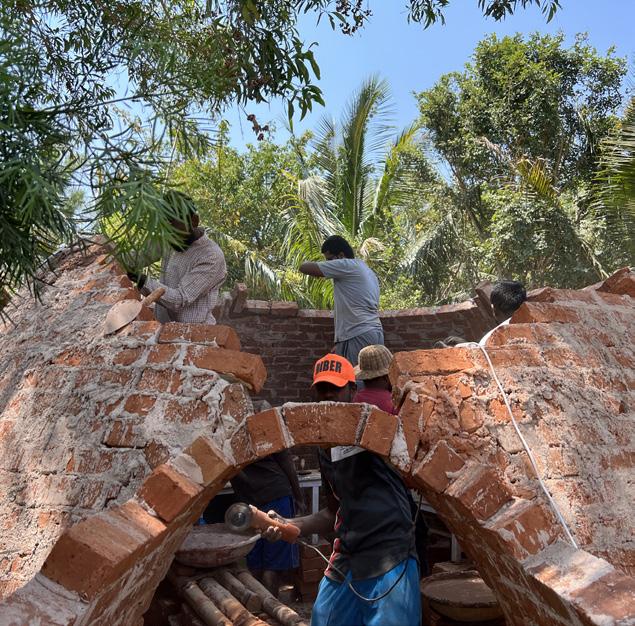
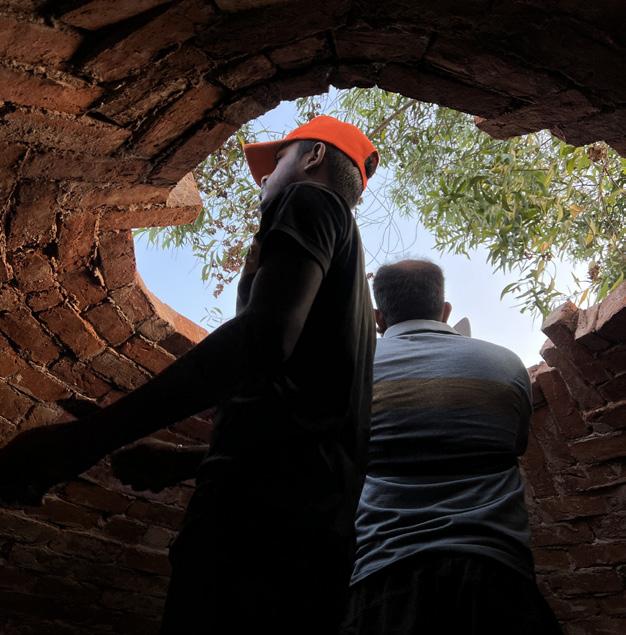
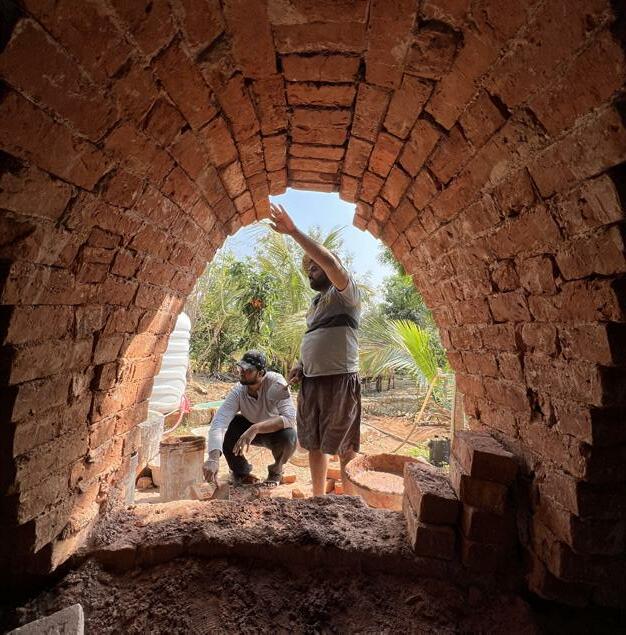
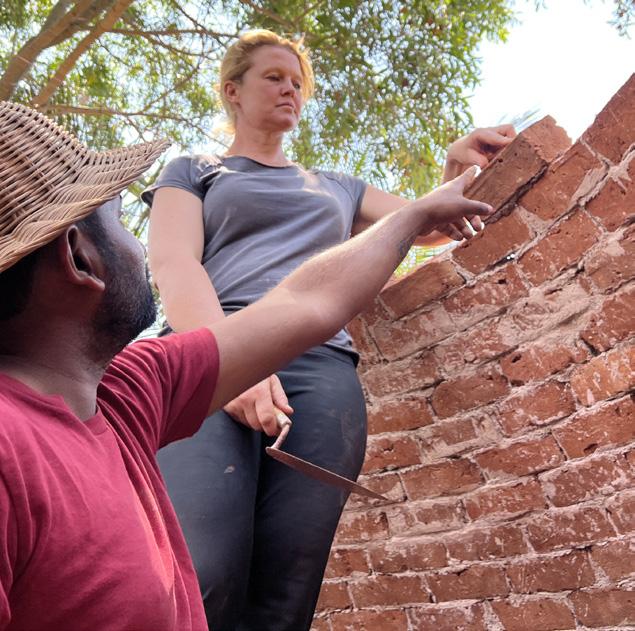
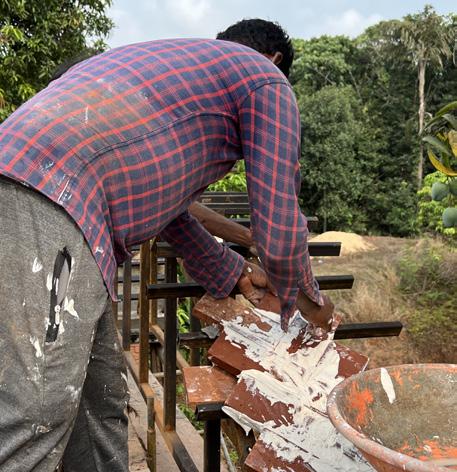
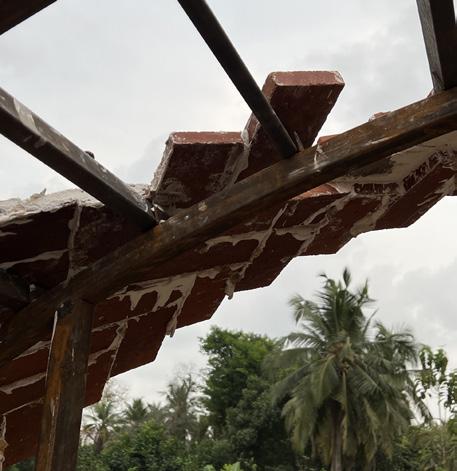
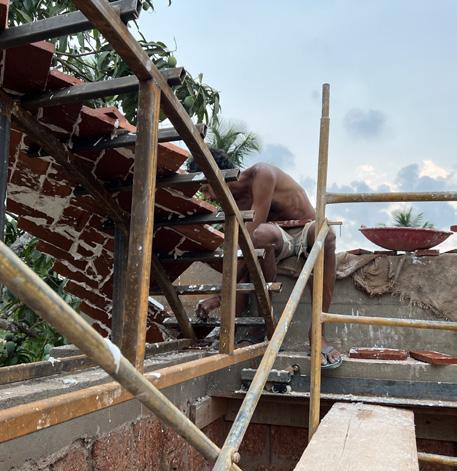
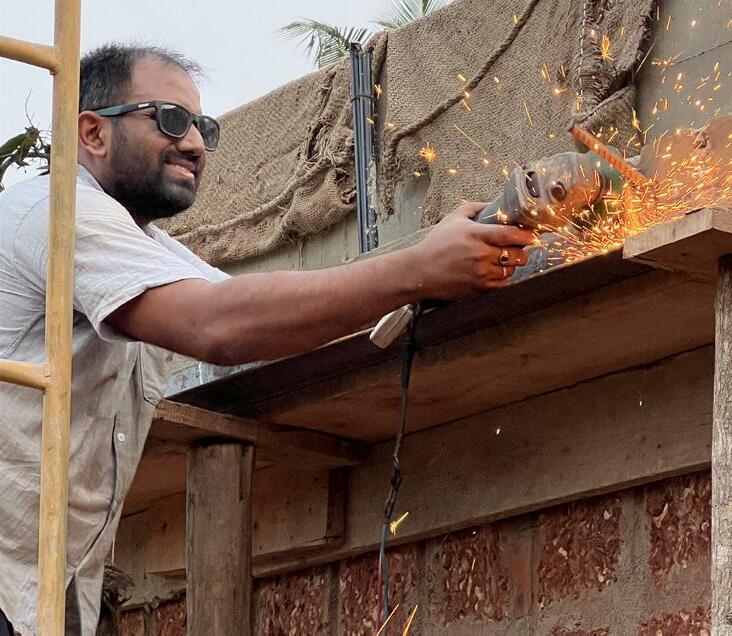
The brick oven was planned and designed as an add on to the studio. The main intent was to do one last project that was something interactive and hands-on that would be integral to the learning experience and would be a cathartic initiative to my 6 months training period in the office.
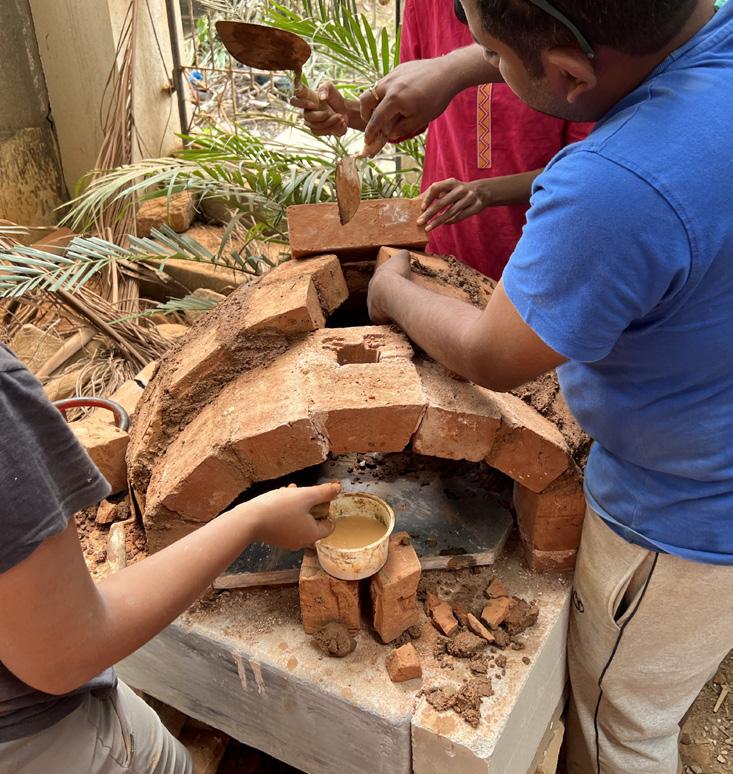
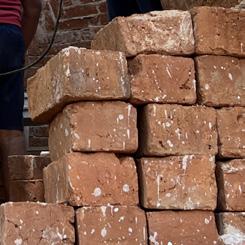
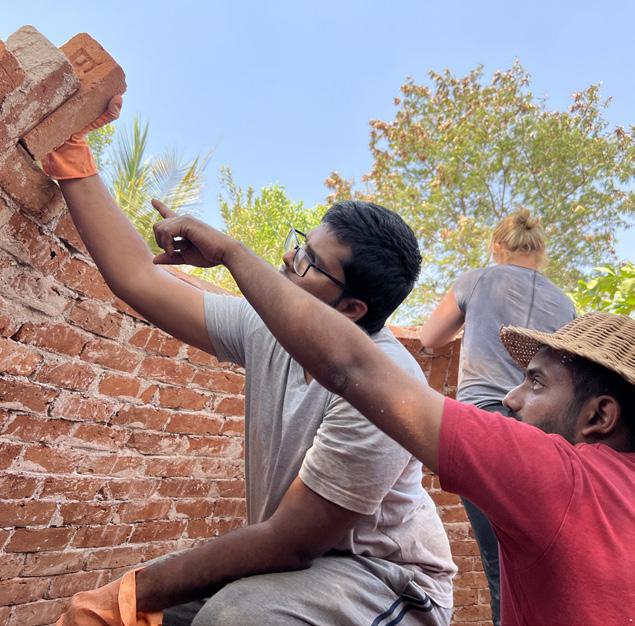
A brick oven is typically a dome with an opening and a vent. The form factor could vary depending on various factors such as material, space allocated for the furnace, the site in general, etc. We decided to go with a traditional brick dome, as the intent from the beginning was to build a brick oven.
shape & size
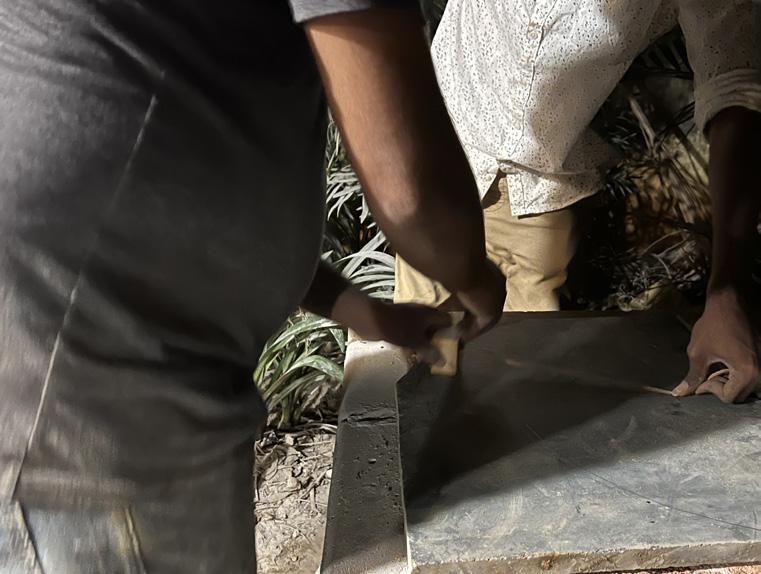
The most ideal shape for a brick oven is a dome. But the choices vary on the scale and size of your oven. For a commercial oven which would require multiple uses at the same time, there would be a necessity of a bigger diameter. For a domestic oven, a radius as small as 34” would do or anything between 2.5’ to 3’. It is always essential to have the height of the oven as minimal as possible while still maintaining the form factor. The opening is preferred as a bucket arch/ flat arch rather than a semicircular vault, which would allow more heat to escape, thereby disturbing the working of an oven.
techniques
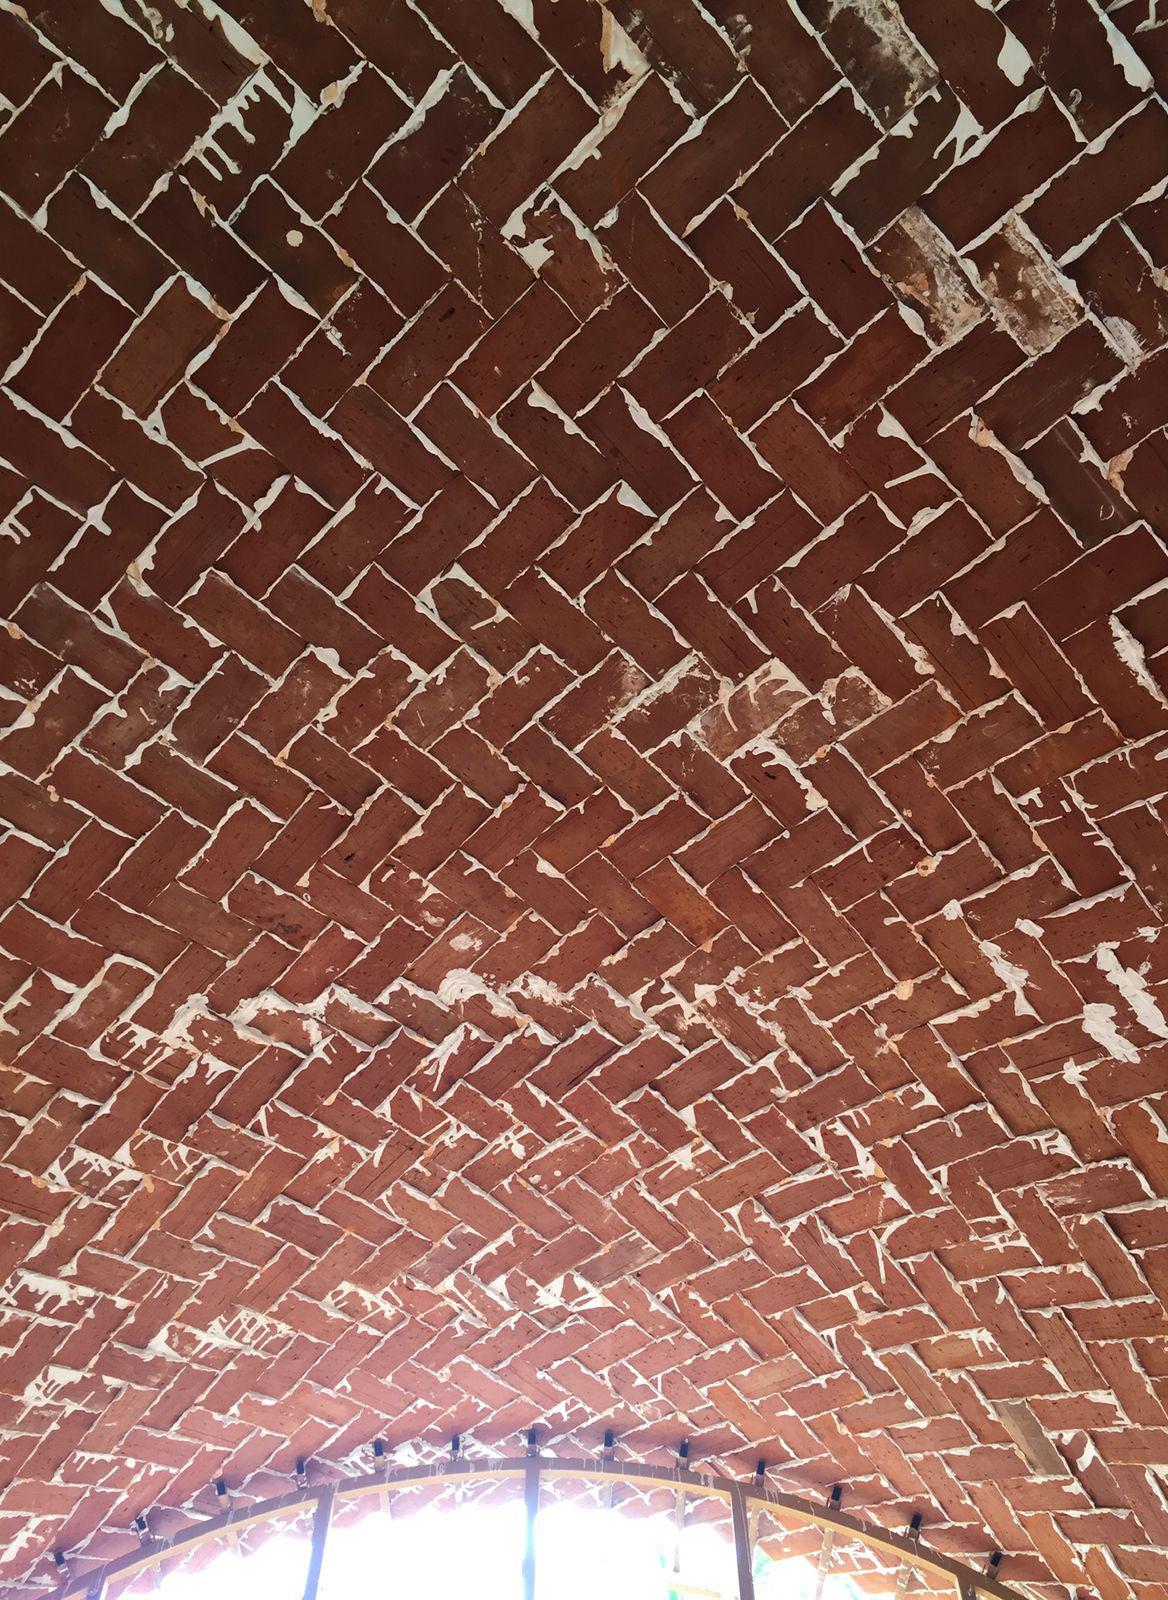
The previous workshop shaped my observational skills during the construction of a dome. The intuitive way of feeling the curve and placing the brick properly matters with regard to any type of dome. This dome due to its smaller scale, involved a lot of to and fro attempts where every single brick had to be cut so that it could fit in place and it follows the diameter. Primarily half cut bricks were used with added modifications whenever necessary in terms of chamfering or further angular cuts. Because we were majorly working with mud mortar, the dome wasn’t cured regularly as it would erode the mud. Hence it was only cured once before the final plastering with lime surkhi thappi. Angling of the bricks is to be done to create a wedge kind of arrangement to curve the dome as intended. The intrados of the bricks were touching edges with the neighbouring bricks and the extrados was to be filled with aggregate, such as broken brick chips, appropriate stone chips and mortar, to make the dome tighter.
17


18
workshops & curations vanamu
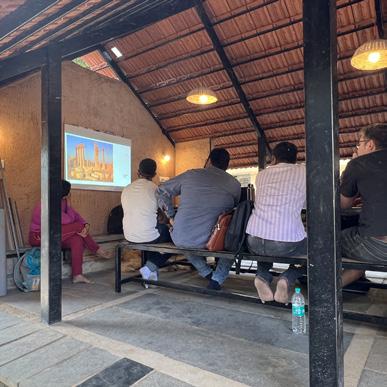
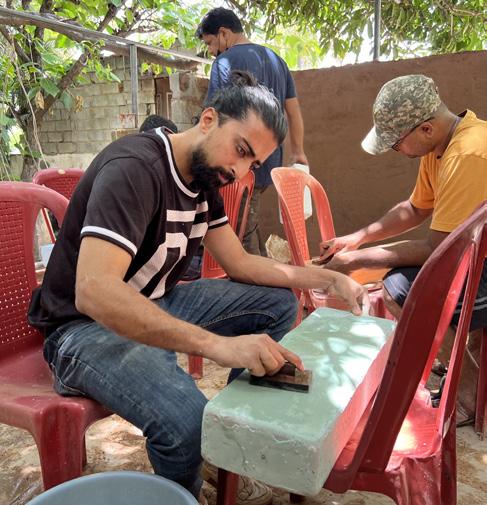
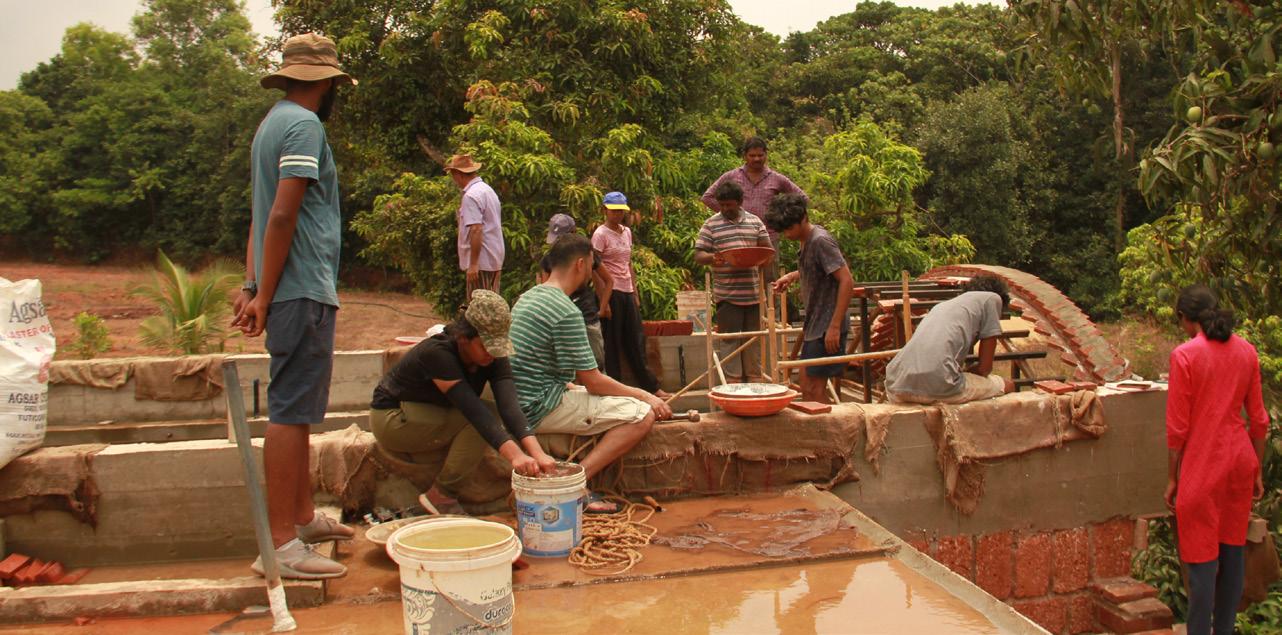
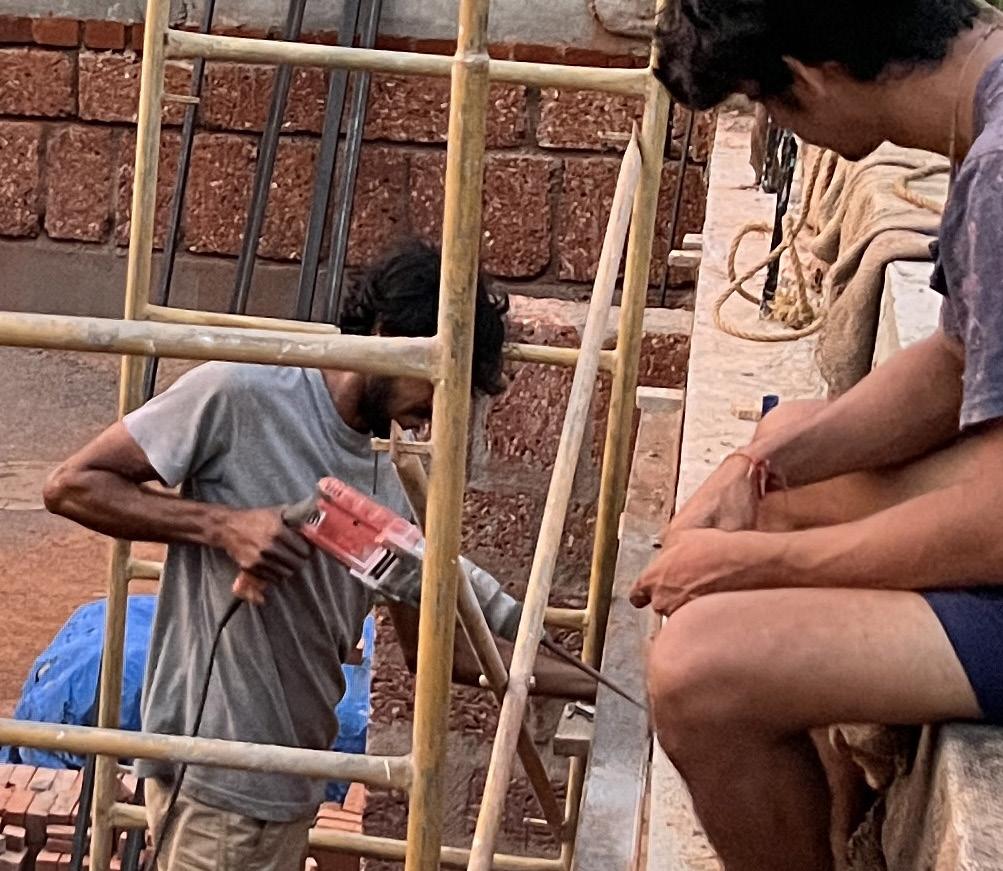
The following section is comprised of all the learniings and knowledge curated from the outreach intitative of the firm - Vanamu. I had the opportunity to conduct, organize, document, learn and participate in many workshops conducted by Vanamu. Some workshops (such as ‘Fine Natural Plasters’) were conducted multiple times throughout my period of internship. I have tried to present a concised version of my learnings and curations throughout all the workshops I got the opportunity to learn, participate, document and organize.
roles assigned organisation documentation assisting in demonstration of techniques management
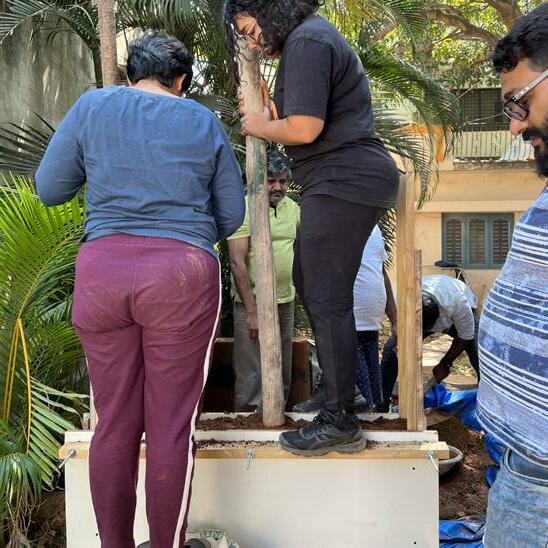
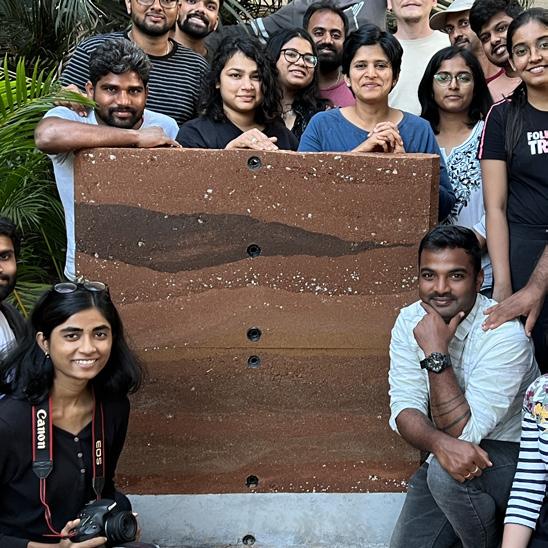
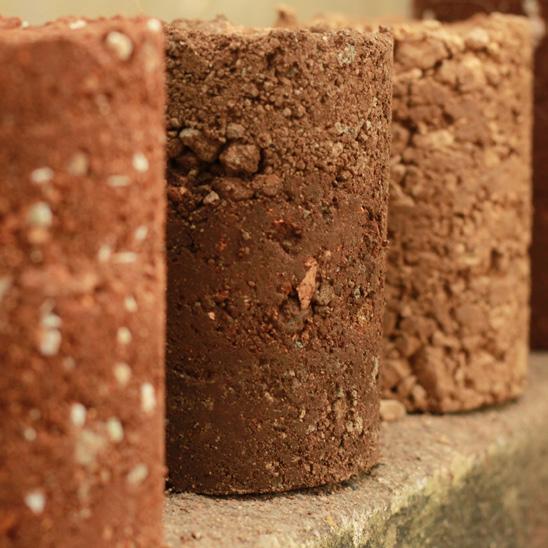
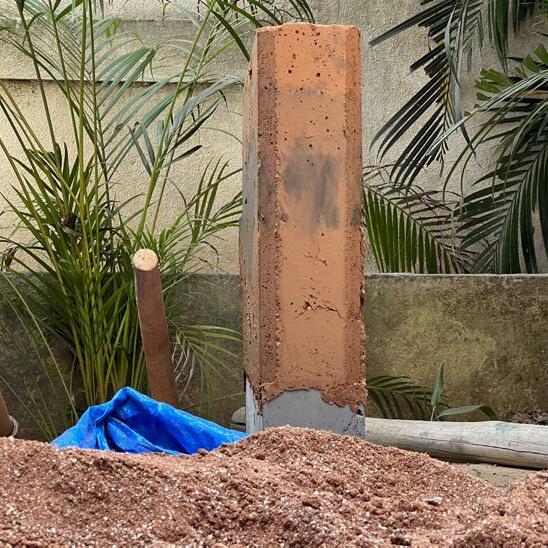
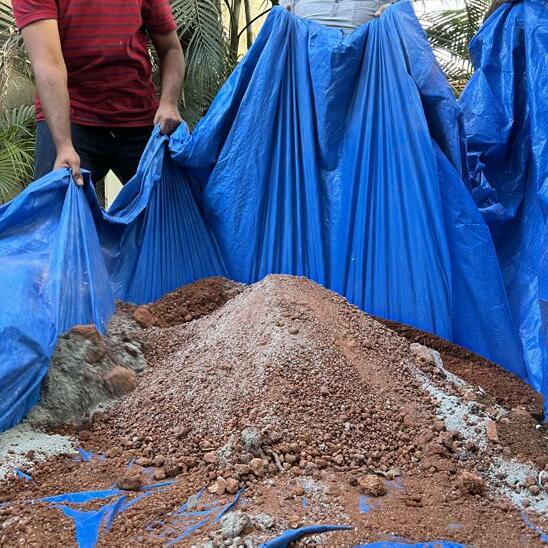
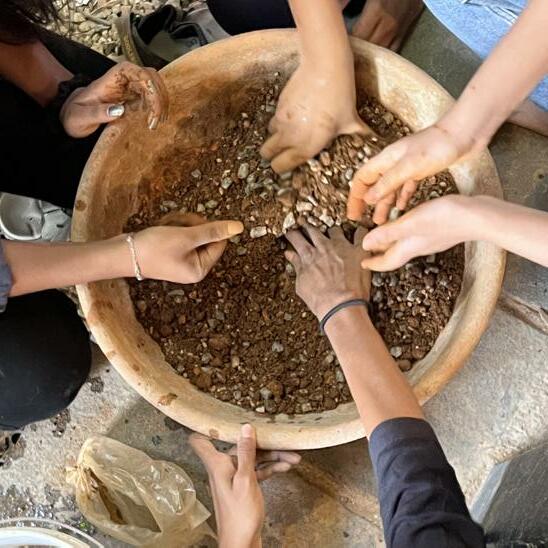
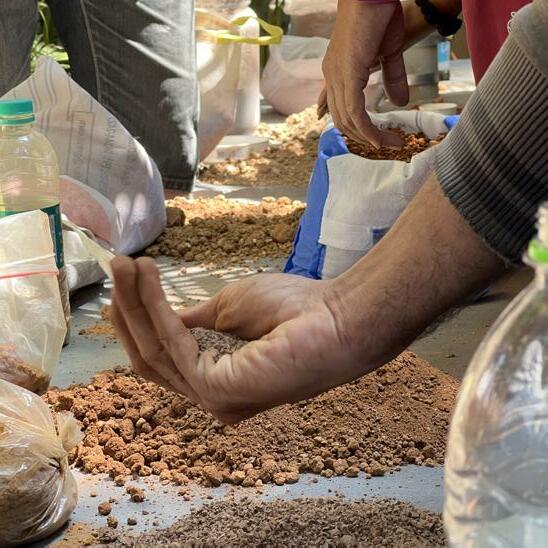
01 rammed & poured earth


Vanamu | Bengaluru about the workshop


The rammed earth & poured earth workshop was a popular workshop being held at Vanamu. I was able to participate, document, learn and understand the various techniques involved in building a rammed earth wall. The workshop focused on everything from the types of soil used to technical details such as formworks and width aspects. It was an indepth learning experience and I am glad I was able to be a part of it.

introduction
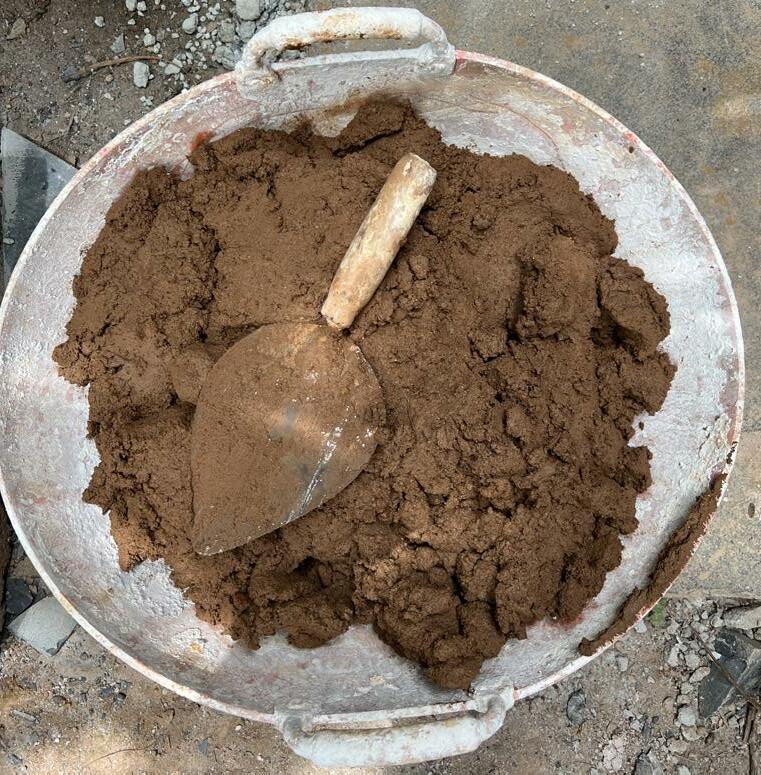
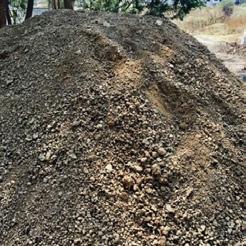
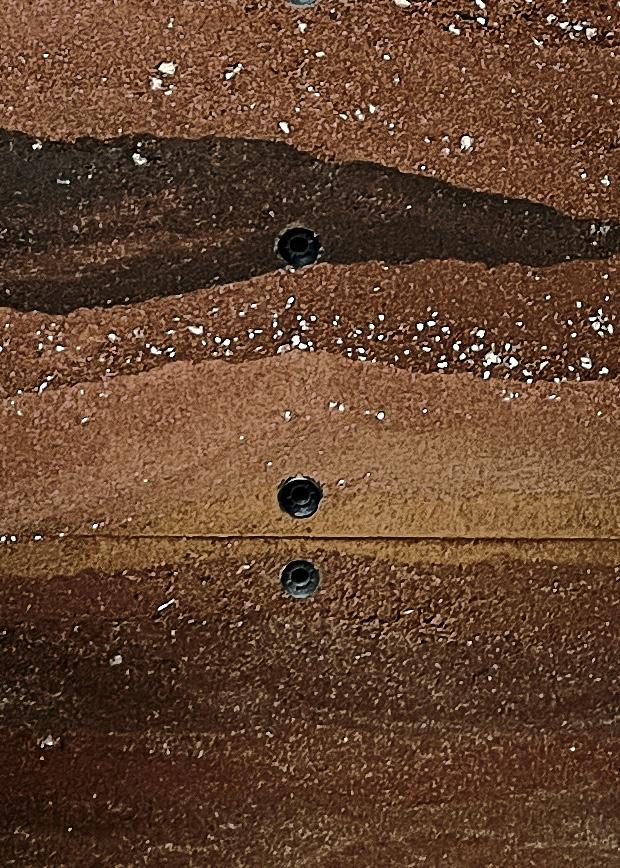
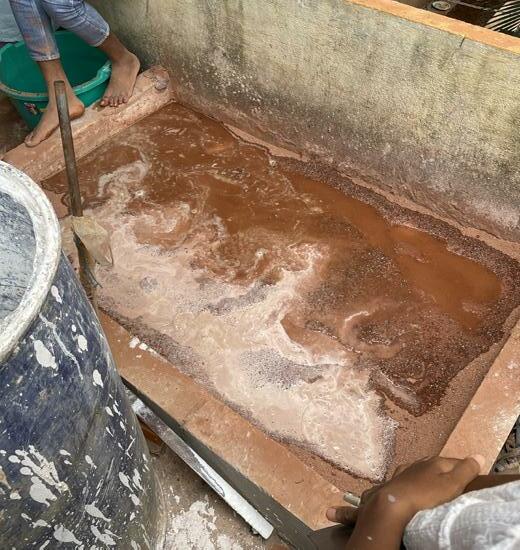
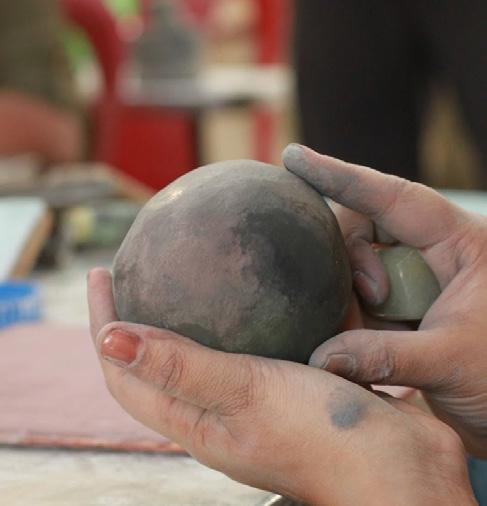
Rammed earth is a building material made by compacting specific types of soil with components including earth, chalk, lime, or gravel. Builders compact layers of a damp mixture of the previously mentioned components into a framework. This ancient technique has been used to build walls, floors, and foundations and is now taking its place in the sustainable architecture realm. Poured earth is also an approach confiened within a formwork but, it is an earthen mix we prepare and let it settle inside the formwork inorder to solidify as a structural member.
21
murram soil red soil gravelly clay river sand gravel
the beginnings of rammed earth
As evidence suggests, rammed earth was first used during the Neolithic period in China. Some archaeological sites of Chinese cultures that date back to 5000 BCE have structures built with rammed earth—this is perhaps what made this ancient technique a common one in China later on.
A section of the wall of the fort at Basgo (Rabtan Lhartsekhar Castle). Basgo was the capital of Ladakh before 1357, and it is possible that the castle dates from this period [2]. The wall outer face forms a stepped batter, each lift slightly inset from the one below. Such a batter is constructed by the formwork for a higher lift being rested on the edge of the lower lift, each lift of rammed earth thus becoming progressively thinner towards the head of the wall.

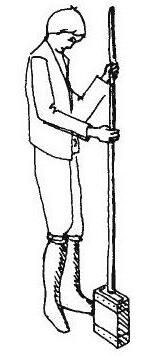
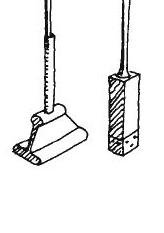
types of rammers
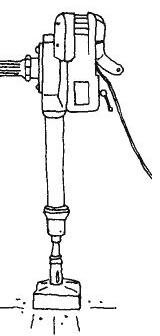
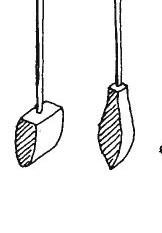
A rammer is the primary instrument/ equipment that is used in constructing a rammed earth wall. It is an equipment that works on brute force combined with gravity inorder to compact the soil. Traditionally, a rammer used to be an iron pole or a timber log with a heavy bottom or a ‘head’, generally of iron so as to amplify the impact while ramming due to the interplay of gravity. These are known as ironhead rammers. Over time, The base evolved based on different needs or situations. They included flat based, wedge based, narrow based, etc. With the advancement of technology, pneumatic and hydraulic rammers were invented which brought in more precission and consistency but lacked the manual touch with irregularities.
benefits of rammed earth
Being a natural ooption to build, rammed earth does have various benefits that would put it above conventional options. Few of them are:
• Low Environmental Impact
• High Thermal Mass
• Strength and Durability
• Acoustic Insulation
• Resistance and Safety
• Versatility
• Aesthetic Harmony
learnings from the workshop:
The workshop emphasised more on the practical side of rammed earth construction yet touching many theoritical aspects. The theory has been discussed above, I’d like to focus on the practical learnings:


• Rammed earth and poured earth requires strong understanding of the soil available and how to alter them using granulometery to make them better for the pupose.

• Along with that ramming needs to follow a rythem in which your body, rammer and ramming are involved.
• the choice of your rammer, and the length has an impact on the outcome.
• The base of both the earth wall typologies were made from poured concrete and preperation and construction of that was equally engaging.
• The artistic outcome different coloured soil can bring to a wall amazed me more than anything.
22
02
fine natural plasters
Vanamu | Bengaluruabout the workshop
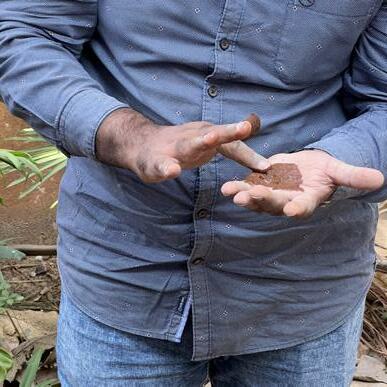
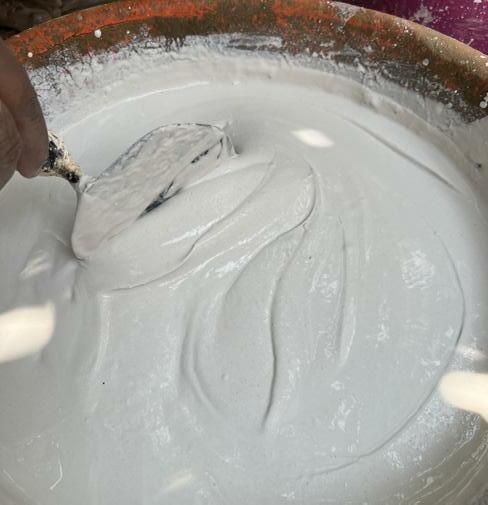
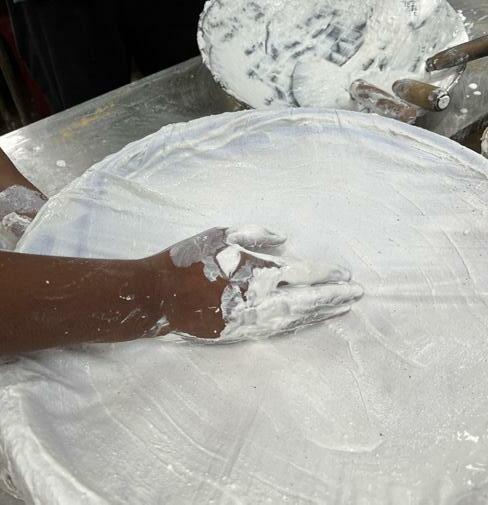
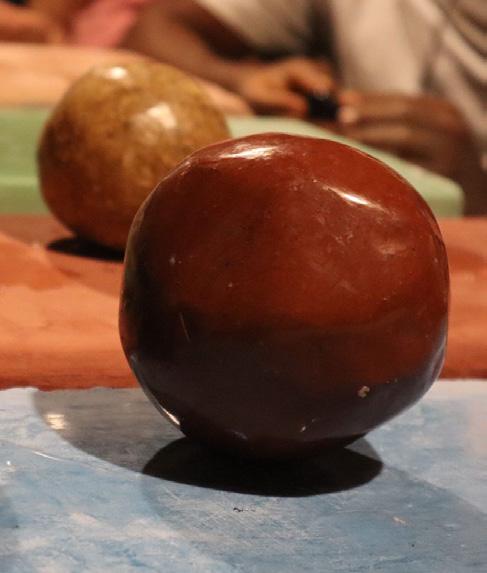
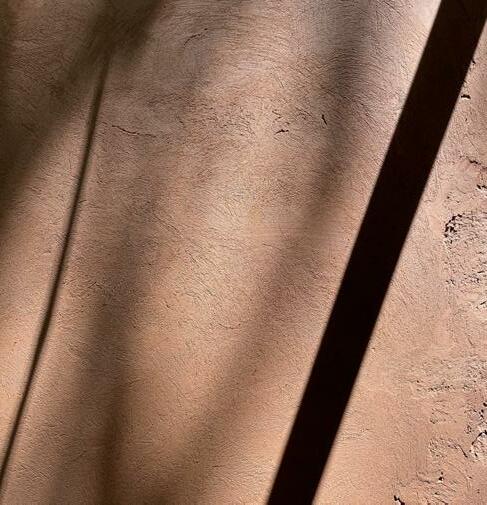
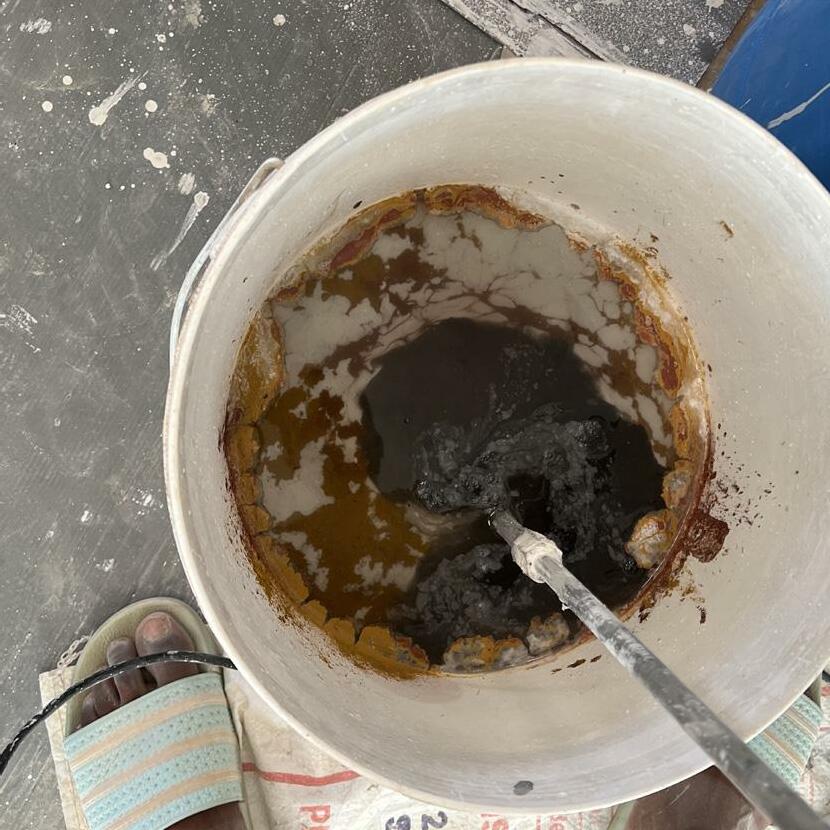
The workshop focused predominantly on the traditional plasters that were practised centuries ago by natural means. Any earthen material’s primary attribute is the aesthetic value it upholds that is indegenious in nature. Natural plasters are easy to use and provides one with scopes of eperimentation with divergent colors & textures. These natural finishes deny the need of any chemicals in finishes as they provide us with a variety of finishing options such as smooth trovel finish, sponge finish, rough brush finish, matte finish, grainy and glossy finishes, etc.


about the primary material - lime
Lime is a material which gains most of its strength in the first few weeks after application, before which it is delicate. Once this curve crosses the setting time, while its still gaining strength, becomes scratch resistant when compared too any finished plasters.


23
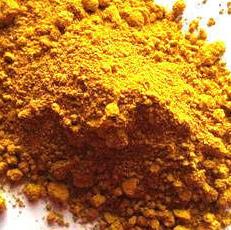
surkhi dolomite oxides water lime
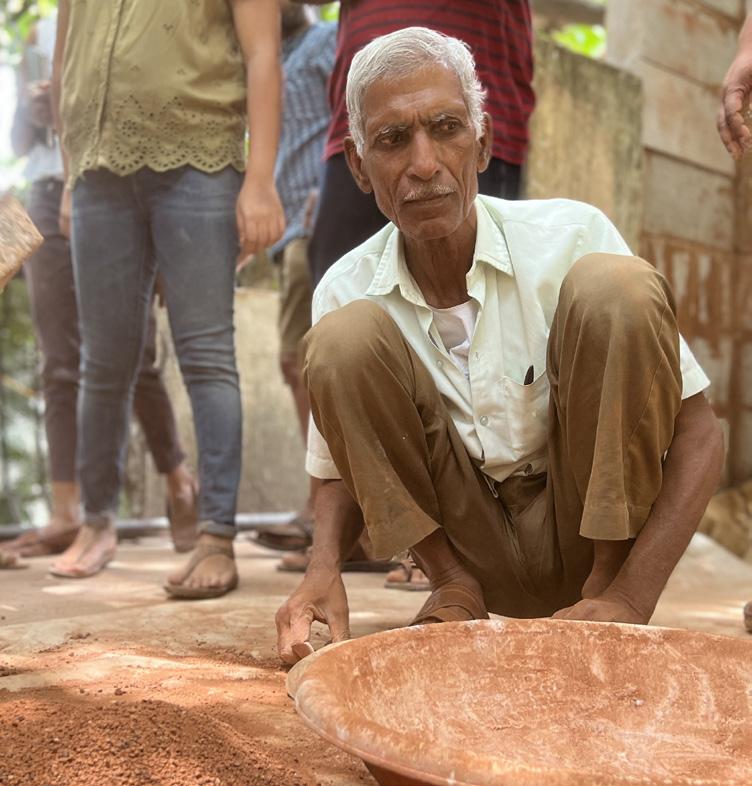
dawood muval - a master artisan from rajasthan Dawood muval is a master artisan who predominatly works with lime, from Sardarshahar, Rajasthan. As we called him humbly as ‘Dawoodji’, has a hands on working experience for more tthan half a century. He takes pride in sharing his craft with eager students and in doing so hopes too raise awareness of and appreciation for these ancient techniques.
We were fortunate to get an opportunity to work and more over observe him two workshops and during his consultancy over a month. His ways of work are more inclined towards intuitve approaches rather than rational methods, which makes it more observation centric. The rational part of the process which is important for us to understand the process, method and the art was decoded and covered by Varun sir in simplified manner.
lime processing
Lime has to go thorugh a slaking process inorder to be used as a primary component of a plaster.
Types of slaking:
• First - lime was added in a big barrel which filled about 1/20 of volume. To this about hallf a barrel of water is added iin a continuous heavy flow. Water and lime reacts in an exothermic way and hence was left untouched until it slaked on its own.

• Second - normal temperature water was added to a small lime sample slowly, batch by batch and was continuously stirred.
• Third - It involved hot water addition in small batches with stirring. In both these methods it was made sure that lime doesn’t boil, else it will produce undesirable powder and not paste.
lohi
This is a type of a final coat and can be directly applied on the top layer. Seiving of lime is ensured here to avoid lumps and a finer grade of surkhi is used. This is a trovel finished plaster and is very thin. But, since lime is hardens over time, it becomes durable over time. The result is a hard, slightly shinny reddish brown smooth finish.
applications
Lime plasters were mostly applied in 3 coats soo as to obtain a fine finish. For an undulated surface, even one coat is acceptable and many places only have lime washes as the final finish. In the 3 layer coat:

• First layer is applied with coarse aggregattes to allow carbonation.
• Second layer witnesses a mix of finer aggregates which generally is followed by soft compression for minimising cracks.
• The final layer acts as a hydraulic mortar and has the finest components.
It is also sensible not to apply any sort of alien coat on a surface, because if anything like that happens then the structural bond between the material weakens.
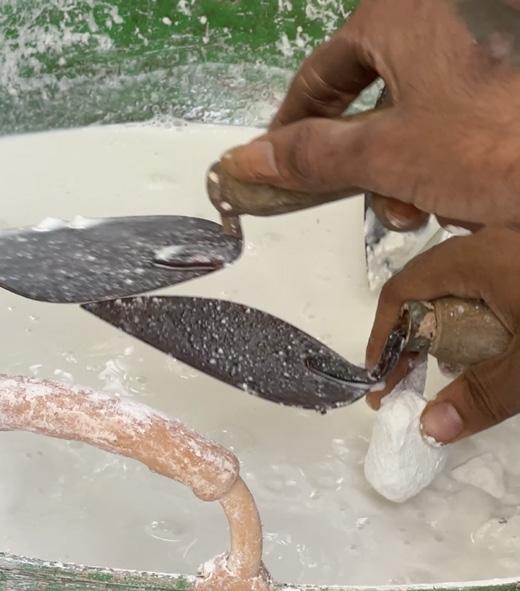
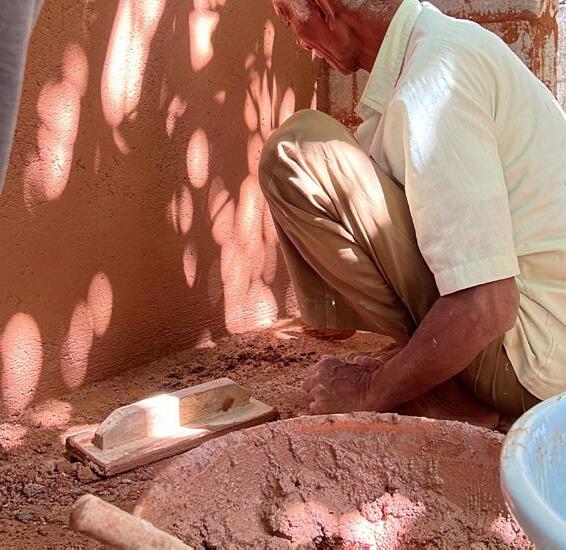
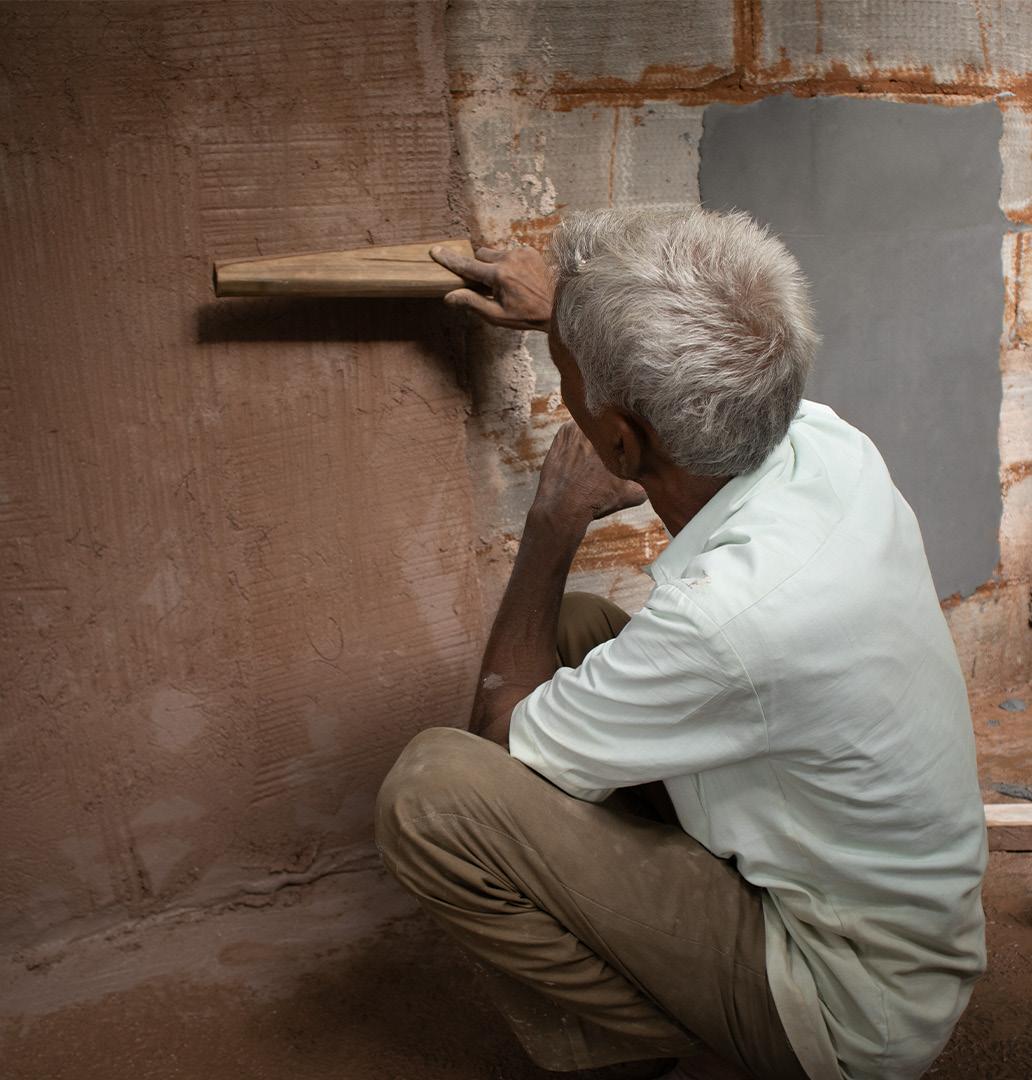
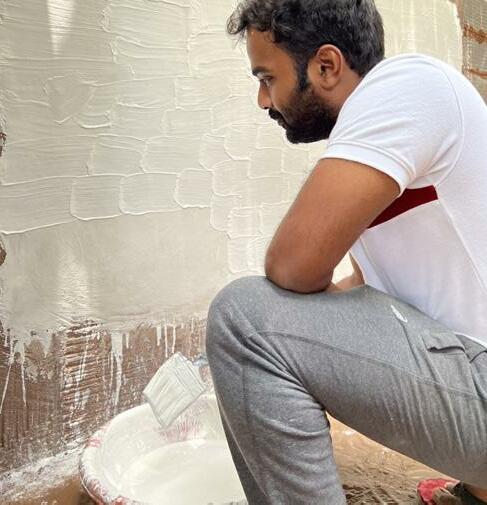
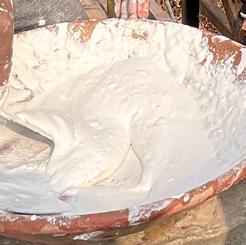
thappi
It is an indegenious lime application process where a wooden tool caleld thappi is used to apply pressure on the plaster. The mortar preperation starts with slaking lime atleast a day prior, which is then added to coarse surkhi or brick powder and MSand. In order to make it more workable, jaggery and fenugreek water is added. It facilitates the setting of lime, while anchoring it to the previous layer. The lightness and levels of a ‘thappi’ stick is an important consideration to maintain consistency.
araish
It is also a finish coat plaster that is only 2-3mm thick. It involves seiving of slaked lime to get rid of lumps and addition of ‘sangjeera’ powder or a type of marble dust to the mix and grinded well. The traits of araish is in its glossy shine and velvety touch which is achieved by a trovel finish at an angle.


tadelakt
Tadelakt is a mexican cum morooccan based plaster. It primarily consists of two coats. First one being a trovel finish, followed by a soap and alum water coat. The final coat has wooden trovelling and burnishing the surface with a semi prcious stone such as a ‘black tourmaline’ or ‘red jasper’. we get a glossy, waterproof finish.
24
Intent
Mayamandalam was concieved as a communal meditation space for the village, Mayavadi. It was buillt for a social cause and was ececuted through a workshop inorder to emphazise the communal approach towards building it.
 Mayavadi | Nandi Hills
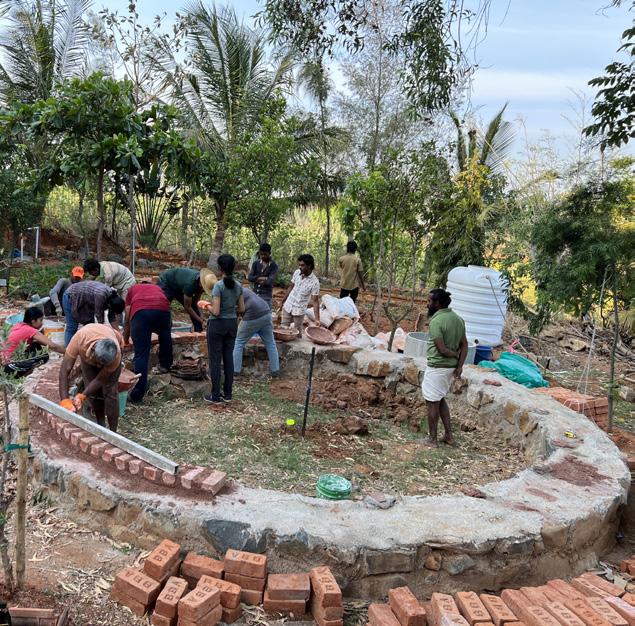
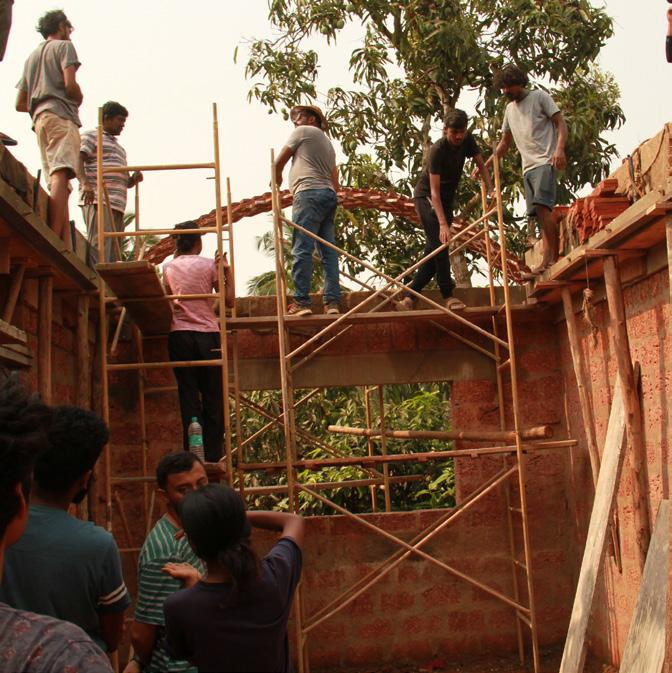
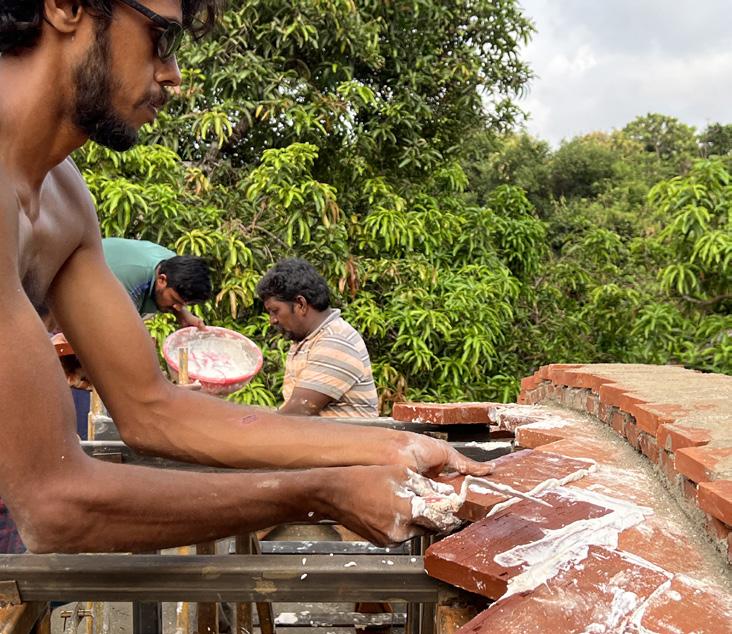
03 catenary dome building
about the workshop
This was a hands on dome building workshop, focused on building techniques of a catenary dome. The laying of bricks in the dome comes intuitionally. We were taught how to feel the curve through trowel movement, looking from three directions and then checking the radius. This came with a lot of practice, redos and mostly observing the master.
approach
Due to its limited base radius of 7’6” would give only a same height same if a semi-circular dome was to build and would also leave a lot of unusable space on the bottom of the dome. Hence to elongate the dome on the z-axis and to provide more clear height near the inner periphery, a catenary was selected.
25
fired bricks soil lime surkhi stone
• A catenary describes the curve taken by a hanging chain that is held at both ends. The distance between the ends with the limited length of the chain creates different curves and different forces which can be altered.
• The building of a catenary dome involves intuition a lot more than rational thinking, but as for we workshop participants were doing it for the first time, and techniques were rationalised to understand it initially.
• The choice of mortar was done according to the major building material, which was brick in this case. Surkhi which is brick powder was used with slaked lime paste to make the structure act like a monolithic entity.

• Tools used – Karni/brick trowels big and small, masons’ thread, hook for the centre, bandali/ mortar tubs, concrete ring, mixer, water source, wire brush, sieves, hammer, country bricks, soil, lime, surkhi/ brick powder, tube level.

learnings from the workshop
The entire process introduced the diversity of arch, vault and dome construction around the world, and delved into the technical aspects for implementation. It was also fun to interact with enthusiastic learners of all ages and across disciplines, where we shared knowledge and learnt different things. We could also understand the way the forces are distributed in a dome and arches. The hands-on experience gave us further insight into the process.

• Lime has a tendency to expand when drying, and as it is used extensively in the mortar, it will tighten the dome even further once set, hence further strengthening the dome.
• Growth of moss will be promoted which will absorb the excess water from the surface of the dome, hence keeping it clean and will absorb the toxins too. This is also a way of natural waterproofing.
• Each sector started or ended with a vertical brick and then full-length horizontal brick was placed, shaping the spirals with herringbone patterns around the dome. This helped in breaking the masonry pattern which is essential in strengthening a structure.
When we visited the site the stone foundation in a circular plan was already done up till the plinth. The width of the stone masonry was 1’ 6” which was till 9” above the ground level.


The first layer of bricks was placed along the radius, perpendicular to the circumference. The next course onwards the bricks were kept perpendicular to the prior position.
The laying of bricks in the dome comes intuitively. We were taught how to feel the curve through trowel movement, eyes in the three directions and then checking the radius. This came with a lot of practice, redos and mostly observing the master.


The last one–third of the dome took as much time as the rest. The last four layers of the dome required an eye for detail. As the dome grew bigger in height it became smaller in width, leaving less and less space for the people to work on it.
26
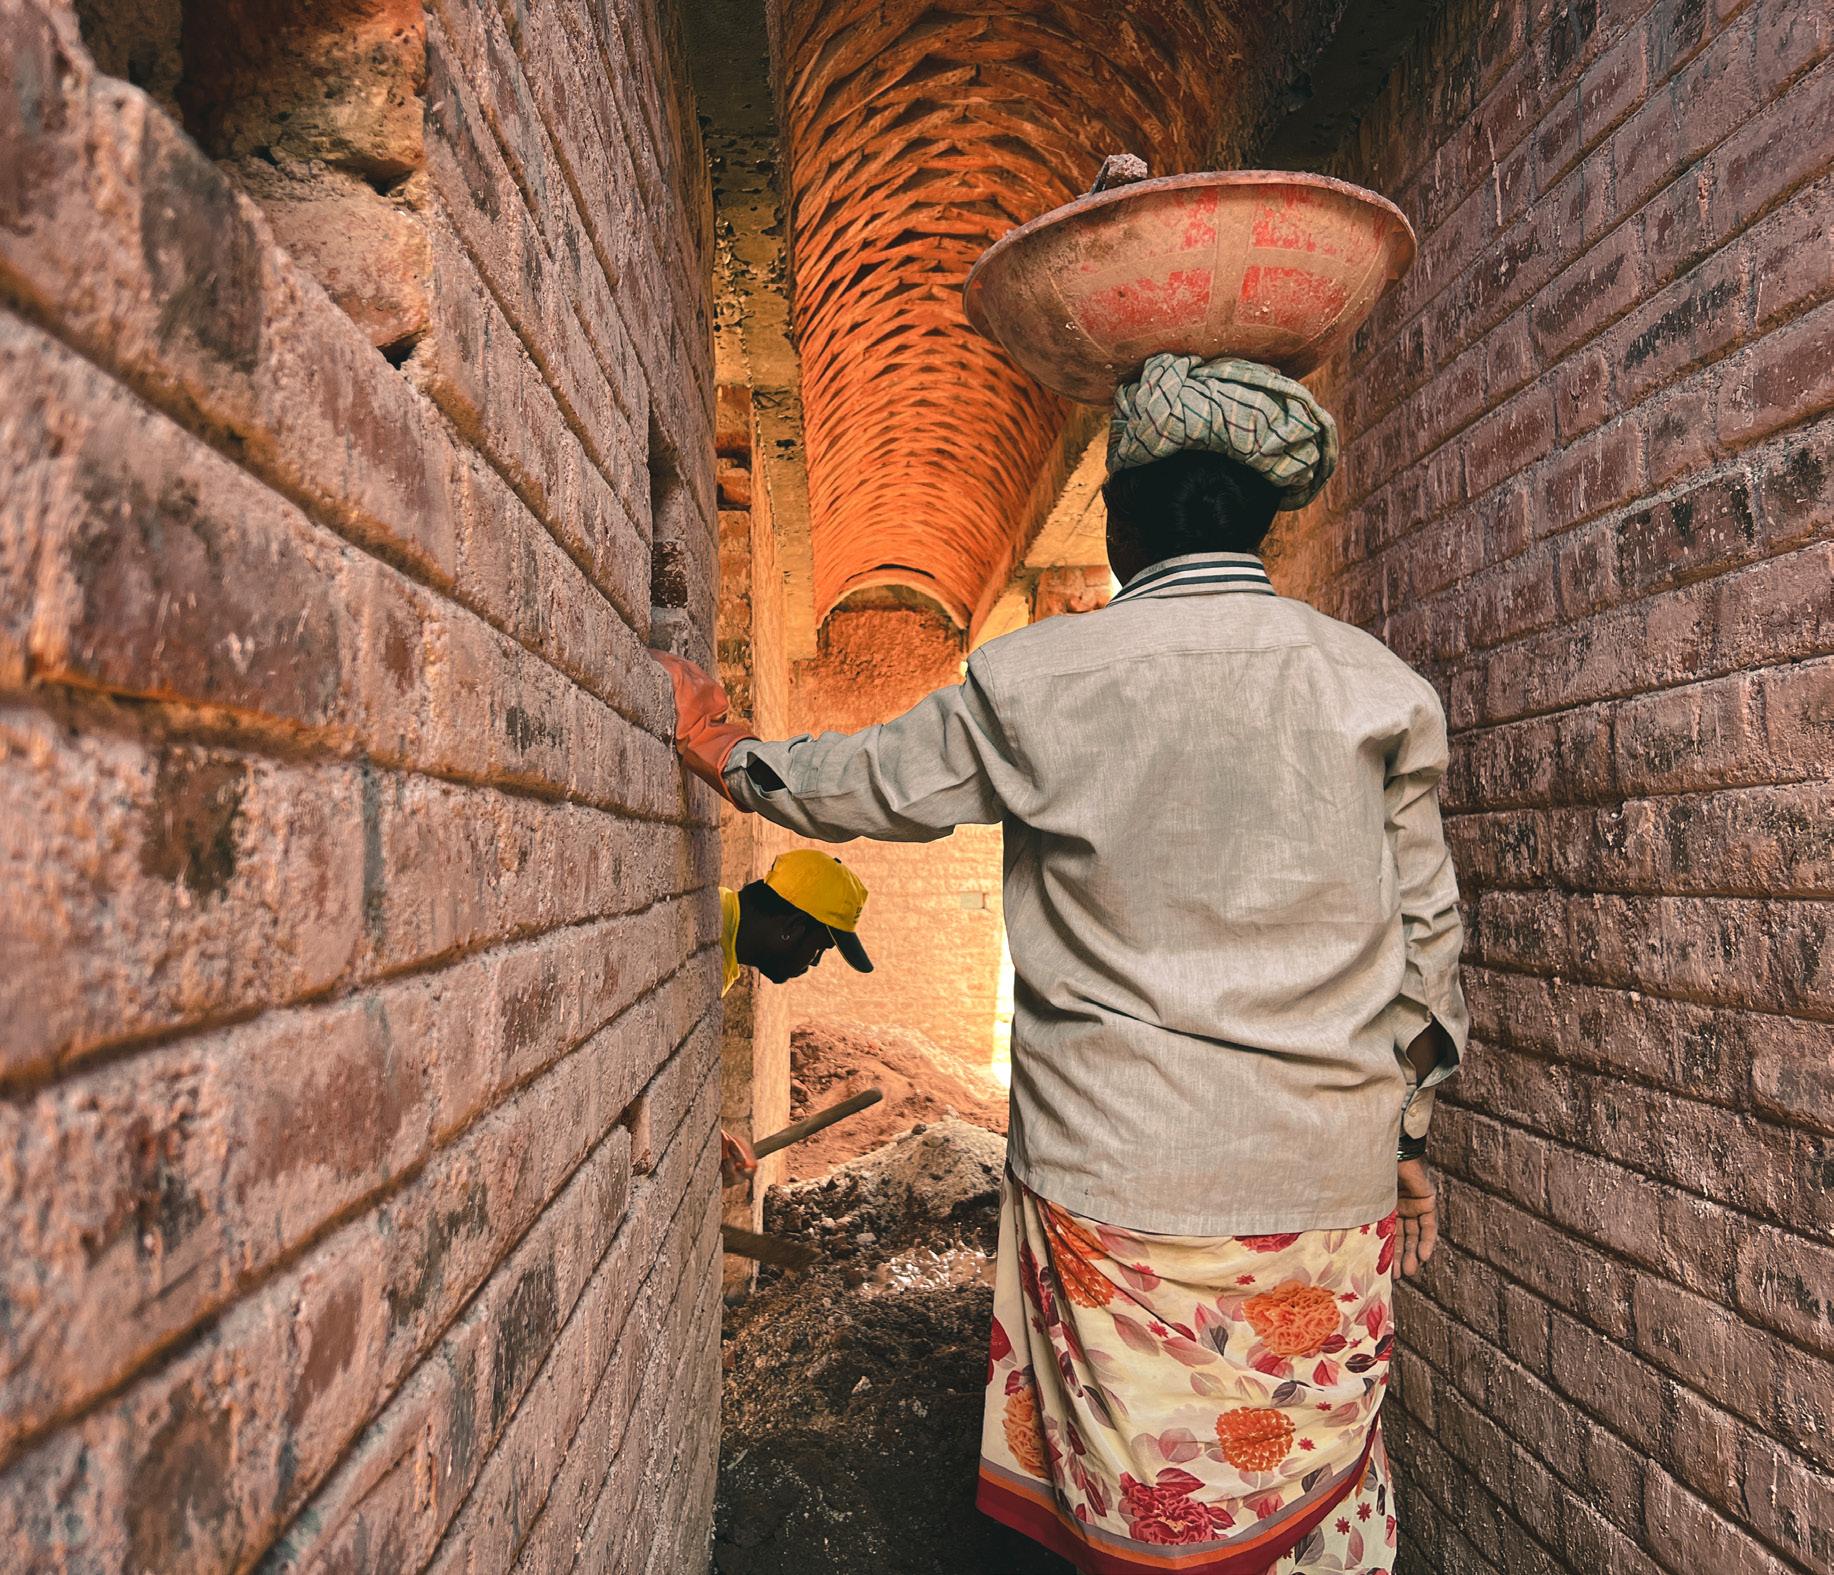
timbrel vaulting

Suratkal | Mangalore approach
about the workshop
This was a collaborative workshop based on ‘Gustavino Vaults’ or ‘Timbrel Vaults’ organised by a Mangalore based practice called as ‘Maya Space Monkey’. We were invited to conduct the workshop where we had to teach the art of building gustavino vaults. The workshop was organized on one of their sites in an ongoing projects in Suratkal, Mangalore. Every hands on workshop was about something that is integral in the building process and this was about patience.

The vault was planned by them as a roofing system for which we had a meeting a month prior to the workshop. We decided we would design the formwork out of steel which would eventuually be their clerestory windows to allow light in the space. The beam was used to mount the formwork and rollers were welded to it to move it along the beam.
04
brick tiles gypsum lime surkhi 27
The initial step of the process was to set up a track and trail system along the already cast RCC beams. The scafoldings were setup to reach the desired height and rollers were welded to the form work to be installed.
The 3 day workshop focused mainly on the building techniques and stratergies that are taken while executing such a construction. Timbrel vaults are generally delicate to handle whe they are being built, compared to when after. Few take aways from this workshop are listed below:
• The building should have a concrete strategy of execution and a well prepared site for its execution for a smooth construction. We had utilised a lot of our time on the installation of the track and trail for the formwork. Scaffoldings have to be erected hours prior to construction.
• It is also advised to procure and process the materials atleast 24 hours prior to the commencement of construction, such as ‘slaking lime’ or soaking brick tiles in water.
• The mortar used here is a gypsum lime mortar, which means one of the primary contents is ‘P.O.P’ a.k.a ‘Plaster Of Paris’. This means the motar has a tendency to settle or dry up faster, hence has to be mixed in small batches while building.

• The process of placing bricks or the primary construction process is a patience driven activity. Because it is just lime and pop, with lime being the major content, it doesnt set as quickly as a cement mortar. Hence, the mason is required to have that ppatience to keep holding the brick until the mortar hardens before moving on to the next brick.
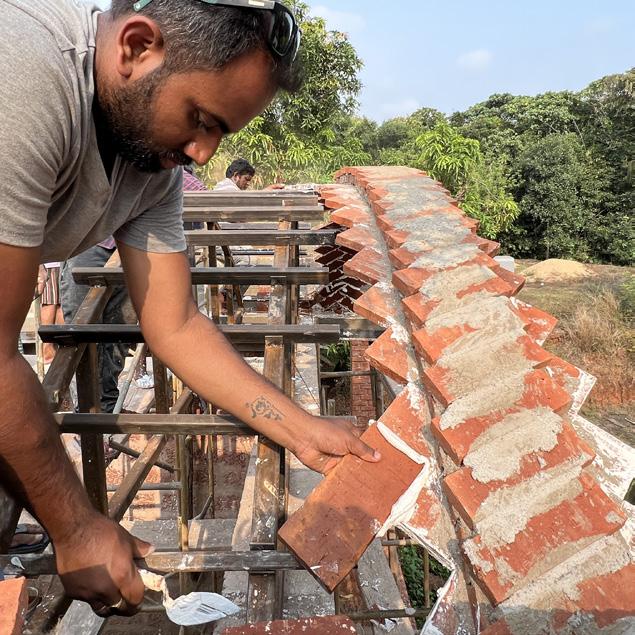


The vault involved 3 layersthe first being a herringbone pattern. This helped the vault to be stable as we were using 1” thick brick tiles. It was made more stable by having 2 additional layers of 45º tilts such that the net thickness of the vault was 5”.

For the track & trail, 3” MS L-angles were pinned into the concrete beam. After construction, they are either left as it is or can be removed upon the design and client’s opinions because the vault is ultimately attached to the beam and not to the track and trail or the formwork.
learnings from the workshop
28
05 natural paints exploration


Malleshwaram | Bengaluru about the workshop
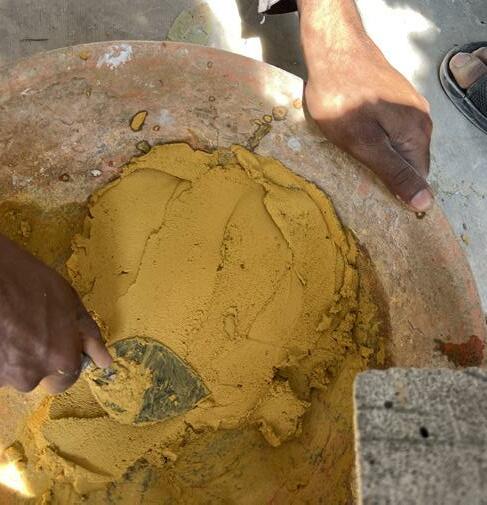
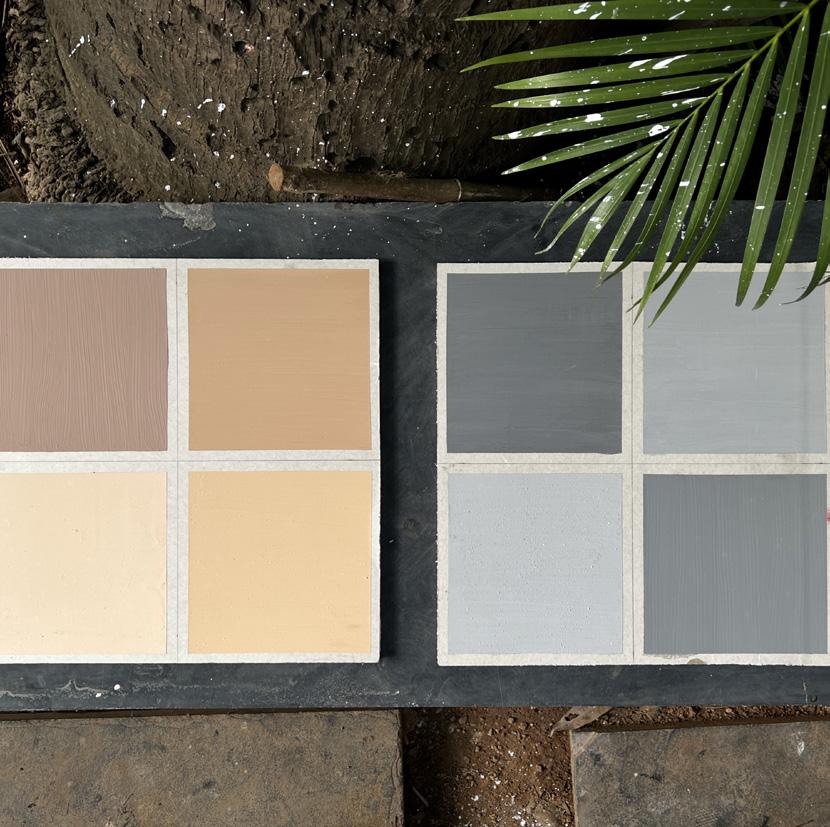
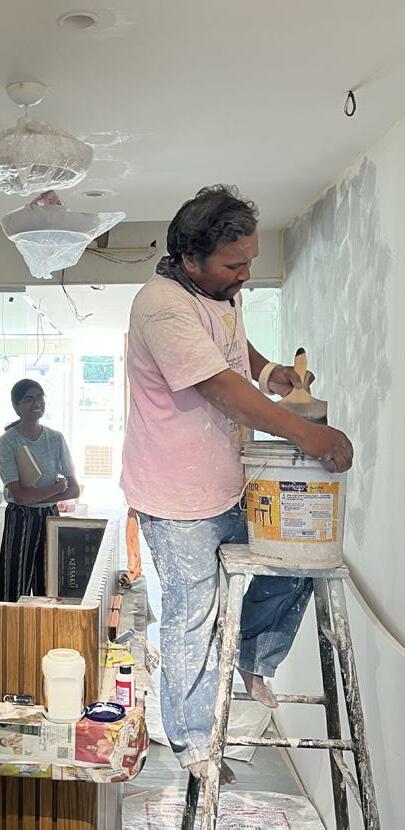
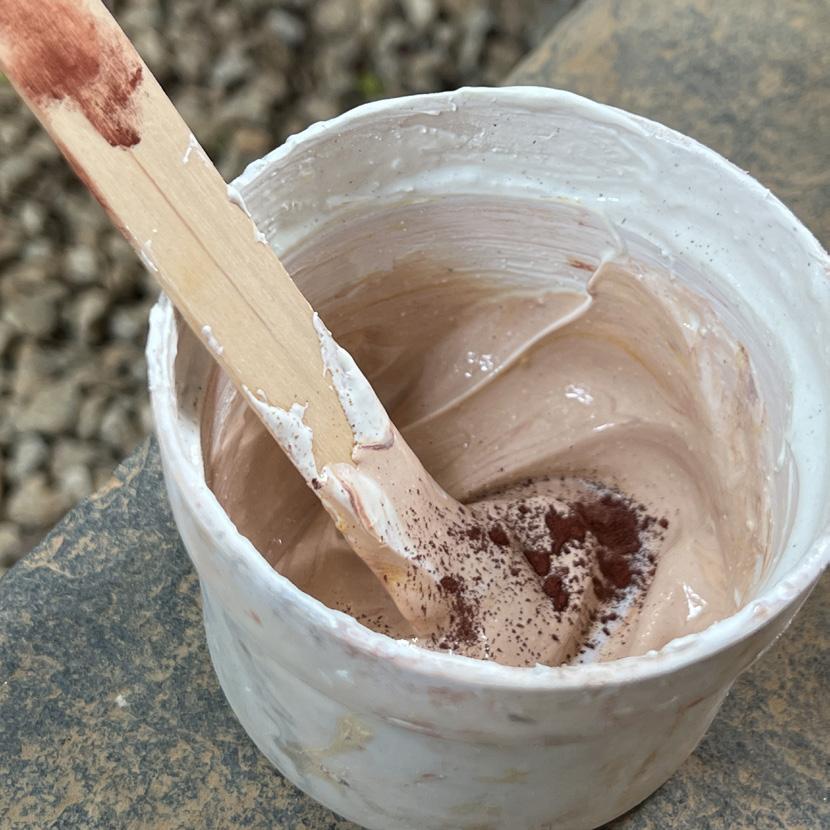
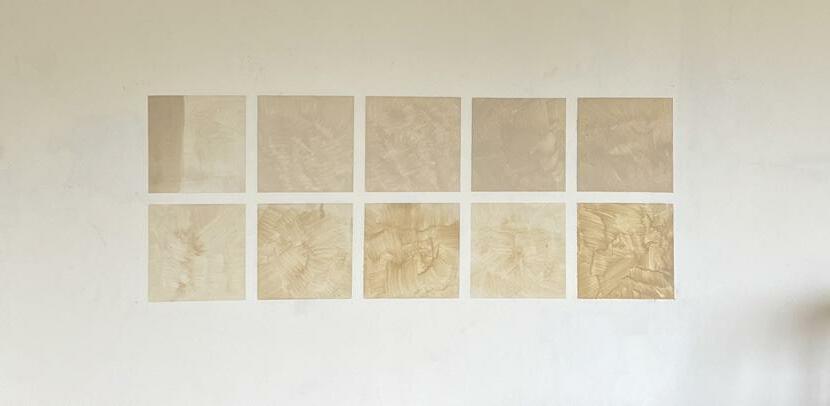
This was an experiment conducted for a client who wanted to explore natural options for paint like finishes for an office interior project. The site predominantly had dry walls. Hence we had to work out a mix that was suitable to dry wall and also end up paint like. We had gotten a few sample references from the client as of to the shades and color tones that we needed to achieve. To make it more naturally percieving we decided to use natural oxides as pigments. This was a 2 phase project - first, a studio experimentation and second, the onsite execution of the achieved mixes. I have discussed the experiences as well as learnings and challenges faced during the process.

29
white cement fevicol lime natural red oxide natural yellow oxide dolomite powder
experimenting at the studio
When we had recieved the brief for coming up with paint like natural finish with the suggested color tones and shades, the main factor was that it should not be a trovel finish. It should be brush applied, like a paint finish. So we needed a liquidy mix. We then arrived at the previously mentioned materials. Over experimenting, it was realized that we needed a proper binding material for the finish to be applied on a ‘dry wall’. Hence we tried out white cement and later added fevicol too.
The concept of granulometry played a crucial role in ensuring the intermixing of these materials with one another. The basic proportions were restricted to ‘lime’, ‘dolomite’, ‘white cement’ & ‘fevicol’. The studio experimentation focused on getting the consistency right predominantly. We achieved the color roughly based on trail and error.
The client wanted variations in 2 dominant shades - ochre & greys. Hence we had used natural oxides as pigments. The red and yellow oxides worked perfectly as they blended in with the lime dolomite mix seamelessly. But the black oxide in powdered form didn’t work out. This was the lime mix having a finer granulometry than the oxide which didn’t allow it to blend in. Hence we ended up using an asian paints stainer to achieve the greys.
Another important learning was that, because the mix contains white cement and fevicol, it lightens as far as twice the color of the wet mix as it dries. This caused a lot of trial and errors as we were not able to be clear as of to how much should the pigment concentration be. But we did find a solution on site for this problem.
on-site execution
The execution part was large in scale compared to the studio experimentation. Hence, we had to do some pre-visit prepearations such as slaking and seiving the lime in large batches. We took all the necessary oxides and pigments to the site and decided to achieve the right mix there, as we could not arrive at a proportion for the pigmentation. The solution for the pigment’s proportion was to make a waterbased solution with oxides and add it gradually to small batches of the lime mixture in mililitres, until the desired mix was achieved. The proportions for the same were calculated for a larger batch later.
The first step was to make samples on the wall so that the client could choose the desired shades. The samples varied in concentration of the pigment alone, keeping the base mixture of lime, dolomite, fevicol and white cement as the same. Once the samples were finalized, we had to mix the same proportions in a large drum using a paint mixer.
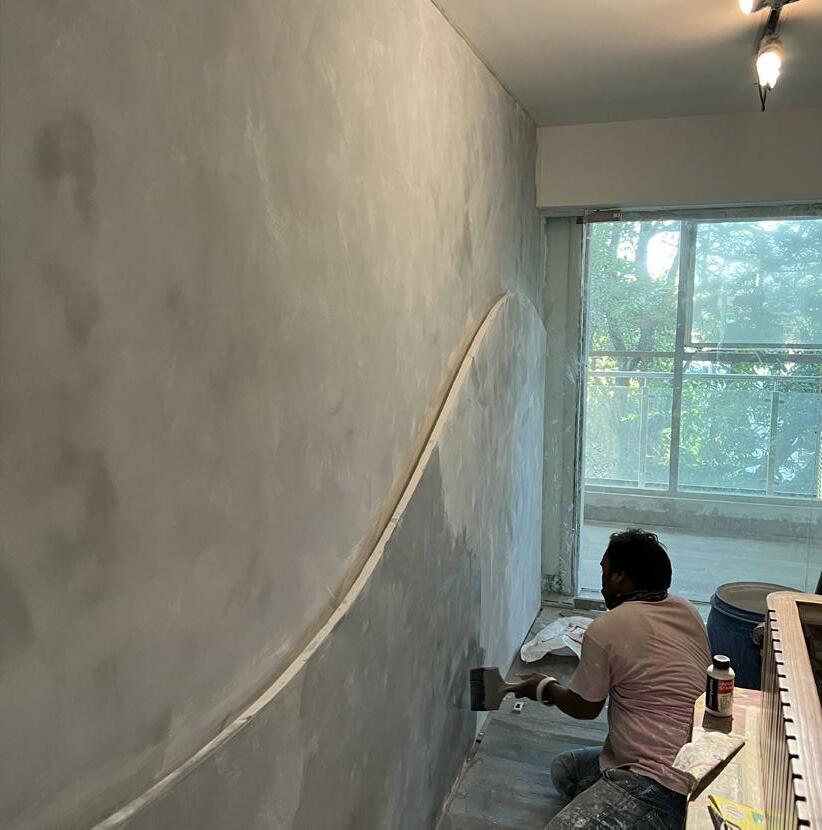

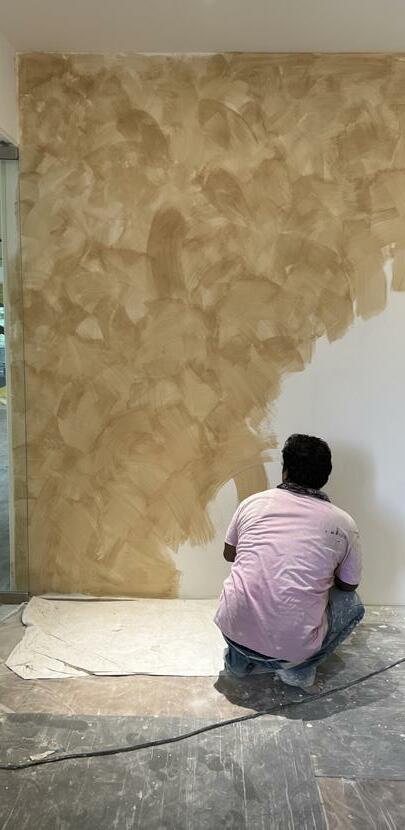


There was a requirement of a visual texture (cloud like) to be achieved. Hence we had to follow a two coat approach with broken brush strokes so that the patchy overlap of boath the coats would result in a cloud like visual texture. The painter had to be guided for the type of brush strokes we needed and he grasped it quickly.
One major learning from site was that a dry wall doesnt absorb or accept this kind of a natural paint finish beyond 2 coats. We had realized this when we tried to fix a few areas with an additional coat but it backfired by resulting in white patches. It then had to be sanded out to blend the finishes on the wall.
30
miscelaneous administrative works
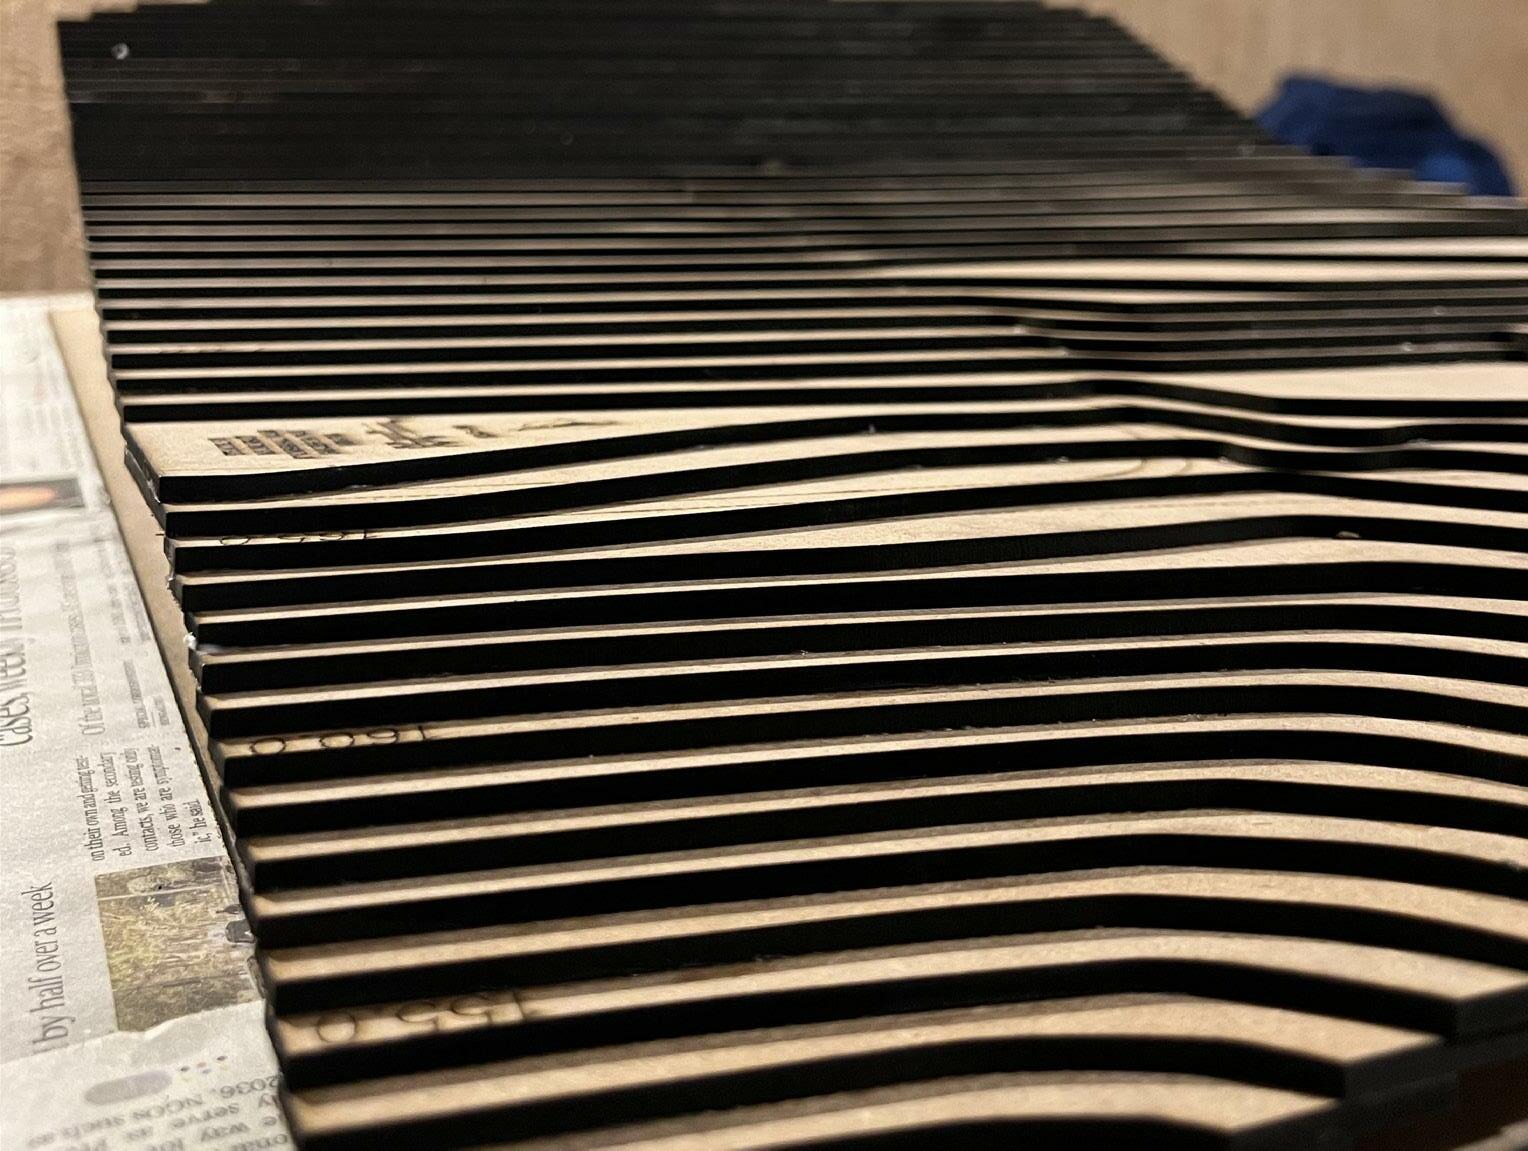
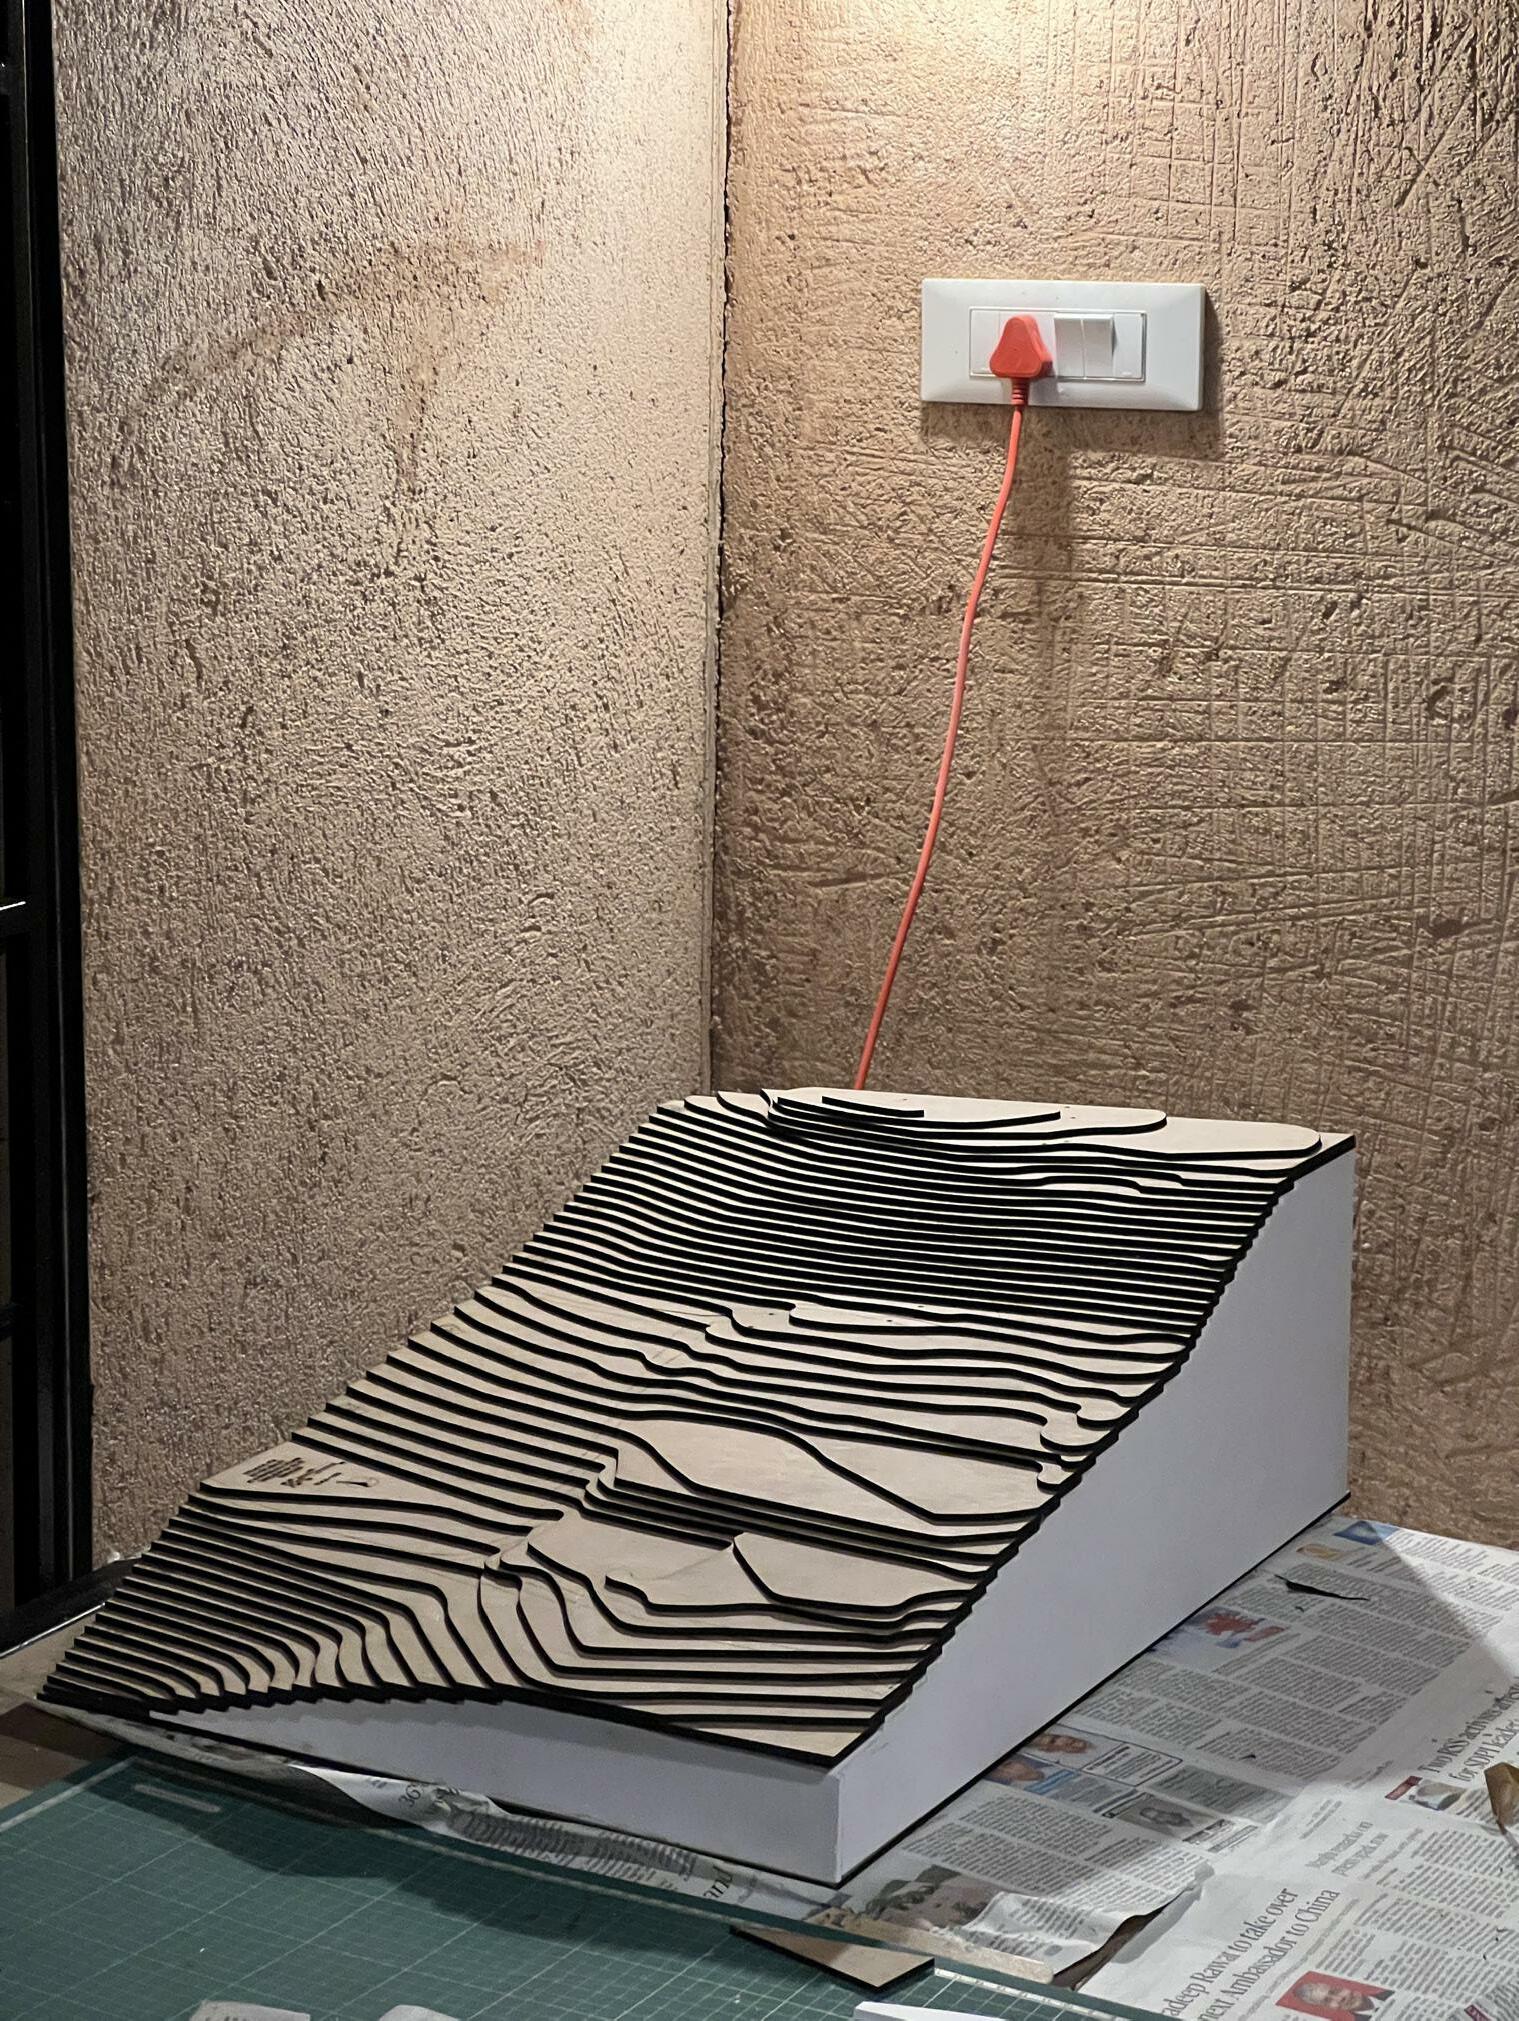
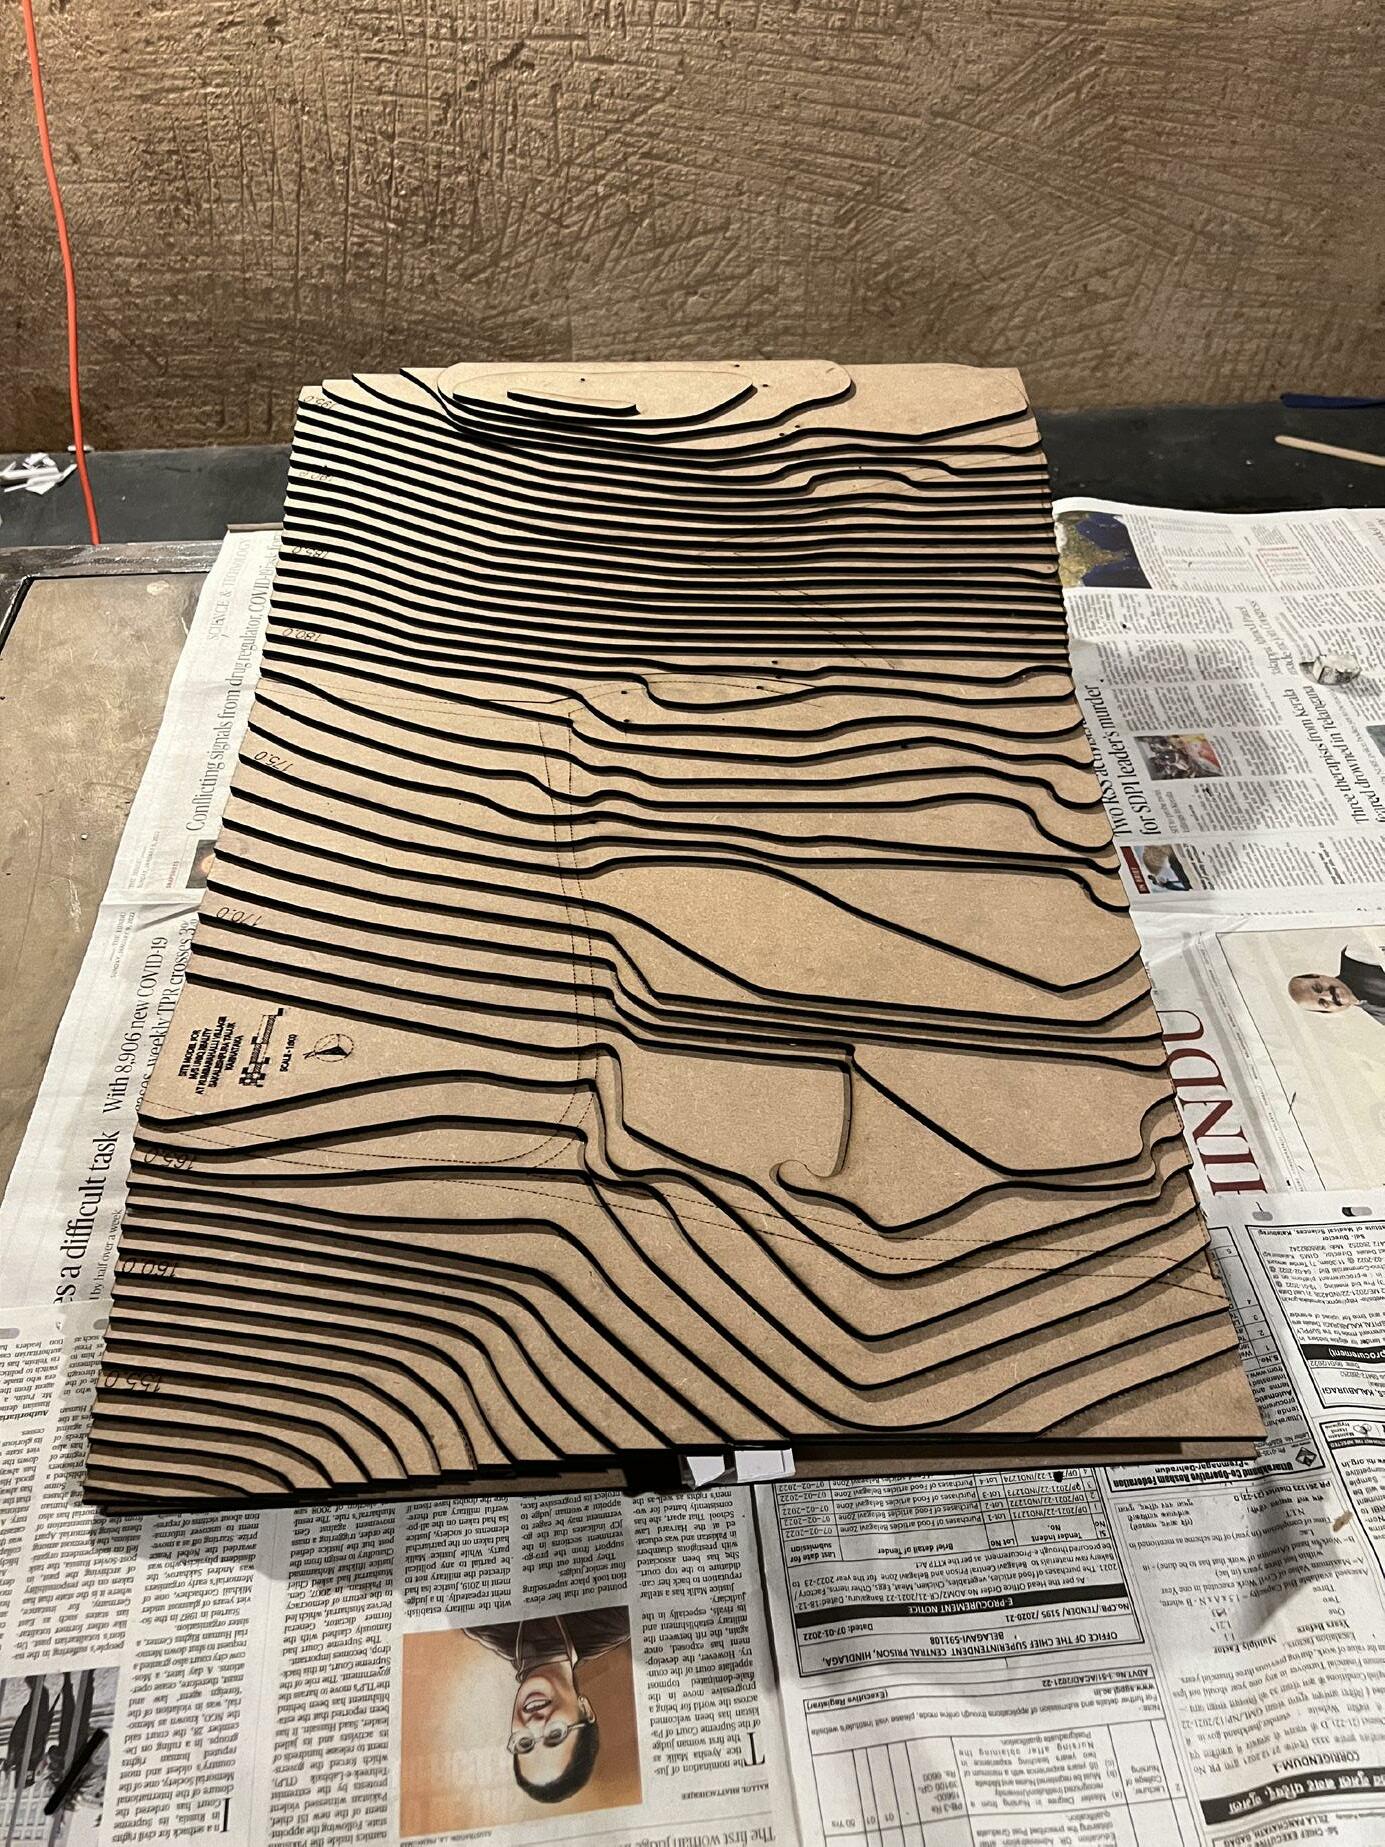
I also had an oportunity to be involved with the administrative works of the office where I made presentations, involved in creating tools for estimation, photographed some of the firm’s works, and produced media content for Vanamu’s social handle. I was also involved in a physical model making project where I had to make a terrain model along with Suman. This section is a compilation of all such administratiive works.
SLIDING DOOR CALCULATOR
COST & QUANTITY OF STEEL PROFILES
Avg Cost of steel per Kg (Rs) 250.00 Door size (opening) Length (m) Width (m) 2.10 1.00 Category of Profiles Cross - Section Kg/m Frame Profile L-Angle 30 x 4 1.80 Shutter Profile Box Section 25 x 2.6 1.69 Mullion Profile L-Angle 30 x 3 1.40
TYPE Size (m) Quantity (nos) Total Length (m) Kg/m Total Weight (Kg) Cost (Rs) FRAME Length 2.10 0 .00 1.80 0 .00 Breadth 2 .00 SHUTTER Length 2.10 1.25 3.875 1.69 6.54875 1,637.19 Breadth 1.00 1.25 MULLION Horizontal 1.00 2 6.2 1.40 8.68 2,170.00 Vertical 2.10 2 Total Cost 3,807.19
OF HARDWARES Category of Hardware Type Rate/ Sqft or /Kg Quantity Unit Area (sft) Rate/sqm Cost (Rs) Shutter Panel Type Toughened Glass 180.00 1.00 #N/A 22.60419 1506.96 4068.75 Lock Type Plantex 7093 Heavy Duty Door Lock Set with latches and Handles 3,499.00 1.00 Per Piece - - 3499 Roller Set Type Sliding Door Wheel, 2Pcs 2" Heavy Duty V Groove Track Wheel 700.00 2.00 Per Piece - - 1400 Tower Bolt type RAB Tower Bolt Stainless Steel Slide Bolt 135.00 1.00 Per Piece - - 135 Total Cost 9102.75 TOTAL COST OF DOOR (Rs) 12909.94 COST PER SQM (Rs) 6147.59
SFT (Rs) 574.54 33
COST
COST PER
MANGALORE TILED ROOF OF SPAN 18' X 12' WITH 100 X 50 X 4 MM RAFTERS, 25 X 25 X 3.2 MM PURLINS WITH 2' OVERHANG
AREA TO BE ROOFED OVERHANGS GRID SPACING
Length (ft) Width (ft) Height (ft) Overhang Across Width (ft) Overhang Across Length (ft) X (ft) Y (ft) 18 12 4.5 2 0 6 6 COST OF LABOUR Category of Work Charge/ Unit Unit Total Charge Tile Laying 20 per Tile 8100.01 Welding 50 per Kg 21336.00 Total Cost 29436.01 COST OF RAFTERS Type of Rafter Kg/m Quantity Running Length (m) Total Weight (Kg) 100 X 50 X 4 8.59 8 3.048 209.459 Total Cost 20945.86 COST OF PURLINS Type of Purlins Kg/m Quantity Running Length (m) Total Weight (Kg) 25 X 25 X 3.2 1.98 20 5.486 217.261 Total Cost 21726.14 COST OF MANGALORE TILES Area of Roof (sft) Cost/ Unit Quantity 360 21 405 Total Cost 8505.01 TOTAL COST OF ROOF 80613.01 COST PER SQFT OF FLOOR AREA (Rs) 373.21 34
visual media content

For visual media content produced, kindly visit the below link to the instagram handle of the firm. I contributed by shooting and editing all the reels in their feed:
https://www.instagram.com/va_namu/

35
36
thank you
