


Academic Authors: Ayushi Jain, Neha Verma
Creative Directors: Bhavna Tripathi, Mangal Singh Rana, Satish
Book Production: Rakesh Kumar Singh
Project Lead: Jatinder Kaur
VP, Learning: Abhishek Bhatnagar
All products and brand names used in this book are trademarks, registered trademarks or trade names of their respective owners.
© Uolo EdTech Private Limited
First impression 2023
Second impression 2024
Third impression 2025
This book is sold subject to the condition that it shall not by way of trade or otherwise, be lent, resold, hired out, or otherwise circulated without the publisher’s prior written consent in any form of binding or cover other than that in which it is published and without a similar condition including this condition being imposed on the subsequent purchaser and without limiting the rights under copyright reserved above, no part of this publication may be reproduced, stored in or introduced into a retrieval system, or transmitted in any form or by any means, electronic, mechanical, photocopying, recording or otherwise, without the prior written permission of both the copyright owner and the above-mentioned publisher of this book.
Book Title: Tekie Computer Science Teacher Manual 1
ISBN: 978-81-984519-3-4
Published by Uolo EdTech Private Limited
Corporate Office Address:
85, Sector 44, Gurugram, Haryana 122003
CIN: U74999DL2017PTC322986
Illustrations and images: www.shutterstock.com, www.stock.adobe.com and www.freepik.com
All suggested use of the internet should be under adult supervision.
Uolo’s Tekie program offers a coding-focused curriculum for grades 1 to 8, preparing students for the technology-driven world. We present a carefully crafted Teacher Manual to assist teachers in delivering effective and engaging lessons to students. Rather than prescribing teaching methods, the manual provides examples and demonstrates how and why teachers can apply these examples in their classes.
The Teacher Manual includes a suggested implementation plan to help teachers navigate the curriculum better throughout the academic year. Within the academic year, the Tekie program prescribes the following types of chapters and sessions:
Familiarisation: this period builds familiarity with the Tekie program and the digital platform.
Theory: these periods are dedicated to the Computer Science Theory chapters. These topics are mostly delivered in the classroom.
Tools: these periods are dedicated to the Computer Tools chapters. These topics involve almost equal numbers of classroom and computer labs sessions.
Coding: these periods are dedicated to the Coding chapters. These topics have more computer lab sessions.
Additional Hands-on Time: these are additional computer lab periods that teachers can use to revise topics or dedicate for completion of projects.
Revision: these are additional classroom periods that teachers can use to revise topics or cover syllabus backlogs.
Each chapter in this manual is structured to provide a comprehensive lesson plan. The chapters are divided into multiple sessions, each following the Warm up, Engage, Build, and Sum up (WEBS) strategy. The Warm up phase sets the stage for learning by connecting to prior knowledge and building curiosity. The Engage phase captures the students’ attention and motivates them to participate actively. In the Build phase, questions from various sections are discussed to build the understanding of the students. Finally, the Sum up phase reinforces learning through easy-to-recall activities and questions. Time duration for each section has been suggested based on the requirements of the students. Additionally, an answer key for every chapter is provided to assist teachers in assessing their students’ understanding and guiding their learning effectively.
Lastly, we understand that the Indian education landscape is quite diverse. To suit the needs of all types of schools, we have built-in extra higher-order chapters in the content books. These extra chapters are clearly marked in the table of contents of this manual. We suggest that the teacher completes the main chapters first and then move to higher-order optional chapters only if there is sufficient time left in the academic year and learners are ready for more challenging content.
We hope that this teacher manual will empower teachers to use the curriculum effectively, support the learning of all students thoroughly, create learning opportunities and design interactive learning environments that cater to the students’ needs and interests.
1 Fun with Computers ������������������������� 1
Natural and Human-made Things
What Are Machines?
Computers
Types of Computers
2 Know Your Computer ��������������������� 10
What Computers Do
What Computers Do: Video
Places Where Computers Are Used
Main Parts of a Computer
Devices
3 Operating a Computer ������������������� 21
Starting a Computer 1
Starting a Computer 2
Shutting Down a Computer 1
Shutting Down a Computer 2
Rules for Using Computers
4 Playing with Mouse ������������������������ 32
Computer Mouse and Its Parts and Uses
Tiny Tech Game 1
Holding and Using a Computer Mouse
Tiny Tech Game 2
5 Let Us Type!�������������������������������������� 42
Keyboard, Alphabet Keys and Number Keys
Tiny Tech Game 1
Special Keys
Tiny Tech Game 2
6 Getting Started with Paint ������������ 51
Introduction to Paint 1
Introduction to Paint 2
Drawing in Paint 1
Drawing in Paint 2
Colouring in Paint and Saving a Drawing 1
Colouring in Paint and Saving a Drawing 2
7 Introduction to AI* ������������������������� 64
What Is AI?
Tiny Tech AI Game
AI Around Us
Fun with AI: Using Quick, Draw! Block Coding I
Fun with Coding
What Is Coding?
Block-based Coding
Problem Solving: Example 1
Problem Solving: Example 2 2
Exploring Code.org
Puzzles 1 and 2
Puzzles 3 and 4
Coding Challenge
3 Following Commands and Sequences*
Command 1
Command 2
Sequence 1
Sequence 2
Coding Challenge 1
Coding Challenge 2

33 Ch-5 Let Us Type! Keyboard, Alphabet Keys, and Number Keys
34 Ch-5 Let Us Type! Tiny Tech Game 1
35 Ch-5 Let Us Type! Special Keys
36 Ch-5 Let Us Type! Tiny Tech Game 2
37 Revision Period 6
38 Additional Hands-on Time 4
39 Ch-1 Fun with Coding What is Coding?
40 Ch-1 Fun with Coding
41 Ch-1 Fun with Coding Problem Solving: Example 1
42 Ch-1 Fun with Coding Problem Solving: Example 2
43 Ch-2 A Tour to Code.org Puzzle code studio
44 Ch-2 A Tour to Code.org Puzzle 1 and 2 Coding Lab
45 Ch-2 A Tour to Code.org Puzzle 3 and 4
46 Ch-2 A Tour to Code.org Coding Challenge 1
47
48
49 Ch-3 Following Commands and Sequences* Command 1
50 Ch-3 Following Commands and Sequences* Command 2
51 Ch-3 Following Commands and Sequences* Sequence 1 Coding Classroom
52 Ch-3 Following Commands and Sequences* Sequence 2 Coding Lab
53 Ch-3 Following Commands and Sequences* Coding Challenge 1
54 Ch-3 Following Commands and Sequences* Coding Challenge 2
55
58 Ch-7 Introduction to AI* Fun with AI: Using Quick, Draw!
59 Revision Period 7
60 Additional Hands-on Time 6
Handson Time Lab * Higher-order optional chapters
In Avora, a magical place, Mel and Conji, new classmates, meet on the first day of school. Mel shows Conji his smartwatch and tablet, explaining how robots use them. In the Computer Lab, Mel teaches Conji about computers, mobiles, tablets, and smartwatches. Conji, a young wizard, shares his magic hat and spells in the Magic Classroom, where spell books need magic to open. Mel notices similarities between magic books and computers—both have special steps to use.
Back in the Computer Lab, Mel teaches Conji how to clean the mouse and keyboard. When Conji accidentally drops the mouse, Elder Robot fixes it. Grateful, Mel and Conji create a “Thank You” card for Elder Robot using Paint software. Elder Robot loves the card and gifts them a smart speaker, Stylo, that responds to voice commands. He explains AI (Artificial Intelligence), and Mel and Conji are amazed. They end the day learning and having fun with Stylo.
● It is the first day at Avora School.
● Conji, a smart young wizard, meets Mel, a smart young robot who knows a lot about computers.
● Conji is fascinated by the watch Mel is wearing, and it turns out to be a smartwatch (a small computer).
● Then, Conji asks Mel where her books are. She says they are all on her tablet.
● Conji is unaware of the tablet and asks Mel what a tablet is. Mel says a tablet is like a small computer that can fit in our hands.
● Mel further explains to Conji that a computer is a machine that makes our work easier.
● Mel also tells him that they have a computer lab in school, and they went to see the computer lab.
● Conji is happy to see the different types of machines in the lab.
● Mel shows a computer, mobile, tablet, laptop, and smartwatches to Conji.
This chapter is divided into the following classroom sessions
1. Natural and Human-made Things
2. What Are Machines?
3. Computers
4. Types of Computers
At the end of the session, the students will be able to:
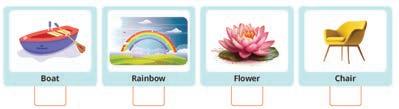
● describe natural things.
● describe human-made things.
Keywords
● Natural Things: Some things like trees, animals, mountains, and rivers are present in nature. These are called natural things.
● Human-made Things: Humans make things like buildings, cars, and umbrella. These are called human-made things.
Warm Up Engage Build Sum Up
Ask the students about different things around them.
Discuss a few examples of things such as buildings, cars, trees, etc., and then describe them as natural and human-made things.
Action Plan
Group discussion Conclude the concepts
Warm Up
● Ask the students about different things around them.
● Now, build the concept by asking the students if they know whether these things are created by humans or nature. Then introduce them to natural and human-made things.
Engage
Explain the following concepts:
Describe natural things. Tell the students that things present in nature like trees, animals, mountains, and rivers are called natural things as given on page 6.
Describe human-made things.
Tell the students that things made by humans are called human-made things as given on page 6.
● Read aloud the questions provided in the Do It Yourself 1A Question 1 section and encourage students to solve them. Instruct them to write the answers in their book.
Correct Responses:
● Conduct a group discussion in the class among the students on the topic “What is the difference between natural and man-made objects?” as mentioned in the Discuss section on page 6.
Correct Response: Some things are present in nature like trees, animals, mountains, and rivers. These are called natural things.
Some things are made by humans like buildings, cars, and umbrella. These are called human-made things.
● Conclude the session by summarising that things that are present in nature like trees, animals, mountains, and rivers are called natural things and things made by humans such as buildings, cars, umbrella, etc., are called human-made things.
● Assign the following questions from the Chapter Checkup given at the end of the chapter to attempt in classroom.
B. Tick the Correct Option: Question 1
C. Who Am I?: Question 1
D. Write T for True and F for False: Question 4
E. Answer the Following Questions: Question 1
At the end of the session, the students will be able to:
● describe machines.
Keyword
● Machines: Machines are human-made things that help us do different kinds of work.
Ask the students about the machines they have seen at home such as washing machine, refrigerator, microwave.
Tell them what machines are. Group discussion Conclude the concepts 5 mins 15 mins 7 mins 3 mins
5 mins
Warm Up
● Ask the students about the machines they have seen at home such as washing machine, refrigerator, microwave, etc. Then tell what functions some of these machines perform. For example, a washing machine helps us wash our clothes.
15 mins
Engage
Explain the following concepts:
Learning Outcome
Explanation
Describe machines. Tell the students what a machine is. Also, tell them that some machines need electricity, some need fuel and some need human power to run, as given on page 7.
Ask the following questions to the students to check their understanding.
● Name three machines you see every day around you.
Possible Responses: Car, mobile, rickshaw
● Categorise the given machines on the basis of whether they require electricity, fuel or human power to run: Aeroplane, cycle, television.
Correct Responses:
Aeroplane: Fuel
Cycle: Human power
Television: Electricity
● Conduct a group discussion in the class among the students on the topic ‘My Favourite Machine’.
Possible Responses: Calculator, mobile, refrigerator
● Conclude the session by summarising that machines are human-made things that help us do different kinds of work. Machines run on electricity, fuel, and human power.
● Assign the following questions from the Chapter Checkup given at the end of the chapter to attempt in classroom.
A. Fill in the Blanks: Question 1
B. Tick the Correct Option: Question 2
C. Who Am I?: Question 2
E. Answer the Following Questions: Question 2
F. Apply Your Learning: Questions 1 and 3
At the end of the session, the students will be able to:
● describe a computer and do things using a computer.
● describe how are computers different from us.
Keyword
Ask the students to name some machines that run on electricity. Explain to the students what a computer is. Tell them things we can do using a computer. Also, tell them how are computers different from us.
● Computer: A computer is a machine. It needs electricity to work. 5 mins Warm
Think and Tell Conclude the concepts
● Ask students to name some machines that run on electricity. Now, build the concept by discussing computer is also a machine that runs on electricity.
Explain the following concepts:
Learning Outcomes
Describe a computer and what things can be done using a computer.
Describe how are computers different from us.
Explanation
Tell the students that a computer is a machine that needs electricity to work. Also, tell them computers are used to learn new things, listen to music, etc., as given on page 8.
Tell them that a computer is a smart machine that works very fast, never gets tired, etc., as discussed on page 9.
● Read aloud the questions provided in the Do It Yourself 1A Question 2 section and encourage students to solve them. Instruct them to write the answers in their book.
Correct Responses: 2. a. F b. T c. T Build 7
● Ask the students to answer the question “What can be other things you can do using a computer?” asked in the Think and Tell section given on page 8.
Possible Responses: see our pictures, watch cartoons, make drawing, etc. Sum
● Conclude the session by summarising that a computer is a machine that needs electricity to work. Computers are used to learn new things, listen to music, etc. Also revise with them that a computer is a smart machine that works very fast, never gets tired, does not make any mistakes, and can store pictures, letters, and videos.
● Assign the following questions from the Chapter Checkup given at the end of the chapter to attempt in classroom.
A. Fill in the Blanks: Questions 2 and 3
B. Tick the Correct Option: Question 3
C. Who Am I?: Question 3
E. Answer the Following Questions: Question 3
At the end of the session, the students will be able to:
● describe different types of computers.
Ask the students where they have seen computers. Describe different types of computers.
Group discussion Conclude the concepts
● Ask the students where they have seen the computers.
● Now, build the concept of types of computers by asking students if they know that a smartphone is also a type of computer.
● Also tell them that a desktop, laptop, tablet, and a smartphone are different types of computers.
Explain the following concepts:
Learning Outcome
Explanation
Describe different types of computers. Tell the students that there are many different types of computers such as desktops, laptops, tablets, and smartphones. Also, tell them about the features of each of these types of computers, as given on page 10.
● Read aloud the questions provided in the Do It Yourself 1B section and encourage students to solve them. Instruct them to write the answers in their book. Correct Responses:
● Conduct a group discussion in the class among the students on the topic “Can computers be smaller than smartphones?” as mentioned in the Discuss section on page 10. Possible Responses: Yes/No
● Conclude the session by summarising that there are many different types of computers such as desktops, laptops, tablets, and smartphones.
● Assign the following questions from the Chapter Checkup given at the end of the chapter to attempt in classroom.
A. Fill in the Blanks: Question 4
C. Who Am I?: Question 4
D. Write T for True and F for False: Questions 1, 2, and 3
E. Answer the Following Questions: Question 4
F. Apply Your Learning: Question 2
In Avora, a magical place, Mel and Conji, new classmates, meet on the first day of school. Mel shows Conji his smartwatch and tablet, explaining how robots use them. In the Computer Lab, Mel teaches Conji about computers, mobiles, tablets and smartwatches. Conji, a young wizard, shares his magic hat and spells in the Magic Classroom, where spell books need magic to open. Mel notices similarities between magic books and computers—both have special steps to use.
Back in the Computer Lab, Mel teaches Conji how to clean the mouse and keyboard. When Conji accidentally drops the mouse, Elder Robot fixes it. Grateful, Mel and Conji create a “Thank You” card for Elder Robot using Paint software. Elder Robot loves the card and gives them a smart speaker, Stylo, that responds to voice commands. He explains AI (Artificial Intelligence), and Mel and Conji are amazed. They end the day learning and having fun with Stylo.
● Mel and Conji are in the Magic Classroom.
● Conji tells Mel that magic drinks are drinks that have powers.
● Mel then asks Conji how people do magic with the magic wand.
● Conji tells Mel that they say their spells, the words they speak to do magic and wave the wands.
● Conji further says that they look for the magic spells in the spell books.
● Mel then tells Conji that just as magic has many uses, computers also have many uses.
● Mel then takes Conji to the computer lab to show what all a computer can do.
This chapter is divided into the following classroom and lab sessions
1. What Computers Do
2. What Computers Do: Video
3. Places Where Computers Are Used
4. Main Parts of a Computer
5. Devices
At the end of the session, the students will be able to:
● describe about the activities we can do on a computer.
Warm Up Engage Build Sum Up
Ask the students what a computer is.
Ask them to name a few things that they keep in their school bag. Describe to them what activities we can do on a computer. Group Discussion Conclude the concepts
● Ask the students what a computer is.
● Ask them to name a few things that they keep in their school bag.
● Tell them as we do different kinds of work with each item in our school bag like books, bottles, pencils, and crayons. In the same way, a computer also has many things in it that lets us do different activities. 15 mins Engage
Explain the following concepts:
Learning Outcome
Describe about the activities we can do on a computer.
Explanation
Describe to the students that we can draw and colour, learn new things, play games, etc., on a computer, as given on page 20.
● Read aloud the questions provided in the Do It Yourself 2A Question 1 section and encourage the students to solve the questions. Instruct the students to write the answers in their book.
Correct Responses: 1. a. T b. F c. T
● Conduct a group discussion in the class among the students based on the topic “What are some of the new things you wish to learn on a computer?” provided in the Discuss section, as mentioned on page 20.
Possible Responses: Learn block-based coding, touch typing, etc.
Sum Up
3 mins
● Conclude the session by summarising that we can use a computer to do different activities such as learn new things, draw and colour, listen to music, send messages, watch videos, etc.
● Assign the following questions from the Chapter Checkup given at the end of the chapter to attempt in classroom.
A. Fill in the Blanks: Questions 1 and 2
D. Write T for True and F for False: Question 2
E. Answer the following questions: Question 1
At the end of the session, the students will be able to:
● describe about the activities we can do on a computer.
Let the students watch the video related to the topic on the digital panel.
Describe to them what activities we can do on a computer. Attempt the activity on the Assignment page. Conclude the concepts
Warm Up
● Instruct the students to go to the Tekie’s Digital platform and open a Lab session on What Computers Do: Video.
● Show the video and discuss the concepts shown on the slides in the panel.
Engage
Explain the following concepts:
Learning Outcome
Describe the activities we can do on a computer.
Explanation
Describe to the students that we can draw and colour, learn new things, play games, etc., on a computer, as given on page 20.
● Discuss the concepts shown in the video and ask students questions about what they learnt from it.
● Instruct the students to attempt the assignment by clicking on the Assignment tab.
● Explain the activity to the students.
Sum Up
3 mins
● Conclude the session by summarising that we can use a computer to do different activities such as learn new things, draw and colour, listen to music, send messages, watch videos, etc.
At the end of the session, the students will be able to:
● describe the uses of computers at different places.
Ask the student to name the places where they have seen computers.
Describe uses of computers at different places. Group Discussion Conclude the concepts
● Ask the students to name the places where they have seen computers.
● Tell them that computers are used at various places, such as offices, schools, shops, airports, etc.
Explain the following concepts:
Learning Outcome
Describe the uses of computers at different places.
Explanation
Describe to the students that we go to different places like restaurants, shopping malls, and airports. People use computers at all these places for different kinds of work, such as at airports to check flight information, schools to teach, etc., as given on page 21.
● Read aloud the questions provided in the Do It Yourself 2A Question 2 section and encourage the students to solve the questions. Instruct the students to write the answers in their book.
Correct Responses:
2. a. To teach and learn.
b. To book tickets.
c. To play on the field.
Build

7 mins
● Conduct a group discussion in the class among the students on the topic ‘Use of Computers at Home’. Possible Responses: Talk to friends and family, play games, watch cartoons, etc.
3 mins
Sum Up
● Conclude the session by summarising that computers can be used at airports and railway stations to check flights and train information, offices to do important work and send messages, hospitals to keep information of the patients, etc.
● Assign the following questions from the Chapter Checkup given at the end of the chapter to attempt in the classroom.
B. Tick the Correct Option: Question 1
C. Who Am I?: Questions 1 and 2
D. Write T for True and F for False: Question 3
F. Apply Your Learning: Questions 1 and 2
At the end of the session, the students will be able to:
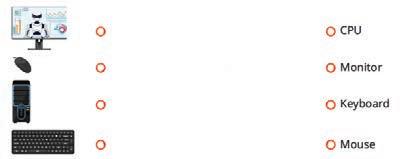
● describe the four main parts of a computer: monitor, CPU, keyboard, and mouse.
Keywords
● Monitor: A monitor looks like a TV screen. It shows us what we are doing on a computer.
● CPU (Central Processing Unit): It is like the brain of a computer.
● Keyboard: A keyboard helps us write on a computer.
● Mouse: A mouse allows us point to and select different things on the monitor.
• Ask the students the names of different parts of the body.
• Ask the students how they write in their notebooks.
• Ask the students how they point to some words in their book.
• Relate our body parts to the computer’s parts and tell them about the monitor and the CPU.
• Tell the students that with the help of the keyboard we can write on a computer.
• Tell the students that on a computer, we point to a line or word with the help of a mouse.
● Ask the students the names of different parts of the body. Relate our body parts to the computer’s parts and tell them about the monitor and the CPU.
● Ask the students how they write in their notebooks.
● Ask the students how they point to some words in their book.
● Now, explain to them about the keyboard and the mouse.
Explain the following concepts:
Describe four main parts of a computer: monitor, CPU, keyboard, and mouse.
Describe to the students that the monitor looks like a TV screen. It shows us what we are doing on a computer, and the CPU is like the brain of a computer. Also tell them that the keyboard helps us write on a computer and the mouse allows us point to and select different things on the monitor, as given on pages 22 and 23.
Read aloud the questions provided in the Do It Yourself 2B section and encourage the students to solve the questions. Instruct the students to write the answers in their book.
Correct Response: 15 mins
Build
7 mins
● Conduct a group discussion in the class among the students on the topic ‘Have you seen a monitor before?’.
Correct Response: Yes. I have seen a monitor at home. I watch cartoons on it.
3 mins
● Conclude the session by summarising that the monitor, CPU, keyboard, and mouse are the four important parts of a computer. The monitor looks like a TV screen, and the CPU is the brain of a computer. The keyboard helps us write on a computer and the mouse allows us point to and select different things on the monitor.
● Assign the following questions from the Chapter Checkup given at the end of the chapter to complete in the classroom.
A. Fill in the Blanks: Question 4
C. Who Am I?: Questions 3 and 4
F. Apply your Learning: Question 4
At the end of the session, the students will be able to:
● describe the input devices.
● describe the output devices.
● describe the storage devices.
Keywords
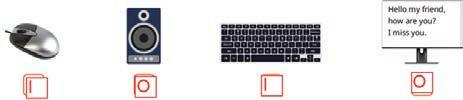
● Input Devices: These devices help us tell the computer what to do.
● Output Devices: These devices help the computer to share information with us by displaying the final output.
● Storage Devices: These devices help the computer store information.
• Ask the students what a keyboard is.
• Ask the students where they store their clothes and books.
• Explain to them that a keyboard is an input device. Then explain to them the input and output devices by giving examples of each.
• Describe to the students that storage devices are like their wardrobe where they keep their toys, clothes, and books.
Group discussion Conclude the concepts
5 mins
● Ask them what a keyboard is and then build the concept by defining the input and output devices.
● Ask the students where they store their clothes and books. Describe to the students that storage devices are like their wardrobe where they keep their toys, clothes, and books.
Explain the following concepts:
Describe the input devices.
Describe the output devices.
Describe the storage devices of computers.
Explain to the students that input devices help us to tell the computer what we want to do. The keyboard and mouse are input devices, as given on page 24.
Explain to the students that output devices help the computer share information with us by displaying the final output. Monitor, speaker, and printer are output devices, as given on page 24.
Describe to the students that a computer stores information on storage devices. A compact disc, pen drive, hard disk, and memory card are some examples of storage devices, as given on pages 24 and 25.
● Read aloud the question provided in the Do It Yourself 2C section. Instruct the students to write the answers in their book.
Correct Responses:

7 mins
● Conduct a group discussion in the class among the students on the topic ‘Give examples of input and output devices’.
Correct Responses: Input: Keyboard, mouse
Output: Monitor, speaker Sum Up
3 mins
● Conclude the session by summarising that the keyboard and mouse are input devices, whereas the monitor, printer, and speaker are output devices.
● Assign the following questions from the Chapter Checkup given at the end of the chapter to complete in the classroom.
A. Fill in the Blanks: Question 3
B. Tick the Correct Option: Question 2
D. Write T for True and F for False: Questions 1 and 4
E. Answer the Following Questions: Question 2
F. Apply Your Learning: Question 3
In Avora, a magical place, Mel and Conji, new classmates, meet on the first day of school. Mel shows Conji his smartwatch and tablet, explaining how robots use them. In the Computer Lab, Mel teaches Conji about computers, mobiles, tablets and smartwatches. Conji, a young wizard, shares his magic hat and spells in the Magic Classroom, where spell books need magic to open. Mel notices similarities between magic books and computers—both have special steps to use.
Back in the Computer Lab, Mel teaches Conji how to clean the mouse and keyboard. When Conji accidentally drops the mouse, Elder Robot fixes it. Grateful, Mel and Conji create a “Thank You” card for Elder Robot using Paint software. Elder Robot loves the card and gives them a smart speaker, Stylo, that responds to voice commands. He explains AI (Artificial Intelligence), and Mel and Conji are amazed. They end the day learning and having fun with Stylo.
● Mel and Conji are running a race on the school playground.
● Mel says that if she wins, Conji must teach her about the magic books in the Magic Library. Conji wants Mel to teach him about computers.
● After the race, Mel is not tired. She says she is like a computer that does not get tired, even if it works hard.
● They run to the Magical Library, where Mel is excited to see the magical books.
● When Mel tries to read a book, Conji explains that a spell is needed to open and close it.
● Mel says it’s the same with computers. We need to follow steps to start and shut them down. Mel then teaches Conji how to use one.
This chapter is divided into the following classroom and lab sessions
1. Starting a Computer 1
2. Starting a Computer 2
3. Shutting Down a Computer 1
4. Shutting Down a Computer 2
5. Rules for Using Computers
At the end of the session, the students will be able to:
Ask the students if they know how to turn on the television at their homes.
● start a computer. 5
Explain to the students the steps to start a computer. Think and Tell Conclude the concepts
● Ask the students if they know how to turn on the television at their homes.
● Now tell them that they can start the computers by following certain steps.
Explain the following concepts:
Start a Computer. Explain to the students that there are four steps needed to start a computer:
Switching on the main power switch
Pressing the ON button on the CPU
Pressing the Power button on the monitor, and waiting till the Windows screen appears, as given on page 33.
● Read aloud the questions provided in the Do It Yourself 3A section. Instruct the students to write the answers in their book.
Correct Responses:
● Ask the students to give the answer to the question “What will happen if we just switch on the main power and then turn on the monitor? Will the computer start?” asked in the Think and Tell section, as given on page 33.
Correct Response: No, the computer will not start. We also need to switch on the CPU to start the computer. Sum Up
● Conclude the session by summarising that to start a computer, we need to switch on the main power switch, then press the ON button of the CPU and finally, press the ON button of the monitor.
● Assign the following questions from the Chapter Checkup given at the end of the chapter to attempt in the classroom.
A. Fill in the Blanks: Questions 1, 2 and 5
B. Tick the Correct Option: Question 1
C. Who Am I?: Question 1
D. Write T for True and F for False: Question 5
E. Answer the Following Questions: Question 1
F. Apply Your Learning: Question 4
At the end of the session, the students will be able to:
● start a computer.
Let the students watch the video or the learning slides related to the topic on the digital panel.
Demonstrate to the students the steps to start a computer.
Attempt the activity on the Assignment Page.
Conclude the concepts
5 mins
Warm Up
● Instruct the students to go to the Tekie’s Digital platform and open a Lab session on Starting a Computer 2
● Show the learning slides or the video and discuss the concepts explained on the panel.
Explain the following concepts:
Learning Outcome
15 mins
Explanation
Start a Computer. Explain to the students that there are four steps needed to start a computer:
Switching on the main power switch
Pressing the ON button on the CPU
Pressing the Power button on the monitor, and
Waiting till the Windows screen appears, as given on page 33.
● Ask the questions provided on the slides one by one to assess the students’ understanding. Discuss the answers to the questions with the students. If necessary, ask additional relevant questions.
● Instruct the students to attempt the assignment by clicking on the Assignment tab.
● Explain the activity to the students. Sum Up
3 mins
● Conclude the session by summarising that to start a computer, we need to switching on the main power switch, press the ON button on the CPU, press the Power button on the monitor, and wait till the Windows screen appears.
At the end of the session, the students will be able to:
● shut down a computer.
Keyword
● Shut down: To shut down a computer means to turn it off.
Ask the students if they keep the television on for the whole day or they switch it off after watching it for some time.
Explain to the students how to shut down a computer. Also, explain to them why they should not turn off the computer directly.
Group discussion Conclude the concepts
Action Plan
Warm Up
● Ask the students if they keep the television on for the whole day or if they switch it off after watching it for some time.
● Now, tell them that they should shut down the computer when it is not in use.
Engage
Explain the following concepts:
Learning Outcome
Explanation
Shut down a computer. Describe the steps of shutting down a computer: clicking on the Start menu, clicking on the Power icon, and clicking on the Shut down option, as given on page 34. Also, explain to the students if they turn off the computer directly, then it may get damaged.
● Read aloud the question provided in the Do It Yourself 3B Question 2 section. Instruct the students to write the answers in their book.
Correct Response: 2. F
● Conduct a group discussion in the class among the students based on the topic ‘Should we leave the computer on forever?’
Possible Responses: Yes/No
Correct Response: No, we should not leave the computer on forever. We should shut it down when it is not in use. Sum Up 3
● Conclude the session by summarising that we should shut down a computer properly and always use the mentioned steps to shut down a computer.
● Assign the following questions from the Chapter Checkup given at the end of the chapter to attempt in the classroom.
A. Fill in the Blanks: Question 3
B. Tick the Correct Option: Question 2
C. Who Am I?: Question 3
D. Write T for True and F for False: Questions 1 and 4
E. Answer the Following Questions: Question 2
F. Apply Your Learning: Question 1
At the end of the session, the students will be able to:
● shut down a computer.
Let the students watch the video or the learning slides related to the topic on the digital panel.
Demonstrate to the students the steps to shut down a computer. Attempt the activity on the Assignment Page.
Conclude the concepts
Action Plan
5 mins
Warm Up
● Instruct the students to go to the Tekie’s Digital platform and open a Lab session on Shutting Down a Computer 2.
● Show the learning slides or the video and discuss the concepts explained on the panel.
Engage
Explain the following concepts:
Learning Outcome
15 mins
Explanation
Shut down a computer. Describe the steps of shutting down a computer: clicking on the Start menu, clicking on the Power icon, and clicking on the Shut down option, as given on page 34. Also, explain to the students if they turn off the computer directly, then it may get damaged.
● Ask the questions provided on the slides one by one to assess the students’ understanding. Discuss the answers to the questions with the students. If necessary, ask additional relevant questions.
● Instruct the students to attempt the assignment by clicking on the Assignment tab.
● Explain the activity to the students.
● Conclude the session by summarising that we should shut down a computer properly and always use the mentioned steps to shut down a computer.
At the end of the session, the students will be able to:
● follow the do’s while using a computer.
● learn what not to do while using a computer.
Keywords
● Do’s: Do’s are the things we must do.
Warm Up
Ask the students if they follow some rules while playing in the playground.
Then tell them that while using a computer, they must follow some do’s and don’ts.
● Don’ts: Don’ts are the things we must never do. 5 mins
Warm Up
Engage Build Sum Up
Explain to the students the various do’s and don’ts one must follow while using a computer.
Group discussion Conclude the concepts
Action Plan
● Ask the students if they follow some rules while playing in the playground.
● Then tell them that while using a computer, they must follow some do’s and don’ts.
Engage
Explain the following concepts:
Learning Outcome
Follow the do’s while using a computer.
Learn what not to do while using a computer.
Explanation
Describe some do’s that must be followed while using a computer, such as keeping the computer clean and pressing the keyboard keys gently, etc., as given on page 35.
Describe some don’ts that must be followed while using a computer, such as not to switch off the CPU directly, not to touch the computer devices with wet and dirty hands, and not to pull the wires from the computer, etc., as given on page 35.
● Read aloud questions 1, 3 and 4 provided in the Do It Yourself 3B section. Instruct the students to write the answers in their book.
Correct Responses:
1. F 3. T 4. T
Build
7 mins
● Conduct a group discussion in the class among the students based on the topic ‘Is it necessary to follow rules to operate computers?’.
Correct Response: Yes, it is necessary to follow the rules to operate computers, as they function properly when we take good care of them.
3 mins
Sum Up
● Conclude the session by summarising that we should follow some do’s while using a computer, such as keeping the computer clean and pressing the keyboard keys gently, etc. We should also follow some don’ts while using a computer, such as not to switch off the CPU directly, not to touch the computer devices with wet and dirty hands, and not to pull the wires from the computer, etc.
● Assign the following questions from the Chapter Checkup given at the end of the chapter to attempt in the classroom.
A. Fill in the Blanks: Question 4
B. Tick the Correct Option: Question 3
C. Who Am I?: Questions 2 and 4
D. Write T for True and F for False: Questions 2 and 3
E. Answer the Following Questions: Questions 3 and 4
F. Apply Your Learning: Questions 2 and 3
In Avora, a magical place, Mel and Conji, new classmates, meet on the first day of school. Mel shows Conji his smartwatch and tablet, explaining how robots use them. In the Computer Lab, Mel teaches Conji about computers, mobiles, tablets and smartwatches. Conji, a young wizard, shares his magic hat and spells in the Magic Classroom, where spell books need magic to open. Mel notices similarities between magic books and computers—both have special steps to use.
Back in the Computer Lab, Mel teaches Conji how to clean the mouse and keyboard. When Conji accidentally drops the mouse, Elder Robot fixes it. Grateful, Mel and Conji create a “Thank You” card for Elder Robot using Paint software. Elder Robot loves the card and gives them a smart speaker, Stylo, that responds to voice commands. He explains AI (Artificial Intelligence), and Mel and Conji are amazed. They end the day learning and having fun with Stylo.
● Mel is cleaning the Computer Lab when Conji enters.
● On being asked why Mel is cleaning the computer lab, Mel says that Elder Robot has taught her that cleaning our devices is a very good habit.
● Conji tells Mel that his mother has also taught him the same. She also taught him how to clean his things.
● When Conji offers to help Mel with the cleaning work, Mel asks him to clean the mouse.
● To this Conji says that the mouse would bite him.
● Mel then tells him that it is not a real mouse. It is a computer device. To this, Conji replies that he was joking.
● When Conji starts cleaning the mouse, the mouse drops from his hands.
● Mel then closes her eyes to call Elder Robot fo help.
● Elder Robot advises them to be careful when holding the computer parts.
● Elder Robot fixes the mouse.
● Mel then starts teaching Conji how the computer mouse works.
This chapter is divided into the following classroom and lab sessions
1. Computer Mouse and Its Parts and Uses 3. Holding and Using a Computer Mouse
2. Tiny Tech Game 1 4. Tiny Tech Game 2
At the end of the session, the students will be able to:
● describe a computer mouse and a mouse pointer.
● identify parts of a computer mouse.
● describe the uses of a computer mouse.
Keywords
● Mouse: A computer mouse is a pointing device that is used to point at and select things on the computer screen.
● Mouse Pointer: It is a small arrow that appears on your computer screen.
Ask the students if they have ever tried pointing to the words using their fingers or a pencil while reading books.
Explain to the students what a computer mouse and a mouse pointer is. Also explain to them the parts and uses of a computer mouse.
Think and Tell Conclude the concepts
Warm Up
● Ask the students if they have ever tried pointing to the words using their fingers or a pencil while reading books. This helps to avoid getting lost in the words.
● In the same way, we use the computer mouse to point on the screen.
Explain the following concepts:
Learning Outcomes
Describe a computer mouse and a mouse pointer.
Explanation
Tell the students that a computer mouse is a pointing device that is used to point at and select things on the computer screen. Also, tell them about the mouse pointer, as given on page 45.
Identify parts of a computer mouse.
Describe the uses of a computer mouse.
Explain to the students the parts of a computer mouse, namely, the left mouse button, the scroll wheel, and the right mouse button, as given on page 45. Also explain the difference between wired and wireless mouse.
Tell the students that a mouse can be used to point and select, draw and colour, play games, open a file, etc., as given on page 47.
● Read aloud the questions provided in the Do It Yourself 4A section and encourage the students to solve the questions. Instruct the students to write the answers in their book.
7 mins
Build
● Ask the students to give the answer to the question “Which type of mouse would you like to use— wired or wireless? Why?” asked in the Think and Tell section given on page 46.
Possible Response: Nowadays, we use mouse that have no wire, as they give us freedom of movement.
Sum Up


3 mins
● Conclude the session by summarising that a computer mouse is a pointing device that is used to point at and select things on the computer screen. A mouse pointer is a small arrow that appears on your computer screen. Parts of a computer mouse are the left mouse button, the scroll wheel, and the right mouse button. A mouse can be used to point and select, draw and colour, play games, open a file, etc.
To hold a mouse:
● Assign the following questions from the Chapter Checkup given at the end of the chapter to attempt in the classroom.
Put your index finger on the left mouse button.
A. Fill in the Blanks: Questions 2 and 5
Put the middle finger on the right mouse button.
B. Tick the Correct Option: Questions 3, 4, and 5
C. Who Am I?: Question 5
D. Write T for True and F for False: Questions 1, 2, 3 and 5
E. Answer the Following Questions: Questions 1, 2, and 3
At the end of the session, the students will be able to:
● perform various actions using a mouse by playing fun-based interactive games.
Keywords
● Mouse: A computer mouse is a pointing device that is used to point on the computer screen.
● Mouse Pointer: It is a small arrow that appears on your computer screen.
Let the students watch the video or the learning slides related to the topic on the digital panel.
Demonstrate to the students how to play the game for which the link is provided on the panel. Attempt the activity on the Assignment page. Conclude the concepts
Warm Up
● Instruct the students to go to the Tekie’s Digital platform and open a Lab session on Tiny Tech Game 1.
● Show the learning slides or the video and discuss the concepts shown on the panel.
● Demonstrate to the students how to play the game for which the link is provided on the panel.
● Ask the questions provided on the slides one by one to assess the students’ understanding. Discuss the answers to the questions with the students. If necessary, ask additional relevant questions.
● Instruct the students to attempt the assignment by clicking on the Assignment tab.
● Explain the activity to the students.
Sum Up
3 mins
● Conclude the session by summarising that a computer mouse is a pointing device that is used to point at and select things on the computer screen. Parts of a computer mouse are the left mouse button, the scroll wheel, and the right mouse button. A mouse can be used to point and select, draw and colour, play games, open a file, etc. The game of this session on the digital platform lets you use the left mouse button to make letters in the English alphabet by following the direction of the arrows.
At the end of the session, the students will be able to:
● hold a mouse and use the mouse buttons.
Keyword
● Scroll Wheel: The scroll wheel helps you move up and down on the screen.
Ask the students if they have ever played games using a computer mouse. Also, ask them how they use the mouse to play games.
Explain to the students how to hold a mouse and use the mouse buttons.
Group discussion
Conclude the concepts
● Ask the students if they have ever played games using a computer mouse. Also, ask them how they use the mouse to play games.
● Tell them that a mouse is held using different fingers and used by clicking its two buttons or using the scroll wheel. 15 mins Engage
Explain the following concepts:
Learning Outcomes
Explanation
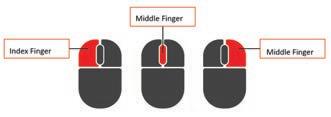
Hold a mouse and use the mouse buttons. Tell the students that one must hold the left mouse button and the right mouse button with the index finger and the middle finger, respectively, as given on pages 47 and 48. Also, tell them what a left mouse button, a right mouse button, and a scroll wheel do, as given on page 48.
● Read aloud the questions provided in the Do It Yourself 4B section and encourage the students to solve the questions. Instruct the students to write the answers in their book.
1.
2. a. Right mouse button
b. Scroll wheel
c. Left mouse button
● Conduct a group discussion in the class among the students on the topic ‘Uses of a Computer Mouse’. Possible Responses: A mouse helps us do many things: point and select, draw and colour, play games, open a file, etc.
3 mins
Sum Up
● Conclude the session by summarising that we put the index finger on the left mouse button and the middle finger on the right mouse button. The left mouse button opens the file, and the right mouse button pops up a list of items. The scroll wheel helps you move up and down on the screen.
● Assign the following questions from the Chapter Checkup given at the end of the chapter to attempt in the classroom.
A. Fill in the Blanks: Questions 1, 3, and 4
B. Tick the Correct Option: Questions 1 and 2
C. Who Am I?: Questions 1, 2, 3, and 4
D. Write T for True and F for False: Question 4
E. Answer the Following Questions: Questions 4 and 5
F. Apply Your Learning: Questions 1, 2, 3, 4, and 5
At the end of the session, the students will be able to:
● perform various actions using a mouse by playing fun-based interactive games.
Keywords
● Mouse: A computer mouse is a pointing device that is used to point on the computer screen.
● Mouse Pointer: It is a small arrow that appears on your computer screen.
Let the students watch the video or the learning slides related to the topic on the digital panel.
Demonstrate to the students how to play the game for which the link is provided on the panel. Attempt the activity on the Assignment page.
Conclude the concepts
Action Plan
Warm Up
● Instruct the students to go to the Tekie’s Digital platform and open a Lab session on Tiny Tech Game 2.
● Show the learning slides or the video and discuss the concepts shown on the panel.
● Demonstrate to the students how to play the game for which the link is provided on the panel.
● Ask the questions provided on the slides one by one to assess the students’ understanding. Discuss the answers to the questions with the students. If necessary, ask additional relevant questions.
● Instruct the students to attempt the assignment by clicking on the Assignment tab.
● Explain the activity to the students.
3 mins
● Conclude the session by summarising that we put the index finger on the left mouse button and the middle finger on the right mouse button. The game of this session on the digital platform lets you use the left mouse button to drag and drop the matching parts of different vegetables.
In Avora, a magical place, Mel and Conji, new classmates, meet on the first day of school. Mel shows Conji his smartwatch and tablet, explaining how robots use them. In the Computer Lab, Mel teaches Conji about computers, mobiles, tablets and smartwatches. Conji, a young wizard, shares his magic hat and spells in the Magic Classroom, where spell books need magic to open. Mel notices similarities between magic books and computers—both have special steps to use.
Back in the Computer Lab, Mel teaches Conji how to clean the mouse and keyboard. When Conji accidentally drops the mouse, Elder Robot fixes it. Grateful, Mel and Conji create a “Thank You” card for Elder Robot using Paint software. Elder Robot loves the card and gives them a smart speaker, Stylo, that responds to voice commands. He explains AI (Artificial Intelligence), and Mel and Conji are amazed. They end the day learning and having fun with Stylo.
● Mel and Conji are in the Computer Lab.
● Conji asks Mel if he can clean the thing which is kept next to the mouse. Conji cannot recall the device name.
● Mel reminds him that it is called a keyboard.
● Conji suggests giving a Thank You card to Elder Robot as he helped them.
● Conji thinks of bringing a pen and paper to write a message on the card.
● Mel then asks Conji if he knows that they can type it on the computer by using a keyboard.
● Mel tells Conji more about the keyboard.
This chapter is divided into the following classroom and lab sessions
1. Keyboard, Alphabet Keys and Number Keys
2. Tiny Tech Game 1
3. Special Keys
4. Tiny Tech Game 2
At the end of the session, the students will be able to:
● describe a keyboard.
● describe what the alphabet keys are.
● describe what the number keys are.
Keywords
● Keyboard: It is a part of the computer that helps us write on it.
● Typing: Writing on the computer using a keyboard is called typing.
● Cursor: The blinking line on the computer screen is called a cursor.
Ask the students how we can write on a computer. Explain to the students what a keyboard is. Also explain to them about alphabet keys and number keys.
Think and Tell Group discussion Conclude the concepts
● Ask the students how we can write on a computer.
● Tell them that just as we write on paper with a pencil, we can write on the computer using its part called the keyboard.
Engage
Explain the following concepts:
Learning Outcomes
Describe a keyboard.
Explanation
Tell the students that a keyboard is a part of the computer that helps us write on it. Tell them about typing and the cursor as well, as given on pages 58 and 59.
Describe what the alphabet keys are.
Describe what the number keys are.
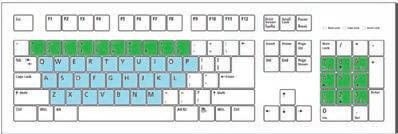
Tell the students that for each letter of the alphabet, we have one key on the keyboard. These keys are called alphabet keys, as given on page 59.
Tell them that we can use the number keys to type numbers on the computer, as given on page 60.
● Read aloud the questions provided in the Do It Yourself 5A section and encourage the students to solve the questions. Instruct the students to write the answers in their book.
Build
7 mins
● Ask the students to give the answer to the question “Which keys will you use to type your name?” asked in the Think and Tell section, as given on page 59.
Possible Response: Alphabet Keys/Number Keys
Correct Response: Alphabet Keys
● Conduct a group discussion in the class among the students on the topic “Which number keys will you use to type your age?”, as mentioned in the Discuss section on page 60.
Possible Responses: 5 or 6.
3 mins
● Conclude the session by summarising that a keyboard is a part of the computer that helps us write on it. Writing on the computer using a keyboard is called typing. The alphabet keys are used to type words and sentences on a computer. We can type numbers using the number keys.
● Assign the following questions from the Chapter Checkup given at the end of the chapter to attempt in the classroom.
A. Fill in the Blanks: Questions 3 and 5
C. Who Am I?: Questions 1 and 5
D. Write T for True and F for False: Question 4
E. Answer the Following Questions: Questions 1 and 3
F. Apply Your Learning: Questions 1 and 2
At the end of the session, the students will be able to:
● perform various actions using a keyboard by playing fun-based interactive games.
Keyword
● Keyboard: It is a part of the computer that helps us write on it.
Let the students watch the video or the learning slides related to the topic on the digital panel.
Demonstrate to the students how to play the game for which the link is provided on the panel.
Attempt the activity on the Assignment page.
Conclude the concepts
● Instruct the students to go to the Tekie’s Digital platform and open a Lab session on Tiny Tech Game 1.
● Show the learning slides or the video and discuss the concepts shown on the panel.
Engage
● Demonstrate to the students how to play the game for which the link is provided on the panel.
● Ask the questions provided on the slides one by one to assess the students’ understanding. Discuss the answers to the questions with the students. If necessary, ask additional relevant questions.
● Instruct the students to attempt the assignment by clicking on the Assignment tab.
● Explain the activity to the students.
3 mins
● Conclude the session by summarising that a keyboard is a part of the computer that helps us write on it. The alphabet keys are used to type words and sentences on a computer. We can type numbers using the number keys. The game of this session on the digital platform lets you press the keys for the alphabets that pop up on the screen.
At the end of the session, the students will be able to:
● describe what special keys are.
Ask the students if they know, while typing on the computer, which key helps them to move up, down, left, and right across various words.
Ask the students how they erase what they write on paper.
Explain to the students what special keys are.
Group discussion Conclude the concepts
● Ask the students if they know that while typing on the computer, which key helps them to move up, down, left, and right across various words, sentences, etc.
● Tell them that the up arrow key helps them move the cursor up, the left arrow key helps to move the cursor left, and similarly for the other keys.
● Ask how they erase what they write on paper.
● Tell them that similar to how they write on paper, they can erase text using the Backspace or the Delete key on the keyboard.
Explain the following concepts:
Describe what special keys are.
Tell the students about special keys such as the Spacebar, Enter, Backspace, Delete, and Arrow keys, as given on pages 61 and 62.
● Read aloud the questions provided in the Do It Yourself 5B section and encourage the students to solve the questions. Instruct the students to write the answers in their book.
Build
7 mins
● Conduct a group discussion in the class among the students on the topic ‘Use of Backspace Key’. Correct Response: The backspace key helps us to erase mistakes while typing.
3 mins
Sum Up
● Conclude the session by summarising that the Spacebar, Enter, Backspace, Delete, and Arrow keys are some special keys on the keyboard.
● Assign the following questions from the Chapter Checkup given at the end of the chapter to attempt in the classroom.
A. Fill in the Blanks: Questions 1, 2, and 4
B. Identify the Keys Correctly: Question 1
C. Who Am I?: Questions 2, 3, and 4
D. Write T for True and F for False: Questions 1, 2, and 3
E. Answer the Following Questions: Questions 2, 4, and 5
F. Apply Your Learning: Questions 3 and 4
At the end of the session, the students will be able to:
● perform various actions using a keyboard by playing fun-based interactive games.
Let the students watch the video or the learning slides related to the topic on the digital panel.
Demonstrate to the students how to play the game for which the link is provided on the panel.
Attempt the activity on the Assignment page.
Conclude the concepts
● Instruct the students to go to the Tekie’s Digital platform and open a Lab session on Tiny Tech Game 2.
● Show the learning slides or the video and discuss the concepts shown on the panel.
● Demonstrate to the students how to play the game for which the link is provided on the panel.
● Ask the questions provided on the slides one by one to assess the students’ understanding. Discuss the answers to the questions with the students. If necessary, ask additional relevant questions.
● Instruct the students to attempt the assignment by clicking on the Assignment tab.
● Explain the activity to the students.
● Conclude the session by summarising that the Spacebar, Enter, Backspace, Delete, and Arrow keys are some special keys on the keyboard. The game of this session on the digital platform lets you type selected words on the screen using a keyboard.
In Avora, a magical place, Mel and Conji, new classmates, meet on the first day of school. Mel shows Conji his smartwatch and tablet, explaining how robots use them. In the Computer Lab, Mel teaches Conji about computers, mobiles, tablets, and smartwatches. Conji, a young wizard, shares his magic hat and spells in the Magic Classroom, where spell books need magic to open. Mel notices similarities between magic books and computers—both have special steps to use.
Back in the Computer Lab, Mel teaches Conji how to clean the mouse and keyboard. When Conji accidentally drops the mouse, Elder Robot fixes it. Grateful, Mel and Conji create a “Thank You” card for Elder Robot using Paint software. Elder Robot loves the card and gifts them a smart speaker, Stylo, that responds to voice commands. He explains AI (Artificial Intelligence), and Mel and Conji are amazed. They end the day learning and having fun with Stylo.
● Mel and Conji write a ‘Thank You’ message on the card for Elder Robot.
● But the card looks very plain and simple to Conji. He thinks of adding some shapes around the message.
● Mel suggests drawing the shapes and colouring them using Paint.
● Conji is unaware of Paint. Mel said that she would help him understand Paint.
This chapter is divided into the following classroom and lab sessions
1. Introduction to Paint 1
2. Introduction to Paint 2
3. Drawing in Paint 1
4. Drawing in Paint 2
5. Colouring in Paint and Saving a Drawing 1
6. Colouring in Paint and Saving a Drawing 2
At the end of the session, the students will be able to:
● describe what Paint is.
● start Paint.
● explain the different parts of the Paint window.
Keyword
● MS Paint: MS Paint or simply Paint lets us draw and colour on the computer.
Ask the students to draw their favourite fruit on a paper using a pencil. Discuss what MS Paint is. Explain to them how they can start Paint. Also, get them familiar with the different parts of the Paint window.
Group discussion Conclude the concepts
Warm Up
● Ask the students to draw their favourite fruit on a paper using a pencil.
● Now, build the concept by telling the students that we can draw on a computer as well, using MS Paint.
15 mins
Engage
Explain the following concepts:
Learning Outcomes
Explanation
Describe what MS Paint is. Tell the students that as we draw on paper using pencil and colours, we can also draw on the computer, as given on page 71.
Start Paint. Explain the steps to start MS Paint to the students, as given on page 71.
Explain the different parts of the Paint window.
Tell the students about different parts of the MS Paint window, such as the title bar, drawing area, tools, etc., as given on page 72.
● Read aloud the questions provided in the Do It Yourself 6A section and encourage the students to solve the questions. Instruct the students to write the answers in their book.
Correct Responses:
Ask the students the following questions to check their understanding:
● Name the space where you draw in MS Paint.
Correct Response: Drawing area
● Which bar shows the name of your MS Paint file?
Correct Response: Title bar
Title bar Shapes Tabs
● Conduct a group discussion in the class among the students on the topic ‘My Favourite Drawing in MS Paint’.
Possible Responses: Hut, robot, etc.
● Conclude the session by summarising that MS Paint lets us draw and colour on the computer. To start MS Paint, click on the Search bar, type “Paint” in it, and click on Paint in the menu. In MS Paint, you’ll see the title bar at the top, tabs like File, Home and View, different tools, different shapes, color options, and the drawing area where you can draw and colour.
● Assign the following questions from the Chapter Checkup given at the end of the chapter to attempt in the classroom.
A. Fill in the Blanks: Question 1
B. Tick the Correct Option: Questions 1 and 3
C. Who Am I?: Question 1
D. Write T for True and F for False: Question 1
At the end of the session, the students will be able to:
● describe what MS Paint is.
● start Paint.
● explain the different parts of the Paint window.
Keyword
Let the students watch the video or the learning slides related to the topic on the digital panel.
● MS Paint: MS Paint or simply Paint lets us draw and colour on the computer. 5 mins
Warm Up
Discuss what MS Paint is. Demonstrate to them how they can start Paint. Also, get them familiar with the different parts of the Paint window.
Attempt the activity on the Assignment page.
Conclude the concepts
● Instruct the students to go to the Tekie’s Digital platform and open a Lab session on Introduction to Paint 2
● Show the learning slides or the video and discuss the concepts shown on the panel.
Engage
Explain the following concepts:
15 mins
Explanation
Describe what MS Paint is. Tell the students that as we draw on paper using pencil and colours, we can also draw on the computer, as given on page 71.
Start Paint. Demonstrate the steps to start MS Paint to the students, as given on page 71.
Explain the different parts of the Paint window.
Tell the students about the different parts of MS Paint window, such as the title bar, drawing area, tools, etc., as given on page 72.
● Ask the questions provided on the slides one by one to assess the students’ understanding. Discuss the answers to the questions with the students. If necessary, ask additional relevant questions.
● Instruct the students to attempt the assignment by clicking on the Assignment tab.
● Explain the activity to the students.
● Conclude the session by summarising that MS Paint lets us draw and colour on the computer. To start MS Paint, click on the Search bar, type “Paint” in it, and click on Paint in the menu. In MS Paint, you’ll see the title bar at the top, tabs like File, Home and View, different tools, different shapes, color options, and the drawing area where you can draw and colour.
At the end of the session, the students will be able to:
● draw an oval.
● draw a triangle.
Ask the students to give examples of some objects that are oval in shape. Discuss how to draw an oval and a triangle using the Shapes tool.
Group discussion Conclude the concepts 5 mins
● Ask the students to give examples of some objects that are oval in shape. Then, build on the concept by explaining how they can draw shapes using Paint.
Explain the following concepts: Learning
Draw an oval. Tell the students the various steps to draw an oval, as given on page 73.
Draw a triangle. Tell the students the various steps to draw a triangle, as given on page 73.
● Read aloud the questions provided in the Do It Yourself 6B section and encourage the students to solve the questions. Instruct the students to write the answers in their book. Possible Responses: Oval, Rectangle, Square, Triangle, etc.
● Conduct a group discussion in the class among the students based on the topic, “Which is your favourite shape? Which shapes do you want to draw in Paint?” provided in the Discuss section, as mentioned on page 73.
Possible Responses: Triangle, star, diamond, etc.
Sum Up 3 mins
● Conclude the session by summarising the steps to draw an oval and a triangle in Paint.
● Assign the following questions from the Chapter Checkup given at the end of the chapter to attempt in the classroom.
A. Fill in the Blanks: Question 2
C. Who Am I?: Questions 2 and 3
D. Write T for True and F for False: Question 2
At the end of the session, the students will be able to:
● draw an oval.
● draw a triangle.
Let the students watch the video or the learning slides related to the topic on the digital panel.
Demonstrate to the students how to draw an oval and a triangle using the Shapes tool.
Attempt the activity on the Assignment page.
Conclude the concepts
5 mins 15 mins 7 mins 3 mins
5 mins
Warm Up
● Instruct the students to go to the Tekie’s Digital platform and open a Lab session on Drawing in Paint 2.
● Show the learning slides or the video and discuss the concepts shown on the panel.
Engage
Explain the following concepts:
Learning Outcomes
Draw an oval.
Draw a triangle.
15 mins
Explanation
Demonstrate to the students the various steps to draw an oval, as given on page 73.
Demonstrate to the students the various steps to draw a triangle, as given on page 73.
● Ask the questions provided on the slides one by one to assess the students’ understanding. Discuss the answers to the questions with the students. If necessary, ask additional relevant questions.
● Instruct the students to attempt the assignment by clicking on the Assignment tab.
● Explain the activity to the students.
● Conclude the session by summarising the steps to draw an oval and a triangle.
At the end of the session, the students will be able to:
● colour a drawing.
● save a drawing.
Ask the students if they would like to colour in the drawings they have created.
Ask the students how they can see the same drawing again some days later.
Describe the steps to colour and save a drawing. Group discussion Conclude the concepts
5 mins
● Ask the students if they would like to add colour to the drawings they have created. Tell them that they can make their drawings colourful by using the Fill with color tool.
● Ask the students how they can see the same drawing again some days later. Tell them that they can do so by saving their files.
15 mins
Engage
Explain the following concepts:
Learning Outcomes
Explanation
Colour a drawing. Tell the students the steps to colour a drawing, as given on page 74.
Save a drawing. Tell the students the importance of saving a drawing and then tell them the steps to save a drawing, as given on page 75.
● Read aloud the questions provided in the Do It Yourself 6C and Do It Yourself 6D sections and encourage the students to solve the questions. Instruct the students to write the answers in their book.
Correct Responses:
Do It Yourself 6C: Draw a diamond shape and colour using your favourite colour. Do It Yourself 6D: 1. T 2. T
● Conduct a group discussion in the class among the students on the topic, “By what name should we save our drawing?”.
Possible Responses: Our name, favourite animal, superhero, etc.
Correct Response: We should give the file a name that reflects the content of the drawing.
● Conclude the session by summarising that saving a file helps us open our drawing again on Paint. Also, revise with them the steps to colour and save a drawing.
● Assign the following questions from the Chapter Checkup given at the end of the chapter to attempt in the classroom.
A. Fill in the Blanks: Questions 3 and 4
B. Tick the Correct Option: Question 2
C. Who Am I?: Question 4
D. Write T for True and F for False: Questions 3 and 4
E. Answer the Following Questions: Questions 1 and 2
F. Apply Your Learning: Question 1
At the end of the session, the students will be able to:
● colour a drawing.
● save a drawing.
Warm Up Engage Build Sum Up
Let the students watch the video or the learning slides related to the topic on the digital panel.
Demonstrate the steps to colour and save a drawing. Attempt the activity on the Assignment page.
Conclude the concepts
5 mins
● Instruct the students to go to the Tekie’s Digital platform and open a Lab session on Colouring in Paint and Saving a Drawing 2.
● Show the learning slides or the video and discuss the concepts shown on the panel.
Explain the following concepts:
Learning Outcomes
15 mins
Explanation
Colour a drawing. Demonstrate to the students the steps to colour a drawing, as given on page 74.
Save a drawing. Demonstrate to the students the importance of saving a drawing, and then tell them the steps to save a drawing, as given on page 75.
● Ask the questions provided on the slides one by one to assess the students’ understanding. Discuss the answers to the questions with the students. If necessary, ask additional relevant questions.
● Instruct the students to attempt the assignment by clicking on the Assignment tab.
● Explain the activity to the students.
● Conclude the session by summarising that saving a file helps us open our drawing again on Paint. Also, revise with them the steps to colour and save a drawing.
In Avora, a magical place, Mel and Conji, new classmates, meet on the first day of school. Mel shows Conji his smartwatch and tablet, explaining how robots use them. In the Computer Lab, Mel teaches Conji about computers, mobiles, tablets and smartwatches. Conji, a young wizard, shares his magic hat and spells in the Magic Classroom, where spell books need magic to open. Mel notices similarities between magic books and computers—both have special steps to use.
Back in the Computer Lab, Mel teaches Conji how to clean the mouse and keyboard. When Conji accidentally drops the mouse, Elder Robot fixes it. Grateful, Mel and Conji create a “Thank You” card for Elder Robot using Paint software. Elder Robot loves the card and gives them a smart speaker, Stylo, that responds to voice commands. He explains AI (Artificial Intelligence), and Mel and Conji are amazed. They end the day learning and having fun with Stylo.
● Elder Robot surprises Mel and Conji with a smart speaker to say thank you for their card.
● The speaker says its name is Stylo. Conji gets a fright when the speaker talks. He thought the speaker was a ball.
● Mel explains that Stylo is a smart speaker. Conji has never seen one before.
● Elder Robot tells Conji that Stylo understands voice commands.
● Mel asks Stylo to play the story of how the First Elder Robot and First Elder Wizard became friends. Conji is amazed.
● Mel explains that smart speakers use AI (Artificial Intelligence).
● Elder Robot then explains to Conji what AI is.
This chapter is divided into the following classroom and lab sessions
1. What Is AI?
2. Tiny Tech AI Game
3. AI Around Us
4. Fun with AI: Using Quick, Draw!
At the end of the session, the students will be able to:
● define AI.
Keyword
● AI (Artificial Intelligence): AI gives machines the ability to learn and do things on their own, just like humans do.
Warm Up Engage Build Sum Up
Ask the students if they have ever given a command to the speaker to play a song, and it plays it.
Explain to the students what AI is. Group discussion Conclude the concepts
Action Plan
Up
● Ask the students if they have ever given a command to the speaker to play a song, and it plays it.
● Also, ask them if they know what these speakers are known as.
● Tell them that these special speakers, which follow your voice commands, are known as smart speakers.
Explain the following concepts:
Learning Outcome
Explanation
Describe what AI is. Tell the students that AI gives machines the ability to learn and do things on their own, just like humans do, as given on page 84.
Ask the following questions to the students to check their understanding:
● Can you name few more machines that can learn and do things on their own.
Possible Responses: Smartwatch, Robots, etc.
● Conduct a group discussion in the class among the students on the topic ‘Things that a robot can do’.
Possible Responses: Some robots can move around, pick things up, help with cleaning, talk to us, etc.
● Conclude the session by summarising that AI gives machines the ability to learn and do things on their own, just like humans do.
● Assign the following questions from the Chapter Checkup given at the end of the chapter to attempt in the classroom.
A. Fill in the Blanks: Questions 1 and 2
B. Tick the Correct Option: Question 1
D. Answer the Following Questions: Question 1
At the end of the session, the students will be able to:
● describe AI by learning through playing fun and interactive AI games.
Keyword
Let the students watch the video or the learning slides related to the topic on the digital panel.
Demonstrate to the students how to play the game for which the link is provided on the panel.
● Artificial Intelligence: AI gives machines the ability to learn and do things on their own, just like humans do. 5 mins
Attempt the activity on the Assignment page.
Conclude the concepts
Warm Up
Instruct the students to go to the Tekie’s Digital platform and open a Lab session on Tiny Tech AI Game.
Show the learning slides or the video and discuss the concepts shown on the panel. 15 mins
Engage
Demonstrate to the students how to play the game for which the link is provided on the panel.
Ask the questions provided on the slides one by one to assess the students' understanding. Discuss the answers to the questions with the students. If necessary, ask additional relevant questions.
● Instruct the students to attempt the assignment by clicking on the Assignment tab.
● Explain the activity to the students.
Sum Up
3 mins
● Conclude the session by summarising that AI gives machines the ability to learn and do things on their own, just like humans do. The AI game of this session on the digital platform allows you to start drawing an object, and when you stop drawing further, the AI game guesses the rest of your drawing and continues drawing where you left off.
At the end of the session, the students will be able to:
● know about the AI devices around them.
Ask the students about the things that both humans and machines can do.
Explain to the students about various AI devices around us. Group discussion Conclude the concepts
Warm Up
● Ask the students to give examples of things that both humans and machines can do.
● Tell them that humans can do things they are told to do. They can even do things on their own.
● Tell them that some machines can do these things that humans can. There are many types of machines that use AI to perform tasks or respond to us.
Explain the following concepts:
Learning Outcome Explanation
Describe various AI devices. Tell the students about various AI devices such as talking toys, smart speakers, robot helpers, selfie magic, and learning games, as given on pages 84 and 85.
Ask the following questions to the students to check their understanding:
● Does AI help robots talk to us?
Possible Responses: Yes/No
Correct Response: Yes
● Can machines solve problems for us?
Possible Responses: Yes/No
Correct Response: Yes
Build
● Conduct a group discussion in the class among the students on the topic ‘AI helps robots’.
7 mins
Possible Responses: AI helps some robots walk on their own. AI also helps some robots to talk to us.
3 mins
● Conclude the session by summarising about various AI devices such as talking toys, smart speakers, robot helpers, selfie magic, and learning games.
● Assign the following questions from the Chapter Checkup given at the end of the chapter to attempt in the classroom.
A. Fill in the Blanks: Question 3
B. Tick the Correct Option: Questions 2 and 3
C. Write T for True and F for False: Questions 1, 2, and 3
D. Answer the Following Questions: Questions 2 and 3
E. Apply Your Learning: Questions 1, 2, and 3
At the end of the session, the students will be able to:
● learn about educational games that use AI.
Let the students watch the video or the learning slides related to the topic on the digital panel.
Demonstrate to the students how to play the game for which the link is provided on the panel.
Attempt the activity on the Assignment page.
Conclude the concepts
Warm Up
● Instruct the students to go to the Tekie’s Digital platform and open a Lab session on Fun with AI: Using Quick, Draw!
● Show the learning slides or the video and discuss the concepts shown on the panel.
Engage
● Demonstrate to the students how to play the game for which the link is provided on the panel.
● Ask the questions provided on the slides one by one to assess the students’ understanding. Discuss the answers to the questions with the students. If necessary, ask additional relevant questions.
● Instruct the students to attempt the assignment by clicking on the Assignment tab.
● Explain the activity to the students.
● Conclude the session by summarising that there are educational games that you play on your computer. Some of them use AI to adjust the difficulty level as you play. For example, Quick, Draw! The AI game of this session on the digital platform allows you to start drawing something like a cat, mug, house, etc., in under 20 seconds. Once you are done, the AI will guess what you have drawn.
This chapter is divided into the following classroom sessions 1. What Is Coding?
Block-based Coding
Problem Solving: Example 1
Problem Solving: Example 2
At the end of the session, the students will be able to:
● describe what coding is.
Keywords
● Instruction: An instruction means telling someone what to do.
● Coding: Coding is a language used to give instructions to a computer.
Ask the students whether they like to solve the puzzles. Explain to the students what coding is.
● Ask the students if they like solving puzzles. Tell them, just like solving a puzzle, coding is putting the right instructions in the right order to tell the computer what to do. Then, connect this concept to define coding.
Explain the following concepts:
Describe what coding is. Tell the students that a computer does not understand human languages. That is why we need to learn coding to give instructions to a computer. Also ask the students to solve the puzzle to complete the image of a dog, as given on page 1.
Ask the following questions to the students to check their understanding.
● Computers are smart, but they need instructions. Can you talk to a computer in any language? Do you think it will listen to you?
Possible Responses: Yes/No
Explanation: No. The computer does not understand all the languages. It will only understand our instructions if we use a language that the computer understands.
● How would learning coding help us?
Possible Response: Learning coding will help us to understand problems, think of solutions, make a computer do a task, and solve a question in many ways.
● Conduct a group discussion in the class among the students on the topic, ”How can you solve any puzzle?”.
Possible Responses: Sort by colour, trial and error method, looking at the solved picture, etc.
● Conclude the session by summarising that a computer does not understand human language. So, we use coding to give instructions to a computer.
● Assign the following questions from the Chapter Checkup given at the end of the chapter to attempt in the classroom.
A. Fill in the Blanks: Question 3
D. Write T for True and F for False: Questions 1 and 2
E. Answer the Following Questions: Question 2
At the end of the session, the students will be able to:
● explain block-based coding.
Keyword
● Block-based coding: The coding language that uses blocks to give instructions is called block-based coding.
Ask the students if they have ever played with Lego or physical colourful blocks.
Explain to the students what block-based coding is.
Conduct the “Build a House” scenario Activity
Conclude the concepts
5 mins
Warm Up
Ask the students if they have ever played with Lego or physical colourful blocks.
Explain to them that, just like connecting the Lego blocks with each other, we need to arrange the blocks in a sequence in block-based coding.
15 mins
Engage
Explain the following concept:
Learning Outcome
Explanation
Explain block-based coding. Tell the students that block-based coding is a coding language that uses blocks to give instructions, as given on page 2.
● Consider that you are playing with Lego. What will you need to play?
Possible Responses: Blocks, boxes, shapes
Correct Response: Blocks
● How will you make the shape of “number 1” with blocks?
Possible Response: I will join 1 block above the other until the desired shape is created.
Build
Cut out one triangle and three rectangles of different sizes using colourful papers.
7 mins
● Present the scenario: Consider these shapes as blocks. Now, build a house using these shapes.
1. Allow some time for the kids to do this activity.
2. Now, similarly ask the students to make a tree using rectangle and oval shape cutouts. Make a sun using oval shape cutout using colourful papers.
3 mins
Sum Up
● Conclude the session by summarising that in block-based coding, we join blocks just like Lego.
● Assign the following questions from the Chapter Checkup given at the end of the chapter to attempt in the classroom.
A. Fill in the Blanks: Question 2
D. Write T for True and F for False: Question 3
E. Answer the Following Questions: Question 3
At the end of the session, the students will be able to:
● solve the given problem.
Keyword
● Problem: A problem is something that we need to solve.
Warm Up Engage Build Sum Up
Give some puzzle pieces to the students to solve and ask them how they have solved them.
Discuss the given problem. Group discussion Conclude the concepts
Action Plan
Warm Up
● Give some puzzle pieces to the students to solve, and ask them how they have solved them. Then, relate them to the concept of problem solving.
Note: The teacher can ask the students to bring any puzzle pieces/paper cutouts from home for this activity.
Explain the following concepts:
Learning Outcome
Explanation
Solve the given problem. Explain to the students the problem of ‘Finding Your Friend’s House’ given on page number 2 and give them hints on how to solve it.
● Read aloud the questions provided in the Do It Yourself 1A section and encourage the students to solve the questions. Instruct the students to write the answers in their book.
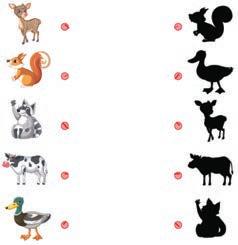
7 mins
● Conduct a group discussion in the class among the students based on the topic ‘What are the different ways to solve a problem?’.
Possible Responses: Breaking down a problem into small steps, identifying the pattern, etc.
Sum Up
● Conclude the session by summarising that a problem is something that we need to solve.
3 mins
● Assign the following questions from the Chapter Checkup given at the end of the chapter to attempt in the classroom.
A. Fill in the Blanks: Question 1
B. Tick the Correct Option: Question 1
E. Answer the Following Questions: Question 1
At the end of the session, the students will be able to:
● solve a given problem.
Keyword
Ask the students the steps to make a sandwich. Discuss the given example. Group discussion Conclude the concepts
● Problem: A problem is something that we need to solve. 5 mins
● Ask the students what steps they follow to make a sandwich.
Explain the following concepts:
Learning Outcome
Explanation
Solve a given problem. Discuss the given example with the students to make a sandwich, as given on page 3.
● Complete the grid:
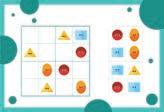
Note: The teacher can draw this pattern on the board and ask the students to solve it.
● Conduct a group discussion in the class among the students on the topic ’What to do when you can’t find your things?’.
Possible Response: Ask my mom or dad for help, look in all the places where I usually play, wait for some time, and look again later.
Sum Up 3 mins
● Conclude the session by summarising that a problem is something that we need to solve.
● Assign the following questions from the Chapter Checkup given at the end of the chapter to attempt in the classroom.
B. Tick the Correct Option: Question 2
C. Who Am I?: Questions 1 to 5
F. Apply Your Learning: Questions 1 to 5
This chapter is divided into the following classroom and lab sessions 1. Exploring Code.org
Puzzles 1 and 2
Puzzles 3 and 4
Coding Challenge
At the end of the session, the students will be able to:
● describe what Code.org is.
● describe parts of the Puzzle Code Studio.
Keywords
● Code.org: Code.org is an educational platform to learn coding in a fun and engaging way.
● Play Area: The play area is where the program will run. It is on the left side of the screen.
● Toolbox: The toolbox is the area that holds all the blocks needed to solve the puzzles.
● Workspace: The workspace is the area where we drag the blocks from the toolbox to code.
● Instruction Area: The instruction area holds the instructions to solve a puzzle.
● Jigsaw puzzle: A jigsaw puzzle is like a game where you put pieces together to make a picture.
Ask the students whether they like to solve puzzles.
Explain to the students what Code.org is.
Explain the parts of the Puzzle Code Studio.
Group discussion
Conclude the concepts
5 mins
Warm Up
● Ask the students if they like to solve puzzles. Then, tell them that they can solve coding puzzles on the computer by using Code.org.
Explain the following concepts:
Describe Code.org. Tell the students that we can solve and practice various puzzles using the Code.org platform. Also, tell them that Code.org is an educational platform to learn coding in a fun and engaging way, as given on page 10.
Describe parts of the Puzzle Code Studio. Explain the various parts of the Puzzle Code Studio interface, such as the play area, toolbox, workspace, and instruction area, as given on pages 10 and 11.
Describe jigsaw puzzle. Tell students that a jigsaw puzzle is like a game where you put pieces together to make a picture, as given on page 12.
Ask the following questions to the students to check their understanding:
● How would learning about Code.org platform help us?
Correct Response: Learning about Code.org platform will help us to solve puzzles easily.
● Conduct a group discussion in the class among the students based on the topic ‘What is the purpose of the workspace?’.
Correct Response: The workspace is the area where we drag the blocks from the toolbox to code.
● Conclude the session by summarising that Code.org is an educational platform to learn coding in a fun and engaging way. Also, mention the different parts of the Puzzle Code Studio, such as play area, toolbox, workspace, and instruction area.
● Assign the following questions from the Chapter Checkup given at the end of the chapter to attempt in the classroom.
A. Fill in the Blanks: Questions 1, 2, 3, and 4
C. Who am I?: Questions 1, 2, 3, and 4
D. Write T for True and F for False: Questions 1, 2, and 3
E. Answer the Following Questions: Questions 1 and 2
At the end of the session, the students will be able to:
Let the students watch the video or the learning slides related to the topic on the digital panel.
● solve the given puzzle. 5 mins
Warm Up
Discuss the given puzzle problem. Attempt the activity on the Assignment page.
Conclude the concepts
● Instruct the students to go to the Tekie’s Digital platform and open a Lab session on Puzzles 1 and 2.
● Show the learning slides or the video and discuss the concepts shown on the panel.
Explain the following concepts:
Learning Outcome
Explanation
Solve the given puzzles. Tell the students that they need to drag and drop the partial block picture to complete the puzzle picture. Demonstrate the steps to solve the two puzzles, as given on pages 12, 13, and 14.
Ask the following questions to the students to check their understanding:
● What will you do to move the puzzle block?
Possible Responses: Drag and drop.
● Where do we need to put the puzzle block?
Possible Responses: On the shaded region.
● Instruct the students to attempt the assignment by clicking on the Assignment tab.
● Explain the activity to the students.
● Conclude the session by summarising that we need to drag and drop the puzzle blocks to complete the puzzle.
● Assign the following question from the Chapter Checkup given at the end of the chapter to attempt in the classroom.
B. Tick the Correct Option: Question 1
At the end of the session, the students will be able to:
Ask the students whether they have solved puzzles given in the newspapers, books, etc.
Describe what a puzzle is. Explain how to solve a puzzle.
Group discussion Conclude the concepts
● solve a puzzle. 5
● Ask the students whether they have solved puzzles given in the newspapers, books, etc. Then, relate the concept to solving puzzles in Code.org.
Explain the following concepts:
Solve a puzzle. Explain to the students that to solve a puzzle, we need to observe it first and then place the missing parts by dragging and joining them together, as given on pages 15, 16, and 17.
Ask the following questions to the students to check their understanding:
● What is one word for joining pieces together to complete a picture?
Possible Response: Puzzle
● How do you check whether a puzzle is completed?
Possible Responses: When the puzzle is completed, a sound will be played.
● Conduct a group discussion in the class among the students based on the topic ‘What do you need to do before solving a puzzle?’.
Correct Response: We need to observe the puzzle first before solving it.
3 mins
● Conclude the session by summarising that a puzzle can be solved by observing it and then placing the pieces together to complete the puzzle.
● Assign the following question from the Chapter Checkup given at the end of the chapter to attempt in the classroom.
B. Tick the Correct Option: Question 2
At the end of the session, the students will be able to:
● solve the given coding challenge.
Let the students watch the video or the learning slides related to the topic on the digital panel.
Discuss the given puzzle problem. Attempt the activity on the Assignment page.
Conclude the concepts
5 mins
Warm Up
● Instruct the students to go to the Tekie’s Digital platform and open a Lab session on Coding Challenge.
● Show the learning slides or the video and discuss the concepts shown on the panel.
Explain the following concept:
Solve the coding challenge. Demonstrate to the students how to solve the given coding challenge, as given on page 17. Then, ask the students to solve it.
Ask the following question to the students to check their understanding:
● Can we rearrange the blocks while placing them to complete the puzzle? Possible Responses: Yes/No
Correct Response: Yes, we can rearrange the blocks in a puzzle to complete it.
● Instruct the students to attempt the assignment by clicking on the Assignment tab.
● Explain the activity to the students.
● Conclude the session by summarising that we need to drag and drop the puzzle blocks to complete the given coding challenge.
● Assign the following questions from the Chapter Checkup given at the end of the chapter to attempt in the classroom.
F. Apply Your Learning: Questions 1 and 2
This chapter is divided into the following classroom and lab sessions 1. Command 1
Sequence 2 2. Command 2
Sequence 1
Coding Challenge 1
Coding Challenge 2
At the end of the session, the students will be able to:
● describe a command.
● describe various types of command blocks.
Keyword
● Command: Command is the instruction given to a computer to do something.
Instruct the students to touch their eyes, nose, and ears. Play this game and the one who touches correctly will be the winner.
Describe a command.
Describe the various types of command blocks. Group discussion Conclude the concepts
Warm Up
● Play a game of instructions where you ask the students to touch their nose, eyes, and ears, and the one who touches correctly will be the winner. Now, relate this concept of giving commands to the students to the commands concept in the computer.
Explain the following concepts:
Describe a command. Tell the students that instructions which we give to a computer to do something are called commands, as given on page 22.
Describe various types of command blocks. Explain the purpose of various types of command blocks, such as east, west, north, and south, as given on page 22.
● Read aloud the questions provided in the Do It Yourself 3A section and encourage the students to solve the questions. Instruct the students to write the answers in their book.
Correct Response: Option a
● Conduct a group discussion in the class among the students based on the topic ‘Why do we use command blocks?’
Correct Response: We use command blocks to give instructions to the computer.
● Conclude the session by summarising that instructions given to a computer to do something are known as commands and we have four types of command blocks, such as east, west, north and south.
● Assign the following questions from the Chapter Checkup given at the end of the chapter to attempt in the classroom.
A. Fill in the Blanks: Question 1
D. Write T for True and F for False: Question 3
E. Answer the Following Questions: Question 1
At the end of the session, the students will be able to:
● solve angry-bird puzzles.
Keywords
● Run button: The Run button allows you to run the code in the workspace.
● Reset button: The Reset button allows you to reset the workspace.
Warm Up Engage Build Sum Up
Let the students watch the video or the learning slides related to the topic on the digital panel. Discuss the given angry bird puzzle. Attempt the activity on the Assignment page.
Conclude the concepts
5 mins
Warm Up
● Instruct the students to go to the Tekie’s Digital platform and open a Lab session on Command 2.
● Show the learning slides or the video and discuss the concepts shown on the panel.
Engage
Explain the following concepts:
Learning Outcome
15 mins
Explanation
Solve angry-bird puzzles. Describe the activity as given on pages 22 and 23 to the students and demonstrate how to arrange the command blocks to solve the puzzle. Also, explain the purpose of the Run and Reset buttons.
● Ask the questions provided on the slides one by one to assess the student’s understanding. Discuss the answers to the questions with the students. If necessary, ask additional relevant questions.
● Instruct the students to attempt the assignment by clicking on the Assignment tab.
● Explain the activity to the students.
● Conclude the session by summarising that we use different command blocks to solve the given angry bird puzzle. Also, revise that the Run button is used to run the code and the Reset button is used to reset the workspace, respectively.
At the end of the session, the students will be able to:
● describe a sequence.
● describe the types of sequence.
Keywords
● Sequence: When we give more than one command in order, it is called a Sequence.
● Fixed Sequence: In a fixed sequence, there is only one way to do the task.
● Flexible Sequence: In a flexible sequence, there can be more than one way to do the task.
Discuss with the students the process of growing a plant. Describe a sequence. Describe the types of sequence.
Group discussion Conclude the concepts
Warm Up
● Discuss with the students the process of growing a plant.
● Tell them that to grow a plant, we need to dig the soil, insert a seed, water the seed, make sure to place it in an area that receives sufficient sunlight, seed will sprout slowly, the plant will start to flower, that flower will convert into a fruit and the fruit will grow.
Explain the following concepts:
Learning Outcomes
Describe a sequence.
Describe the types of sequence.
Explanation
Describe the concept of a sequence to the students that when we give more than one command in an order, it is called a sequence. Also, give an example of drawing a hut by following a sequence, as given on page 24.
Discuss the various types of sequence, such as fixed and flexible, with the students. Explain both types by giving examples, as given on page 25.
● Read aloud the questions provided in the Do It Yourself 3B section and encourage the students to solve the questions. Instruct the students to write the answers in their book.
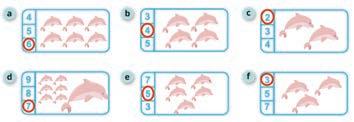
Build
7 mins
● Conduct a group discussion in the class among the students based on the topic ‘What steps do you follow to get ready for school?’
Possible Responses: Brush our teeth, rinse the mouth, take a bath, have a breakfast, pack our bags, and go to school.
3 mins
Sum Up
● Conclude the session by summarising that a set of commands given more than once is called a sequence. Also, we have two types of sequences: fixed and flexible. In a fixed sequence we only have one way to do a task. In a flexible sequence, we have more than one way to do a task.
● Assign the following questions from the Chapter Checkup given at the end of the chapter to attempt in the classroom.
A. Fill in the Blanks: Questions 2 and 3
C. Who Am I?: Question 1
D. Write T for True and F for False: Questions 1 and 2
E. Answer the Following Questions: Questions 2 and 3
At the end of the session, the students will be able to:
● differentiate between fixed and flexible sequence.
Warm Up Engage Build Sum Up
Let the students watch the video or the learning slides related to the topic on the digital panel.
Discuss the difference between the two types of sequences, fixed and flexible.
Attempt the activity on the Assignment page.
Conclude the concepts
5 mins
Warm Up
● Instruct the students to go to the Tekie’s Digital platform and open a Lab session on Sequence 2.
● Show the learning slides or the video and discuss the concepts shown on the panel.
Explain the following concept:
Learning Outcome
Differentiate between fixed and flexible sequence.
● Ask the questions provided on the slides one by one to assess the student’s understanding. Discuss the answers to the questions with the students. If necessary, ask additional relevant questions. 15
Explanation
Explain the difference between the fixed and flexible sequence with the help of the examples, as given on pages 26, 27, and 28.
● Instruct the students to attempt the assignment by clicking on the Assignment tab.
● Explain the activity to the students.
● Conclude the session by summarising that we have two types of sequence: fixed and flexible. In fixed sequence, we only have one way to do a task. In flexible sequence, we have more than one way to do a task.
● Assign the following questions from the Chapter Checkup given at the end of the chapter to attempt in the classroom.
B. Tick the Correct Option: Questions 1 and 2
At the end of the session, the students will be able to:
● solve the given coding challenge.
Now that the students have understood the concept of fixed and flexible sequences, ask them to solve a few puzzles.
Discuss the given coding challenge with the students and explain how to solve it.
Group discussion Conclude the concepts
5 mins
Warm Up
● Now that the students have understood the concept of fixed and flexible sequences, ask them to solve a few puzzles. You can give the puzzles from old magazines or newspapers.
Explain the following concepts:
Learning Outcome
Explanation
Solve the given coding challenge. Discuss the given coding challenge with the students, as given on page 29.
Ask the following questions to the students to check their understanding.
1. Which sequence helps us to do the task in one way?
Possible Response: Fixed/Flexible sequence
Correct Response: Fixed Sequence
2. Your mother gives you three commands in an order. Let’s guess the name of it.
Correct Response: Sequence
● Conduct a group discussion in the class among the students based on the topic ‘What happens when we use some extra blocks mistakenly?’
Possible Response: The code doesn’t run in the way we want it to.
● Conclude the session by summarising that in some situations we can have just one way or multiple ways to solve the given problem.
● Assign the following questions from the Chapter Checkup given at the end of the chapter as to attempt in the classroom.
F. Apply Your Learning: Questions 1 and 2
At the end of the session, the students will be able to:
● solve the coding challenge.
Let the students watch the video or the learning slides related to the topic on the digital panel.
Discuss the given coding challenge with the students and explain how to solve it.
Attempt the activity on the Assignment page.
Conclude the concepts
5 mins
● Instruct the students to go to the Tekie’s Digital platform and open a Lab session on Coding Challenge 2.
● Show the learning slides or the video and discuss the concepts shown on the panel.
Explain the following concept:
15 mins
Explanation
Solve the given coding challenge. Discuss the given coding challenge with the students, as given on page 29.
● Ask the questions provided on the slides one by one to assess the student’s understanding. Discuss the answers to the questions with the students. If necessary, ask additional relevant questions.
● Instruct the students to attempt the assignment by clicking on the Assignment tab.
● Explain the activity to the students.
● Conclude the session by summarising that we can have one or multiple ways to solve the given problem.
● Assign the following questions from the Chapter Checkup given at the end of the chapter to attempt in the classroom.
F. Apply Your Learning: Questions 3 and 4
A. Fill in the Blanks.
1. machine 2. games 3. mistakes 4. laptop
B. Tick () the Correct Option.
1. b. Television
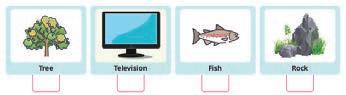
2. c. Computer
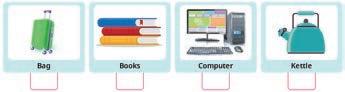
3. a. Play a game
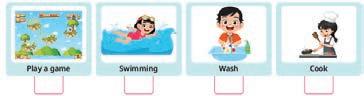
C. Who Am I?
1. Water 2. Washing Machine 3. Computer 4. Tablet
D. Write T for True and F for False.
1. F 2. T 3. T 4. F
E. Answer the Following Questions.
1. Trees, animals, mountains, rivers, and flowers
2. Machines are human-made things that make our work faster and easier. A computer and a refrigerator are two machines that work on electricity.
3. a. Computers do not make mistakes.
b. The computer never gets tired.
4. A laptop is smaller than a desktop. It can be folded and carried easily.
F. Apply Your Learning.
1. Microwave
2. Laptop
3. Torch, sewing machine, and clock
Chapter Checkup
A. Fill in the Blanks.
1. videos 2. friends 3. input 4. mouse
B. Tick () the Correct Option.
1. a. Offices
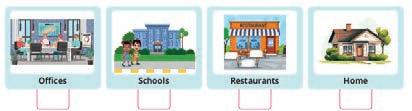
2. a. Mouse
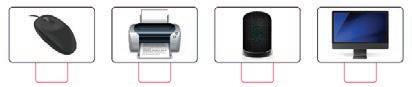
C. Who Am I?
1. Airport 2. Restaurant 3. CPU 4. Monitor
D. Write T for True and F for False.
1. T 2. F 3. T 4. F
E. Answer the Following Questions.
1. We can draw and colour, learn new things, and send emails and messages on a computer.
2. Pen drive and hard disk are two storage devices used in a computer.
F. Apply Your Learning.
1. A computer can help Neha to take orders and make bills for food in a restaurant.
2. Pranjal can keep information of patients in a hospital.
3. A printer can help get a card on a computer printed on paper.
4. Divyansh must use a mouse to select a picture of his friend.
Chapter Checkup
A. Fill in the Blanks.
1. machine 2. electricity 3. shut down 4. Don't 5. CPU
B. Tick () the Correct Option.
1. a. Switch the main power button on
2. a. Computer may get damaged
3. b. Clean and dry cloth
C. Who Am I?
1. ON button on the CPU 2. Wires 3. Power icon 4. Keyboard
D. Write T for True and F for False.
1. F 2. T 3. F 4. F 5. T
E. Answer the Following Questions.
1. To switch the computer on, follow the given steps:
a. Switch on the main power switch.
b. Press the On button on the CPU.
c. Press the Power button on the monitor.
d. Wait till the Windows screen appears.
2. To shut down a computer, follow the given steps:
a. Click Start to open the menu.
b. Then, click on the Power icon.
c. Click on the Shut down option from the second menu.
3. The computer should be cleaned by wiping the computer with a soft and dry cloth.
4. a. Do: Press the keyboard keys gently.
b. Don’t: Don’t touch the computer devices with wet or dirty hands.
F. Apply Your Learning.
1. Riya must shut down her computer.
2. Sanjay should wipe the computer with a soft and dry cloth.
3. Kalpana and her brother should always keep food away from the computer. So, they must eat food at the dining table.
4. The steps to turn on the computer are:
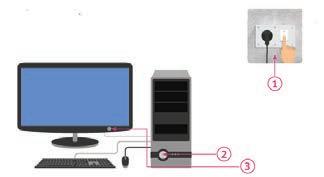
A. Fill in the Blanks.
1. Scroll wheel 2. Two 3. Left 4. List 5. Pointer
B. Tick () the Correct Option.
1. a. Left mouse button
2. b. Right mouse button
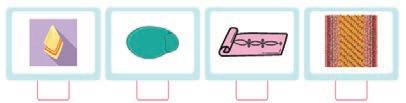
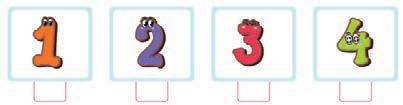
C. Who Am I?
D. Write T for True and F for False.
1. F 2. F 3. F 4. F 5. F
E. Answer the Following Questions.
1. A computer mouse is a pointing device that is used to point at and select things on the computer screen.
2. The Mouse Pointer is the small arrow that moves on the computer screen when you move the mouse.
3. A computer mouse has two buttons.
4. The left button on the mouse opens a file.
5. The mouse has a scroll wheel to help you move up and down on the screen.
F. Apply Your Learning.
1. The middle finger is used to click the right button on the mouse.
2. The palm is kept on the body of the mouse.
3. The scroll wheel is the part of the mouse used for scrolling.
4. The index finger is used to click the left button on the mouse.
5. The right button on the mouse pops up the menu on the screen.
Chapter Checkup
A. Fill in the Blanks.
1. Up 2. Spacebar 3. Keyboard 4. Enter 5. Number
B. Identify the Keys Correctly.
Alphabet keys
Backspace Key Number keys
Spacebar key Enter key
Arrow keys
C. Who Am I?
1. Keyboard 2. Backspace Key or Delete Key 3. Enter Key 4. Spacebar Key 5. Cursor
D. Write T for True and F for False.
1. T 2. T 3. F 4. F
E. Answer the Following Questions.
1. We use the keys on the keyboard to type what we want.
2. The arrow keys help us to move the cursor up, down, left or right.
3. The number keys help us type the numbers.
4. The Spacebar key helps us to add a space between the two words.
5. The Delete key is used to erase the letter or the number after the cursor.
F. Apply Your Learning.
1. Gaurav can use the alphabet keys to type a letter.
2. Sanchit can use the number keys to type his father’s mobile number on the computer.
3. Sara can use the Backspace key or the Delete key to correct her mistake.
4. Gurung can use the Enter key to take the cursor to the next line.
Chapter Checkup
A. Fill in the Blanks.
1. Paint 2. Oval 3. Fill with color 4. Saving
B. Tick () the Correct Option.
1. c. Drawing Area 2. b. File 3. d. Title Bar
C. Who Am I?
1. Drawing Area 2. Circle 3. Left mouse button 4. Save option
D. Write T for True and F for False.
1. T 2. F 3. T 4. T
E. Answer the Following Questions.
1. The Fill with color tool helps us colour our shapes.
2. Saving a file helps us to open our drawing again in Paint.
F. Apply Your Learning. Do it yourself
Chapter Checkup
A. Fill in the Blanks.
1. Smart 2. Learn 3. Machines
B. Tick () the Correct Option.
1. a. Artificial Intelligence
2. c. Talking toys
3. c. Cleaning the floor
C. Write T for True and F for False.
1. T 2. T 3. T
D. Answer the Following Questions.
1. AI or Artificial Intelligence gives machines the ability to learn and do things on their own, just like humans do.
2. Learning games are educational games that you play on your computer. For example, Quick, Draw!
3. One example of AI around us is a smart speaker.
E. Apply Your Learning. 1.
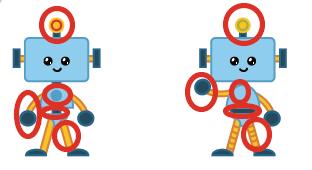
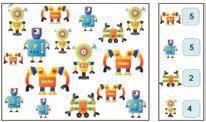
Chapter Checkup
A. Fill in the Blanks.
1. Solved 2. Blocks 3. Computer
B. Tick () the Correct Option.


D. Write T for True and F for False.
1. T 2. F 3. T
E. Answer the Following Questions.
1. A problem is something that we need to solve.
2. Coding is the language that is used to give instructions to a computer.
3. The coding language that uses blocks to give instructions is called Block-based coding.
F. Apply Your Learning.
1. The correct path is C. a. No b. Yes
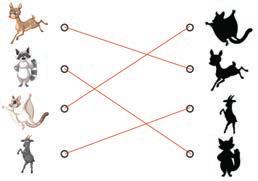

A. Fill in the Blanks.
1. Run 2. Blocks 3. Workspace 4. Instructions
B. Tick () the Correct Option.


D. Write T for True and F for False.
1. F 2. F 3. T
E. Answer the Following Questions.
1. The two parts of the Puzzle Code Studio are the play area and the toolbox.
2. The part of the Puzzle Code Studio where programs run is called the play area.
F. Apply Your Learning.
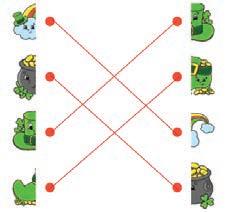
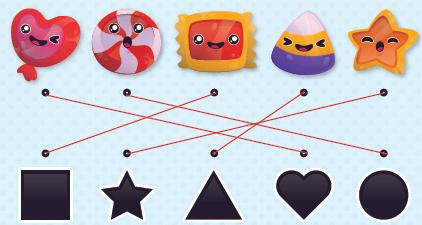
Chapter Checkup
A. Fill in the Blanks.
1. Instructions 2. Sequence 3. Fixed
B. Tick (
) the Correct Option.


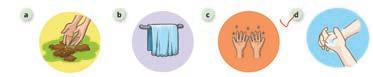
C. Who Am I?
1. Do It Yourself
D. Write T for True and F for False.
1. F 2. T 3. F
E. Answer the Following Questions.
1. In coding, the instructions we give to a computer to do something are called commands.
2. When we give more than one command in order, it is called a sequence.
3. The different types of sequences are fixed and flexible.
F. Apply Your Learning.


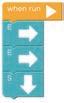
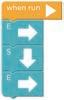
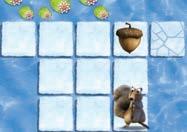
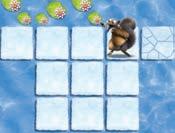
A. Fill in the Blanks.
1. natural 2. electricity/fuel/human power 3. hospitals 4. food
B. Tick () the Correct Option.
1. c. Cars
2. a. Refrigerator
3. c. The Windows screen
C. Write T for True and F for False.
1. T 2. F 3. T 4. T
D. Answer the Following Questions.
1. In offices, computers are used to do important work and send messages.
2. Shut down means to turn your computer off.
3. Hard disk is like a box that stores all the data in the computer.
E. Apply Your Learning.
1. I S O S

2. Two uses of a mouse are:
i. It helps to point and select.
ii. It helps to play games.
3. Piyush must buy a tablet.
A. Fill in the Blanks.
1. right 2. typing 3. Enter 4. Learn
B. Tick () the Correct Option.
1. b. Fill with color tool
2. a. Artificial Intelligence
3. c. Title Bar
C. Write T for True and F for False.
1. F 2. T 3. T 4. T
D. Answer the Following Questions.
1. Robot helpers help us with daily tasks at home. They can clean floors, cook food, etc.
2. The important parts of the Paint window are Title Bar, Tabs, Tools, Shapes, Colors, and the Drawing Area.
3. The Delete key helps us to erase letters or numbers after the cursor.
E. Apply Your Learning.
1. Palak will use the number keys.
2. Parul can use the Backspace key or the Delete key.
3. Megha must use the File tab.
A. Fill in the Blanks.
1. Instruction 2. Visual 3. Toolbox 4. Reset
B. Tick () the Correct Option.
1. c. Play area
2. b. To drag the blocks and code
3. a. North or Up Arrow block
C. Write T for True and F for False.
1. T 2. F 3. F 4. T
D. Answer the Following Questions.
1. Coding is the language used to give instructions to a computer.
2. The four main parts of the Puzzle Code Studio are the Play area, Toolbox, Workspace, and the Instruction area.
3. The two types of sequences are fixed sequence and flexible sequence.
E. Apply Your Learning.
Do It Yourself.
It is a flexible sequence because there is more than one way to complete the task.
This teacher manual has been designed to implement Tekie, the storytelling-based Coding and Computer Science program. The manual consists of lesson plans within each chapter that teachers transact within classrooms and computer labs. Each lesson is based on a research-based ‘WEBS’ framework that simplifies pedagogical practices for teachers and enables them to deliver effectively.
• Sharp Lesson Planning: Each lesson plan focuses on specific sub-learning outcomes within a chapter and are designed for delivery within the stipulated class or lab time.
• Real-life and Application-based Questions: Additional questions that link Computer Science to real-life contexts and assist teachers to develop learners’ conceptual understanding and application skills.
• Support and Detailed Solutions: In-depth solutions for in-class and post-class activities to reinforce learning.
Uolo partners with K-12 schools to provide technology-enabled learning programs. We believe that pedagogy and technology must come together to deliver scalable learning experiences that generate measurable outcomes. Uolo is trusted by over 15,000+ schools across India, Southeast Asia, and the Middle East.
ISBN 978-81-984519-3-4