Teacher Manual Grade 3

NEP 2020 aligned ICSE compliant Digital coding platform included


Note: Use the following points to prepare for the session beforehand. Avoid reading the points in the class.
● Junior robot Mel and junior wizard Conji are friends and live in a land named Avora.
● Lord Ero, a wizard, cast a magic spell on Mel and Conji to get the weapon.
● The spell caused Mel and Conji to land in the “Memory Palace”.
● Mr. Time, the head of the Time Palace, tried to send them back to their home.
● But something terrible happened, and they ended up in Robotland.
● Conji helped the robots complete a task they were stuck on.
● The robots helped Mel and Conji to go home.
● Mel and Conji are returning to Avora from the Memory Palace.
● Their spaceship lands in a strange place, surrounded by factories and warehouses.
● They start looking around and discover a machine.
● They eventually realise they have landed in ancient Avora.
The content covered in this chapter is aligned with the following CSTA Standard
● 1B-CS-02 - Computer Systems - Hardware & Software
This chapter is divided into the following classroom sessions
Objectives
In this session, students will learn about –
● A Computer
● Hardware
● Types of Hardware
Keywords
● A Computer: machine or electronic device that takes data and instructions as input, processes them, and returns an output
● Hardware: physical parts of a computer that can be seen and touched
Revise the story
Read the next story aloud
Warm-Up
● Recap the background story.
Conclude the concepts Assign homework
Action Plan 5 min
● Introduce Mel and Conji to the students.
● Read the story aloud from page 1 to panel 1 on page 4, up to Mel’s words “Storage devices.”

10 min
Engage
● Say: Let me explain the hardware and its types.
CS Concepts Explain
Hardware
Identify hardware devices
Types of Hardware
As given in Panel 3 on Page 3
By doing Spot me as given in Panel 4 on Page 3
As given in Panel 1 on Page 4
● Present the scenario: Consider your father runs a computer hardware shop and he has brought some new computer parts. He needs your help to store them in the right section.
List the devices: Monitor; Keyboard; Mouse; Printer; Speaker; Pen Drive on the board.
● Discuss:
■ How will you group the devices?
Possible Responses: Input; Output; Storage
■ What devices will you put in the Input Devices section?
Possible Responses: Mouse; Keyboard
■ What devices will you put in the Output Devices section?
Possible Responses: Monitor; Speaker; Printer
■ What devices will you put in the Storage Devices section?
Possible Responses: Pen drive
● Conduct Spot me on Page 3:
■ Say: Now, Elder Robot wants you to answer some questions.
■ Read: Find the Hardware parts aloud
■ Invite some students to share their answers and others to validate their peers’ answers.
■ Instruct: Write the correct answer in your books.
● Conduct Definitions on Page 23:
■ Say: It’s time to help Conji answer a question.
■ Read Q4 aloud.
■ Invite some students to share their responses.
■ Discuss and validate the answers with the whole class.
■ Instruct: Write the correct answers in your books.
● Conclude: Today, we learned about computers, hardware and types of hardware.
● Ask the following probing questions:
■ Which type of hardware device will you use to listen to music?
Possible Responses: Output Device; Speaker
■ What type of hardware device will you use to give instruction to a computer?
Possible Responses: Input Device; Keyboard; Mouse
● Assign the Pick the odd one out on Page 23 from DIY as homework.
Objectives
In this session, students will learn about –
● Input Devices
● Types of Input Devices - Keyboard and Mouse
Keywords
● Input Devices: hardware devices to take data and instructions as input
● Keyboard: input device used to type letters, numbers and give commands to the computer
● Mouse: input device used to move around the screen, point, and click
● Webcam: input device to take pictures and make video calls
● Sensors: input devices to take fingerprints or for face recognition
● Recap the story and revise the concepts covered in the previous chapter.
● Read the story aloud from panel 2 page 4 to panel 5 page 5 up to the “Sensors to take input.”
Say: Let me explain input devices and their types.
CS Concepts Explain
Input Devices
Types of Input Devices
As given in Panel 1, 2 on Page 4
As given in the book from Panel 3 on Page 4 to Panel 4 on Page 5 (Keyboard, Mouse, Webcam, Trackpad, Sensors)
● Present scenario 1: Consider you have a cousin who lives in another city. You want to send them a message to plan a picnic together.
● Discuss:
■ What device do you think you can use to send a message to your cousin?
Possible Responses: Smartphone; Mobile; Computer
■ What Input device can you use to type and send your message on a computer?
Possible Responses: Keyboard; Touch screen
● Present scenario 2: Consider your school is being automated and your attendance will be tracked automatically.
● Discuss:
■ What device can be used to input your attendance?
Possible Responses: Sensors; Finger sensors; Face recognition
● Conduct Who am I? on Page 20:
■ Say: Help Mel to add answers under its category(Input).
■ Read aloud the question.
min
■ Invite some students to share their answers and others to validate their peers’ answers.
■ Instruct: Fill in the final answers in your books.
● Conduct Definitions on Page 23:
■ Say: Help Conji to answer a question.
■ Read Q1 aloud
■ Invite some students to share their answers and others to validate their peers’ answers.
■ Instruct: Write the correct answers in your books.
● Conduct Guess my name on Page 21:
■ Say: Now, Conji wants you to answer some questions.
■ Read Q1, 2, and 3 aloud, one by one.
■ Invite some students to share their answers and others to validate their peers’ answers.
■ Instruct: Write the correct answer in your books.
Note
● If time permits, discuss Fun Time – Input devices (MOUSE and KEYBOARD) from DIY or assign it as homework.
1. Ask students to identify the input devices given in the activity.
2. Fill in the letters from top to bottom to name them.
Sum-Up 5 min
● Conclude: Today, we learned about input devices and two of their types: Keyboard and Mouse.
● Ask the following probing questions:
■ What can you do with a keyboard or a mouse on a computer?
Possible Responses: Type; Play video games; Open files; Scroll up and down; Drawing
■ Where have you seen sensors being used?
Possible Responses: In Cars; Malls; Hospitals; Laptops; Smartphones
● If not covered in the class, assign Fun Time - Input Devices (MOUSE and KEYBOARD) from DIY as homework.
Chapter 1 • A Computer System—Hardware and Software
Objectives
In this session, students will learn about –
● Output devices and their types
Keywords
● Output devices: a device that displays the result of the instruction given
● Monitor: an output device that displays our input and the result as well
● Printer: an output device that prints text or images on paper
● Speaker: an output device that is used to listen to music
● Headphones: a device that is used to listen to music and to speak
● Recap the story and revise the concepts covered in the previous chapter.
● Read the story aloud from panel 6 on page 5 to page 6 up to Mel’s words, “Storage devices.”
Say: Let me explain output devices and their types.
CS Concepts Explain
Output Devices
Types of output devices
As given in Panel 6 on Page 5
As given on Page 6
● Say: A headphone is both an input and an output device as we can listen to music and speak with it. Also, unlike a speaker, we can wear headphones.
● Present the scenario: Consider you need to prepare a project for a competition.
● Discuss:
■ What device will display the project-related information you’ve found?
Possible Responses: Monitor; Computer; Google
■ What device will you use to listen to the videos to prepare for the project?
Possible Responses: Speaker; Headphones
■ What device will you use to print your project?
Possible Responses: Printer
● Conduct What am I? on Page 20:
■ Say: Help Mel to add answers under its category(Output).
■ Read questions aloud
■ Invite some students to share their answers and others to validate their peers’ answers.
● Conduct Guess my Name on Page 21:
■ Say: Let’s help Conji answer some questions.
■ Read Q5 aloud.
■ Invite some students to share their answers and others to validate their peers’ answers.
■ Instruct: Write the correct answers in your books.
● Conduct Definitions on Page 23:
■ Say: Help Conji to answer a question.
■ Read Q3 aloud.
■ Invite some students to share their answers and others to validate their peers’ answers.
■ Instruct: Write the correct answers in your books.
Note
● If time permits, discuss the remaining part of DIY: Fun Time activity or assign it as homework.
● Conclude: Today, we learned about output devices and their types: monitor, printer, speaker and headphones.
● Ask the following probing questions:
■ Where have you seen speakers being used?
Possible Responses: School Announcements; Birthday Parties; Cars
■ Where have you seen people using printers?
Possible Responses: Computer Labs; Libraries; Homes; Shops; Offices
● Assign Fun Time (Complete the Pictureka activity) from DIY as homework.
In this session, students will learn about –
● Storage devices and their types
Keywords
● Storage Device: a device to store data and information
● Pen Drive: a device to store and transfer data from one computer to another
● Cloud Storage: online storage to store data and information without using any hardware device
WEBS at a Glance
Warm-Up Engage Build Sum-Up
Recap the story
Discuss storage devices and their types
Action
Examples all the way Definitions - Q2 Who am I? (Storage)
Conclude the concepts Assign homework
5
● Recap the story and revise the concepts covered in the previous chapter.
● Read the story aloud from page 7.
● Say: Let me explain storage devices and their types.
CS Concepts Explain
Storage devices
Pen drives
Cloud storage
As given in Panel 5 on page 6 and Page 7
As given in Panel 1 on Page 7
As given in Panel 2 on Page 7
● Present the scenario: Consider you are on a trip and your father wants to take a picture of you. But suddenly a notification pops up on his phone that says ‘your phone storage is full’.
● Discuss:
■ What will your father do?
■ What storage hardware device can help your father save images to make space on his phone?
Possible Responses: Pen drive; Memory card
■ Which storage can help your father access the images anywhere on any device?
Possible Responses: Cloud Storage
■ What will be needed to access images stored in cloud storage?
Possible Responses: Internet
■ Say: Elder Wizard wants you to help Mel and Conji answer a question.
■ Read the question aloud
■ Invite some students to share their answers and others to validate their peers’ answers.
■ Instruct: Write the correct answers in your books.
● Conduct Definitions on Page 23:
■ Say: It’s time to help Conji answer a question.
■ Read Q2 aloud, one by one.
■ Invite some students to share their responses.
■ Discuss and validate the answers with the whole class.
■ Instruct: Write the correct answers in your books.
● Conduct Who am I? on Page 20:
■ Say: Help Mel to add answers under its category(Storage).
■ Read the question.
■ Invite some students to share their answers and others to validate their peers’ answers.
■ Instruct: Fill in the final answers in your books.
Note
Sum-Up
● Conclude: Today, we learned about storage devices and their types.
● Ask the following probing questions:
■ What type of storage do you think is better and why?
Possible Responses: Pen drive; Cloud storage
min
Note: Students respond with a reason they think is valid for their choice. Appreciate students’ responses.
■ In what situations would you use a pen drive?
In this session, students will learn about –
● Software
● Types of Software
● Frequently Used Software
● Software: set of instructions that tell the computer what task to do and how to do it
● System: set of things working together to complete a complex task
WEBS at a Glance
Revise the conceptshardware and storage devices
Read the story aloud
Discuss software and types of software
Where do I belong? Conclude the concepts Assign homework
● Recap the story covered in the previous chapter.
● Instruct: Let’s learn how the story moves ahead. We will read from page 8 to panel 1 on page 10 up to the text “macOS are system software.”
● Read the story aloud OR invite 2 students to read the dialogues aloud.
● Say: Let me explain what software is and what the different types of softwares are.
Software
Types of software
Frequently used Software
As given in Panel 3 on Page 9
As given in Panel 1 on Page 10
As given in Panel 1 on Page 10
● Present the scenario: Consider that you want to view a video on YouTube on your computer, but the computer is switched off.
● Discuss:
■ What will you do as a first step?
Possible Responses: Switch on the computer
Explanation: Yes, so that the system software can get ready to take commands.
■ How will you open YouTube?
Possible Responses: Using a browser; Type YouTube in Google; Type www.youtube.com
● Conduct Where do I belong? on Page 18:
■ Say: Help Conji to fill in the rows.
■ Read aloud the question.
■ Invite some students to share their answers and others to validate their peers’ answers.
● Conclude: Today, we learned about software and types of software.
● Ask the following probing questions:
■ Why do we need software?
Possible Responses: To tell the computers to do a task; To run programs on them; To play songs; To play games; To write in a document
In this session, students will learn about –
● Application Software
● Types of Application Software
● Voice Recognition Technology
● Cloud Storage
● Biometric Software
Keywords
● Photoshop: image editing software
● Characteristics: special quality or features
● Biometric: recognition of people based on their physical characteristics such as fingerprint, face etc.
● Retina: part of an eye
● Say: Do you remember what we learned in the previous session?
● Invite responses from some students.
● Say: There are two new characters in this chapter.
● Introduce: First Elder Robot and First Elder Wizard to the students.
● Instruct: Let’s read from panel 2 on page 10 to page 15 up to the text “Wizard too.”
● Read the story aloud OR invite 2 students to read the dialogue aloud
● Say: Let me explain more about the application software and its types.
CS Concepts Explain
Application Software
Types of Application software
Voice recognition technology
Cloud Storage
Biometric Software
As given in Panel 2 on Page 10
As given in Panel 3 on Page 10
As given in Panel 1 on Page 11
As given in Panel 2 on Page 11
As given in Panel 1 on Page 12
As given in Panel 2 on Page 12
● Present the scenario: Consider that your computer is under an attack by a virus.
● Discuss:
■ What type of software will protect your computer from the attack?
Possible Responses: Utility software; Anti-virus; McAfee; Norton
Explanation: Utility software like antivirus software helps maintain the system.
■ What type of software will you use for booking a movie ticket online?
Possible answers: BookMyShow; Specific software; Theatre websites
● Conduct Define me on page 18:
■ Say: Help Conji to fill in the answers.
■ Read Fill Up – Q1, 2 and 3, 4 aloud, one by one.
■ Invite some students to share their answers and others to validate their peers’ answers.
■ Instruct: Fill in the final answers in your books.
● Conduct Find the odd one out on page 19:
■ Say: Help Conji to fill in the right answer.
■ Read the task aloud
■ Invite some students to share their answers and others to validate their peers’ answers.
■ Instruct: Fill in the final answers in your books.
● Conduct Guess my name section:
■ Say: Help Conji to answer the questions.
■ Read Q4 aloud.
■ Invite some students to share their responses.
■ Discuss and validate the answers with the whole class.
■ Instruct: Write the final answers in your books. Note
● If time permits, discuss the section What am I? and Match the following on page 22.
● Conclude: Today, we revised the application software. We learned about types of application software and about voice recognition technology.
● Ask the following probing question:
■ Name 2 voice assistants using voice recognition technology.
Possible Responses: SIRI; Alexa; Cortana; Google Assistant
Note: Use the following points to prepare for the session beforehand. Avoid reading the points in class.
● Mel and Conji learned about the hardware and software.
● Mel and Conji walk out of the room. They notice a robot walking towards them.
● The system helped the robots build the new world.
● Suddenly, the system started failing due to a lack of energy.
● Conji tried to help by using magic, but it needed more energy.
● The First Elder Wizard came to the rescue.
● To help the robots start their new world, the First Elder Wizard asks the First Elder Robot to reset the system.
● When Conji asks, Mel explains the operating system and the GUI of the application.
● The First Elder Wizard successfully starts the system with magic.
● The First Elder Robot offers the First Elder Wizard to expand Wizard kind on their planet.
The content covered in this chapter is aligned with the following CSTA Standard
● 1B-CS—02 Abstraction
This chapter is divided into the following classroom sessions
1. Operating System I
2. Operating System II
3. Operating System III
In this session, students will learn about –
● Operating System
● History of Operating System
● Windows
● GUI
Keywords
● Operating System: software that helps users, computer hardware, and software to communicate
● GUI: allows users to interact with their computer using a mouse and keyboard
Discuss operating system, history of operating system, different types of OS, Windows, and GUI 5 min 12 min 10 min 3 min
Warm-Up
Expand and define Q1, 2
Conclude the session Assign the homework
5 min
● Say: Today, we will be learning the magic needed for the computer to work.
● Say: Let’s learn how the story moves ahead.
● Read the story aloud from Page 26 to panel 1 on Page 28 up to Mel’s words “... the latest version.”
Engage
● Discuss the operating system and its history while reading the story.
CS Concepts
Operating System
History of computer
GUI
12 min
Explain
As given in Panel 3 on Page 26
As given in Panel 3 on page 27
As given in Panel 3 on Page 27
● Present the scenario: You visit a village with your parents and meet a village boy who has never seen a computer, laptop or smartphone. The village boy sees you using your father’s laptop and wonders how that device works. He wants you to answer some questions.
● Discuss
■ What helps you use the laptop?
Possible Responses: Operating System; Keyboard; Laptop; Device
■ What is an Operating System?
Possible Responses: Software that helps us communicate with computers
■ What is Software?
Possible Responses: Application; Program
■ What operating systems are there?
Possible Responses: Windows; Apple Mac and other laptop companies’ names
● If time allows, discuss all four questions, or discuss the first two.
● Conduct Where do I belong? on Page 40:
■ Say: Let’s help Conji to identify devices that have OS and those that do not.
■ Read options aloud.
■ Invite some students to share their answers and others to validate their peers’ answers.
■ Instruct: Fill in the final answers in your books.
● Conduct Expand and define on Page 40:
■ Say: Let’s help Mel to find out full forms and write the correct answers.
■ Read Q1, 2 aloud, one by one.
■ Invite some students to share their responses.
■ Discuss and validate the answers with the whole class.
■ Instruct: Write the final answers in your books.
● Conclude: Today, we learned about Operating Systems, their history, Windows and GUI.
● Ask the following probing questions:
■ What devices do you see around you that work on an operating system?
Possible Responses: Smartphone; SmartTV; Smartwatch
■ What can be used as an interface between the user and the computer?
Possible Responses: Keyboard; Mouse; Operating System; Software
● Assign Find out more about me on Page 28 as homework.
In this session, students will learn about –
● Desktop
● How to change the background image
Keywords
● Desktop: main screen we see when the computer is switched on
● Taskbar: provides a quick and easy way for users to access and manage running applications
● Screensaver: it displays moving images or animations
Revise the previous session concepts Read the story covered in the session aloud
Discuss the desktop, changing the background image, screensaver
● Say: Today, we will be learning the magic of Desktop that helps to operate a computer.
● Read the story aloud from Panel 3 on Page 28 to Page 31
Engage
● Discuss the following concepts while reading the story.
CS Concepts Explain
Desktop
How to change the background image
How to download the applications
Screensaver
As given in Panel 3 on Page 28
As given in Panel 3 on Page 29
As given in Panel 3 and 4 on Page 30 and Panel 1 and 2 on Page 31
As given in Panel 4 on Page 31
● Present the scenario: You visit your cousin’s house with your parents. You start using your laptop to play games. Your cousin asks you how everything works and wants you to answer some questions.
● Discuss:
■ What is a Desktop?
Possible Responses: Operating System; Keyboard; Laptop; Device
■ What is a Taskbar?
Possible Responses: A bar on which we can decide to perform many tasks
■ What is an Application?
Possible Responses: Windows; Apple Mac; Games; Computer
■ What is a Screensaver?
Possible Responses: Application; Program
● Conduct Let’s Number them on Page 39:
■ Say: Let’s help Mel to number the steps in the correct order.
■ Read Questions A and B aloud, one by one.
■ Invite some students to share their answers and others to validate their peers’ answers.
■ Instruct: Fill in the final answers in your books.
● Conclude: Today, we learned about Desktop and changing its background image.
● Ask the following probing questions:
■ What do we see when the Computer is turned on?
Possible Responses: Operating System; Image; Desktop
■ What types of applications do we have?
Possible Responses: Games; Images; Desktop; Free applications; Paid applications
min
In this session, students will learn about –
● How to change the Screensaver
● Shapes of Mouse pointers
Keywords
● Mouse Pointer: used to select or click on different objects on the screen, like buttons, icons, links, and menus
● Shut Down: process of turning off all the hardware and software components of the computer system
Revise the previous session concepts
Read the story covered in the session aloud
Discuss changing mouse pointers’ shapes, how to shut down the computer
● Say: Today, we will be learning about Screensaver and the shapes of Mouse pointers in a Computer.
● Read the story aloud from Page 32 to Panel on Page 37
● Discuss the following concepts while reading the story.
CS Concepts Explain
How to change the screensaver
Shapes of mouse pointers
Shut Down
As given on Page 32
As shown in Panel 1 on Page 33
As shown in Panel 2 on Page 33
● Present the scenario: You visit your cousin’s house with your parents. You start using your laptop and play games. Your cousin asks you how everything is working and wants you to answer some questions.
● Discuss:
■ What does a Double-headed arrow mean?
Possible Responses: Busy; Working in the background; Image is changing
■ What is a Mouse Pointer?
Possible Responses: It helps to perform a different task
■ What are the different shapes of Mouse Pointers?
Possible Responses: Arrow; Normal; Pointer
Build 10 min
● Conduct Expand and define on Page 40:
■ Say: Let’s help Mel to find out full forms and write the correct answers.
■ Read Q3 and Q4 aloud, one by one.
■ Invite some students to share their answers and others to validate their peers’ answers.
■ Instruct: Write the correct answers in your books.
● Conduct Let’s Number them on Page 39:
■ Say: Let’s help Mel to number the steps in the correct order.
■ Read Question C aloud, one by one.
■ Invite some students to share their answers and others to validate their peers’ answers.
■ Instruct: Fill in the final answers in your books.
Sum-Up
● Conclude: Today, we learned about the mouse pointer and changing screensaver.
● Ask the following probing questions:
■ When the Computer is busy, what is the shape of the mouse?
Possible Responses: Working; Busy; We have to wait; Computer is busy
■ When we see the Four-headed arrow, what does it mean?
Possible Responses: The mouse is busy; System is working; We can move pictures
3 min
Note: Use the following points to prepare for the session beforehand. Avoid reading the points in class.
● Conji discussed Operating System.
● Mel suggested that GUI is simply a user interface that helps users communicate with computers using icons.
● Conji understands how to change the background of the desktop.
● Mel and Conji also learned about How to download apps.
● Mel shared what is a File and Folder.
● Mel Created a folder called “Mel and Conji”.
● Mel shared how to delete any File.
The content covered in this chapter is aligned with the following CSTA Standard
● 1A-CS–02 Computer Systems
This chapter is divided into the following classroom and lab sessions
1. File Management I
2. File Management II
3. File Management III
4. File Management IV
In this session, students will learn about –
● File
● Folder
● How to save a file
Keywords
● File: store our work on a computer and it has a name
● Folder: holds one or more files
Revise the story and CS concepts covered in the previous session
Read the story aloud
Discuss file, folder, and how to save a file
Where do I belong? Is it true? Q1, 2
Conclude the concepts Assign the homework
● Say: Let’s learn how the story moves ahead.
● Instruct: Let us open the book and read the story.
● Read the story aloud from page 42 to panel 1 on page 44.
● Say: Let me explain about files, folders and how to save a file.
Scenarios If you are teaching without a projector OR
If you are teaching with a projector Open a Google doc on your computer system
CS Concepts Explain Demonstrate
File As given in Panel 1 on Page 43 A file on the computer
Folder As given in Panel 3 on page 43 A folder on the computer
● Present the scenario: Consider that you have to make a list of items you want to buy when you go to the supermarket.
● Discuss:
■ How will you start jotting down the items on a sheet of paper or a device?
Possible Responses: Mobile Phone; Tab
■ How will you make a list of the items?
Possible Responses: Pen and paper; Creating a file on the computer
■ What points have you jotted down? Have you placed those items in a single place?
Possible Responses: Can be a page or a Tab file
■ How will you revisit or re-check the list of items?
Possible Responses: Open the file; Check and tick the items on the sheet of paper
● Conduct Fill in the blanks on Page 43:
■ Say: Help Mel fill in the blanks.
■ Read Q1, 2, 3 aloud, one by one.
■ Invite some students to share their answers and others to validate their peers’ answers.
■ Instruct: Fill in the answers in your books.
● Conduct Where do I belong? on Page 50:
■ Say: Help Mel match the right files to folder
■ Read the question aloud
■ Invite some students to share their answers.
■ Discuss and validate their answers.
■ Instruct: Mark the answers in your books.
● Conduct Is it true? on Page 51:
■ Say: Help Mel answer the following question.
■ Read Q1 and 2 aloud.
■ Invite some students to share their answers and others to validate their peers’ answers.
■ Instruct: Mark the right answer in the space given.
● Conclude: Today, we learned about file, folder, and how to save a file in the folder.
● Ask the following probing questions:
■ How can you add information in the file you just created?
Possible Responses: By adding new items to the grocery list; By updating the quantity of items; By deleting some of the items
■ What should you do after adding more information to the file?
Possible Responses: Save the file; Print it out
In this session, students will learn about –
● How to make a new folder
● How to rename a folder or file
● Save: store a file in the computer
● Rename: change the name of a file
Read the story to be covered in the current session aloud from Page 44 panel 1 on page 45.
Discuss the ways in which you can rename a folder Is it true? on Page
● Say: Let’s learn how to rename a file.
● Instruct: Let us open the book and read the story.
● Read the story aloud from panel 2 on page 44 to panel 1 on page 45
● Say: Let me explain how to rename a file.
Scenarios If you are teaching without a projector
How to make a new folder
How to rename a folder or file
given in Panel 2 on Page 44
given in Panel 1 on Page 45
If you are teaching with a projector Open a google doc on your computer system
How to make a new folder
How to rename a folder or file
● Present the scenario: Consider a situation where you have to rename a document on your computer for a school project.
● Discuss:
■ How will you look for relevant names that will be suitable for a particular file?
Possible Responses: Mobile Phone; Tab
■ What sources will you use to jot down all the names?
Possible Responses: Can be a page; Can be a Tab file
■ How will you search for the renamed file?
Possible Responses: Type the first five letters of the word
■ How will you find out whether the name is saved or not?
Possible Responses: If the name appears on the screen while searching; It means the file has been saved
● Conduct Is it true? on Page No. 51:
■ Say: Now help Mel with a question related to saving and renaming the file in the find the truth section.
■ Read Q5 and Q6 aloud
■ Invite some students to share their answers.
■ Discuss and validate their answers.
■ Instruct: Mark the answers in your books.
● Conclude: Today, we learned about how to make a new folder and rename a file or folder.
● Ask the following probing questions:
■ How can you rename a file you just created?
Possible Responses: Remove the previous name and add new letters to the file by using the keyboard to type
■ How will you check whether the file you have renamed has been saved?
Possible Responses: While searching for the file; If the file comes up on the search list; It means the file is saved
In this session, students will learn about –
● Recycle bin and restore deleted files
● Recycle Bin: temporary storage for deleted files
Present the slides to recall the concepts covered on creating a file on
Discuss the ways you can delete the file. Open a new file and type “Myself”, and then save the file in a folder that you have created on the desktop and try to delete any file.
● Say: In this section, we will create a file and save it in a folder.
● Instruct: We will create a new file and save it.
● Go to the Tekie panel and Open the Lab session on File Management III.
● Show the slides given in the Tekie panel to recall the concepts covered in the previous session.
● Read the story aloud from panel 2 on page 45 to panel 6 on page 45.
● Discuss the quiz questions given on the slides in the Tekie panel.
● Conduct creating and saving the “Myself” file in the Tekie panel:
■ Explain the activity given on the panel.
■ Instruct: Click on the Go to Practise button on the Assignment page.
■ Walk around in the classroom and observe the activity done by the students.
■ Guide students if they are struggling with the activity.
● If time permits, conduct the additional activity given in the Tekie panel.
● Conclude: Today, we learned about the recycle bin and restoring deleted files.
● Ask the following probing questions:
■ What are the possible ways you can create a file?
Possible Responses: The new file can be created in a completely new location; It can also be created in the existing folder
■ What do you want to mention in the “Myself” File?
Possible Responses: Myself will be about your family; Friends; Likes and dislikes
■ Once you have created a file, how can you save it?
Possible Responses: Once the file is created; Save it in a folder of your choice; You can do it at any new location where the folder is created
● Assign Who am I ? on page 52 as homework.
In this session, students will learn about –
● Searching Files and Task Manager
● Search icon: allows you to search for files in the computer
Present the slides to recall the concepts covered in searching a file Tekie Platform
Discuss the ways to search for a file once created
Save the “Myself” File in a new folder and search for it in both the new folder and on desktop
● Say: In this section, we will learn how to search for a file.
● Instruct: We will learn how to search for a file.
● Go to the Tekie panel and open the Lab session on File Management IV.
Conclude the session on searching for a file
● Show the slides given in the Tekie panel to recall the concepts covered in the previous session.
● Read the story aloud from page 46 to page 48
● Discuss the quiz questions given on the slides in the Tekie panel.
● Conduct searching for the “Myself” file in the Tekie panel:
■ Explain the activity given in the panel.
■ Instruct: Click on the Go to Practise button on the Assignment page.
■ Walk around in the classroom and observe the activity done by the students.
■ Guide students if they are struggling with the activity.
● Conduct Is it true? on Page No. 51:
■ Say: Now help Mel with a question related to saving and renaming the file in the find the truth section.
■ Read Q3 and Q4 aloud.
■ Invite some students to share their answers.
■ Discuss and validate their answers.
■ Instruct: Mark the answers in your books.
● If time permits, conduct the additional activity given in the Tekie panel.
Sum-Up
● Ask the following probing questions:
■ What are the possible ways you can search for a file?
Possible Responses: The new file can be created in a completely new location
■ Can you search for the file within the folder that has been created?
Possible Responses: Once the file is created; Save it in a folder; You can search for it in recent documents
● Assign Colour me! on page 52 as homework.
Note: Use the following points to prepare for the session beforehand. Avoid reading the points in class.
● Mel shared what is a File and Folder.
● Mel Created a folder called “Mel and Conji.”
● Mel shared how to delete any File.
● Mel and Conji are looking for Eva all over.
● Mel discussed the Internet and www with Conji.
The content covered in this chapter is aligned with the CSTA Standard
● 1B-NI–04 Networks & the Internet
This chapter is divided into the following classroom and lab sessions
1. Internet I
2. Internet II
In this session, students will learn about –
● The Internet
● History and uses of the Internet
● Internet: a network of connected computers that helps gather information and communicate with others
● Recap the story and revise the concepts covered in the previous chapter.
● Say: Today, we will be learning the magic of the Internet.
● Say: Let’s learn how the story moves ahead.
● Read the story aloud from Panel 1 on Page 54 to Page 57.
● Discuss the Internet and its uses while reading the story.
As given in Panel 2 on page 56
Uses of the Internet
As given on Page 57
● Present the scenario: Consider your best friend is moving to another city as their father got orders from his office. You ask your friend to stay in touch using the Internet. But your friend has never heard of the Internet.
● Discuss
■ What is the Internet?
Possible Responses: Software that helps us communicate with people
■ What device does your friend need to use the internet?
Possible Responses: Laptop; Smartphone; Computer
■ What applications can we use to share messages to stay connected?
Possible Responses: Email; Facebook; Instagram; Whatsapp
■ What else can we do with the Internet?
Possible Responses: Play Games; Watch Videos; Run the computer
Note
● If time allows, discuss all four questions, or discuss the first two.
● Conduct Fill in the blanks on Page 61:
■ Say: Let’s help Conji fill in the blanks.
■ Read Q1, 2, and 3 aloud, one by one.
■ Invite some students to share their answers and others to validate their peers’ answers.
■ Instruct: Fill in the final answers in your books.
● Conduct Answer the following in detail on Page 61:
■ Say: Let’s help Conji write the correct answer in detail.
■ Read Q1 aloud.
■ Invite some students to share responses.
■ Discuss and validate the answers with the whole class.
■ Instruct: Write the final answers in your notebook.
● If time allows, discuss the following questions or assign them as homework:
■ With the help of the Internet we can share Information. (T/F)
■ It is safe to watch videos online using the Internet. (T/F)
● Conclude: Today, we learned about the Internet and its history.
● Ask the following probing questions:
■ What is used to connect multiple computers?
Possible Responses: Computer; Internet
■ What devices can you use to connect to the Internet?
Possible Responses: Share information; Play games; Watch videos
● Assign the following questions as Homework:
■ Short Answers - Q1 and 2 on Page 62
In this session, students will learn about –
● IP Address
● www
● Web Browser
● Web Browser: an application to access information over the internet and stay connected with people who are far away
Recap the story and revise the concepts covered in the previous session
Read the story to be covered in this session aloud
Discuss Uses of the Internet and Web Browser, www
Answer the following briefly - Q1, 2, 3 Answer the following in detail - Q2, 3
● Recap the story and revise the concepts covered in the previous session.
● Say: Let’s learn how the story moves ahead.
Conclude the session Assign the homework
● Read the story aloud from Panel 1 on Page 58 to Panel 2 on Page 59 up to the words “....using a web browser....”
● Say: Let me explain the magic of the Web Browser.
As given in Panel 1 on Page 58
IP Address
WWW
As given in Panel 1 on Page 59
As given in Panel 2 on Page 59
● Present the scenario: You visit your friend’s house at the weekend and see that his parents and your friend are playing computer games using Web Browser. You are curious and ask your friend how to play these games and he tells you about web browsers.
● Discuss:
■ What are the uses of Web Browsers?
Possible Responses: Internet; Website; Webpages
■ What is used to play games and watch videos?
Possible Responses: Internet; Computer; Web browser
■ You want to talk to your friend while sitting at home. What will you use?
Possible Responses: Internet; Software; Computer; Laptop
Note
● If time allows, discuss all three questions, or discuss the first two.
● Conduct Q and A Time on Page 61:
■ Say: Let’s help Mel to find the correct answers.
■ Read Q1, 2, and 3 aloud.
■ Invite some students to share their answers and others to validate their peers’ answers.
■ Instruct: Write the correct answers in your notebooks.
● Conduct Answer the following in detail on Page 61:
■ Say: Let’s help Conji to find the correct answer.
■ Read Q2, 3 aloud
■ Invite some students to share their responses.
■ Discuss and validate the answers with the whole class.
■ Instruct: Write the final answers in your notebooks.
● Conduct Short Answers on Page 62:
■ Say: Let’s help Conji to find the correct answer.
■ Read Q3, 4, 5 aloud
■ Invite some students to share their responses.
■ Discuss and validate the answers with the whole class.
■ Instruct: Write the final answers in your notebooks.
Note
● If time allows, discuss the following questions or assign them as homework.
■ It is safe to play games online using the Internet. (T/F)
■ Email is the safest mode to communicate and share information using the Internet. (T/F)
● Conclude: Today, we learned about the uses of the internet and web browsers.
● Ask the following probing questions:
■ What is used to play games?
Possible Responses: Computer; Internet; Web Browser
■ What are the uses of Web Browsers?
Possible Responses: To share information; Play games; Watch videos
● Assign the following questions as homework:
■ Guess the odd one out on Page 63
■ Word Search on Page 63
Note: Use the following points to prepare for the session beforehand. Avoid reading the points in class.
● Mel and Conji are looking for Eva all over.
● Mel discussed the Internet and www with Conji.
In this Chapter…
● Mel, Conji and the Elder Wizard are at the control centre.
● Elder Wizard told the kids that Avora is in big trouble.
● The kids talk about their favourite potion.
● They discuss MS Paint.
This chapter is divided into the following classroom and lab sessions
1. Fun with MS Paint I
2. Fun with MS Paint II
3. Fun with MS Paint III
In this session, students will apply what they have learned from the previous class to complete tasks on MS Paint.
● Tools: used to perform tasks
● Eraser: used to erase mistakes and make changes
● Shapes: used to create shapes
● Pencil: used to draw outlines on the page
● Say: Do you remember what we learned in the previous session?
● Invite responses from some students.
● Say: Let us revise what we have learned.
● Instruct: Go to the Panel and open Lab on Fun with Paint I
● Show slides one by one and discuss the concepts shown on the slide in the panel.
● Present the scenario: Consider your friend wants to make a drawing on MS Paint but has never used it before. Let’s answer some questions to help your friend.
● Discuss:
■ What tool can be used to draw something in MS Paint?
Possible Responses: Pencil; Shape
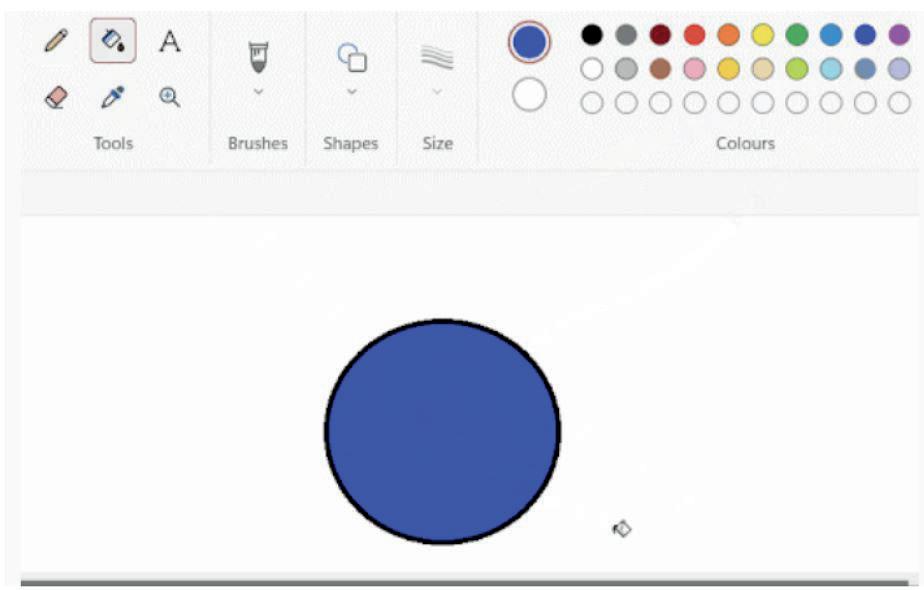
■ Which tool can be used to fill colour in a shape?
Possible Responses: Fill Color
■ Suppose your friend made some mistake in the drawing. What can they use to remove it?
Possible Responses: Eraser Tool; Eraser
■ What shapes can be used to make drawings in MS Paint?
Possible Responses: Circle; Oval; Square; Rectangle
Note
● If time allows, discuss all four questions, or discuss the first two.
● Instruct: We know how to open MS Paint and use its Shape tool.
● Now, let us practise our learning. Click on the Practice button on the Assignment page to attempt the activity.
● Open MS Paint on your computer.
● Walk around in the classroom and observe the activity done by the students.
● Instruct: Click on File->Save to save your work when you are done with the activity.
● Instruct: Practise the same activity at home.
● Assign the following project as homework.
● Project: Draw a carrot in MS Paint and colour it using Color Tools.
In this session, students will apply what they have learned from the previous classes to revise all the tools and make new drawings using shapes.
● MS Paint: computer application to draw
● New: create a new drawing page
● Pencil: used to draw shapes
● Eraser: used to erase mistakes
● Home: contains different tools
● Print: prints the MS Paint file
● Tools: used to perform tasks
● Eraser: used to erase mistakes and make changes
● Shapes: create shapes
● Fill Tool: add colours to shapes
● Magnifier: used to zoom in / zoom out
● Say: Do you remember what we learned in the previous session?
● Invite responses from some students.
● Say: Let us revise what we have learned.
● Instruct: Go to the Panel and open Fun with MS Paint II.
● Show slides one by one and discuss the concepts shown on the slides in the panel.
● Discuss:
■ Can you name some drawing tools in MS Paint?
Possible Responses: Pencil; Brush; Eraser
■ On which tool’s drawing can the Eraser tool work?
Possible Responses: Shapes; Brush; Pencil
■ Can we use multiple tools to create a drawing in MS Paint?
Possible Responses: Yes; No; Maybe
■ Which colours can be used while using the Pencil tool?
Possible Responses: Black; Red; Yellow; Blue; Any colour
Note
● If time allows, discuss all four questions, or discuss the first two.
● Instruct: We know how to draw shapes on MS Paint.
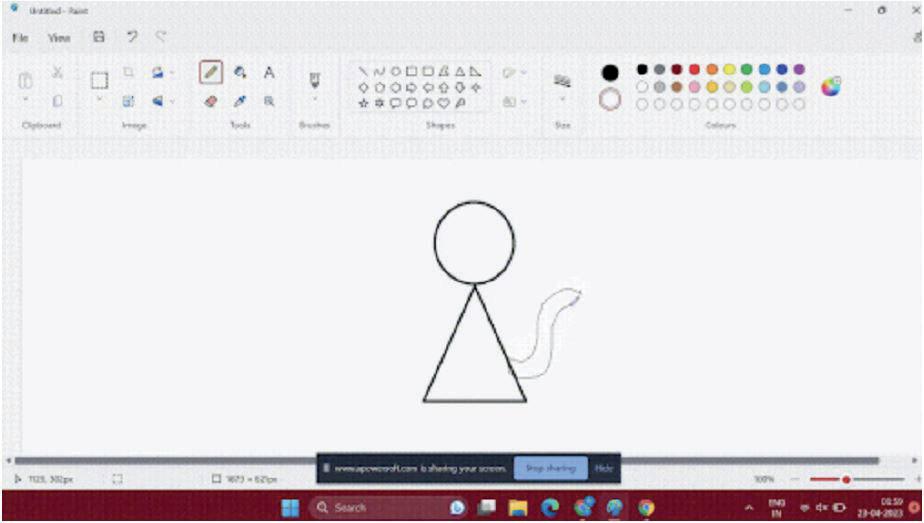
● Now, Let’s draw a cat using shapes in MS Paint and colour it.
● Open MS Paint on your computer and start drawing the figure of the cat.
● Walk around in the classroom and observe the activity done by the students.
● Instruct: Click on File->Save to save your work when you are done with the activity.
Note
● If time permits you can try “Fish Shape” to enhance your learning.
2 min
● Conclude: Today, we have revised and used MS Paint for colouring.
● Instruct: Practise the same activity at home.
In this session, students will apply what they have learned from the previous classes to revise all the tools and make new drawings as well as save them.
● MS Paint: computer application to draw
● Tools: used to perform tasks
● Eraser: used to erase mistakes and make changes
● Shapes: create shapes
● Fill Tool: a tool to add colours to shapes
● Magnifier: a tool used to zoom in / zoom out
● Say: Do you remember what we learned in the previous session?
● Invite responses from some students.
● Say: Let us revise what we have learned.
● Instruct: Go to the Panel and open Fun with MS Paint III.
● Show slides one by one and discuss the concepts shown on the slides in the panel.
● Discuss:
■ Can you name some drawing tools in MS Paint?
Possible Responses: Pencil; Brush; Eraser
■ On which tool’s drawing can the Eraser tool work?
Possible Responses: Shapes; Brush; Pencil
■ Can we use multiple tools to create a drawing in MS Paint?
Possible Responses: Yes; No; Maybe
■ Which colours can be used while using the Pencil tool?
Possible Responses: Black; Red; Yellow; Blue; Any colour
Note
● If time allows, discuss all four questions, or discuss the first two.
● Instruct: We know how to draw shapes on MS Paint.
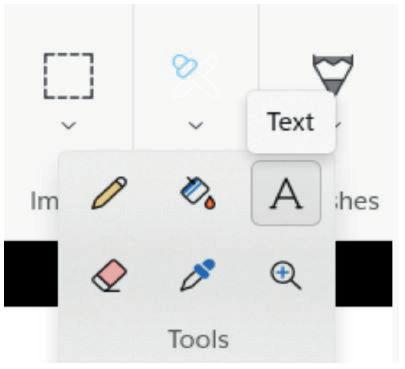
● Now, let us practise our learning and try to add text.
● Open MS Paint on your computer and select the text tool.
● Walk around in the classroom and observe the activity done by the students.
● Instruct: Click on File->Save to save your work when you are done with the activity.
Note
● If time permits you can try to use the text tool.
Sum-Up
● Conclude: Today, we have revised and used MS Paint for adding text.
● Instruct: Practise the same activity at home.
Note: Use the following points to prepare for the session beforehand. Avoid reading the points in class.
● Mel, Conji and the Elder Wizard are at the control centre.
● Elder Wizard told the kids that Avora is in big trouble.
● The kids talk about their favourite potion.
● They discuss MS Paint.
● Conji and Mel go to the Memory palace and meet Mr. Geebal.
● Conji asks Mr.Geebal to help him record all the events.
● Mr. Geebal runs to Mr. Times office.
The content covered in this chapter is aligned with the CSTA Standard
● 1B-DA-06
This chapter is divided into the following classroom and lab sessions
1. Google Docs I
2. Google Docs II
3. Google Docs III
4. Google Docs IV
In this session, students will learn about –
● Google Docs and its Uses
● Creating new documents
● How to name the document
Keywords
● Font: it is a style of text
Recap the story and the concepts covered in the previous session
Discuss creating new documents and how to name the document
Conduct the activity given on the panel
Type me
Mr Geebal’s Test of memory Q1, 2 Is Mr.Geebal lying - Q1, 2
Conclude the session Assign the homework
● Recap the story and revise the concepts covered in the previous chapter.
● Show the slides and discuss the questions given in the panel.
Build
● Brief students about the activity given in the Tekie panel.
■ Instruct: Click on Start Practice button and attempt the activity.
■ Walk around in the classroom and observe the activity done by the students.
■ Guide students if they are struggling with the activity.
10 min
● Conduct Mr.Geebal test of memory on Page 96:
■ Say: Let us help Mel to choose the right answer.
■ Read Q1, 2 aloud.
■ Invite some students to share their answers and others to validate their peers’ answers.
■ Instruct: Select the right answers in your books.
● If time permits, conduct Is Mr.Geebal lying? on Page 97:
■ Say: Let us help Mel mark these statements as true or false.
■ Read Q1 and 2 sentences aloud one by one.
■ Invite some students to share responses.
■ Discuss and validate the answers with the whole class.
■ Instruct: Mark the final answers in your books.
Sum-Up
● Conclude: Today, we have learned about how to create a google docs.
● Ask the following questions as homework:
■ Type me on page 81
■ Mel asks on page 98 - Q1, 2
In this session, we will learn about –
● Saving a Document
● Searching a Document
● Sharing a Document
● Opening an Existing Document
● Font: it is a style of text
Recap the story and the concepts covered in the previous session
Discuss how to save documents and how to open the document. Search and share the document
Conduct the activity given on the panel
Type me Mr. Geebal’s Test of memory Q3, 4 Is Mr. Geebal lying - Q3, 4
● Recap the story and revise the concepts covered in the previous session.
Conclude the session Assign the homework
8 min Engage
● Show the slides to discuss how to save, open, search and share a document.
● Discuss the questions given in the panel.
● Brief students about the activity given in the Tekie panel.
■ Instruct: Click on Start Practice button and attempt the activity.
■ Walk around in the classroom and observe the activity done by the students.
■ Guide students if they are struggling with the activity.
● Conduct Mr.Geebal test of memory on Page 96:
■ Say: Let us help Mel to choose the right answer.
■ Read Q3, 4 aloud.
■ Invite some students to share their answers and others to validate their peers’ answers.
■ Instruct: Select the right answers in your books.
● If time permits, conduct Is Mr.Geebal lying? on Page 97:
■ Say: Let us help Mel mark these statements as true or false.
■ Read Q3 sentences aloud one by one.
■ Invite some students to share responses.
■ Discuss and validate the answers with the whole class.
■ Instruct: Mark the final answers in your books.
● Conclude: Today, we have learned how to search and share Google Docs.
● Ask the following probing questions:
■ Which tool is used for editing text online?
Possible Responses: Word; Google Docs; Document
■ What do we use to make a new file in Google docs?
Possible Responses: Ctrl + Shift + N (Windows) or Command + Shift + N (Mac)
● Assign Mel asks on Page 98 Q-3,4 as homework.
Objectives
In this session, students will learn about –
● Add text
● Delete text
● Move text
Keywords
● Delete: remove or erase content
● Add: include something
● Move: change position
Recap the story and the concepts covered in the previous session
Discuss how to add text, delete text, move text
Conduct the activity given on the panel Where
● Recap the story and revise the concepts covered in the previous chapter.
● Say: Today, we will be learning how to move,add and delete the text in Google Docs.
● Show the slides to discuss how to add text, delete text, move text.
● Discuss the questions given in the panel.
Build
● Brief students about the activity given in the Tekie panel.
■ Instruct: Click on Start Practice button and attempt the activity.
■ Walk around in the classroom and observe the activity done by the students.
■ Guide students if they are struggling with the activity.
● Conduct Where am I? on Page 102:
■ Say: Let us help Mel mark the right answer.
■ Read Q2 and 4 aloud.
■ Invite some students to share their responses.
■ Discuss and validate the answers with the whole class.
■ Instruct: Tick the final answers in your books.
● If time permits, conduct Choose the Correct Answer on Page 101:
■ Say: Let us help Mel tick the correct answers.
■ Read Q 1, 2, 4 aloud.
■ Invite some students to share their answers and others to validate their peers’ answers.
■ Instruct: Mark the final answers in your books.
Sum-Up
● Conclude: Today, we have learned about how to add, delete and move text in google docs.
● Ask the following probing questions:
■ Which option can be used to delete text?
Possible Responses: Delete key; Backspace key
■ Which option can be used to add space to the text?
Possible Responses: Spacebar; Enter button
In this session, students will learn about –
● Undo text
● Redo text
● Copy text
Keywords
● Undo: reverse previous action
● Redo: repeat previous action again
● Copy: duplicate content
Recap the story and the concepts covered in the previous session
Action
Plan
Build
● Brief students about the activity given in the Tekie panel.
■ Instruct: Click on Start Practice button and attempt the activity.
■ Walk around in the classroom and observe the activity done by the students.
■ Guide students if they are struggling with the activity.
● If time permits, open A visit to the jungle session on the Tekie panel and conduct the activity given in the session.
Sum-Up
● Conclude: Today, we learned about indents and spacing.
● Ask the following probing questions:
■ What do we use to Redo the last action on google docs?
Possible Responses: Ctrl + Y (Windows) or Command + Y (Mac)
■ What do we use to Undo the last action on google docs?
Possible Responses:Ctrl + Z (Windows) or Command + Z (Mac)
3 min
The content covered in this chapter is aligned with the following CSTA Standard
● 1B - AP - 10 Control
This chapter is divided in the following lab sessions
1. Introduction to Coding
2. Commands
3. Sprites
4. Sequences and Algorithms
5. Scenes and Events
In this session, students will learn about –
● Coding
● Purpose of Learning to Code
● Block-based Coding
● Code.org
● Coding: telling the computer what to do in a language the computer understands
● Block-based coding: a drag-and-drop learning environment to code animated stories or games
● Say: Today, we will learn about coding. What does the word “coding” mean?
● Invite 1 or 2 responses from the students, but don’t give the correct answer yet.
● Say: Let’s read the chapter story to understand in simple words and we will come up with a definition of “coding” afterwards.
● Read the text aloud on page 1.
● Say: Computers do not understand human languages. That is why we need to learn to code so that we can communicate with computers.
● Explain the following concepts –
Coding
As given on Pages 1 and 2
Why should we learn to code? As given on Page 3
Block-Based Coding As given on Page 4
Scenarios If you are teaching without a projector
● Draw three rectangles of different sizes on the board.
● Present the scenario: Consider these rectangles as Lego blocks, you have arranged them in increasing order of their sizes.
1. Allow some time for kids to do this activity.
2. Once most of the students have arranged the rectangles, summarise the learning outcomes as follows -
■ Blocks in block-based coding are like the rectangles given to you.
■ Just as you have simply arranged them in increasing order, we have to arrange the blocks to make computers do a task. That is Block Coding.
■ Just like you have done this activity in your notebook, we will use Code.org to write the code.
● Conclude: Today, we learned about coding. We were introduced to a coding method called block-based coding. Additionally, we have learned about Code.org.
In this session, students will learn about –
● Drag and Drop
● Commands
Keywords
● Commands: instructions given to the computer to do something
Revise the concepts form the previous coding class
● Say: Do you remember what we learned in the previous session?
● Invite responses from some students.
● Revise the concepts learned in the previous class.
● Say: Today we are going to learn about Commands.
● Instruct to open at page 13
● Ask: What did I just do?
● Say: I just asked you to do something. I gave you an instruction to open at page 13. Similarly, a command is an instruction given to a computer to perform a task.
● Discuss the concepts of Commands from the book.
min
● Say: Let’s practise Drag and Drop on Code.org with the help of some activities.
● Help the students open the Drag-and-Drop activities given on pages 5 – 12, one by one.
● Discuss and attempt each activity with students.
● Invite answers from as many students as possible.
● Walk around in the classroom and observe the activity done by the students.
2 min
● Conclude: Today, we have learned about Drag and Drop, and Commands.
In this session, students will learn about –
● Sprites
Keywords
● Sprites: characters in coding
● Sprite lab: a section in Code.org where you can create your own stories and apps
● Say: Do you remember what we learned in the previous session?
● Invite responses from some students.
● Revise the topics learned in the previous class.
● Say: Today we are going to learn about characters in coding called Sprites.
● Instruct: Open at page 14
● Read the story aloud and discuss the characters with the students.
● Explain the concept of Sprite from the book.
● Instruct the students to open Code.org - Sprite Lab.
● Explain the sections of the Sprite lab.
● Say: Let’s learn to make a Sprite with the help of some activities.
● Help the students open the activities given on pages 17 – 21, one by one.
● Discuss and attempt each activity with students.
● Invite answers from as many students as possible.
● Walk around in the classroom and observe the activity done by the students.
● Conclude: Today, we have learned about Sprites.
● Ask the following probing questions (Attempt these questions only if time permits):
■ Name your favourite cartoon characters that can be called Sprites.
Possible Responses: Snow White; Tom and Jerry; Oggy: Jack; Simba; Nala
■ What can you make with Sprite Lab?
Possible Responses: Apps; Games; Puzzles; Stories
In this session, students will learn about –
● Sequences
● Algorithms
● Sequences: more than one command in an order
● Algorithm: a specific set of instructions given to do a particular task
Revise the concepts form the previous coding class
Discuss the key concepts covered Attempt the activities related to Sequences and Algorithms
Conclude the concepts
● Say: Do you remember what we learned in the previous session?
● Invite responses from some students.
● Revise the topics learned in the previous class.
● Say: Today we are going to learn about Sequences and Algorithms.
● Instruct: Open at the topic Sequence on Page 22.
● Discuss the concept of Sequence with the help of examples given from the book.
● Instruct: Open at the topic Algorithm on Page 32
● Discuss the concept of an Algorithm with the help of examples given from the book.
● Explain the concepts up to the text “. . . the process will continue.” on Page 35.
● Say: Let’s practise what we have learned with the help of some activities.
● Instruct the students to attempt the practice questions on Pages 23 and 24, one by one.
● Invite answers from as many students as possible.
● Validate the responses and instruct them to write the answers in their books.
● Help the students open the activities related to Sequence and Algorithms.
● Discuss and attempt each activity with students.
● Invite answers from as many students as possible.
● Walk around in the classroom and observe the activity done by the students.
● Conclude: Today, we have learned about Sequences and Algorithms.
In this session, students will learn about –
● Creating a Scene on Sprite Lab
● Events
● Scene: the characters in action build a scene
● Event: brings about an action or a change
Revise the concept form the previous coding class
Discuss the key concepts convered Attempt the activities related to Scenes and Events
Conclude the concepts
● Say: Do you remember what we learned in the previous session?
● Invite responses from some students.
● Revise the topics learned in the previous class.
● Help students to open Sprite Lab.
● Discuss Creating a Scene using the project – “Life Cycle of a Butterfly” as given in the book.
● Explain the following:
Setting up a Scene
Creating an Event
How to set up a Scene on Sprite Lab.
How to create an Event on Sprite Lab.
● Discuss and attempt the project - “Life Cycle of a Butterfly” with students in a step-by-step manner.
● Walk around in the classroom and observe the activity done by the students.
● Run the project and demonstrate the working of different blocks of code.
● Conclude: Today, we have learned about Scenes and Events.
The content covered in this chapter is aligned with the following CSTA Standards
● 1B-AP–10 Control
This chapter is divided into the following lab sessions
1. Repeat Loop
2. Variables
3. For Loop
4. Nested Loop
In this session, students will learn about –
● Loop
● Repeat Loop
● Loop: an action of doing something over and over again
● Repeat Loop: is used when we want to repeat a task a certain number of times
Introduce students to the words “Loop” and “Repeat Loop”
5 min Warm-Up
● Say: Today, we will learn about a loop. What does the word “loop” mean?
● Invite 1 or 2 responses from the students, but do not give the correct answer yet.
● Say: Let us read the chapter story to understand in simple words and we will define “loop” afterwards.
● Read the text aloud on page 51
● Say: Now, we will learn about a repeat loop. What does the word “repeat” mean?
● Invite 1 or 2 responses from the students, but do not give the correct answer yet.
● Say: Let us read the chapter story to understand in simple words and we will define “ repeat loop” afterwards.
● Read the text aloud on page 53
● Explain the following concepts –
CS Concepts Explain Loop
As given on Page 51
Repeat Loop
As given on Page 53
Scenarios If you are teaching without a projector
If you are teaching with a projector Open Code.org on your computer system
CS Concepts Explain Demonstrate
OR
Code.org Help them open the link without signing up How to open the link without signing up
● Say: Let us practise what we have learned with the help of some activities.
● Help the students open the activities related to the Repeat Loop.
● Discuss and attempt the activity on page 56 with students.
● Invite answers from as many students as possible.
● Walk around in the classroom and observe the activity done by the students.
● If time permits, discuss and attempt the example on page 54 with students.
● Walk around in the classroom and observe the activity done by the students.
● Instruct the students to attempt the practice questions on Page 60 (if time permits).
● Invite answers from as many students as possible.
Note
● Attempt only the link activity.
Sum-Up 2 min
● Conclude: Today, we learned about loops. We were introduced to a new loop called repeat loop.
In this session, students will learn about –
● Variables
● Rules of naming a variable
● Variables: are like boxes in the computer memory to hold information
Revise the concepts from the previous coding class Discuss the key concepts covered Attempt the activities related to Variables from the Tekie Panel.
● Say: Do you remember what we learned in the previous session?
● Invite responses from some students.
● Revise the concepts learned in the previous class.
● Say: Today we are going to learn about Variables.
● Instruct: Let’s assume you have a bunch of pens.
● Ask: Where do you keep those pens?
● Say: You have answered that we will keep them in a pouch or a box. Similarly, a variable is a container in a computer that holds values.
● Instruct: Open page 57 to read the examples.
● Discuss the rules of naming variables from page 57 and page 58 in the book.
● Instruct: Now, let us practise our learning. Click on the Practice button on the Assignment page to attempt the activity from the Tekie app.
● Open Code.org (Sprite Lab) on your computer.
● Conduct Touch the Ball Game on the panel.
■ Say: In this activity, we will create a game in which a dog chases a ball and scores a point every time it touches the ball. You have to touch the ball as many times as possible to get the highest score.
■ Walk around in the classroom and observe the activity done by the students.
■ Instruct: Click on Rename -> Save ->Share to save and share your work when you have finished the activity.
■ Find the location of the saved file and drag and drop the file in the panel.
○ Instruct: Click on Rename -> Save ->Share to save and share your work when you have finished the activity
○ Find the location of the saved file and drag and drop the file in the panel
Sum-Up
● Conclude: Today, we have learned about variables and the rules to name them.
● Conclude: Today, we have learned about variables and the rules to name them
2 min
In this session, students will learn about –
● For Loop
Keywords
• Loops
● Loop: An action of doing something over and over again
● For Loop: A loop with a known beginning, end and inter val
In this session, students will learn about –
● For Loop
● Loop: an action of doing something over and over again
● For Loop: a loop with a known beginning, end and interval
● Say: Do you remember what we learned in the previous session?
● Invite responses from some students.
● Revise the topics learned in the previous class.
● Say: Today we are going to learn about For Loop.
● Instruct: Open page 58 from the booklet.
● Read the activity aloud and discuss Practice activity on page 56 with the students.
● Explain the concept of For Loop in the book.
● Say: Let us practise what we have learned with the help of some activities.
● Help the students open the activities related to For Loop.
● Discuss and attempt activities with students.
● Walk around in the classroom and observe the activity done by the students.
● Instruct the students to attempt the practice questions on Page 60 if time permits.
● Invite answers from as many students as possible.
● Conclude: Today, we have learned about For Loop.
In this session, students will learn about –
● Nested Loop
● Loop: an action of doing something over and over again
● For Loop: a loop with a known beginning, end and interval
● Repeat Loop: is used when we want to repeat a task a certain number of times
● Nested Loop: is a loop inside another loop
Revise the concepts from the previous coding class Discuss the key concepts covered Attempt the activities related to
● Say: Do you remember what we learned in the previous session?
● Invite responses from some students.
● Revise the topics learned in the previous class.
● Say: Today we are going to learn about Nested Loop.
● Ask: You have a Sack Race competition of 400 m and the track is only 200 m. How many rounds will you take to win the race?
● Say: You have answered correctly, it’s 2 rounds. We are taking 8 jumps in 1 round and we have a total of 2 rounds. In such cases, we use a Nested Loop. The outer loop for rounds and the inner loop for jumps.
● Instruct: Open the topic Nested Loop on Page 65
● Discuss the concept of Nested Loop with the help of examples given from the book.
● Say: Let us practise what we have learned with the help of some activities.
● Help the students open the activities related to Nested Loop.
● Discuss and attempt activities with students.
● Walk around in the classroom and observe the activity done by the students.
● Instruct the students to attempt the practice questions on Page 67 if time permits.
● Invite answers from as many students as possible.
● Conclude: Today, we have learned about Nested Loop.
The content covered in this chapter is aligned with the following CSTA Standard
● 1B-AP–10 Control
This chapter is divided into the following lab sessions
1. Conditional Statement I
2. Conditional Statement II
3. Adding Behaviour
4. Conditional Statement III
5. Multiple Conditions
In this session, students will learn about –
● If conditional statement
Keywords
● If conditional statement: tells the computer what to do if a certain condition is true
● Say: Do you remember what we learned in the previous session?
● Invite responses from some students.
● Revise the topics learned in the previous class.
● Instruct: Go to the Panel and open the Lab on Conditional Statement I.
● Play the video given in the panel.
● Discuss the quiz questions given in the Panel.
● Invite answers from as many students as possible.
● Instruct: Open the topic If statement on Page 73
● Discuss the concept of the If statement with the help of examples given from the book.
● Conduct Number Activity given in the Panel:
■ Say: Make a variable number and set it to your favourite number. Check whether the number is greater than 0. If yes, then display “POSITIVE NUMBER” on the screen.
■ Instruct: Click on the assignment section.
■ Instruct: Click the Go to Practise button to attempt the activity.
■ Walk around in the classroom and observe the activity done by the students.
■ Instruct: Click on the Yes button to submit the activity.
● If time permits, conduct the additional activity given in the panel.
● Ask the following probing questions:
■ When your parents ask you to study and put a condition. State the conditions put by them. Possible Responses: If you study you will get chocolate; If you study you will get a PlayStation; If you study you will get good marks; If you study your teachers will praise you
■ During class at school, the teacher awards you stars and badges. When does it happen? Possible Responses: If you answer the question correctly; If you maintain silence; If you keep the class clean
In this session, students will learn about –
● If-else conditional statement
● If-else conditional statement: in this statement the if block is executed if the condition is true and the else block is executed if the condition is false
Recall the concepts covered in the previous coding session
Play the video given in the panel to introduce the concepts to be covered in this session
Discuss the if-else statement and application
Attempt the activities related to the Conditional statement II
Conclude the session Assign the homework
● Instruct: Go to the Panel and open the Lab on Conditional Statement II
● Play the video given in the panel.
● Discuss the quiz questions given in the Panel.
● Invite answers from as many students as possible.
● Instruct: Open the topic If-else statement on Page 76.
● Discuss the concept of the If-else statement with the help of examples given in the book.
● Conduct Creating a Game given on Page 79:
■ Say: Today we are going to create a Unicorn game where the Unicorn needs to eat candy and avoid monsters.
■ Instruct: Open Code.org’s Sprite Lab on your computer.
■ Instruct: Click the Go to Practise button to attempt the activity.
■ Guide and help students to complete the activity up to Page 86
■ Walk around in the classroom and observe the activity done by the students.
■ Instruct: Rename the activity with the Unicorn Game title and click on the Save button to save the activity.
● Instruct the students to attempt the practice question on Page 76 if time permits.
■ Invite answers from as many students as possible.
● If time permits, conduct the additional activity given on the panel. Please save the activity of the students as it will be continued in the next class.
3 min
● Ask the following probing questions:
■ Can we change the sprites just like the characters of a story?
Possible Responses: Yes; No; Maybe
■ In which locations can we place our sprite?
Possible Responses: Some location; Everywhere
In this session, students will learn about –
● Sprite Begins
● Sprite Stops
● Looping Behaviour
● Sprite Begins: makes the sprite do the given task
● Sprite Stops: makes the sprite stop doing the given task
● Looping Behaviour: makes the sprite do the given task repeatedly
Discuss
their application Attempt
● Instruct: Go to the Panel and open the Lab on Adding Behaviours
● Play the video given in the panel.
● Discuss the Quiz questions given in the Panel.
● Invite answers from as many students as possible.
● Instruct: Open the topic Moving West and Looping Behaviour on Page 87.
● Discuss the concept of Behaviours with the help of examples given from the book.
● Continue Creating a Game given on Page 87:
■ Say: Let us continue our Unicorn game.
■ Instruct: Open Code.org’s Sprite Lab on your computer.
■ Instruct: Click on the Sign in button that is in the top right-hand corner. Sign in to your account, and go to My Projects. Search and open the previously saved activity to attempt it.
■ Guide and help students to complete the activity up to page 95.
■ Walk around in the classroom and observe the activity done by the students.
■ Instruct: Click on the Save button to save the activity.
Note
● If time permits, conduct the additional activity given in the panel. Please save the activity of the students as it will be continued in the next class.
3 min
● Ask the following probing questions:
■ What do you do if you do not get your favourite game to play?
Possible Responses: Start crying; Get angry; Be quiet
■ Your art teacher has asked you to make five identical houses. How do you make them?
Possible Responses: Make 5 houses; Make 1 house and repeat the same step again
In this session, students will learn about –
● If-else if conditional statement
● If - else if conditional statement: is used whenever we have more than one condition
Recall the concepts covered in the previous coding session
Play the video given in the panel to introduce the concepts to be covered in this session
Discuss Conditional Statement III and its application
Attempt the activities related to Conditional Statement III
● Instruct: Go to the Panel and open the Lab on Adding Behaviours.
● Play the video given in the panel.
Conclude the session Assign the homework
● Discuss the Quiz questions given in the Panel.
● Invite answers from as many students as possible.
● Instruct: Open the topic If - else if on Page 96
● Discuss the concept of If - else if with the help of examples given from the book.
● Continue Creating a Game given on Page 97:
■ Say: Let us continue our Unicorn game.
■ Instruct: Open Code.org’s Sprite Lab on your computer.
■ Instruct: Click on the Sign in button that is in the top right-side corner. Sign in to your account, and go to My Projects. Search and open the previously saved activity to attempt it.
■ Guide and help students to complete the activity up to Page 104
■ Walk around in the classroom and observe the activity done by the students.
■ Instruct: Click on the Save button to save the activity.
● If time permits, conduct the additional activity given in the panel. Please save the activity of the students as it will be continued in the next class.
3 min
● Ask the following probing questions:
■ What conditional statements have you learnt so far?
Possible Responses: If-else; If; If-else-if
■ If there is a quiz competition, how many conditions do we check to find the winners of the quiz?
Possible Responses: Two; Three; Four; Five
In this session, students will learn about –
● If - else conditional statement
● If - else if conditional statement
Keywords
● If-else conditional statement: in this statement the if block is executed if the condition is true and the else block is executed if the condition is false
● If - else if conditional statement: is used whenever we have more than one condition
Recall the concepts covered in the previous coding session
Introduce the concepts to be covered in this session
Discuss Multiple Conditions and their application
Attempt the activities related to If - else, Ifelse if
Conclude the session Assign the homework
● Instruct: Go to the Panel and open the Lab on Multiple Conditions.
● Discuss the slides given on the panel.
Engage
● Discuss the quiz questions given in the Panel.
● Invite answers from as many students as possible.
● Instruct: Open the topic Change Levels on Page 104
Build 15 min
● Continue Creating a Game given on Page 104:
■ Say: Let us continue our Unicorn game.
■ Instruct students to open Code.org’s Sprite Lab on the computer.
■ Instruct: Click on the Sign in button that is in the top right-hand corner. Sign in to your account, and go to My Projects. Search and open the previously saved activity to attempt it.
■ Guide and help students to complete the activity up to Page 112.
■ Walk around in the classroom and observe the activity done by the students.
■ Instruct: Click on the Save button to save the activity.
● If time permits, conduct the additional activity given in the panel.
● Ask the following probing questions:
■ How will you decide what to say to greet your teacher depending upon the time of the day?
Possible Responses: If the time is before 12 pm, say good morning; If the time is between 12 pm and 4 pm, say good afternoon; If it is after 5 pm, say good evening
■ How will you decide what clothes to wear depending on the weather outside?
Possible Responses: If it is cold outside, choose warm clothes; If it is hot outside, choose cotton clothes; If it is chilly outside, choose a thick woollen sweater
The content covered in this chapter is aligned with the following CSTA Standard
● 1B-AP-10 Control
This chapter is divided into the following lab sessions
1. Loop inside a Conditional
2. Condition inside a Loop
In this session, students will learn about –
● Loop inside if
● Loop inside if: first we take an if condition and then place a loop like a repeat loop or for loop inside it
the concepts covered in the previous coding session
● Say: Do you remember what we learned in the previous session?
● Invite responses from some students.
● Revise the topics learned in the previous class.
● Instruct: Go to the Panel and open the Lab on Loop inside a Conditional
● Show the slides to introduce the concept.
● Discuss the quiz questions given in the Panel.
● Invite answers from as many students as possible.
● Instruct: Open the topic Loop inside a Conditional on Page 113
● Discuss the concept of the “Loop inside if” with the help of examples given from the book.
min
● Conduct Find Star Shield given on Page 113:
■ Say: Today we are going to create a Find Star Shield game where Baby Joe is trying to find a star shield. If she finds the star shield, she will be rewarded with two magic carrots.
■ Instruct: Open Code.org’s Sprite Lab on your computer.
■ Instruct: Click the Go to Practice button to attempt the activity.
■ Guide and help students to complete the activity up to Page 114.
■ Walk around in the classroom and observe the activity done by the students.
■ Instruct: Rename the activity with the Find Star Shield title and click on the Save button to save the activity.
● If time permits, conduct the additional activity given in the panel.
3 min
● Ask the following probing questions:
■ Which subject’s class is repeated in a week?
Possible Responses: English; Maths; Science; Hindi
■ Which things are needed for a birthday party?
Possible Responses: Cake; Balloons; Candles; Gifts
In this session, students will learn about –
● If inside Loop
● If inside Loop: first we take a loop like a repeat loop or for loop and then place an if condition inside it
Recall the concepts covered in the previous coding session
Introduce the concepts to be covered in this session
Discuss If inside Loop statement Attempt the activities related to Condition inside a Loop
Conclude the session Assign the homework
● Instruct: Go to the Panel and open the Lab on Condition inside a Loop
● Show the slides to introduce the concept.
● Discuss the quiz questions given in the Panel.
● Invite answers from as many students as possible.
● Instruct: Open the topic “If inside Loop” statement on Page 115.
● Discuss the concept of the If inside Loop statement with the help of examples given from the book.
● Conduct Space Ninja given on Page 116:
■ Say: Today we are going to create Space Ninja Activity where Ben is an astronaut who has reached Mars to meet his friends called spacers.
■ Instruct: Open Code.org’s Sprite Lab on your computer.
■ Instruct: Click on the Go to Practice button to attempt the activity.
■ Guide and help students to complete the activity up to Page 121
■ Walk around in the classroom and observe the activity done by the students.
■ Instruct: Rename the activity with the Space Ninja title and click on the Save button to save the activity.
● If time permits, conduct the additional activity given in the panel.
3 min
● Ask the following probing questions:
■ How will you play a vegetable race in which you have to pick up only potatoes?
Possible Responses: Check potatoes and pick them up; Run then check potatoes and pick them up
■ How many months have 28 days?
Possible Responses: One; Twelve
● Assign Practice Question from Page 121 as homework.
● The project is optional. Assign it if feasible.
The content covered in this chapter is aligned with the following CSTA Standard
● 1B-CS–03 Troubleshooting
● 1B-AP–15 Program Development
This chapter is divided into the following lab sessions
1. Debugging
In this session, students will learn about –
● Debugging
● Bug: errors in the code
● Debugging: is the process of finding and correcting bugs in the code
Recall the concepts covered in the previous coding session
Play the video given in the panel to introduce the concepts to be covered in this session
Action
● Say: Do you remember what we learned in the previous session?
● Invite responses from some students.
● Revise the topics learned in the previous class.
● Instruct: Go to the Panel and open the Lab on Debugging.
● Play the video given on the panel.
Plan 7 min Warm-Up 5 min
● Discuss the quiz questions given on the Panel.
● Invite answers from as many students as possible.
● Instruct: Open the topic Debugging on Page 123
● Conduct Practice Question 1 given on Page 134:
■ Say: Today we are going to debug the blocks to make the honey bee vanish when we click on her.
■ Instruct: Open the link on your computer and click on the Remix option to make changes.
■ Instruct: Click on the Go to Practice button to attempt the activity.
■ Guide and help students to complete the activity.
■ Walk around in the classroom and observe the activity done by the students.
■ Instruct: Click on the Save button to save the activity.
● Conduct Example 2 given on Page 130:
■ Say: Now, let’s debug the blocks to make the Princess move left.
■ Instruct: Open the link on your computer and click on the Remix option to make changes.
■ Instruct: Click the Go to Practice button to attempt the activity.
■ Guide and help students to complete the activity.
■ Walk around in the classroom and observe the activity done by the students.
■ Instruct: Click on the Save button to save the activity.
● If time permits:
1. Conduct the additional activity given on the panel.
2. Conduct Puzzle 1 given on Page 125
Sum-Up
● Conclude: Today, we learned how to find code bugs and correct them. That is called debugging
● Assign the following project as homework:
■ Practice Question 2 on Page 135
■ Example 1 on Page 126
● The project is optional. Assign it if feasible.
This Teacher Manual has been designed to implement Tekie, the storytelling-based Coding and Computer Science program. The manual consists of lesson plans within each chapter that teachers transact within classrooms and computer labs. Each lesson is based on a research-based ‘WEBS’ framework that simplifies pedagogical practices for teachers and enables them to deliver effectively.
• Sharp Lesson Planning: Each lesson plan focuses on specific sub-learning outcomes within a chapter and are designed for delivery within the stipulated class or lab time.
• Real-life and Application-based Questions: Additional questions that link Computer Science to real-life contexts and assist teachers to develop learners’ conceptual understanding and application skills.
• Support and Detailed Solutions: In-depth solutions for in-class and post-class activities to reinforce learning.

Uolo partners with K12 schools to bring technology-based learning programs. We believe pedagogy and technology must come together to deliver scalable learning experiences that generate measurable outcomes. Uolo is trusted by over 8,000 schools with more than 3 million learners across India, South East Asia, and the Middle East.