Teacher Manual
Grade 5
NEP 2020 aligned ICSE compliant Digital coding platform included


2.
3. Shapes and Tables in Google Docs I
4. Shapes and Tables in Google Docs II
5. Page Setup in Google Docs I
6. Page setup in Google Docs II
7. Header and Footers in Google Docs I
8.
1. GIFs in Google Slides I
2. GIFs in Google Slides II
3. Adding Music and Videos in Slides I
4. Adding Music and Videos in Slides II

Note: Use the following points to prepare for the session beforehand. Avoid reading the points in the class.
In the Previous Grade…
● Conji helped Mel recover her memory.
● There was a change in all the robots and machines due to an anomaly in Avora’s timeline.
● Mel and Conji’s arrival in Nexus caused an interchange in the meaning of binary digits.
● With Conji by Mel’s side, the duo once again become a ray of hope for Avora to fix the timeline.
● Conji recalls how he and Mel overcame all the challenges thrown by Lord Ero.
● Mel disguises herself as a dragon to prank Conji.
● To make up for the prank, Mel agrees to teach Conji about computers.
● Eva joins them on their journey of learning about computers.
The content covered in this chapter is aligned with the following CSTA Standards
● 1B-CS–01 Computing Systems
This chapter is divided into the following classroom sessions
1. Difference and Analytical Engines
2. Generations of Computers I
3. Generations of Computers II
In this session, students will learn about –
● Computers
● Analytical Engine
● Difference Engine
Keywords
● Storage: a process by which digital data is stored in a storage device by a computer
● Calculator: a small electronic device used for doing mathematical calculations

Brief the story of the previous grade
Discuss computers,
Is this correct? - Q4
Action Plan
● Recap the story covered in the previous grade.
Conclude the concepts Assign homework
Warm-Up 10 min
● Read or Invite two students to read the story aloud from Page 1 to 3 up to Mel’s words “You know . . . right?”
Engage
● Say: Let’s learn about computers, the first computer ever made: The Analytical Engine; and a device with storage capacity: The Difference Engine.
CS Concepts Explain Computer
Analytical Engine
Difference Engine
As given in Panel 1 on Page 4
As given in Panel 3 on Page 4
As given in Panel 1 on Page 5
● Present the scenario: Consider your father has asked you to help him in calculating monthly expenses.
● Discuss:
■ Which device will you use to perform calculations?
Possible Responses: Calculator; Computer; Analytical Engine
■ Which device lets you store the answer to your calculations?
Possible Responses: Computer; Difference Engine; Storage device
■ What challenges do you think you would face if the computers we see today were as big as the first generation computers?
Possible Responses: They would need huge spaces to store them; They would be expensive; They would be immovable
■ Why do you think the machine to solve maths problems was called a Difference Engine?
Possible Responses: They could do calculations; They could find the difference between two numbers
Note
● if time allows, discuss all four questions, or discuss the first two.
● Conduct Is this correct? on page 12:
■ Say: Let’s help Conji find the correct answer.
■ Read Q4 aloud.
■ Invite some students to share their answers and others to validate their peers’ answers.
■ Instruct: Tick the final answers in your books.
● Conclude: Today, we learned about the first computers ever made: Analytical Engines and Difference Engines.
● Ask the following probing questions:
■ When do you think you would need computers to perform calculations?
Possible Responses: To solve maths problems; To add or subtract large numbers; To do 10-digit multiplication
■ What do you think the Analytical Engine could do?
Possible Responses: Solve maths problems; Add; Subtract; Multiply; Divide
● Assign Q4 and Q6 from Who am I? as homework.
In this session, students will learn about –
● Generations of computers
● Details of the first four generations of computers
Keywords
● Generation of computers: indicates the change in the technology of computers that were in use
● GUI: graphical User Interface is a way to communicate with a computer using interactive icons
Revise the story of the previous session Recall the concepts of Analytical engine and Difference engine
Discuss the first four generations of computer Inform that we are in the fifth generation of computers
Is this correct? - Q3 Which generation am I? - Q1, 2
Conclude the concepts Assign homework
● Recap the story covered in the previous session.
● Instruct: Let’s recall the concepts learned so far.
● Invite some students to recall and share the concepts aligned with the chapter story.
Engage
10 min
● Say: Currently, we are in the fifth generation of computers. Let’s learn about the first four generations of computers.
CS Concepts Explain
Hint about the current generation of computers
First four generations of computers
GUI (Graphical User Interface)
As given in Panel 2 on Page 5
As given in Panel 2, 4 on Page 6, Panel 1, 2 on Page 7
As given in Panel 3 on Page 7
● Present the scenario: Consider you are building a computer.
● Discuss:
■ If you are in the 1940s, which areas will your computer be used in?
Possible Responses: Military; Industries; Scientists
■ Why can only these areas use your computer?
Possible Responses: The computers are expensive; Use a lot of electricity; Very advanced computers of their time
■ You build a PC. Which generation does it NOT belong to?
Possible Responses: First-generation computers; Second-generation computers; Third generation computers; Fifth-generation computers
■ What are the features of the PC you have made?
Possible Responses: Generates less heat; Is faster; Has a mouse; Has GUI; Can be used by anyone
Note
● If time allows, discuss all four questions, or discuss the first two.
Build
● Conduct Is this correct? on Page 12:
■ Say: Let’s test our learnings to revise what we have learned.
■ Read Q3, aloud.
■ Invite some students to share their responses.
■ Discuss and validate the answers with the whole class.
■ Instruct: Fill in the final answers in your books.
● Conduct Which generation am I? on Page 14:
■ Say: Let’s help Mel and Conji Identify the generations of the computers.
■ Read Q1 and 2 aloud, one by one.
Note
10 min
■ Invite some students to share their answers and others to validate their peers’ answers.
■ Instruct: Fill in the final answers in your books.
● If time permits, discuss Q3 from Which generation am I? or assign it as homework.
Sum-Up
5 min
● Conclude: Today, we learned about the first four generations of computers. We also learned about the generation of computers we are in.
● Ask the following probing questions:
■ Why would people not build small and fast computers in the 1950s?
Possible Responses: They did not have the knowledge; Technology was not advanced enough; There was no need
■ Name computers you see in your daily life.
Possible Responses: Smartwatch; Phone; Laptop; Calculator
● Assign the following as homework:
■ Q1, 3, and 5 from Who am I?
■ Q3 from Which generation am I?
In this session, students will learn about –
● Fifth-generation computers
● Supercomputers
Keywords
● Artificial Intelligence: the ability of computers to perform tasks which previously required human intelligence
● Weather forecasting: prediction of weather conditions in a certain place
Revise the story of the previous session
Read the story aloud/ask the students to read the story aloud
Discuss the fifth generation of computers and supercomputers
● Recap the story covered in the previous session.
● Say: There is a new character in this chapter.
● Introduce Eva to the students.
Conclude the concepts Assign
● Instruct: Let’s learn how the story moves ahead. We will read from Panel 2 on Page 10
● Say: Let’s learn about the fifth generation of computers, and the most powerful computers: the supercomputers.
CS Concepts
Fifth Generation of Computers
Supercomputers
As given from Panel 1, 2 on Page 8
As given from Panel 5 on Page 9
● Present the scenario: Consider you want to plan a trip to the mountains. And, before you plan, you first want to check the weather conditions in the area.
● Discuss:
■ Which type of computer can you use for weather forecasting?
Possible Responses: Supercomputers; Very powerful computers
■ Which generation computer cannot be used here?
Possible Responses: First-generation computers; Second-generation computers; Thirdgeneration computers; Fourth-generation computers; Fifth-generation computers
■ Name the generation if the device you used is your phone to check the weather in the mountains.
Possible Responses: Fifth-generation computers; Fourth-generation computers; Current generation of computers
■ Why do you think we need fifth-generation computers in this situation?
Possible Responses: To save time; To make the computers less expensive; To make the computers widely available; To save space; To make the computers available for everybody
● If time allows, discuss all four questions, or discuss the first two.
● Conduct Is this correct? on Page 12:
■ Say: Let’s test our learnings to revise what we have learned.
■ Read Q1, 2 aloud.
■ Invite some students to share their responses.
■ Discuss and validate the answers with the whole class.
■ Instruct: Tick the final answers in your books.
● Conduct Which generation am I? on Page 14:
■ Say: Let’s help Mel and Conji Identify the generations of the computers.
■ Read Q4, 5 aloud.
■ Invite some students to share their answers and others to validate their peers’ answers.
■ Instruct: Fill in the final answer in your books.
● Conclude: Today, we learned about the fifth generation of computers and supercomputers.
● Ask the following probing questions:
■ List some features of Fifth-generation computers.
Possible Responses: Faster; Easier; Cheaper to use; Take less space; Widely available; Based on AI
■ Name computers you see in your daily life
Possible Responses: Smartwatch; Phone; Laptop; Calculator
● Assign Q2 and 7 from Who am I? as homework.
Note: Use the following points to prepare for the session beforehand. Avoid reading the points in the class.
● Conji recalled how he and Mel overcame all the challenges thrown by Lord Ero.
● Mel disguised herself as a dragon to prank Conji.
● To make up for the prank, Mel agreed to teach Conji about computers.
● Eva joined them on their journey of learning about computers.
● Conji is curious about how machines work.
● So, Mel takes Conji on an excursion to a Robot Workshop.
● Conji is excited to look around the museum and learn new things.
The content covered in this chapter is aligned with the following CSTA Standard
● 1B-CS–02 Hardware & Software
This chapter is divided into the following classroom sessions
1. Software types
2. Application Software Types
3. Application Software
In this session, students will learn about –
● System Software
● Application Software
● Operating System
● Software: a set of instructions that tells the computer what to do and how to do it
● System Software: any program that controls internal computer operations
● Application Software: any program that performs specific task for the user
● Operating System: a system software that controls the overall activities of a computer and acts as a link between user and hardware
● Programming language: programming language is a special way to talk to computers and make them do things
Warm-Up
● Recap the story covered in the previous session.
● Instruct: Let’s recall the concepts learned so far.
● Read the story aloud on Page 16 up to Conji’s words “What do you mean?”
5 min
● Say: Let me introduce some softwares and types.
CS Concept Explain
System Software
Operating System
Application Software
As given in Panel 1 on Page 17
As given in Panel 1 on Page 17
As given in Panel 2 on Page 17
● Present the scenario: Consider your school wants to build the software of a computer from scratch.
● Discuss:
■ What elements will you require?
Possible Responses: System software; Operating software; Application software
■ Name the operating system you would like to install.
Possible Responses: MacOS; Windows; Linux
■ What will the operating system do?
Possible Responses: Controls the overall activities; Acts as a link between user and hardware
Note
● If time allows, discuss all three questions, or discuss the first two.
Build
● Conduct Where do I belong? on Page 24:
■ Say: Let’s help Mel to put the following softwares in their respective boxes.
■ Read out the options aloud, one by one.
10 min
■ Invite some students to share their answers and others to validate their peers’ answers.
■ Instruct students to write the final answers in their books.
● Ask the following probing questions:
■ Name the operating software you have used.
Possible Responses: MacOS; Windows; Linux
■ What are the categories of System Software?
3 min
Possible Responses: Operating Software; Utility Software; Device Drivers; Firmware; Language Translator
● Assign Match the following - Q5, as homework.
In this session, students will learn about –
● General-purpose software
● Specific-purpose software
● Utility software
● Utility Software: system software that helps to maintain the proper and smooth functioning of a computer system
● Specific-purpose software: software that is made for doing one specific thing or set of things, like playing games or editing photos
● General-purpose software: software that can be used for many different things, like writing documents, browsing the internet, or creating spreadsheets
Recap the story and the concepts covered in the previous session
Read the story to be covered in the current session aloud
Discuss utility software and utility programs, i.e., scanning, backup, and defragmentation
Define me - Q1, 2, 3 Conclude the session Assign the homework
● Recap the story covered in the previous session.
● Instruct: Let’s recall the concepts learned so far.
● Read the story aloud from Page 21 to Panel 3 on Page 23 up to Conji’s words “. . . types of system software later ”.
● Say: Let me explain the types of Application Software.
Types of Application Software
Utility Software
Specific-purpose software
General-purpose software
As given in Panel 3 on Page 17
As given in Panel 1 on Page 18
As given in Panel 1 on Page 18
As given in Panel 1 on Page 18
● Present the scenario: Consider you want to write a story for your school project.
● Discuss:
■ Which software can you use to type your story and make it look nice with pictures?
Possible Responses: Word processor (e.g., Microsoft Word); Notepad; Google docs
■ What will you do if you want to edit pictures and videos specifically?
Possible Responses: Use Adobe Photoshop; IMovie
■ How will you add special effects and animations to your story? Which software can you use for that?
Possible Responses: Presentation software (e.g., Microsoft PowerPoint, Google Slides); Application softwares; Moving Images; gifs
■ What will you do if you want to edit a text?
Possible Responses: Use general-purpose editors like MS Word; Google Doc; Pages
● If time allows, discuss all three questions, or discuss the first two.
● Conduct Define me on Page 24:
■ Say: Let’s test what we have learned today.
■ Read Q1, 2, and 3 aloud.
■ Invite some students to share their answers.
■ Discuss and Validate their answers.
■ Instruct students to write the final answers in their books.
● Ask the following probing questions:
■ Name a few Specific-purpose softwares you have used for designing.
Possible Responses: Photoshop; Illustrator; Canva
■ What are some anti-virus programs you have used?
Possible Responses: Norton; McAfee; Kaspersky
● Assign the following questions as homework:
■ Find the odd one out - Q2
■ Match the following - Q3, 4
Objectives
In this session, students will learn about –
● BIometric software
● Voice Recognition
● Cloud Storage
Keywords
● Cloud Storage: it allows us to access our files on any device we want, as long as it is connected to the internet
● Biometric Software: software that helps us identify people based on their unique characteristics like fingerprint, face, retina, etc.
Recap the story and the concepts covered in the previous session
Read the story to be covered in the current session aloud
Action Plan
● Recap the story covered in the previous session.
● Instruct: Let’s recall the concepts learned so far.
● Read the continued story from Panel 1 on Page 20 to Page 22.
● Say: Let’s learn about the second type of software, application software.
CS Concept Explain
Application Software
Voice Recognition
Cloud Storage
Biometric software
As given in Panel 3 on Page 17
As given in Panel 2 on Page 18
As given in Panel 1 on Page 19
As given in Panel 2 on Page 19
● Present the scenario: Consider you are playing on your dad’s mobile phone.
● Discuss:
■ Whom will you ask to do the operations on the phone?
Possible Responses: Siri; Google Assistant; Alexa; Cortana
■ How will you unlock the phone?
Possible Responses: Face ID; Fingerprint; Iris recognition
■ Which software on your dad’s phone recognizes your unique features like your fingerprint or face to keep it secure?
Possible Responses: Face ID; Touch ID
Note
● If time allows, discuss all four questions, or discuss the first two.
Build
● Conduct What am I? on Page 26:
■ Say: Let’s help Conji to identify the software names by reading their descriptions.
■ Read Q1, 2 and 3 aloud, one by one.
■ Invite some students to share their answers.
■ Discuss and Validate their answers.
■ Instruct students to write the final answers in their books.
Note
● If time permits, discuss Find the odd one out- Q1, 3 on Page 25, or assign it as homework.
Sum-Up
● Ask the following probing questions:
■ Name a few voice assistants you know.
Possible Responses: Alexa; Siri; Google Assistant; Cortana
■ What can you store in cloud storage?
Possible Responses: Pictures; Videos; Documents; Folders
● Assign the following questions as homework:
■ Match the following- Q1
■ Find the odd one out- Q1, 3
10 min
3 min
Note: Use the following points to prepare for the session beforehand. Avoid reading the points in the class.
● Conji is curious about how machines work.
● So, Mel takes Conji on an excursion to a Robot Workshop.
● Conji is excited to look around the museum and learn new things.
● Mel and Conji continue their discussion about Avora’s creation.
● They recall how the combination of magic and technology led to Avora’s birth.
● They recall Ms. Idea’s explanation of a spell that was given to the first wizard to save Avora from Lord Ero.
● Mel teaches Conji about Internet services as they study ancient Avora.
● The kids started looking for the special spell over the internet.
● Elder Wizard and Elder Robot hint at where they could find the spell.
The content covered in this chapter is aligned with the following CSTA Standard
● 1B-NI-04 – Networks and the Internet
This chapter is divided into the following classroom sessions
1. Introduction to Internet
2. Internet Services
3. Basic Internet Terms
In this session, students will learn about –
● The Internet – Introduction
● Internet Service providers
● Types of Internet connection
● GBPS: stands for GigaBits Per Second, Gbps is a method of measuring how much data is being transmitted per second
● Satellite: refers to a machine that is launched into space and moves around Earth or another body in space
● Server: main computer that accepts and responds to requests made over a network
Connect the story from the previous chapter Read the story aloud
Discuss the key concepts covered –The Internet ISP Email Types of Internet connections
Answer the questions - Q1 Class Activity - Q1 Abbreviations - Q1, 2
● Recap the story covered in the previous chapter.
● Instruct: Let’s learn how the story moves ahead. We will read page 28.
Conclude the concepts Assign homework
● Read the story aloud or invite two students to read the characters’ dialogue aloud.
Engage
● Say: Let me introduce what the Internet is.
● Present the scenario: Consider your school wants to have an Internet connection.
● Discuss:
■ What elements will you require?
Possible Responses: Computer; Mouse; ISP; DSL; A computer lab; Telephone line; Satellite; Fibre optics
■ Which type of connection would give your school the fastest internet speed?
Possible Responses: Fibre; DSL
■ What can you use the internet for at your school?
Possible Responses: Search for images; Learn different concepts; Watch videos; Watch educational movies
■ Name some Internet service providers you are familiar with.
Possible Responses: Jio; Vodafone; Airtel; BSNL
● Conduct Answer the questions on Page 37:
■ Say: Help Mel by answering the question below.
■ Read Q1 aloud.
■ Invite some students to share their answers and others to validate their peers’ answers.
■ Instruct: Write the final answer in your books.
● Conduct Class Activity on Page 39:
■ Read Q1 aloud.
■ Invite some students to share their answers and others to validate their peers’ answers.
■ Instruct: Write the final answers in your books.
● Conduct Abbreviations on Page 40:
■ Say: Let’s practise some more to revise what we have learned.
■ Read Q1 and 2 aloud.
■ Invite some students to share their responses.
■ Discuss and validate the answers with the whole class.
■ Instruct: Fill in the final answer in your books.
● Conclude: Today, we learned about the Internet, ISPs, and Types of Internet connections.
● Ask the following probing questions:
■ What do you think will happen if the internet goes off for one entire day?
Possible Responses: We will be disconnected from the internet; We will not be able to access the internet; Offices will be closed
■ For what purposes do you think you would need an Internet connection at your home?
Possible Responses: To get help with homework; To watch movies online; To read books; for parent’s office work; To shop online
● Assign the following as homework:
■ Pick the odd one out - Q1
■ Who am I? - Q7
Objectives
In this session, students will learn about –
● WWW
● IP address
● Creating an Email account
Keywords
● IP Address: stands for Internet protocol address; a unique address that identifies a device on the internet or a local network
● WWW: stands for World Wide Web. It is a collection of different websites you can access through the internet
● Email: electronic mail; a way to send and receive messages over the internet
Recall and connect the story from the previous session
Discuss the key concepts covered –WWW IP Email Creating an Email account
Answer the questionsQ2, 3 Abbreviations - Q3
● Recap the story and concepts covered in the previous session.
Conclude the concepts Assign homework
min
● Instruct: Let’s learn how the story moves ahead. We will learn more about the internet today. 10 min Engage
● Say: Let me introduce you to WWW – World Wide Web.
CS Concepts Explain WWW
As given in Panel 2 on Page 30
IP Address As given in Panel 3 on Page 30
Email As given in Panel 1 on Page 31 Creating an Email account As given from Panel 3 on Page 31 to Panel 1 on Page 33
● Present the scenario: Consider you want to know about some good picnic spots near your town.
● Discuss:
■ How will you search for picnic spots using your smartphone?
Possible Responses: Internet; WWW; The web
■ What search words will you type?
Possible Responses: Picnic Spots near me; Picnic Spots in my city; Holiday spots; Nearby Mountains
■ After deciding on the picnic spot, what other information about it can you search for online?
Possible Responses: Water availability; Sports availability; Sanitation; Prime spot
■ Name the address of your computer.
Possible Responses: IP address; Unique address; Address of the computer
● Conduct Answer the questions on Page 37:
■ Say: Help Mel by answering the question below.
■ Read Q2, and 3 aloud.
■ Invite some students to share their answers and others to validate their peers’ answers.
■ Instruct: Write the final answer on the board so that students can note it down.
● Conduct Abbreviations on Page 40:
■ Say: Let’s practise some more to revise what we have learned.
■ Read Q3, aloud.
■ Invite some students to share their responses.
■ Discuss and validate the answers with the whole class.
■ Instruct: Fill in the final answer in your books. Note
● If time permits, discuss the section Abbreviations – Q4 or, assign it as homework.
● Conclude: Today, we learned about WWW, IP address, Email, and email account creation using gmail.
● Ask the following probing questions:
■ For what purposes do you use your email?
Possible Responses: Send messages; Documents; Image files; Seek information about something
■ Suppose you wish to send messages to the tourism department of your town. Which internet service would you use?
Possible Responses: Email, Gmail; Outlook mail; Twitter
● Assign the following as homework:
■ Abbreviations – Q4
■ D-I-Y (Create email account) on Page 40
Objectives
In this session, students will learn about –
● Social Media
● Social networking sites
● Image-sharing sites
● Video-hosting platforms
● Community blogs
● Instant messengers
Keywords
● Social Media: a community where we can connect with people across the world using an internet connection
Recall and connect the story and concepts from the previous session
Discuss the key concepts to be covered –Social media
Social networking sites
Answer the questions-Q4 Who am I?-Q4, 5, 6 Class Activity-Q2
● Recap the story and concepts covered in the previous session.
Conclude the concepts Assign homework
3 min
● Instruct: Let’s learn how the story moves ahead. We will learn more about social media today.
10 min
● Say: Let me tell you about social media, and various social networking websites.
CS Concepts
Social Media
Social Networking Websites
Explain
As given in Panel 2 on Page 33
As given from Panel 3 on Page 23 to Panel 1 on Page 34
● Present the scenario: Let’s say you want to write a blog about your picnic experience.
● Discuss:
■ Where can you share your experience on the internet?
Possible Responses: Social media; Social networking sites; Instagram; Facebook
■ Where can you blog about your picnic?
Possible Responses: Facebook; Discord; Tumblr; Medium
■ Where can you upload videos related to your picnic?
Possible Responses: YouTube; Vimeo; Instagram
■ Which app would you use to send instant messages to your friends and family about the picnic?
Possible Responses: WhatsApp; Messenger; Instagram
● Conduct Answer the questions on Page 37:
■ Say: Help Mel by answering the question below.
■ Read Q4, aloud.
min
■ Invite some students to share their answers and others to validate their peers’ answers.
■ Instruct: Write the final answer on the board so that students can note it down.
● Conduct Who am I? on Page 38:
■ Say: Help Mel by answering the question below.
■ Read Q4, 5 and 6 aloud.
■ Invite some students to share their answers and others to validate their peers’ answers.
■ Instruct: Write the final answer on the board so that students can note it down.
● Conduct Class Activity on Page 39:
■ Read Q2 aloud.
■ Invite some students to share their answers and others to validate their peers’ answers.
■ Instruct: Write the final answers in your books.
● Conclude: Today, we learned about social media and various social networking sites.
● Ask the following probing question:
■ Which social media networking sites do members of your family use?
3 min
Possible Responses: Youtube; Prime Video; Netflix; Disney Hotstar; Zee5; LinkedIn; SonyLIV
■ Which platform would you use to watch your favourite movie?
Possible Responses: Youtube; Prime Video; Vimeo; Netflix; Disney Hotstar; Zee5
● Assign the following as homework:
■ Pick the odd one out - Q2, 3
■ Who am I? - Q1, 2, and 3
Note: Use the following points to prepare for the session beforehand. Avoid reading the points in the class.
● Mel and Conji discussed about Avora’s creation.
● They recalled how the combination of magic and technology led to Avora’s birth.
● They recalled Ms. Idea’s explanation of a spell that was given to the first wizard to save Avora from Lord Ero.
● Mel taught Conji about Internet services as they studied ancient Avora.
● The kids started looking for the special spell over the internet.
● Elder Wizard and Elder Robot hint at where they could find the spell.
● Mel and Conji look for Eva as she betrayed them as she joined Lord Ero.
● Eva is guilty and apologises for her mistake.
● Mel asks Geebal how to trust her loyalty now.
● Mr Geebal suggests they give Eva her friend another chance.
● Mel, Conji, and Eva go through the records.
● With hope, they all head to the Idea Center, A world full of ideas.
The content covered in this chapter is aligned with the following CSTA Standard
● 1B-DA–06 Data and Analysis
This chapter is divided into the following sessions
1. Images in Google Docs I
2. Images in Google Docs II
3. Shapes and Tables in Google Docs I
4. Shapes and Tables in Google Docs II
5. Page Setup in Google Docs I
6. Page Setup in Google Docs II
7. Header and Footer in Google Docs I
8. Header and Footer in Google Docs II
In this session, students will learn about –
1. Adding images to Google Docs from a computer and the web
2. Text wrapping
3. Cropping images
Keywords
● Text wrapping: the process of adjusting text around an inserted image
● Cropping: trimming an image to get rid of extra elements
● Inline format: wtriting words in a straight line without breaking them into separate lines
Revise the story and CS concepts covered in the previous chapter Read or invite students to read the story of the chapter
Discuss layouts, page margins and how to adjust them, and how to organise content into columns.
Q and A (Answer the following briefly) - Q1, 2 Q and A (Answer the following detail) - Q1 Give me answers - Q1, Q3
● Recap the story covered in the previous chapter.
● Say: There is a new character in this chapter.
● Introduce Mr. Geebal to the students.
● Instruct: Let’s learn how the story moves ahead. We will read from Page 48 to Panel 5 on Page 49 until the text “Google docs”.
● Read the story aloud or invite 4 students to read the dialogues of the characters
Conclude the concepts Assign homework
● Say: Let me explain about images in Google Docs.
Mr. Geebal
A kind and friendly Goblin, who is Responsible for tracking events happening around the world.
If you are teaching without a projector
If you are teaching with a projector, open a Google Doc on your computer system
CS Concepts Explain Demonstrate
Adding an Image From a computer as given in Panel 1 on Page 46
From the web as given in Panel 2 on Page 46
Text Wrapping As given in Panel 2 and 2 on Page 47
Cropping an Image
As given in Panel 2, 3 on Page 48
How to add an image from a computer and from the web on screen.
How to wrap the text around the image on screen.
How to crop an image on screen.
● Present the scenario: Consider you are creating a project on Seven Wonders of the World on Google Docs.
● Discuss:
■ What elements will you add in the document?
Possible Responses: Text; Images; Shapes; Videos; Arrows
■ What steps will you follow to add the images to the document?
Possible Responses: Click on insert; Select image; Select “Upload from Computer”; Upload from the web
■ What will you do if there is some extra part in an image that you don’t want to show?
Possible Responses: Crop the image; Resize the image; Reduce the size; Use the cropping tool
■ Which text wrapping formats can you apply to the images added in the document?
Possible Responses: Inline with text; Wrap text format; Text above the image; Text below the image
● Conduct Q and A (Answer the following briefly) on Page 61:
■ Say: Help Mel by answering the question below.
■ Read Q1, 2 aloud.
■ Invite some students to share their answers and others to validate their peers’ answers.
■ Instruct: Write the final answers on the board so that students can note it down.
● Conduct Q and A (Answer the following detail) on Page 61:
■ Say: Help Conji by answering the question below.
■ Read Q1, aloud.
■ Invite some students to share their answers and others to validate their peers’ answers.
■ Instruct: Write the final answers on the board so that students can note it down.
● Conduct Give me answers on Page 62:
■ Say: Help Mel by answering the question below.
■ Read Q1, 3 aloud.
■ Invite some students to share their answers and others to validate their peers’ answers.
■ Instruct: Write the final answers on the board so that students can note it down.
● If time permits, conduct Give me answers - Q2, or assign it as homework.
● Conclude: Today, we learned to add images in a Google Doc, Wrap text and Crop an image.
● Ask the following probing questions:
■ For what purposes do you think you would need to insert an image in a document?
Possible Responses: Digital Greeting Card; Project Work; Invitation; Notices
■ Why would you need text wrapping?
Possible Responses: To move the text around the image; To make the document look presentable; To move the text above the image; To move the text below the image
● Assign the following as homework:
■ Give me answers - Q2
■ Fill in the blanks - Q1, 2, 4, 5
■ Pick the Odd-one Out - Q2
In this session, students will apply what they have learned from the previous class to complete tasks on Google docs.
● Text wrapping: the process of adjusting text around an inserted image
● Cropping: trimming an image to get rid of extra elements
● Say: Do you remember what we learned in the previous session?
● Invite responses from some students.
● Say: Let’s revise what we have learned.
● Instruct: Go to the Panel and open Lab on Images in Google Doc – II.
● Show slides one by one and discuss the concepts shown on the slide in the panel.
● Discuss the following questions one by one to check students’ understanding:
■ When would you need to add images while creating docs?
Possible Responses: To make digital greeting cards; Project work; Invitations
■ Why do we need to crop an inserted image in Google Docs?
Possible Responses: To get rid of unwanted parts of an image; To customise the image; To reduce the size; To make the image bigger or smaller
● Invite answers from as many students as possible.
● Address if students have any other doubts related to the concepts presented in the slides.
● Open and explain the activity on the Assignment page in the panel.
● Instruct: Click on the Start practice button and attempt the activity.
● Walk around in the classroom and observe the activity done by the students.
● Guide students if they are struggling with the activity.
● Instruct: Click on the Confirm button to submit your work when you are done with the activity.
Sum-Up 5 min
● Conclude: Today, we have learned how to add images, wrap text around the image and crop the unwanted part from an image.
● If feasible, assign the following as homework:
■ Project: Make a card for an upcoming festival (Teacher’s Day/Mother’s Day/Independence Day) using the tools you learnt today.
■ Practise the same activity at home.
In this session, students will learn how to –
● Add and modify shapes in Google Docs
● Add and modify tables in Google Docs
● Table: a set of data arranged in rows and columns
Warm-Up Engage Build Sum-Up
Revise the story and CS concepts covered in the previous chapter. Read or invite students to read the story of the chapter
Discuss adding and Modifying shapes, and adding and modifying tables in Google Docs
Case-Study
Q and A time (Answer the following detail) - Q3
● Recap the story covered in the previous session.
Conclude the concepts Assign homework
● Invite a few students to recall the CS concepts covered in the previous session.
● Say: Let me explain how we can use shapes and create tables in Google Docs.
Scenarios
If you are teaching without a projector OR
If you are teaching with a projector, open a Google Doc on your computer system
CS Concepts Explain Demonstrate
Add and Modify shapes
Insert and Modify tables
As given on Page 49
As given on Page 50
How to add and modify shapes in Google Docs.
How to insert and modify tables in Google Docs.
● Present the scenario: Consider you are creating a project on Seven Wonders of the World on Google Docs.
● Discuss:
■ What elements do you think can be added in your document?
Possible Responses: Shapes; Tables; Images; Text
■ If you want to arrange the seven wonders in a table, what steps would you take in Google Docs?
Possible Responses: Click on Insert menu; Select table; Select the size; Select table from insert menu; Draw a table using lines
■ What information would you like to include in your project?
Possible Responses: Images; Name of the seven wonders; A brief description; Countries of the seven wonders
■ How many rows and columns do you think you would need to select?
Possible Responses: 7 rows; 8 rows; 2 columns; 1 column; 3 columns, 4 columns
● Conduct Case study on Page 61:
■ Say: Mr. Time was angry with Geebal. Let’s help Geebal with following the instructions told in Case-Study.
■ Read the Instructions aloud.
■ Invite some students to share their ways to create a table.
■ Instruct: Create a table following the instructions.
● Conduct Q and A time (Answer the following detail) on Page 61:
■ Say: Help Conji by answering the question below.
■ Read Q3, aloud.
■ Invite some students to share their answers and others to validate their peers’ answers.
■ Instruct: Write the final answers on the board so that students can note it down.
Note
● If time permits, discuss the section Pick the Odd one Out - Q1, 3 or, assign it as homework.
● Conclude: Today, we learned about shapes and tables in Google Docs.
● Ask the following probing questions:
■ How do you think a table can be useful in a document?
Possible Responses: To see the data clearly; Add information; Modify information; Delete information
■ A shape can highlight an important text in the document. What are the other ways we can use shapes to create better documents?
Possible Responses: To make charts; Drawings; Paintings; Figures
● Assign the following as homework:
■ Pick the Odd one Out - Q1, 3
■ D-I-Y on Page 62
In this session, students will apply what they learned from the previous class to complete tasks
Google Docs.
Keywords
● Table: a set of data arranged in rows and columns
Action Plan
● Say: Do you remember what we learned in the previous session?
● Invite responses from some students.
● Say: Let’s revise what we have learned.
● Instruct: Go to the Panel and open Lab on Shapes and Tables in Docs II.
● Show slides one by one and discuss the concepts shown on the slide in the panel. 7 min
● Discuss the following questions one by one to check students’ understanding:
■ Which shapes do you see in the Shapes tool?
Possible Responses: Rectangle; Square; Circle; Arrow; Lines; Triangles; Moon
■ How many rows and columns would you like to insert in Google Docs?
Possible Responses: 1 row and 2 columns; 2 rows and 2 columns; 1 column and 2 rows
● Invite answers from as many students as possible.
● Address if students have any other doubts related to the concepts presented in the slides.
● Open and explain the activity on the Assignment page in the panel.
● Instruct: We know how to add shapes and tables in Google Docs. Click on the Start practice button and attempt the activity.
● Walk around in the classroom and observe the activity done by the students.
● Guide students if they are struggling with the activity.
● Instruct: Click on the Confirm button to submit your work when you are done with the activity.
5 min
Sum-Up
● Conclude: Today, we have learned how to add and modify shapes, and insert tables in Google Doc.
● Instruct: Practise the same activity at home.
● If feasible, assign a project: Make a table on your expenses from the pocket money you receive from your parents/money you get from relatives.
In this session, students will learn about –
● What is a layout and how to change it
● What are page margins and how to change them
● How to organise text into columns
● Layout: a way to describe what each page of a document will look like when it is printed
● Page Orientation: the direction in which a document is displayed or printed (vertical or horizontal)
● Page Margin: the blank spaces at the top, left, right, and bottom of the document that can be set to make the doc look neat and professional
Revise the story and CS concepts covered in the previous chapter Read or Invite students to read the story of the chapter
Discuss layout and page margins and how to change them, and how to organise text into columns
Q and A (Answer the following in brief) - Q1, 3 Q and A (Answer the following detail) - Q2
● Recap the story covered in the previous chapter.
Conclude the concepts Assign homework
● Instruct: Let’s learn how the story moves ahead. We will read from Panel 1 on Page 51 to Panel 3 on Page 52 until the text “But, what is a layout?”
● Read the story aloud or invite 4 students to read the dialogues of the characters.
● Say: Let me explain about page setup in Google Docs.
min
What is a layout
If you are teaching without a projector
If you are teaching with a projector open a Google Doc on your computer system
what a layout is.
how to change Page Layout. What is Page Orientation
How to change Page Layout
what Page Orientation is. What are Page Margins
How to change Page margins
How to organise text into columns
given in Panel 2 on Page 54
what page margins are.
how to change page margins.
how to organise text into columns.
● Present the scenario: Consider you are creating a storybook on Google Docs.
● Discuss:
■ How can you make the story presentable?
Possible Responses: Add images; Format text; Add shapes and elements; Set page margins
■ How many types of orientations are available in Docs?
Possible Responses: Landscape or Horizontal; Portrait or Vertical
■ What all options are available in the Page setup option?
Possible Responses: Setting page orientation; Margins; Paper size; Paper colour
■ How can we arrange text in Docs?
Possible Responses: we can organise text in columns; Use the Format menu for text formatting; Options available under Format options → align and indent text; Bold, Italics, subscript or superscript text; Page orientation; Set paragraph and line spacing; Paragraph styles; Add header and footer and so on
● If time allows, discuss all four questions, or discuss the first two.
● Conduct Q and A (Answer the following in brief) on Page 65:
■ Say: Help Mel by answering the question below.
■ Read Q1, 3 aloud.
■ Invite some students to share their answers and others to validate their peers’ answers.
■ Instruct: Write the final answers on the board so that students can note it down.
● Conduct Q and A (Answer the following detail) on Page 65:
■ Say: Help Conji by answering the question below.
■ Read Q2, aloud.
■ Invite some students to share their answers and others to validate their peers’ answers.
■ Instruct: Write the final answers on the board so that students can note it down.
● Conclude: Today, we learned about page setup in Google Docs.
● Ask the following probing questions:
■ What kind of things can you create in Google Docs?
Possible Responses: Documents like stories; Questions; Describe and keep track of a plan; Points of a to-do list; Legal documents; Technical documents
■ Who do you think uses Google Docs?
Possible Responses: Story writers; Teachers; Technical writers; Doctors; Lawyers
● Assign True or false - Q1, 4 as homework.
In this session, students will apply what they have learned from the previous class to complete tasks on Google docs.
● Layout: a way to describe what each page of a document will look like when it is printed
● Page Orientation: the direction in which a document is displayed or printed (vertical or horizontal)
● Page Margin: the blank spaces at the top, left, right, and bottom of the document that can be set to make the doc look neat and professional
● Say: Do you remember what we learned in the previous session?
● Invite responses from some students.
● Say: Let’s revise what we have learned.
● Instruct: Go to the Panel and open Lab on Page Setup in Docs – II
● Show slides one by one and discuss the concepts shown on the slide in the panel.
● Discuss the following questions one by one to check students’ understanding:
■ If you wish to type a story in Google Docs, which topic would you choose?
Possible Responses: Birthday story; Summer story; A day in the life of my mom; My country; My city; My home; My best friend
■ What are the options to change the look and feel of your page?
Possible Responses: Change the page margins; Orientation; Organise text into columns
● Invite answers from as many students as possible.
● Address any other doubts that students may have related to the concepts presented in the slides.
● Open and explain the activity on the Assignment page in the panel.
● Instruct: Click on the Start practice button and attempt the activity.
● Walk around in the classroom and observe the activity done by the students.
● Guide students if they are struggling with the activity.
● Instruct: Click on the Confirm button to submit your work when you are done with the activity.
Sum-Up 5 min
● Conclude: Today, we have learned how to set up a page in Google Docs.
● Instruct: Practise the same activity at home.
● If feasible, Assign the following as homework:
● Project: Write a summary of your favourite novel/book/storybook using the tools you learnt today.
In this session, students will learn about –
● What are header and footer
● How to add a header and footer to a Google Doc
● How to add and position page numbers
● How to print a document
Keywords
● Header: a section of a document that appears in the top margin
● Footer: a section of a document that appears at the bottom of the page
Revise the story and CS concepts covered in the previous chapter
Read or invite students to read the story of the chapter
Discuss what are header and footer, how to add them, how to add and position page numbers, and how to print a document
Let’s Number them-Q2, 3
Q and A (Answer the following in brief)-Q2
Q and A (Answer the following detail)-Q1, 3
Conclude the concepts Assign homework
● Recap the story covered in the previous session.
● Invite a few students to recall the CS concepts covered in the previous session.
● Say: Let me explain what headers and footers are and how we can add them in Google docs.
If you are teaching without a projector
If you are teaching with a projector, open a Google Doc on your computer system
What is a header As given in Panel 3 on Page 66 Show what a header is and where it is located in a document.
What is a footer As given in Panel 1 on Page 67 Show what a footer is and where it is located in a document.
Adding a header or footer As given in Panel 1 on Page 67 Show how to add a header and footer to a document.
Add page numbers As given in Panel 1 on Page 68 Show how to add page numbers.
Position page numbers As given in Panel 2 on Page 68 Show how to position page numbers at various places.
Print a document As given in Panel 1 on Page 69 Show how to print a document.
● Present the scenario: Consider you are still working on your story in Google Docs.
● Discuss:
■ What elements do you think can be added to your document?
Possible Responses: Shapes; Tables; Images; Text; Links; Charts; Horizontal lines; Header; Footer; Page numbers
■ You want to show it to your friends. How can you do that?
Possible Responses: Send them a link to the doc; Share it over email; Print it and send it or give them
■ What is the importance of Google Docs?
Possible Responses: Ease of collaboration; Access your work from any device; Automatic saving; A lot of helpful features; It is free
■ Have you come across places where you saw text in columns?
Possible Responses: Newspapers; Textbooks; Books; Documents
● If time allows, discuss all four questions, or discuss the first two.
● Conduct Let’s Number them on Page 63:
■ Say: Help Conji by correcting the steps by numbering them.
■ Read Q2, 3, aloud.
10 min
■ Invite some students to share their answers and others to validate their peers’ answers.
■ Instruct: Fill in the final answers in your books.
● Conduct Q and A (Answer the following in brief) on Page 65:
■ Say: Help Mel by answering the question below.
■ Read Q2 aloud.
■ Invite some students to share their answers and others to validate their peers’ answers.
■ Instruct: Write the final answers on the board so that students can note it down.
● Conduct Q and A (Answer the following detail) on Page 65:
■ Say: Help Conji by answering the question below.
■ Read Q1, 3 aloud.
■ Invite some students to share their answers and others to validate their peers’ answers.
■ Instruct: Write the final answers on the board so that students can note it down.
Sum-Up
5 min
● Conclude: Today, we learned about headers, footers, page numbers, and printing pages in Google Docs.
● Ask the following probing questions:
■ What options do we have when applying page numbers?
Possible Responses: We can add them in header; Footer; Start from any page
■ Are you aware of any other text editor apart from Google Docs? Name them.
Possible Responses: MS Word; Wordpad; Notepad; Open Office writer; Word Perfect
● Assign the following as homework:
■ Typing is fun! on page 54
■ Match the following
■ True or false? - Q2, 3, 5
In this session, students will apply what they learned from the previous class to complete tasks on Google Docs.
● Header: a section of a document that appears in the top margin
● Footer: a section of a document that appears at the bottom of the page
● Say: Do you remember what we learned in the previous session?
● Invite responses from some students.
● Say: Let’s revise what we have learned.
● Instruct: Go to the Panel and open Lab on Header and Footer in Docs II.
● Show slides one by one and discuss the concepts shown on the slide in the panel.
● Discuss the following questions one by one to check students’ understanding:
■ Ask for what purpose you would want to print a document?
Possible Responses: School project; Art and crafts; Creating a card; Creating invitations; Printing pictures for scrapbook; Diary
■ What all can you add in a header?
Possible Responses: Title; Date; Page numbers
■ What can you add in a footer?
Possible Responses: Title; Author; Date; Page numbers; Subheading; Notes about the document
■ Why should you use Google Docs?
Possible Responses: To write letters; Scripts; Stories; Make lists
● Invite answers from as many students as possible.
● Address any other doubts that students may have related to the concepts presented in the slides.
● Open and explain the activity on the Assignment page in the panel.
● Instruct: Click on the Start practice button and attempt the activity.
● Walk around in the classroom and observe the activity done by the students.
● Guide students if they are struggling with the activity.
● Instruct: Click on the Confirm button to submit your work when you are done with the activity.
● Conclude: Today, we have learned how to add headers, footers, and page numbers in Google docs.
● Instruct: Practise the same activity at home.
● If feasible, Assign Project: Make a document of your choice and add headers, footers, and page numbers to it. Also, try printing it if it is feasible.
Note: Use the following points to prepare for the session beforehand. Avoid reading the points in the class.
● Mel and Conji look for Eva as she betrayed them as she joined Lord Ero.
● Eva is guilty and apologises for her mistake.
● Mel asks Geebal that how we to trust her loyalty now.
● Mr Geebal suggests them to give Eva her friend an another chance.
● Mel, Conji, and Eva goes through the records.
● With hope, they all head to the Idea Center; A world full of ideas.
● Mel and Conji are in Ms. Idea’s office with the muses.
● Ms Idea tells the spell to use it on angry Lord Ero to terminate his powers.
● Mel and Conji take the spaceship to Avora.
● They face Lord Ero and provoke him into anger.
● Conji casts a spell “Eroiso Protectio!” that creates a translucent layer around Eva.
● After this, they are at Great risk when they start flying towards the sky.
The content covered in this chapter is aligned with the following CSTA Standard
● 1B-DA–06 Data Analysis
This chapter is divided into the following classroom and lab sessions
1. GIFs in Google Slides I
2. GIFs in Google Slides II
3. Adding Music and Videos in Slides I
4. Adding Music and Videos in Slides II
5. Animations in Google Slides I
6. Animations in Google Slides II
7. Transitions in Google Slides I
8. Transitions in Google Slides II
In this session, students will learn about –
● Adding and Resizing a GIF on Google Slides
● Adding a GIF online
● Uploading a file to Google Drive
● GIF: stands for Graphic Interchange Format and is a series of images or soundless video that loops continuously and doesn’t require anyone to press Play
Revise the story and CS concepts covered in the previous chapter Read or invite students to read the story of the chapter
Discuss what GIFs are, how to add GIFs, how to resize GIFs, and how to upload a file on Drive
Short answers - Q2 One word answer - Q1 Class activity - Q1 - a and b Short Note - Q1
Conclude the concepts Assign homework
● Recap the story covered in the previous chapter.
● Say: There are new characters in this chapter.
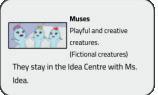
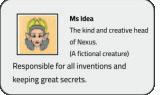
● Introduce Ms. Idea and the muses to the students.
● Instruct: Let’s learn how the story moves ahead. We will read from Page 69 to Panel 2 on Page 71 up to “to our slides” in the text.
● Read the story aloud or invite 4 students to read the characters’ dialogue.
● Say: Let me explain GIFs to you.
If you are teaching without a projector
CS Concepts Explain
Adding a GIF As given in Panel 2 on Page 71
Resizing a GIF As given in Panel 1 on Page 73
Adding an Online GIF As given in Panel 3 on Page 73
Upload a file to drive As given in Panel 1 on Page 75
OR
If you are teaching with a projector, open Google Slides on your computer system
Demonstrate
How to add GIFs from a computer.
How to resize GIFs.
How to add online GIFs in slides.
How to upload a file to drive.
● Present the scenario: Consider you are creating a project on Languages of the World on Google Slides.
● Discuss:
■ How will you make your project interesting?
Possible Responses: We can add elements like - Text; Images; Shapes; Videos; GIFs; Music
■ What steps will you follow to add the GIFs to the slides?
Possible Responses: Click Insert; Select GIF; Select “Upload from Computer”; Upload from the web; Select from the web
■ What are the options for saving your project for future use?
Possible Responses: Save on your computer; Save on Google Drive; Save on a hard disk; Pendrive/Flash drive
■ Why do we use Google Slides?
Possible Responses: To create presentations for school; Projects; Product introductions; Sales; Explaining concepts; Pictorial and interactive ways of presenting information
10 min
Build
● Conduct Short answers on Page 91:
■ Say: Help Conji by answering the question below.
■ Read Q2 aloud.
■ Invite some students to share their answers and others to validate their peers’ answers.
■ Instruct: Write the final answers on the board so that students can note it down.
● Conduct One-word answers on Page 92:
■ Say: Mel’s grandmother is trapped by the witches. Let’s help Mel rescue her by filling in the blanks.
■ Read Q1, aloud.
■ Invite some students to share their answers and others to validate their peers’ answers.
■ Instruct: Fill in the final answers in your books.
● Conduct Class Activity on Page 93:
■ Read Q1 - a and b aloud.
■ Invite some students to share their answers and others to validate their peers’ answers.
■ Instruct: Write the final answers in your books.
● Conduct Short Note on Page 98:
■ Say: Help Mel by answering the question below.
■ Read Q1 aloud.
■ Invite some students to share their answers and others to validate their peers’ answers.
■ Instruct: Write the final answers on the board so that students can note it down.
● If time permits, discuss One word answer - Q2, 4 and Short answers- Q1-a, else, assign it in the homework.
Sum-Up 5 min
● Conclude: Today, we learned to add GIFs to Google Slides from the computer and from the web, resize GIFs, and upload files on Google Drive.
● Ask the following probing questions:
■ For what purposes do you think you would need to insert a GIF in a slide?
Possible Responses: Digital Greeting Card; Project Work; Invitation; Memes
■ What can you do with a GIF in slides?
Possible Responses: Add a GIF (from the computer or from the Web); Resize a GIF; Drag a GIF to different location
● Assign the following as homework:
■ Do your research on page 99
■ One word answer - Q2, 4
■ Short answers- Q1-a
In this session, students will apply what they learned from the previous class to complete tasks on Google Slides.
● GIF: stands for Graphic Interchange Format and it is a series of images or soundless video that loops continuously and does not require anyone to press Play
● Say: Do you remember what we learned in the previous session?
● Invite responses from some students.
● Say: Let’s revise what we have learned.
● Instruct: Go to the Panel and open Lab on Images in GIFs in Google Slides - II.
● Show slides one by one and discuss the concepts shown on the slide in the panel.
● Discuss the following questions one by one to check students’ understanding:
■ When would you need to add GIFs while creating slides?
Possible Responses: To make digital greeting cards; Project work; Invitations
■ If you wished to create a project in Google Slides, Which topic would you choose?
Possible Responses: Invitation cards; Stories and comics for children; A recipe cookbook; Social media posts; Diplomas and certificates; A journal; An eBook
■ Which elements would you add to your project?
Possible Responses: Image; Text; Title; GIFs; Videos; Music
■ Why do we need to resize an inserted GIF in Google Slides?
Possible Responses: To get rid of unwanted parts of a GIF; To customise the GIF; To reduce the size; To make the GIF bigger or smaller
● Invite answers from as many students as possible.
● Address if students have any other doubts related to the concepts presented in the slides.
● Open and explain the activity on the Assignment page in the panel.
● Instruct: Click on the Start practice button and attempt the activity.
● Walk around in the classroom and observe the activity done by the students.
● Guide students if they are struggling with the activity.
● Instruct: Click on the Confirm button to submit your work when you are done with the activity.
● Conclude: Today, we have learned how to add GIFs to Google Slides and upload files on Drive.
● Instruct: Practise the same activity at home.
● If feasible, Assign the following as homework: Project: Make a project on one of the topics that you wanted to create a project on (Invitation cards/Stories and comics for children/a recipe book/Social media posts/Diplomas and certificates/A journal/An eBook) using the tools you learnt today.
In this session, students will learn how to –
● Add music in Google Slides
● Add videos in Google Slides
● YouTube: is a video-sharing service where users can watch, like, share, comment and upload their own videos
● URL: stands for Uniform Resource Locator and is the address of a given unique resource/page on the Web
Revise the story and CS concepts covered in the previous chapter Read or invite students to read the story of the chapter
Discuss adding music and videos in Google Slides
Q and A time (Answer the following detail) - Q3 Class activity - Q1 - c3
● Recap the story covered in the previous session.
Conclude the concepts Assign homework
● Invite a few students to recall the CS concepts covered in the previous session.
● Say: Let me explain how we can add music and videos in Google Slides.
Scenarios
If you are teaching without a projector
If you are teaching with a projector, open Google Slides on your computer system
● Present the scenario: Consider you are creating a project on Cultures of the World on Google Slides.
● Discuss:
■ What elements will you add to the project?
Possible Responses: Text; Images; Shapes; Videos; Music; GIFs
■ What steps will you follow to add the videos to the slides?
Possible Responses: Click on insert → select “Video” → select “YouTube”; Click on insert → select “Video” → select “Google Drive”; Click on insert → select video → paste the link in the URL bar
■ What steps will you follow to add the music to the slides?
Possible Responses: Click on insert → select “Audio” → select “Google Drive”; Click on insert → select “Audio” → paste the link in the URL bar
■ What sources will you use to collect data for your project?
Possible Responses: Internet; Books; Magazines; Newspapers; Encyclopaedias
● Conduct Q and A time (Answer the following detail) on Page 93:
■ Say: Help Mel by answering the question below.
■ Read Q3, aloud.
■ Invite some students to share their answers and others to validate their peers’ answers.
■ Instruct: Write the final answers on the board so that students can note it down.
● Conduct Class Activity on Page 93:
■ Read Q1 - c aloud.
■ Invite some students to share their answers and others to validate their peers’ answers.
■ Instruct: Write the final answers in your books.
Note
● If time permits, discuss One word answer - Q3 and Short answers - Q3, Q1-b, else, assign it in the homework.
5 min
Sum-Up
● Conclude: Today, we learned about adding music and videos to slides in Google Slides.
● Ask the following probing questions:
■ Where do you think presentations can be used?
Possible Responses: Demonstrations; Introductions; Lectures; Presenting a new idea/ product
■ How are presentations made more interactive?
Possible Responses: By adding charts; Images; Videos; Music; Animations; Transitions
● Assign the following as homework:
■ Do as directed on page 92
■ One word answer - Q3
■ Short answers - Q3, Q1-b
In this session, students will learn how to –
● Add music in Google Slides
● Add videos in Google Slides
● YouTube: is a video-sharing service where users can watch, like, share, comment and upload their own videos
● URL: stands for Uniform Resource Locator and is the address of a given unique resource/page on the Web
Action
Plan
● Say: Do you remember what we learned in the previous session?
● Invite responses from some students.
● Say: Let’s revise what we have learned.
● Instruct: Go to the Panel and open Lab on Music & Videos in Slides – II.
■ When would you need to add music to slides?
Possible Responses: To make the slides better; For fun; To explain better; For effect
■ When would you need to add videos to slides?
Possible Responses: To make the students learn concepts visually; To present a visual to the audience; It makes the presentation interactive; Engaging
• Google Slides
■ What options are available in the Insert tab?
Possible Responses: We can add Image; GIF; Video; Audio
■ Are you aware of other applications similar to Google Slides?
Possible Responses: Prezi; Canva; Microsoft Powerpoint; Pitch; Genially Apple Keynote; Microsoft Powerpoint Online; Adobe Presenter
● Invite answers from as many students as possible.
● Address if students have any other doubts related to the concepts presented in the slides.
● Open and explain the activity on the Assignment page in the panel.
● Instruct: Click on the Start practice button and attempt the activity.
● Walk around in the classroom and observe the activity done by the students.
● Guide students if they are struggling with the activity.
● Instruct: Click on the Confirm button to submit your work when you are done with the activity.
● Conclude: Today, we have learned how to add music and videos in Google Slides.
● Instruct: Practise the same activity at home.
● If feasible, Assign the following as homework:
● Project: Make a project on Various Cultures’ Music and complete the tasks mentioned in the Lab Time activity on Page 66 in your book.
● Animations
● Types of animations in Google Slides
● How to apply animations
Keywords
● Animation: the process of giving the illusion of movement to drawings, models, or objects
Revise the story and CS concepts covered in the previous chapter
Read or invite students to read the story of the chapter
Short
answer -
Action Plan
● Recap the story covered in the previous chapter.
● Read or Invite two students to read the story aloud from Page 79 to Page 81 up to the muse’s words, “Teach Conji now.”
If you are teaching with a projector, open Google Slides on your computer system
CS Concepts Explain Demonstrate
What are animations As given on Page 81
Adding an animation
If you are teaching without a projector OR
As given in Panel 1 on Page 82
Fly in from Left As given in Panel 1 on Page 83
Fade in As given in Panel 2 on Page 83
Fly in from bottom As given in Panel 1 on Page 84
Show an illustration of animated images to students.
How to add animations to an object in Google Slides.
Show the effect of using this animation.
Show the effect of using this animation.
Show the effect of using this animation.
● Present the scenario: Consider you have created a project on Google Slides. (You can refer to the one created in the previous chapter)
● Discuss:
■ What objects of your presentation would you like to animate?
Possible Responses: Shapes; Characters/images; Text
■ Why do you want to add animations?
Possible Responses: Becomes appealing; Interactive; Interesting
■ Suppose you want to add animations to a text box added on a slide. How will you do that?
Possible Responses: Select the text box → Click on insert → select “Animation” → select “Fade in” from the Animation Pane; Choose Fly from left; Fly-in from bottom
■ How can you make your presentation interactive?
Possible Responses: Add images; Videos; GIFs; Animations; Transitions; Music; Text in different fonts and styles
● If time allows, discuss all four questions, or discuss the first two.
Build
● Conduct Short answer on Page 95:
■ Say: Help Conji by answering the question below.
■ Read Q1, 2 aloud.
■ Invite some students to share their answers and others to validate their peers’ answers.
■ Instruct: Write the final answers on the board so that students can note it down.
● Conduct Class Activity on Page 97:
■ Read Q1, 2 aloud.
■ Invite some students to share their answers and others to validate their peers’ answers.
■ Instruct: Write the final answers in your books.
● Conclude: Today, we learned about animations in Google Slides.
● Ask the following probing questions:
■ Where have you seen the use of animations in your day-to-day life?
Possible Responses: Animated movies; Cartoons; Animated motion pictures; Reels; Animated rhymes
■ Which is your favourite animated movie/cartoon?
Possible Responses: Chota bheem; Motu Patlu; Shiva; Rudra; The Super Mario Bros.; Mummies; Demon Slayer: Kimetsu No Yaiba - To the Swordsmith Village (2023); The Boss Baby: Christmas Bonus; Brown and Friends
● Assign Q and A time - Q1 as homework.
In this session, students will apply what they learned from the previous class to complete tasks on Google Slides.
● Animation: the process of giving the illusion of movement to drawings, models, or objects
● Say: Do you remember what we learned in the previous session?
● Invite responses from some students.
● Say: Let’s revise what we have learned.
● Instruct: Go to the Panel and open Lab on Animations in Slides – II.
● Show slides one by one and discuss the concepts shown on the slide in the panel.
● Discuss the following questions one by one to check students’ understanding:
■ Which elements would you animate in your project?
Possible Responses: Image; Text; Title; GIFs; Videos; Shapes; Charts
■ What type of animation can you apply to objects in Google Slides?
Possible Responses: Fly-in from left; Fly-in from bottom; Fade-in
● Invite answers from as many students as possible.
● Address if students have any other doubts related to the concepts presented in the slides.
● Open and explain the activity on the Assignment page in the panel.
● Instruct: Click on the Start practice button and attempt the activity.
● Walk around in the classroom and observe the activity done by the students.
● Guide students if they are struggling with the activity.
● Instruct: Click on the Confirm button to submit your work when you are done with the activity.
● Conclude: Today, we have learned how to add animations to objects in Google Slides.
● Instruct: Practise the same activity at home.
● If feasible, Assign Lab time following as homework.
In this session, students will learn about –
● What transitions are
● How to add transitions to Google Slides
● How to control the speed of transitions
● Transition: the visual effect that occurs when you move from one slide to the next during a presentation
Revise the story and CS concepts covered in the previous chapter Read or invite students to read the story of the chapter
Discuss what are transitions, how to add transitions to Google Slides, and how to control the speed of transitions
Write the sequence! - Q1, 2
Who am I? - Q1, 2, 3 Short answer - Q3, 5
● Recap the story covered in the previous session.
Conclude the concepts Assign homework
● Invite a few students to recall the CS concepts covered in the previous session.
● Read or Invite two students to read the story aloud from Page 87.
● Say: Let me explain transitions in Google Slides.
Scenarios
If you are teaching without a projector
If you are teaching with a projector, open Google Slides on your computer system
● Present the scenario: Consider you are creating a project on Heritage of India on Google Slides.
● Discuss:
■ How will you find information for your project?
Possible Responses: Books; Encyclopedias; Internet; Magazines; Journals; Newspapers
■ What elements will you add to the project?
Possible Responses: Text; Images; Shapes; Videos; Music; GIFs; Animations;Transitions
■ Why do you want to add transitions?
Possible Responses: For smooth and clear transitions; Helps the audience to shift their attention from one idea to the other; Makes it appealing; Visually enhances the presentation
■ How will you add transitions to a slide?
Possible Responses: Select the slide → Click on “Slide”→ select “Transition” → select the effect like “Fade in” from the Transition Pane; Choose effects like Dissolve; Fade; Flip; Cube
Build 10 min
● Conduct Write the sequence! on Page 96:
■ Say: Help Conji by answering the question below.
■ Read Q1, 2 aloud.
■ Invite some students to share their answers and others to validate their peers’ answers.
■ Instruct: Write the final answers on the board so that students can note it down.
● Conduct Short answer on Page 95:
■ Say: Help Conji by answering the question below.
■ Read Q3, 5 aloud.
■ Invite some students to share their answers and others to validate their peers’ answers.
■ Instruct: Write the final answers on the board so that students can note it down.
● Conduct Who am I? on Page 100:
■ Say: Help Mel by answering the question below.
■ Read Q1, 2 and 3 aloud.
■ Invite some students to share their answers and others to validate their peers’ answers.
■ Instruct: Write the final answer on the board so that students can note it down.
Sum-Up 5 min
● Conclude: Today we learned about Transitions in Google Slides.
● Ask the following probing questions:
■ Where do you think presentations can be used?
Possible Responses: Demonstrations; Introduction; Lecture; Present a new idea/product
■ How are presentations made more interactive?
Possible Responses: By adding charts; Images; Videos; Music; Animations; Transitions
● Assign the following exercises as homework:
■ Who am I - Q4, 5
■ Guess the odd one out
In this session, students will apply what they have learned from the previous class to complete tasks on Google Slides.
● Transition: the visual effect that occurs when you move from one slide to the next during a presentation
● Say: Do you remember what we learned in the previous session?
● Invite responses from some students.
● Say: Let’s revise what we have learned.
● Instruct: Go to the Panel and open Lab on Transitions and Presentations in Slides –II
● Show slides one by one and discuss the concepts shown on the slide in the panel.
● Discuss the following questions one by one to check students’ understanding:
■ Which is the first transition that you would like to try?
Possible Responses: Dissolve; Fade; Cube; Flip; Gallery; Slide from left; Slide from right
■ What options are available under the Slide menu?
Possible Responses: New slide; Duplicate Slide; Delete Slide; Transition; Skip slide; Change background
● Invite answers from as many students as possible.
● Address if students have any other doubts related to the concepts presented in the slides.
● Open and explain the activity on the Assignment page in the panel.
● Instruct: Click on the Start practice button and attempt the activity.
● Walk around in the classroom and observe the activity done by the students.
● Guide students if they are struggling with the activity.
● Instruct: Click on the Confirm button to submit your work when you are done with the activity.
5 min
Sum-Up
● Conclude: Today, we have learned about Transitions in Google Slides.
● Instruct: Practise the same activity at home.
● If feasible, Assign the following as homework:
■ Project: Make a project on your hobbies (things that you like to do) and add transitions to the slides.
Note
● Questions left unattempted in the previous sessions, can be covered in revision classes.
The content covered in this chapter is aligned with the following CSTA Standard
● 1B-AP–09 Variables
● 1B-AP–10 Control
This chapter is divided into the following lab sessions
1. Print Statement
2. Operations
3. Variables
4. Comparison Operators
5. Logical Operators
6. Conditions
In this session, students will learn about –
● Programming
● Basic blocks in Blockly – Print, number, text
Keywords
● Programming: a set of instructions given to the computer to perform a particular task
● Coding: a term for computer programming
● Programming Language: a language which can be used to give instructions to the computer
● Block-based Coding: instructions are given to the computer using programming blocks
Discuss the word “coding” with students
Show the video “Meet Koi and Newt” in the panel
● Say: Today, the session topic is “Print Statement”. What does the word “coding” mean?
● Invite 1 or 2 responses from the students, but don’t give the correct answer yet.
● Say: Let’s watch a video together and come up with a definition of “coding” afterwards.
● Show the video “Meet Koi and Newt” in the panel.
● Explain the following concepts from the coding booklet -
● Show slides one by one and discuss the blocks shown on the slide in the panel.
● Discuss the Quiz questions given in the Panel.
● Invite answers from as many students as possible.
● Ask the students to complete the Assignment.
● Walk around in the classroom and observe the activity done by the students.
● Present the scenario: (Conduct this activity only if time permits)
Let’s assume that I (the teacher) am a computer. Consider you want me to give you a pencil. What should your instructions be? The instructions should be in English for now.
■ To conduct this activity smoothly, consider picking one student at a time.
■ Whenever the students give you an instruction, think if it is a clear instruction or not. If not, come up with a counter-question.
■ Let the students think. Do not give away the answer. Here are some possible responses
■ Students: Please, give me a pencil.
■ Teacher: But I (the computer) don’t know where the pencil is.
■ Students: On the table, there is a pencil box. Look inside the pencil box. Locate a pencil and pick up the pencil.
■ Teacher: With what should I pick up the pencil?
■ Students: With your hand.
■ Teacher: Yes, but I have two hands. Which one should I use?
■ Students: Use your right hand to pick up the pencil from the pencil box on your table.
■ Teacher: *picks up the chalk and stands still*
■ Students: Now, give it to me.
(Teacher keeps this conversation going until students come up with a clear set of sequential instructions.)
When the students come up with a clear set of instructions, ask them to draw conclusions from this activity.
Here are the conclusions:
1. A computer needs clear instructions to complete a task.
2. The instructions should be in the proper order.
3. The instructions should be given in a language that the computer understands.
4. When you write instructions for the computer, you are coding/programming.
min
● Conclude: Today, we learned about coding. We were introduced to block-based coding named Blockly.
● Ask the following probing questions: (Conduct the activities only if the time permits)
■ When you are giving instructions to the computer, is it important to write the instruction in a certain order?
Explanation: Yes. If the instructions are not in order, the computer will not be able to perform a task properly. Let’s say we want to add two numbers and print the result. If we give the print command first and the addition command after that, the program will not work.
■ Do you think the computer would understand my instructions if I give instructions in Spanish?
Explanation: No. The computer only understands computer languages. Spanish is a human language which the computer doesn’t understand.
In this session, students will learn about –
● Operators
● Maths blocks
Keywords
● Math Block: all the operator blocks available under Math Block in Blockly
Revise the concepts from the previous coding class
Show the video “The Zombie Game”
Discuss operators and maths blocks
Attempt the activities related to maths with Blockly
Conclude the concepts Assign homework
● Say: Do you remember what we learned in the previous session?
● Invite responses from some students.
● Revise the concepts learned in the previous class.
● Show the video, “The Zombie Game” on the panel.
● Discuss the concepts shown in the video.
● Say: We can perform various mathematical functions using blocks under the Math Block in Blockly.
● Explain the following concepts from the coding booklet -
CS Concepts
Operator Block
Even/Odd Block
Positive/Negative Block
Prime Numbers
As given on Page 2
As given on Page 4
As given on Page 4
As given on Page 5
● Ask the students to open the Maths with Blockly section.
● Discuss the Quiz questions given in the Panel.
● Invite answers from as many students as possible.
● Ask the students to complete the Assignment.
● Walk around in the classroom and observe the activity done by the students.
Note
● If time permits, discuss the Worksheet Solving - Operations activity and complete it in class. Otherwise, assign it as homework.
● Conclude: Today, we have learned Operations. Additionally, we have learned about the various mathematical operators present in the math operator block.
● Assign the following as homework -
■ Complete the Worksheet Solving – Operations at home.
Objectives
In this session, students will learn about –
● Variables
● Data Types
Keywords
● Variable: a memory location to store a value in a computer
● Data Types: types of data a variable can hold
Revise the concepts from the previous coding class
Show the video “Horror Movie” in the panel
● Say: Do you remember what we learned in the previous session?
● Invite responses from some students.
● Discuss the homework from the previous session.
● Play the video “Horror Movies” on the panel. Let the student watch the complete video.
● Explain the following concepts from the coding booklet -
CS Concepts Explain
Introduction to Variables
As given on Page 5
Naming a Variable As given on Page 6
Updating Values of a Variable
Data Types
As given on Page 9
As given on Page 11
min
● Discuss the Quiz questions given in the Panel.
● Invite answers from as many students as possible.
● Ask the students to complete the Assignment.
● Walk around in the classroom and observe the activity done by the students.
● If time permits, discuss the activities mentioned under the homework section and complete it in class. Otherwise, assign it as homework.
Sum-Up
● Conclude: Today, we have learned about variables.
● Assign the following as homework –
2 min
1. Create a variable named num1 and store the value 5 in it. Create another variable named num2 and store the value 26 in it. Add both numbers using an operator block and print it.
2. Assign the Q2 from Practice Questions (Page 23, Coding booklet).
In this session, students will learn about –
● Comparison Operators
Keywords
● Comparison Operators: compare two values of the same data type, i.e., either numbers or strings
Revise the learnings from the previous class
Show the video “Super Speed: Fastest Car Mission” in the panel
Discuss comparison operators like - equal, not equal, greater than, less than, etc.
Attempt the activities related to comparison operators
Conclude the concepts
● Say: Do you remember what we learned in the previous session?
● Invite responses from some students.
● Revise the Variables learned in the previous class.
● Play the video “Super Speed: Fastest Car Mission” in the panel. Let the student watch the complete video.
● Explain the following concepts from the coding booklet -
Concepts
Equal (=)
Not Equal (≠)
Less than (<)
Less than or equal to (<=)
Greater than (>)
As given on Page 12
As given on Page 12
As given on Page 12
As given on Page 12
As given on Page 12
Greater than or equal to (>=) As given on Page 13
● Show slides one by one and discuss the concepts shown on the slide in the panel.
● Discuss the Quiz questions given in the Panel.
● Invite answers from as many students as possible.
● Ask the students to complete the Coding Assignment.
● Walk around in the classroom and observe the activity done by the students.
● If time permits, discuss the activities mentioned under the homework section and complete it in class. Otherwise, assign it as homework.
2 min
Sum-Up
● Conclude: Today, we have learned about Comparison Operators.
● Assign the following as homework –
■ Create a variable named num1 and store the value 25 in it. Create another variable named num2 and store the value 30 in it. Create a variable result and store the num1 * num2 Check if the result is greater than 500 or not.
In this session, students will learn about –
● Logical Operators
Keywords
● Logical Operators: used to compare two or more conditions, which are formed using the comparison operator
Revise the learnings from the previous class
Show the video “Logical Operators” in the panel
● Say: Do you remember what we learned in the previous session?
● Invite responses from some students.
● Revise the Comparison Operators learned in the previous class.
● Play the video “Logical Operators” on the panel. Let the student watch the complete video.
● Explain the following concepts from the coding booklet -
CS Concepts Explain
AND Operator
OR Operator
NOT Operator
As given on Page 14
As given on Page 15
As given on Page 17
● Show slides one by one and discuss the concepts shown on the slide in the panel.
● Discuss the Quiz questions given in the Panel.
● Invite answers from as many students as possible.
● Ask the students to complete the Assignment or give it as homework.
● Walk around in the classroom and observe the activity done by the students.
2 min
● Conclude: Today, we have learned about Logical Operators.
● Assign the following as homework –
■ Practise the truth tables at home.
In this session, students will learn about –
● Conditions
● Conditions: used to make decisions
Revise
Show
● Say: Do you remember what we learned in the previous session?
● Invite responses from some students.
● Revise the Logical Operators learned in the previous class.
● Play the video “Conditions” in the panel. Let the students watch the complete video.
● Explain the following concepts from the coding booklet -
If-else Statement
If-do Block
Else-if Block
As given on Page 17
As given on Page 18
As given on Page 19
● Show slides one by one and discuss the concepts shown on the slide on the panel.
● Discuss the Quiz questions given in the Panel.
● Invite answers from as many students as possible.
● Ask the students to complete the Assignment or give it as homework.
● Walk around in the classroom and observe the activity done by the students.
Note
● If time permits, discuss the Q1 from Practice Questions (Page 23, Coding booklet) and complete it in class. Otherwise, assign it as homework.
● Conclude: Today, we have learned about Conditions.
● Assign the following as homework -
1. Assign the Q1 from Practice Questions (Page 23, Coding booklet)
The content covered in this chapter is aligned with the following CSTA Standard
● 1B-AP-10 Control
● 1B-AP-13 Program Development
This chapter is divided into the following lab sessions
1. Loops I
2. Loops II
3. Loops III
4. Timer Clock Project
In this session, students will learn about –
● Loops and iteration
● Types of loops
● Repeat block
● Loop: a set of instructions carried out repeatedly until a particular condition is met
● Iteration: each block of code in a loop
● Repeat Block: allows you to repeat a code for a specified number of times
Recall the concepts covered in the previous coding chapter
Play the video given in the panel to introduce the concepts to be covered in this session
Discuss what is a loop, types of loops, repeat blocks used in Blockly
● Say: Today, the topic is “Loops”. What does the word “loop” mean?
● Invite 1 or 2 responses from the students, but don’t give the correct answer yet.
● Say: Let’s watch a video together and come up with a definition of “loop” afterwards.
● Instruct: Go to the Tekie panel and open the lab on loops.
● Play the video given on the panel for the same topic.
● Discuss the quiz questions given in the Panel.
● Invite answers from as many students as possible.
● Conduct example 2 to print numbers from 1 to 5 given in the Coding Booklet on Page 27:
■ Explain the activity to the students.
■ Instruct: Click on the Practice button on the Assignment page to attempt the activity.
■ Instruct: Click on the Attempt button to open the activity page.
■ Walk around in the classroom and observe the activity done by the students.
■ Assist the students if any of them are struggling.
■ Instruct: Click on Yes button to submit the activity.
● If time permits, conduct the additional activity given in the Coding Booklet on page 26, Example 1.
● Ask the following probing questions:
■ If you had to write a program that plays your favourite song on repeat 10 times, what is the shortest way to code it?
Possible Responses: Use loop repeat 10 times; Use repeat block (10)
■ What does the number 10 stand for in the question I asked above?
Possible Responses: Number of times the loop/code/command repeats
● Assign the following project as homework:
■ Example 3 given in the Coding Booklet on page 27.
Note
● The project is optional. Assign it if feasible.
In this session, students will learn about –
● Repeat while block
● Repeat until block
● Repeat While: repeats a single block or multiple blocks in a loop while a condition is true
● Repeat Until: repeats a single block or multiple blocks in a loop until a condition that you set is met
Recall the concepts covered in the previous coding session
Play the video given in the panel to introduce the concepts to be covered in this session
Discuss repeat while and repeat until blocks Conduct the activity given in the panel in the Coding Booklet
Conclude the session Assign the homework
● Say: Do you remember what we learned in the previous session?
● Invite responses from some students.
● Revise the concepts learned in the previous class.
● Show the video, “Repeat While and Repeat Until” in the panel.
● Ask the students to attempt the quiz questions from the panel and discuss the answers.
● Conduct Example 1 part a and b given in the Coding Booklet from Page 29 and Page 30:
■ Explain the activity to the students.
■ Instruct: Click on the Practice button on the Assignment page to attempt the activity.
■ Instruct: Click on the Attempt button to open the activity page.
■ Walk around in the classroom and observe the activity done by the students.
■ Assist the students if any of them are struggling.
■ Instruct: Click on the Yes button to submit the activity.
Note
● If time permits, conduct the additional activity given in the Coding Booklet on Page 30 (Example 2).
● Ask the following probing questions:
■ What is a repeat while block?
Possible Responses: Repeat while block iterates through one or more blocks in a loop while a condition is met
■ What is a repeat until block?
Possible Responses: Repeat while block iterates through one or more blocks in a loop until a condition is met
● Assign the following project as homework:
■ Example 1 given in the Coding Booklet on Page 28.
Note
● The project is optional. Assign it if feasible.
In this session, students will learn how to use a “break-out” block.
● Loop Termination: ending a loop and moving to the next block
Recall the concepts covered in the previous coding session
Play the video given in the panel to introduce the concepts to be covered in this session
Discuss the “breakout” block
Conduct the activity given in the panel in the coding booklet
● Say: Do you remember what we learned in the previous session?
● Invite responses from some students.
● Revise the concepts learned in the previous class.
● Show the video, “Break-Out Block” on the panel.
● Discuss the quiz questions given in the Panel.
● Invite answers from as many students as possible.
● Conduct Solved Example 1.1 as practice given in the Coding Booklet on Page 32.
■ Explain the activity to the students.
■ Instruct: Click on the Practice button on the Assignment page to attempt the activity.
■ Instruct: Click on the Attempt button to open the activity page.
■ Walk around in the classroom and observe the activity done by the students.
■ Assist the students if any of them are struggling.
■ Instruct: Click on Yes button to submit the activity.
Note
● If time permits, conduct the additional activity given in the Coding Booklet on Page 33 (Solved Example 1.3).
3 min
● Ask the following probing questions:
■ What block do we use to terminate a loop?
Possible Responses: Break-out block
■ What happens once you terminate a loop?
Possible Responses: It executes codes outside the loop body
● Assign the following project as homework:
■ Solved Example 1.2 given in the Coding Booklet on Page 32.
Note
● The project is optional. Assign it if feasible.
In this session, students will apply the knowledge of loop blocks learnt in this chapter.
● Loop: a set of instructions carried out repeatedly until a particular condition is met
● Repeat Block: allows you to repeat a code a specified number of times
● Repeat While: repeats a single block or multiple blocks in a loop while a condition is true
● Repeat Until: repeats a single block or multiple blocks in a loop until a condition that you set is met
● Loop Termination: ending a loop and moving to the next block
Recall the concepts covered in the previous coding session
Play the video given in the panel to introduce the concepts to be covered in this session
Discuss the steps explained in the video
Conduct the activity given in the panel from the Coding Booklet
Conclude the session Assign the homework
● Say: Do you remember what we learned in the previous session?
● Invite responses from some students.
● Revise the concepts learned in the previous class.
● Show the video, “Timer Clock Project” in the panel.
● Discuss the quiz questions given in the Panel.
● Invite answers from as many students as possible.
● Conduct Timer Clock Project as practice given in the Coding Booklet on Page 33.
■ Explain the activity to the students.
■ Instruct: Click on the Practice button on the Assignment page to attempt the activity.
■ Instruct: Click on the Attempt button to open the activity page.
■ Walk around in the classroom and observe the activity done by the students.
■ Assist the students if any of them are struggling.
■ Instruct: Click on the Yes button to submit the activity.
● Ask the following probing questions:
■ How many types of loop blocks did we use in this activity?
Possible Responses: 2; 3
■ Does using a loop block make the code easier to understand?
Possible Responses: Yes; No
Explanation: A loop allows us to reduce the number of times we need to type a code. If a problem requires multiple executions of the same code, it saves us space and clearly mentions the number of iterations we have executed.
● Ask the students to revise and practise the concepts learnt in this chapter.
The content covered in this chapter is aligned with the following CSTA Standard
● 1B-AP-10 Control
● 1B-AP-11 Modularity
This chapter is divided into the following lab sessions
1. Introduction to Functions
2. Functions with Inputs
3. Practice
In this session, student will learn about –
● What is a function
● Advantages of a function
● Declaration and definition of a function
● Function: is a sequence of commands that can be reused together later in a program
● Declaration: is giving the function a name
WEBS at a Glance
Recall the concepts covered in the previous coding chapter
Play the video given in the panel to introduce the concepts to be covered in this session
Discuss the meaning of functions, their advantages, how to declare and define a function
Conduct the activity given in the panel in the Coding Booklet
● Say: Today, the session topic is “Functions”. What does the word “function” mean?
● Invite 1 or 2 responses from the students, but don’t give the correct answer yet.
● Say: Let’s watch a video together and come up with the meaning of “function” afterwards.
● Instruct: Go to the Panel and open the Lab on Introduction to Functions.
● Play the video given on the panel for the same topic.
● Discuss the Quiz questions given on the Panel.
● Invite answers from as many students as possible.
● Conduct Example 1 “Sum of two numbers” given on Page 37:
■ Explain the activity to the students.
■ Instruct: Click on the Practice button on the Assignment page to attempt the activity.
■ Instruct: Click on the Attempt button to open the activity page.
■ Walk around in the classroom and observe the activity done by the students.
■ Assist the students if any of them are struggling.
■ Instruct: Click on the Yes button to submit the activity.
● If time permits, conduct the additional activity given in the panel titled “Difference of two numbers”.
3 min
Sum-Up
● Conclude: Today, we learned functions and how to create them.
● Ask the following probing questions:
■ What are the possible problems that can occur if we don’t use functions while coding?
Possible Responses: Code will become lengthy with repetitions; Hard to manage large chunks of code at once; Difficult to identify bugs
Explanation: Functions breaks allow for separation between codes and help identify bugs easily
■ What is the difference between defining and declaring the function?
Possible Responses: Definition – gives a name to the code to identify it; Declaration – to add instructions inside the body of the function
● Assign the following project as homework:
■ Create a Print function given in the Coding Booklet on Page 37.
● The project is optional. Assign it if feasible.
In this session, students will learn about –
● Calling a function
● Types of functions
● Functions with inputs
Keywords
● Function: is a sequence of commands that can be reused together later in a program
● Calling a Function: is telling the computer to run the created function
Recall the concepts covered in the previous coding session
Play the video given in the panel to introduce the concepts to be covered in this session
Discuss how to call a function, types of functions (in terms of accepting inputs), functions with inputs
Conduct the activity given in the panel from the Coding Booklet
Conclude the session Assign the homework
● Say: Do you remember what we learned in the previous session?
● Invite responses from some students.
● Revise the concepts learned in the previous class.
● Show the video, “Functions II” in the panel.
● Discuss the Quiz questions given in the Panel.
● Invite answers from as many students as possible.
● Conduct Example 2 given on Page 42:
■ Explain the activity to the students.
■ Instruct: Click on the Practice button on the Assignment page to attempt the activity.
■ Instruct: Click on the Attempt button to open the activity page.
■ Walk around in the classroom and observe the activity done by the students.
■ Assist the students if any of them are struggling.
■ Instruct: Click on the Yes button to submit the activity.
Note
● If time permits, conduct the additional activity given in the Coding Booklet on Page 46 (Practice Questions 1).
3 min
● Conclude: Today, we learned about how to call functions and functions with inputs.
● Ask the following probing questions:
■ Why do we define a function?
Possible Responses: To name and identify it; To call it and use it later
■ What are the two types of functions we have discussed?
Possible Responses: Functions with inputs; Functions without inputs
● Assign the following project as homework:
■ Example 2 given in the Coding Booklet on Page 43.
Note
● The project is optional. Assign it if feasible.
In this session, students will practise some activities based on their knowledge of functions.
● Function: is a sequence of commands that can be reused together later in a program
Recall the concepts covered in the previous coding session
Play the video given in the panel to introduce the concepts to be covered in this session
Discuss the questions on the panel
Conduct practice activities in the Coding Booklet
Conclude the session Assign the homework
● Say: Do you remember what we learned in the previous session?
● Invite responses from some students.
● Revise the concepts learned in the previous class.
● Show the video, “Recap” in the panel.
● Discuss the Quiz questions given in the Panel.
● Invite answers from as many students as possible.
● Conduct Solved Examples with Functions 3 as practice given in the Coding Booklet on Page 45:
■ Explain the activity to the students.
■ Instruct: Click on the Practice button on the Assignment page to attempt the activity.
■ Instruct: Click on the Attempt button to open the activity page.
■ Walk around in the classroom and observe the activity done by the students.
■ Assist the students if any of them are struggling.
■ Instruct: Click on the Yes button to submit the activity.
Note
● If time permits, conduct the additional activity given in the Coding Booklet on Page 46 (Practice Questions 2).
● Ask the following probing questions:
■ How have functions benefited you while practising the activities today?
Possible Responses: Can be reused; Breaks the large problem into small chunks; Easy to find bugs
■ What kind of input would you give for a function defined as “multiply”?
Possible Responses: Numerals; Numbers
● Assign the following project as homework:
■ Solved Examples with Functions 2 on Page 45.
Note
● The project is optional. Assign it if feasible.
The content covered in this chapter is aligned with the following CSTA Standards
● 1B-AP-09 -Variables
● 1B-AP-10 Control
This chapter is divided into the following lab sessions
1. Strings
2. More on Strings
In this session, students will learn about –
● Introduction to Strings
● Length of a String
● Empty String
● User Input
● Variables: are containers that store values
● Strings: are values that are put inside single (‘ ’) or double quotes (“ “) and they can be numbers, letters, special characters, or a combination of these
● Length of a String: is the number of characters in a string
● Empty String: is a string that does not hold any value
● Input: is the information given to the computer by the user
Recall the concepts covered in the previous coding session
Play the video given in the panel to introduce the concepts to be covered in this session
Discuss variables, values they can store, strings, string length, empty strings, and taking user input using the prompt block
Length of Vocab! [Students can use their vocab skills and find the length of any word]
Conclude the session Assign the homework
● Instruct: Go to the Panel and open the Lab on Strings.
● Play the video given in the panel.
● Discuss the Quiz questions given in the Panel.
● Invite answers from as many students as possible.
● Conduct Length of Vocab! activity given in the Panel:
■ Say: Today, we are going to work on strings entered by the user and find their length.
■ Instruct: Click on the Assignment section.
■ Instruct: Click on the Go to Practice button to attempt the activity.
■ Walk around in the classroom and observe the activity done by the students.
■ Instruct: Click on the Yes button to submit the activity.
● If time permits, conduct the additional activity given in the panel: Empty or Full. [Students will check whether the information entered by the user has some length or it’s empty.]
● Conclude: Today, we have learned how a user can enter information in a prompt block to work on it.
● Ask the following probing questions:
■ Is your house address a string?
Possible Responses: Yes; No
■ Can you find the length of a string without counting spaces?
Possible Responses: Yes; No [No, because space is also a character.]
● Assign the following project as homework:
■ Create a program to find the length of the information entered by the user.
● The project is optional. Assign it if feasible.
In this session, students will learn about –
● Combining Strings
● Substrings
● Combining Strings: is bringing together multiple blocks of strings or variables in one string
● Substring: is part of a string
Recall the concepts covered in the previous coding session
Play the video given in the panel to introduce the concepts to be covered in this session
Discuss combining strings and getting a substring from a string
Perform the activity given on the panel – Let’s Join Together
Conclude the session Assign the homework
● Instruct: Go to the Panel and open the Lab on More on Strings.
● Play the video given in the panel.
● Discuss the Quiz questions given in the Panel.
● Invite answers from as many students as possible.
● Conduct Let’s Join Together activity given in the Panel:
■ Say: Students! Today we will learn how to join strings together with the help of an activity.
■ Instruct: Click on the Assignment section.
■ Instruct: Click on the Go to Practice button to attempt the activity.
■ Walk around in the classroom and observe the activity done by the students.
■ Instruct: Click on the Yes button to submit the activity.
● If time permits, conduct the additional activity – Solve Examples 1 to 3 given on Pages 51 to 53 in their Coding Book
● Conclude: Today, we learned about joining and taking out part of a string through different activities.
● Ask the following probing questions:
■ Can we use the substring function to display more words from the word given?
Possible Responses: Yes; No
[Yes]
■ Can we use combining and substring methods without getting input from the user?
Possible Responses: Yes; No
[Yes, we can enter strings in the text block to do it.]
● Assign the following project as homework:
■ Do the Practice Questions given on Page 53 in your Coding Book
Note
● The project is optional. Assign it if feasible.
The content covered in this chapter is aligned with the following CSTA Standard
● 1B-AP-09 Variables
This chapter is divided into the following lab sessions
1. Introduction to Lists
2. Sublists and Adding Items
3. Iterating through a List
In this session, students will learn about –
● What is a list
● How to create lists
● List blocks
● Getting and removing items from lists
● Lists: an ordered collection of items
Recall the concepts covered in the previous coding chapter
Play the video given in the panel to introduce the concepts to be covered in this session
Getting
and
● Invite 1 or 2 responses from the students, but don’t give the correct answer yet.
● Say: Let’s watch a video together and come up with the meaning of “lists” afterwards.
● Instruct: Go to the Panel and open the Lab on Lists
● Play the video given in the panel for the same topic.
Action Plan 7 min Warm-Up 5 min Engage
● Discuss the Quiz questions given in the Panel.
● Conduct Get and Remove Example given in the Coding Booklet on Page 60:
■ Explain the activity to the students.
■ Instruct: Click on the Practice button on the Assignment page to attempt the activity.
■ Instruct: Click on the Attempt button to open the activity page.
■ Walk around in the classroom and observe the activity done by the students.
■ Assist the students if any of them are struggling.
■ Instruct: Click on the Yes button to submit the activity.
● If time permits, conduct the additional activity given in the Coding Booklet on Page 67 (Practice Questions 3).
3 min
● Conclude: Today, we learned about creating lists, how to get and remove items and some lists blocks.
● Ask the following probing questions:
■ Give one example of lists that you see used in daily life.
Possible Responses: Grocery list; Ingredients of a recipe; Attendance sheet in a class
■ What is the one advantage of a list that you have observed?
Possible Responses: Organised; helps one to remember; Can add new items easily
● Assign the following project as homework:
■ Create a list of “Animals” and add 5 of your favourite animals in it. Find the first animal on the list. Also find the last animal and remove it from the list.
● The project is optional. Assign it if feasible.
In this session, students will learn about –
● What is a sublist
● How to get a sublist from a list
● How to add items to a list
● List: a collection of data stored together in one place
● Sublist: is a part of a larger list
Recall the concepts covered in the previous coding session
Play the video given in the panel to introduce the concepts to be covered in this session
Discuss the meaning of sublist, how to get it from a list, and adding items to a list
● Say: Do you remember what we learned in the previous session?
● Invite responses from some students.
● Revise the concepts learned in the previous class.
● Show the video, “Sublist and Adding items” in the panel.
● Discuss the Quiz questions given in the Panel.
● Invite answers from as many students as possible.
● Conduct Practice Question 1 given in the Coding Booklet on Page 67:
■ Explain the activity to the students.
■ Instruct: Click on the Practice button on the Assignment page to attempt the activity.
■ Instruct: Click on the Attempt button to open the activity page.
■ Walk around in the classroom and observe the activity done by the students.
■ Assist the students if any of them are struggling.
■ Instruct: Click on the Yes button to submit the activity.
● If time permits, conduct the Example given in the Coding Booklet on Page 63
● Conclude: Today, we learned about sublists and adding items to a list.
● Ask the following probing questions:
■ What is a sublist?
Possible Responses: Part of a bigger list; A small part of a list
■ Do you think it is possible to add items in the middle of the list?
Possible Responses: Yes; No; Don’t know; Maybe
Explanation: Yes it is possible to add items anywhere in the list using the “insert at” block
● Assign the following project as homework:
■ Create a list of subjects you study at school. Extract the sublist from the 3rd position to 5th position. Print the list as well as the sublist.
Note
● The project is optional. Assign it if feasible.
In this session, students will learn about –
● Iterating through a list
● List: a collection of data stored together in one place
● Sublist: a part of the larger list
● Iteration: is a repetition of a sequence of code
Recall the concepts covered in the previous coding session
Play the video given in the panel to introduce the concepts to be covered in this session
Discuss how to iterate through a list Iterating through a List – Example 3
Conclude the session Assign the homework
● Say: Do you remember what we learned in the previous session?
● Invite responses from some students.
● Revise the concepts learned in the previous class.
● Show the video, “Iterating through a list” in the panel.
● Discuss the Quiz questions given in the Panel.
● Invite answers from as many students as possible.
● Conduct Example 3 given in the Coding Booklet on Page 66:
■ Explain the activity to the students.
■ Instruct: Click on the Practice button on the Assignment page to attempt the activity.
■ Instruct: Click on the Attempt button to open the activity page.
■ Walk around in the classroom and observe the activity done by the students.
■ Assist the students if any of them are struggling.
■ Instruct: Click on the Yes button to submit the activity.
Note
● If time permits, conduct the additional activity Example 4 given in the Coding Booklet on Page 66.
● Ask the following probing questions:
■ Which block operates on every item in the list?
Possible Responses: For-each
■ How does iterating through lists help us?
Possible Responses: Reduces the number of times we need to write the same code
● Assign the following project as homework:
■ Practice Questions 2 given in the Coding Booklet on Page 67.
Note
● The project is optional. Assign it if feasible.
The content covered in this chapter is aligned with the CSTA Standard
● 1B-AP-10 Control
This chapter is divided into the following lab sessions
In this session, students will learn through –
● Puzzles
● Puzzle: a game that tests a person’s knowledge or skills
● Trait: a differentiating quality
Recall the concepts covered in the previous coding session Play the video given in the panel to introduce the concepts to be covered in this session
● Say: Do you remember what we learned in the previous session?
● Invite responses from some students.
● Revise the topics learned in the previous class.
● Instruct: Open the topic Puzzles on Page 69.
● Discuss the various puzzles given in the book.
● Conduct the Puzzle given on Page 69:
■ Say: Today we will solve puzzles in Blockly.
■ Instruct: Open the link on your computer and choose the first option (Puzzle).
■ Guide and help students to complete the activity.
■ Walk around in the classroom and observe the activity done by the students.
■ Instruct: Click on Check Answers to check the answer and move forward. Note
● If time permits, conduct the additional activity given in the panel.
3 min
● Ask the following probing questions:
■ Name some traits of snails and ducks.
Possible Responses: Shell; Slime; Beak; Feathers
■ How many legs does a bee have?
Possible Responses: Six; Five; Four
In this session, students will learn through –
● Mazes
● Maze: a puzzle in which you have to find a path
Recall the concepts covered in the previous coding session
Play the video given in the panel to introduce the concepts to be covered in this session
● Say: Do you remember what we learned in the previous session?
● Invite responses from some students.
● Revise the topics learned in the previous class.
● Instruct: Open the topic Maze on Page 71
● Discuss the various Mazes given in the book.
● Conduct the Maze given on Page 71:
■ Say: Today we will solve Mazes from 1 to 5 in Blockly.
■ Instruct: Open the link on your computer and choose the second option (Maze).
■ Guide and help students to complete the activity.
■ Walk around in the classroom and observe the activity done by the students.
■ Instruct: Click on Run Program to check the answer and move forward.
Note
● If time permits, conduct the additional activity given in the panel.
● Ask the following probing questions:
■ Which script do we use for the maze?
Possible Responses: Javascript; Python; Blockly
■ Which button do we click after completing the code?
Possible Responses: OK; Next
● Assign the following project as homework:
■ Practice Questions (stages 6 to 10) on Page 79
Note
● The project is optional. Assign it if feasible.
In this session, students will learn about –
● Turtle
● Turtle: an on-screen pen to draw on the screen
Recall the concepts covered in the previous coding session
Play the video given in the panel to introduce the concepts to be covered in this session
Discuss Turtle
Attempt the activities related to Turtle
Conclude the session Assign the homework
● Say: Do you remember what we learned in the previous session?
● Invite responses from some students.
● Revise the topics learned in the previous class.
● Instruct: Open the topic Turtle on Page 79
● Discuss various activities given in the book.
● Conduct the Turtle given on Page 79:
■ Say: Today we will solve the Turtle activity in Blockly.
■ Instruct: Open the link on your computer and choose the fourth option (Turtle).
■ Guide and help students to complete the activity.
■ Walk around in the classroom and observe the activity done by the students.
■ Instruct: Click on Run Program to check the answer and move forward.
Note
● If time permits, conduct the additional activity given in the panel.
● Ask the following probing questions:
■ How many steps can we move forward using turtles?
Possible Responses: 100; 50; 150; 20
■ Can a Turtle move backwards?
Possible Responses: Yes; No; Maybe
● Assign the following project as homework:
■ Practice Questions (stages 6 and 7) on Page 88
Note
● The project is optional. Assign it if feasible.
This Teacher Manual has been designed to implement Tekie, the storytelling-based Coding and Computer Science program. The manual consists of lesson plans within each chapter that teachers transact within classrooms and computer labs. Each lesson is based on a research-based ‘WEBS’ framework that simplifies pedagogical practices for teachers and enables them to deliver effectively.
• Sharp Lesson Planning: Each lesson plan focuses on specific sub-learning outcomes within a chapter and are designed for delivery within the stipulated class or lab time.
• Real-life and Application-based Questions: Additional questions that link Computer Science to real-life contexts and assist teachers to develop learners’ conceptual understanding and application skills.
• Support and Detailed Solutions: In-depth solutions for in-class and post-class activities to reinforce learning.

Uolo partners with K12 schools to bring technology-based learning programs. We believe pedagogy and technology must come together to deliver scalable learning experiences that generate measurable outcomes. Uolo is trusted by over 8,000 schools with more than 3 million learners across India, South East Asia, and the Middle East.