

NEP 2020 based | NCF compliant | Technology powered SalesSample


Programming is the process of giving instructions to a computer about how to do a task.
But instead of giving the instructions verbally, you write them down in a language that a computer can understand. This language is called a programming language.
A task is a piece of work to be done. In a program, it may represent a section of the program.
A programming language has its own vocabulary and syntax just as we have in English, Hindi and other languages.
Programming languages are classified into two main categories:
• Low-Level Languages
• High-Level Languages
Low-level languages (LLL) are machine-friendly languages that are closer to the machine and harder for humans to understand. They are used to control the hardware of the computer.
Machine language and assembly language are examples of low-level languages. These languages communicate with the computer directly, so no language translation is required. The instructions in the machine language are written using 0s and 1s, which are known as binary digits. On the other hand, symbolic names, also known as mnemonics, are used in assembly language for writing programs.
High-level languages (HLL) are user-friendly and easier to use than low-level languages. They are used for various tasks like making games, websites, and analysing data.
Java, Python, and C are examples of HLLs.
HLLs make programming simpler because they use words that are human readable like English language words, instead of the hardto-remember 0s and 1s of machine language.
But, before a computer can run an HLL program, it needs to be translated into LLL.
Ease of use Easier to understand and use
Purpose Used for making games, websites, and analysing data
Translation Requires translation into LLL before execution
More difficult to understand and use
Used to control the computer hardware
No translation required
Examples Java, Python, C Machine language, assembly language
In this book, we will learn Python, which is the most widely used programming language.
Python is a high-level programming language that is easy to learn and simple to use. It is a “batteries included” language, which means that it comes with a lot of pre-installed features. This makes it simple to start programming without having to learn a lot of complicated material. It was created by Guido van Rossum and first released in 1991.
Here are some of the features of Python:
1 Easy to Read: Python code is easy to read, just like English.
2 Quick to Learn: Python has few keywords, a simple structure, and a clearly defined syntax. This makes it easier to learn and understand, even for beginners.
3 Easy to Maintain: Python source code is easy to maintain and update.
4 Interactive Execution Mode: Python offers script and interactive modes for running programs. The code can be interactively tested and debugged in the interactive mode. A three-step loop process defines how Python is run in the interactive window:
• The Python interpreter first reads the code entered at the prompt.
• Then it evaluates the code.
• Finally, it prints the outcome and awaits new input.
Python is named after a famous British comedy group called Monty Python.
5 Dynamic Typing: Python defines data type dynamically for the objects according to the value assigned. It also supports dynamic data type checking.
6 Portable: Python is a portable language because it can be used on a variety of hardware platforms.
7 Large Database Support: Python provides interfaces to all major commercial databases.
8 GUI Application Creation: Python also supports the creation of Graphical User Interface (GUI) applications.
9 Scalable: Python provides better structure and support for larger programs than shell scripting. This makes it scalable.
Like any language, programming languages have their own sets of rules for writing programs. These rules, called syntax rules, tell us how to write programs in that language.
Python is not different; it has its own rules that we must follow when writing code. One important rule in Python is that it’s case-sensitive. This means that ‘nUm,’ ‘Num,’ and ‘num’ are considered different things in Python.
In Python, there are numerous built-in functions readily available. A function is a block of code used to perform a specific task. Built-in functions are functions predefined in the Python programming language. These functions can be used without the need to define them yourself.
One of the built-in functions is the print() function.
The print() function displays a value or information in the output.
Syntax: print(“value“)
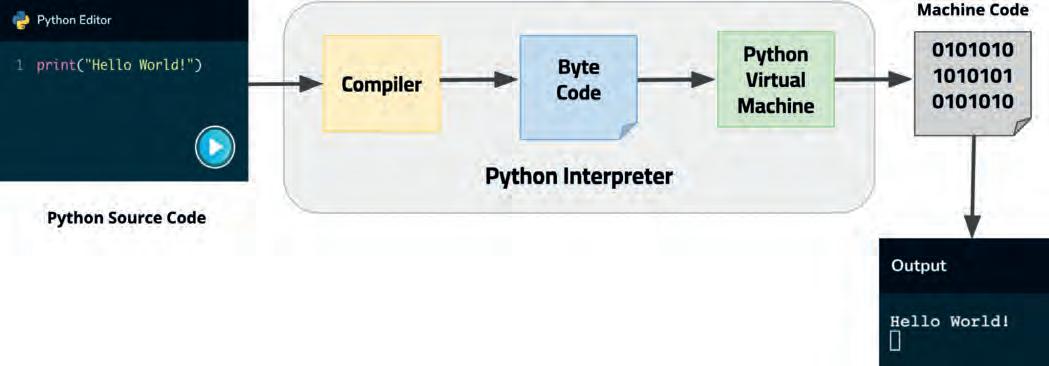
But how does a Python code get executed?
The Python interpreter runs the code line by line and displays the results until an error occurs. It changes the HLL-written source code into bytecode, an intermediate language, which is then converted back into machine language and executed.
We use comments to add documentation to a Python program. Python ignores these lines of comments in the program during execution as they are not part of the code.
Let us learn some benefits of Comments:
• They structure the code and make it easier for humans to read.
• They explain the thought process and intentions behind the code.
• They find errors and debug the code.
After all, there is a popular saying, “Anyone can write code that a computer can understand. Good programmers write code that humans can understand.”
In Python, we have two types of comments:
• Single-line Comment
• Multi-line Comment
Single-Line Comment
A single-line comment starts with a hash character ( # ) and is followed by related information.
Code Output
#using the print command
print(“Learn Programming”) Learn Programming
Multi-line Comment
A multi-line comment begins and ends with three single or double-quote characters (‘ ‘ ‘ or “ “ “) with related information enclosed.
Code Output
hello#world
Printing hello world with the sep command
Printing hello world with an end command
print(“hello”, “world”, sep = “#”)
print(“hello”, “world”, end = “$”)
hello world$
In Python, every value has a data type. Data types define the type of data that a variable can store. There are two categories of data types in Python: Immutable and Mutable.
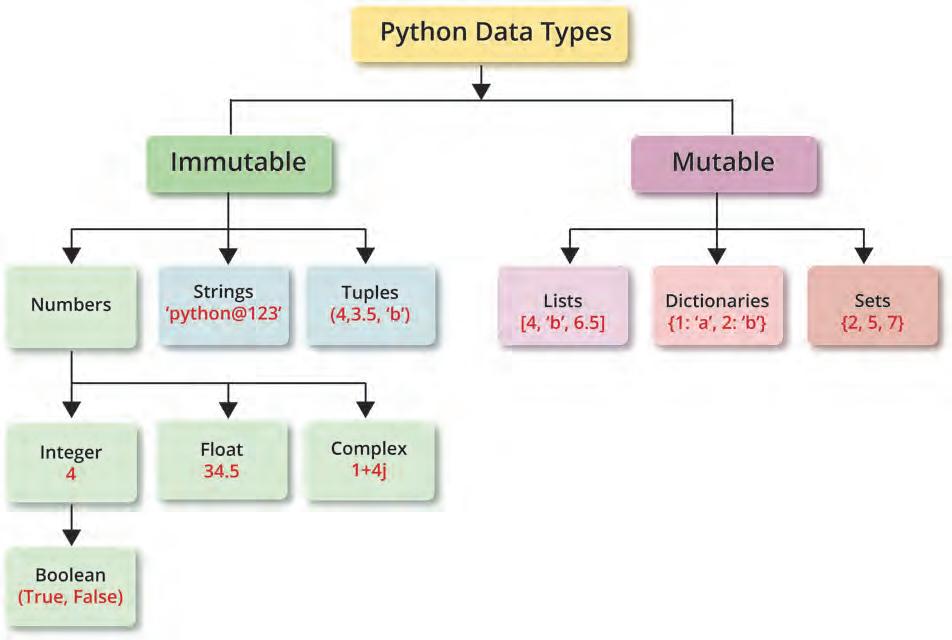
• Immutable Data Types are the data types which cannot be changed once declared. They consist of Numbers, Strings, and Tuples.
• Mutable Data Types are the data types which can be changed anytime. They consist of Lists, Dictionary, and Sets.
Look at the table. It shows the different data types and their descriptions.
Name Type Description
Integer int
Whole numbers, like 15, 200, and 275.
Floating point float Numbers with a decimal point, like 4.3, 7.6, and 340.0.
String str Ordered sequences of characters, like “Python”, “hello”, “1495”, and “SV”.
List list Ordered sequences of objects, like [“hello123”, 40, 107.5].
Dictionary dict Unordered key-value pairs, like {“key”: “value”, “language”: “Python”}.
Tuple tup Ordered immutable sequences of objects, like (50, “python”, 208.7).
Set set
Unordered collections of unique objects, like {“apple”, “bird”}.
Boolean bool Logical value indicating True or False.
A variable is a reference name given to a location in the computer’s memory. It allows you to store a value in that location and refer to it as needed. Variables can be used to store numbers, strings, lists, and other data types. They are just like a label that can be changed.
num
5
Imagine a memory location as a box and a variable name as a label for that box. You can store a number in the box and label it as “num”. Whenever you need to use the number, you can easily find it by the label on the box.
You can even remove the label and put it on another box, or you can replace the number in the box as needed.
In Python, variable declaration and initialisation happen with a single step of assigning a value to a variable.
Syntax: variable_name = value
Assignment Operator (=) is used to assign a value to a variable.
Code Output
word = “Hi”
number = 5
print(word, number)
Hi 5
We can also initialise multiple variables in one line.
Syntax: var1, var2 = value1, value2
Code Output
word, number = “hi”, 5
print(word, number) hi 5
Syntax errors are the mistakes in following the rules to write the code, such as wrong function names, missing quotes, brackets, etc.
Below are some examples of common syntax errors:
1 Missed double quotes
Code Output
print(Learn Python)
SyntaxError: invalid syntax
2 Missed symbols, such as a colon, comma, or brackets
Code Output
print(Learn Python
SyntaxError: incomplete input
3 Wrong operation on wrong type of values
Code Output num = 5
TypeError: can only concatenate str (not “int”) to str
message = “Number is: “ + num
4 No variable for receiving value
Code Output num = 5 =num+4 print(n1)
SyntaxError: invalid syntax
There are certain rules we need to follow while naming a variable.
Some rules are:
1 Instead of using spaces, you should use the underscore (_) symbol when naming variables.
Will a syntax error prevent the program from running?
2 A variable name must start with a letter or the underscore character.
Code Output
greeting_message = “Good Evening!”
_number_ = 205
print(greeting_message)
print(_number_)
Good Evening!
205
Code Output
greeting%message = “Good day!”
print(greeting%message)
SyntaxError: cannot assign to expression here
3
As Python is a case-sensitive language, variable names are also case-sensitive.
Example: old, Old and OLD are three different variables.
4 A variable name can have numbers within it but cannot begin with a number.
1num = 100 print(1num)
As we have case styles for words in English, we have some case styles for naming variables. Below are the case styles you can follow to name variables in Python:
Camel Case
• The first letter of the variable is lowercase.
• Each subsequent word’s first letter is capitalised.
• No spaces or underscores.
• Often used for variable and function names.
Example: “Name of the company” can be written as “name Of The Company”.
As this represents the camel’s hump we call it Camel-Case.
Code Output
print(camelCaseExample) Hello Camel
camelCaseExample = “Hello Camel”
Snake Case
• All letters are lowercase.
• Words are separated by underscores (_).
• Often used for variable and function names.
Example: “name of the company” in snake-case is written as “name_of_ the_company”.
Code Output
snake_case_example = “Hello Python” print(snake_case_example)
Hello Python
If we don’t follow the naming conventions or any syntax of a language, we may get Syntax Errors on executing our code.
In Python, we can even create a variable with user input. To do so, we use a built-in function named input().
The input() function in Python is used to allow input from the user. It is a built-in function.
Syntax: name = input(“<message to be displayed>“)
Code Output
user_input = input(“Enter your favourite colour: “) Enter your favourite colour: blue
Solved Examples
Example 1.1
The side of a square is 80. Use camel case to name the variable area of a square. Calculate the area. Print the result.
Answer:
Code Output side = 80
The area is: 6400
areaOfSquare = side * side print(“The area is: ”, areaOfSquare)
Example 1.2
Below are the average temperatures of different places. Store them in different variables. The temperature has increased by 0.5 in the afternoon. Display the updated temperature of all the places.
Answer:
Code Output
Zo_Hills=20
Met_Town=25
Bay_Area=26
print(“Place”,”Updated Temperature”)
print(“Zo Hills”, Zo_Hills+0.5)
print(“Met_Town”,Met_Town+0.5)
print(“Bay_Area”, Bay_Area+0.5)
Place Updated Temperature
Zo Hills 20.5
Met_Town 25.5
Bay_Area 26.5
Let’s build a simple calculator project while learning the concepts in the chapter.
We will be building this project by dividing this into tasks.
Task 1: Take two numbers and an operator as input from the user.
Let’s create three variables and use the input() function to allow input from the user.
Code
num1 = input(“Enter first number: “)
operator = input(“Enter operator (+, -, *, /): “)
num2 = input(“Enter second number: “)
Now, before we execute the project, do you remember what Dynamic Typing is?
Dynamic typing is a feature of Python where the data type of a variable is not determined until runtime. This means that you can assign a variable to a value of any type, and the variable will automatically take on that type.
In Python, we use the type() function to check the dynamic data type assigned to a variable. It is a built-in function that returns the type of an object. The object can be a variable, a value, or an expression.
Syntax: type(object_name)
Task 2: Check the data type of user input.
num1 = input(“Enter first number: “)
operator = input(“Enter operator (+, -, *, /): “)
num2 = input(“Enter second number: “)
print(type(num1))
print(type(num2))
print(type(operator))
Enter first number: 4
Enter operator (+, -, *, /): +
Enter second number: 6
<class ‘str’>
<class ‘str’>
<class ‘str’>
The input() function always returns a string value, even if it takes a number, operator, or any other value as input. And, since we have created variables with user input, all three variables are of string type.
1 Identify the syntax error and correct the code:
a score = 95
message = “Your score is: “ + score
Ans.
b number = 42 = type(number)
print(“The data type is: “ + str(data_type))
Ans.
2 What will be the output of the given code?
Code Output
a = 7
print(type(a))
b = 3.0
print(type(b))
c = a + b
print(c)
print(type(c))
d = a * b
print(d)
print(type(d))
A string is a data type that represents a sequence of characters. In Python, strings are put inside single quotes (‘ ’) or double quotes (“ ”). These values can be words, symbols, characters, numbers, or a combination of all these.
A string can be categorised into two as follows:
• A single-line string
• A multi-line string
Single-line String
A single-line string can be enclosed in either single quotes or double quotes.
Code Output
name1=“Mohit”
name2=‘Mohit’
print(name1)
print(name2)
Multi-line String
Mohit Mohit
A multi-line string can be enclosed in either three single quotes (‘‘‘ ’’’) or three double quotes (“““ ”””).
Code Output
proverb_1= ‘’’Don’t judge a book by its cover. ‘’’
proverb_2= “””
Beauty is in the eye of the beholder.
“””
print(proverb_1)
print(proverb_2)
Don’t judge a book by its cover.
Beauty is in the eye of the beholder.
The eval() function evaluates a string expression and returns the result.
Syntax: result = eval(expression)
Code Output
expression = “2 * 3 + 4 / 2”
result = eval(expression)
//Using variables within expressions:
x = 5
y = 3
expression = “x + y”
result = eval(expression)
Simple Calculator
Task 3: Pass the user input to the eval() function to evaluate it.
Code Output
num1 = input(“Enter first number: “)
operator = input(“Enter operator (+, -, *, /): “)
num2 = input(“Enter second number: “)
print(“Result: “, eval(num1+operator+num2 ))
Enter first number: 5
Enter operator (+, -, *, /): /
Enter second number: 8
Result: 0.625
Using the eval() function, our code can be completed very quickly.
But it has the following limitations:
• It can be used to execute arbitrary code. This means that if an attacker can trick you into evaluating malicious code, they could take control of your computer system.
• It can be used to inject code into a running program. This means that an attacker could modify the behaviour of your program by injecting malicious code into it.
• It can be used to execute code that is entered by the user. This code could be malicious code that could steal the user’s data or take control of their browser.
• It can be slow. The eval() function has to parse the code that is being evaluated, which can take time.
• It can be difficult to debug. If the code that is being evaluated contains errors, it can be difficult to track down the source of the errors.
For these reasons, it is important to use the eval() function with caution and to use it only when you are sure that the code that is being evaluated is safe.
But there is another way to do this project. It is Type Casting.
Type casting is conversion of the data type of a value into another data type.
We can type cast a data type using type casting functions:
1 int()
2 float()
3 string()
4 bool()
The int() function is used to typecast the value of a variable into an integer. It converts the following data type into an integer:
1 Float by removing the decimal point and everything after it.
2 String only if string represents a number.
3 Boolean by converting True to 1 and False to 0.
Syntax: int(variable_name)
Code Output
str_to_int = int(“8”)
bool_to_int = int(True)
print(str_to_int, type(str_to_int))
print(bool_to_int, type(bool_to_int))
8 <class ‘int’>
1 <class ‘int’>
Code Output
number=int(“Hello”)
ValueError: invalid literal for int() with base 10: ‘Hello’
The float() function is used to typecast the value of a variable into float. It converts the following data type into float:
1 Integer by adding a decimal followed by a zero.
2 String only if the string represents a float or an integer.
Syntax: float(variable_name)
c=float(“Hello”)
ValueError: could not convert string to float: ‘Hello’
The str() function is used to typecast the value of a variable into a string. It converts all the data types including float, integer, and boolean into a string.
Syntax: str(variable_name)
Code Output
num_1 = str(5)
num_2 = str(7.2)
print(num_1 , type(num_1))
print(num_2, type(num_2))
5 <class ‘str’>
7.2 <class ‘str’>
The bool() function is used to typecast the value of a variable into boolean. It converts the following data type into boolean:
1 Integer and prints False if the value of the variable is 0, otherwise prints True
2 String and prints False if the string is empty, otherwise prints True.
Syntax: bool(variable_name)
Code
a=bool(0)
b=bool(1)
c=bool(“”)
d=bool(“Python”)
print(a,b,c,d)
Simple Calculator
False True False True
Task 4: Typecast the numbers that the user inputs into floats.
Code
num1 = float(input(“Enter first number: “))
num2 = float(input(“Enter second number: “))
Next, we need to learn about operators we can use for various mathematical operations on numbers that the user inputs.
Arithmetic operators are the operators used with the integer or float values to perform mathematical operations on them.
There are 7 arithmetic operators in Python:
Solved Examples
Example 1.3
Write a program to get the right answers to the questions given below.
a = 23 b = 13
a) Addition of a and b.
b) Multiplication of a and b.
c) Division of a and b.
d) Base a to the power b.
e) Modulus of a%b
Answer:
a,b=23,13
print(“Addition of a and b is:”,a+b)
print(“Multiplication of a and b is:”,a*b)
print(“a divided by b is:”,a/b)
print(“Base a to the power b is:”,a**b)
print(“Remainder, when a is divided by b, is:”,a%b)
PEMDAS rule
Python follows the PEMDAS rule, which stands for:
Addition of a and b is: 36
Multiplication of a and b is: 299
a divided by b is: 1.7692307692307692
Base a to the power b is: 504036361936467383
Remainder, when a is divided by b, is: 10
This rule tells us the order in which operations are performed in an expression.
Operations within parentheses are performed first, followed by exponents, multiplication and division from left to right, and finally addition and subtraction from left to right.
Example:
9 + 7 * (8 - 4) / 2 - 3**2 (First, the brackets are solved.)
= 9 + 7 * 4 / 2 - 3**2 (Then, the exponent is solved.)
= 9 + 7 * 4 / 2 - 9 (Then, multiplication is solved.)
= 9 + 28 / 2 - 9 (Then, division is solved.)
= 9 + 14 - 9 (Then, addition is solved.)
= 23 - 9 (Finally, subtraction is solved.)
= 14
Simple Calculator
Task 5: Apply all four basic arithmetic operations ( +, - , *, / ) to the numbers the user inputs.
Code Output
num1 = float(input(“Enter first number: “))
num2 = float(input(“Enter second number: “))
add = num1+num2
sub = num1-num2
mul = num1*num2
div = num1/num2
print(“Addition: “, add)
print(“Subtraction: “, sub)
print(“Multiplication: “, mul)
print(“Division: “, div)
Enter first number: 6
Enter second number: 8
Addition: 14.0
Subtraction: -2.0
Multiplication: 48.0
Division: 0.75
Do It Yourself 1B2
Write the output of the following code:
value = True + False + True print(value)
A Fill in the Blanks.
Hints
eval() variable underscore syntax errors letter dynamic typing
1 A allows you to store a value on that location and refer to it as needed.
2 A variable name must start with a or the character.
3 are mistakes in following rules to write the code.
4 means we can assign a variable to a value of any type, and the variable will automatically take on that type.
5 The function evaluates a string expression and returns the result.
B Tick () the Correct Option.
1 Which of the following is used to write comments in Python?
2 Which of the following data types in Python is mutable?
a String
3 What does the eval() function do?
a It evaluates a string expression and returns the result.
b It can be used to execute arbitrary code.
c It can be used to inject code into a running program.
d All of the above.
4 What is the output of the following code?
x = 10
y = “Hello, world!” print(x + y)
a 10Hello, world!
b TypeError: unsupported operand type
c Hello, world!10
d 10
5 What is the output of the following code snippet?
x = 5
y = “Hello”
result = str(x) + y
print(result)
a 5Hello
C Who am I?
b Hello5
c Hello
d Error
1 I am a type of data that can be changed after being created.
2 I am a variable naming style where words are separated by underscores.
3 I am the process of converting one data type into another.
4 I am an acronym that represents the order of operations in mathematical expressions in Python.
5 I am the function used for converting a value into a floating-point number.
D Mark T for True and F for False.
1 Comments in Python are executed as part of the program.
2 Single-line strings can be enclosed in either single quotes or double quotes.
3 Variable names in Python are case-sensitive.
4 Dynamic typing is a feature of Python where the data type of a variable is determined at compile time.
5 The type() function returns the data type of a variable.
E Answer the Following.
1 What are the two main categories of data types in Python?
2 Write the output of the codes in the given space.
a. x = 5.7 y = int(x) print(y)
b. x = 5 y = 10 result = eval(“x + y”) print(result)
Output
3 What is the difference between mutable and immutable data types in Python?
4 What will be the output of the code?
a = “Hello”
b = “World”
c = a + “ “ + b print(c * 3)
5 In Python, what does the input() function return after reading user input from the console?
F Apply Your Learning.
1 Write a Python program that takes two numbers as input from the user and displays their average.
2 Write a program to keep track of a user’s expenses. Choose appropriate variable names to store the user’s name, total expenses, and the category of expenses (e.g., “Food,” “Transportation”). Display a message like “John spent $50 on Food.”
3 Write a Python program to calculate the area of a circle. Include a comment explaining the formula you used for calculating the area.
4 Write a program to find the sum of all the stationery you purchased from a shop:
5 Write a program to take a temperature in Fahrenheit as input from a user and convert it to Celsius, then print the result.
Control statements in Python are used to control the flow of execution of the program. They allow you to make decisions, repeat code, and skip code.
There are three main types of control statements in Python:
• Conditional Statements
• Loops Statements
• Jump Statements
Imagine that a theatre program is going to happen at your school. What role would you like to play?
Just like that, in life, we often find ourselves in situations where we need to make choices. This skill we have is called decision-making ability. But computers cannot make decisions on their own. We have to give them step-by-step instructions in a language they understand, like Python.
In Python, we have what are called conditional statements.
Conditional statements allow us to instruct the computer to check for a specific situation and make it do something if that situation occurs.
A condition is set to establish criteria that require some form of comparison to be performed. Therefore, to define a condition, one must also understand the comparison operators.
Comparison operators are the symbols or expressions that allow us to compare two values or variables. They compare the value on the left-hand side with the value on the right-hand side and return either ‘True’ or ‘False’ as the result of the comparison.
These operators are also known as Relational Operators
Below are the six comparison operators in Python.
Operator Name Purpose Example
== Equal to Returns True if both operands are equal x==y
!= Not Equal to Returns True if operands are not equal x!=y
> Greater than Returns True if the left operand is greater than the right x>y
< Less than Returns True if the left operand is less than the right x<y
>= Greater than or equal to Returns True if the left operand is greater than or equal to the right x>=y
<= Less than or equal to Returns True if the left operand is less than or equal to the right x<=y
Let us look at the examples to understand the usage of conditional operators.
Example 2.1
Johnny needs to determine whether the number of balls in box A is equal to, less than, or greater than the number of balls in box B. Box A contains 453 balls, and box B contains 454 balls. Using conditional statements, print whether the situations are ‘True’ or ‘False’.
Answer:
Code Output
box_A=453
box_B=454
cond1=box_A==box_B
print(“Are balls in box A equal to box B? “, cond1)
cond2=box_A<box_B
print(“Are balls in box A less than box B? “, cond2)
cond3=box_A>box_B
print(“Are balls in box A more than box B?“, cond3)
Example 2.2
Are balls in box A equal to box B? False
Are balls in box A less than box B? True
Are balls in box A more than box B? False
Joe’s mother gives him ` 350 and asks him to buy some groceries from a nearby shop. He plans to purchase tomatoes for ` 50, onions for ` 60, and a jar of peanut butter for ` 100.
1 Using a conditional statement, print ‘True’ or ‘False’ to help him determine whether the money his mother gave him will be enough to buy the planned items or not.
2 Joe intends to buy 2 more jars of peanut butter with the remaining money. Assist him in deciding if he has enough money to do so.
Answer:
Code Output
price_tomato=50
price_onion=60
price_butter=100
total_money=350
print(“The total money Joe has is: “,total_money)
total_bill=price_tomato+price_onion+price_butter
print(“The total bill will be: “,total_bill)
cond=total_money>total_bill
print(“Is the money adequate to buy groceries? “,cond)
remaining_money = total_money - total_bill
The total money Joe has is: 350
The total bill will be: 210
Is the money adequate to buy groceries? True
The remaining amount Joe has left is: 140
Can Joe buy 2 more jars of peanut butter? False
print(“The remaining amount Joe has left is:“, remaining_ money)
cond2=remaining_money>(price_butter*2)
print(“Can Joe buy 2 more jars of peanut butter?“, cond2)
In Python programming, we use something called “indentation” to group together a set of statements into a specific block of code.
Indentation helps Python understand which lines of code belong together and should be executed as a single unit.
Indentation is a fixed number of spaces (or sometimes tabs) added at the beginning of each line of code. These spaces create a visual hierarchy in your program, just like paragraphs in a story or chapters in a book.
Code Interpreter view
Statement 1
Statement 2
Statement 3
Statement 4
Statement 5
Statement 6
Statement 7
Code block 1 begins
Code block 1 continues
Code block 1 continues
Code block 3
Code block 2 continues
Code block 2 ends
Code block 1 ends
What happens if you don’t indent your code properly?
Understanding algorithms and flowcharts is crucial as they form the foundation for comprehending how to plan and create computer programs.
But what exactly are algorithms, and why are they important?
An ‘algorithm’ is a set of step-by-step instructions. It is a clear and precise plan that guides us to achieve a goal. We use algorithms not only in programming but also in our everyday lives.
In programming, we write algorithms to instruct the computer how to perform specific tasks. It’s like giving the computer a set of directions to follow.
Let us write an algorithm to find out if someone is eligible to vote or not.
1 Start
2 Input age
3 If age is greater than or equal to 18, then
4 Display “You are eligible to vote.”
5 Else
7 End
We can represent this algorithm visually using a flowchart. A flowchart is a way to depict an algorithm visually. It uses shapes like circles, rectangles, and arrows, along with labels, to outline the steps in a process.
Flowcharts serve as blueprints for a program, showing each step in the order it should happen.
To create a flowchart, we use specific shapes, and each shape has a particular meaning.
Elements of a Flowchart
Symbol Name Purpose
Symbol
Symbol
Symbol Name Purpose
Name Purpose
Start or End Arrows Input or Output Process Decision
Name Purpose
Start or End Arrows
Start or End Arrows Input or Output Process Decision
Symbol Start or End Arrows Input or Output Process Decision
Represents a start or end point
Represents a start or end point
Represents a start or end point
Start or End Arrows Input or Output Process Decision
Represents a start or end point
Represents a start or end point
Represents the connection between two shapes and the flow of program
Represents the connection between two shapes and the flow of program
Represents the connection between two shapes and the flow of program
Represents the connection between two shapes and the flow of program
Represents the connection between two shapes and the flow of program
Represents input or output
Represents input or output
Represents input or output
Represents the process or block of code
Represents input or output
Represents input or output
Represents the process or block of code
Represents the process or block of code
Represents the process or block of code
Represents the decision or conditional statement (Output is usually True or False)
Name Start or End Arrows Input or Output Process Decision Purpose Represents a start or end point Represents the connection between two shapes and the flow of the program
Represents the decision or conditional statement (Output is usually True or False)
Represents the process or block of code
Represents the decision or conditional statement (Output is usually True or False)
Represents or conditional (Output True or
Represents the decision or conditional statement (Output is usually True or False)
Represents the decision or conditional statement (Output is usually True or False)
1
In Python, we have three types of conditional statements that allow us to make decisions in our programs. These include:
• if Statement
• if… else Statement
• if… elif… else Ladder
The ‘if’ statement is used to check a specific condition. If the condition following the ‘if’ keyword evaluates to True, the code block after the ‘if’ condition will be executed; otherwise, the code block will be skipped.
If Statement flow chart true false
Statement (s) rest of code
Syntax: if condition1:
# Statement to execute if condition1 is true Code Output age = 21
Eligible to vote.
if age >= 18: print(“Eligible to vote.”)
The ‘if… else’ statement checks a condition, allowing us to instruct the computer on what to do in both cases, whether the statement is true or false.
If the condition following the ‘if’ keyword evaluates to True, the code block after the if condition will be executed; otherwise, the code block after the ‘else’ keyword will be executed.
Syntax: if condition_1:
#Statements to execute if condition_1 becomes True
else:
age = 21
if age >= 18:
#Statements to execute if condition_1 becomes False
Eligible to vote.
print(“Eligible to vote.”)
else:
print(“Too young to vote!”)
The elif Statement
Sometimes, we need to evaluate multiple conditions. In such cases, we use the ‘elif’ statement, which stands for ‘else if’. It allows us to check multiple conditions in sequence, and Python checks each condition until one of them is True.
Syntax: if condition_1: Statement_1
elif condition_2: Statement_2 .. else: Final_Statement
If condition_1 becomes True, Statement_1 will be executed, otherwise, the interpreter moves on to condition_2 and if it becomes true then it will execute Statement_2.
This process continues until a True condition is found, otherwise the ‘else’ statement will be executed if none of the conditions are True.
Let us update the project we created in the previous chapter using comparison operators and conditionals.
Simple Calculator
num1 = float(input(“Enter first number: “))
operator = input(“Enter operator (+, -, *, /): “)
num2 = float(input(“Enter second number: “))
if operator == “+”:
result = num1 + num2
elif operator == “-”:
result = num1 - num2
elif operator == “*”:
result = num1 * num2
elif operator == “/”:
if num2 == 0:
result = “Division by zero is not allowed.”
else:
result = num1 / num2
else:
result = “Invalid operator.”
print(“Result:”,result)
Logical operators allow us to combine multiple conditions in one. There are two important logical operators in Python: ‘and’ and ‘or’.
The ‘and’ operator allows us to combine two conditional statements and returns True only if BOTH statements are true.
In all other cases, it returns False. If Statement 1 is True and Statement 2 is True, then the result is True. If either Statement 1 or Statement 2 (or both) is False, then the result is False.
Syntax: Statement 1 and Statement 2
Following is the truth table for the AND operator:
The ‘or’ operator allows us to combine two conditional statements and returns True if EITHER of the statements is true.
It returns False only if BOTH statements are false. If Statement 1 is True or Statement 2 is True (or both), then the result is True. If both Statement 1 and Statement 2 are False, then the result is False.
Syntax: Statement 1 or Statement 2
Following is the truth table for the OR operator:
What is the difference between the ‘and’ and the ‘or’ operator?
In Python, we have the flexibility to create complex conditional statements by using multiple ‘and’ and ‘or’ operators. When dealing with multiple conditional statements involving both ‘and’ and ‘or’, it’s important to know that ‘and’ takes precedence over ‘or’.
This means that conditions with ‘and’ are evaluated first, followed by the conditions with ‘or’.
Syntax
Statement 1 or Statement 2 and Statement 3
#First we solve the ‘and’ operator, and then the ‘or’
print(2>3 or 3==3 and 1>0) True
Let us look at how we got the output for the given code: 2 > 3 or 3 == 3 and 1 > 0
False or True and True #Solve and first
False or True #Solve or True
Write a program to help David pick students for his project. He has two rules:
First, students must have at least 60% in their school grades.
Second, they need a score of at least 7 in their analytical tests.
Run the program to check if Ray and Joe meet David’s conditions.
Ray has 65% in school and 8.5 in tests.
Joe has 55% in school and 8 in tests.
Answer:
ray_academics=65
ray_analytical=8.5
print(“Ray’s scores:”)
print(“Academics:”, ray_academics)
print(“Analytical test:”, ray_analytical)
Code
ray_condition = ray_academics>=60 and ray_analytical>=7
print(“Does Ray meet David’s criteria?-”,ray_condition)
joe_academics=55
joe_analytical=8
print(“Joe’s scores:”)
print(“Academics:”, joe_academics)
print(“Analytical test:”, joe_analytical)
joe_condition = joe_academics>=60 and joe_analytical>=7
print(“Does Ray meet David’s criteria?-”,joe_condition)
Ray’s scores:
Academics: 65%
Analytical test: 8.5
Does Ray meet David’s criteria?- True
Joe’s scores:
Academics: 55%
Analytical test: 8
Does Ray meet David’s criteria?- False
When we write computer programs, there are times when we need to execute the same piece of code again and again.
This is not an efficient way of programming. But we can solve this using ‘loops’. Loops allow us to execute a set of instructions as long as a certain condition is True. Once that condition becomes False, the loop stops. This process is also known as iteration.
A looping process has mainly 4 steps:
1 Creating a condition variable and storing an initial value in it.
2 Providing a test condition that runs the loop.
3 A set of instructions inside the loop.
4 Updating the value of the condition variable.
Python provides mainly two types of loops, the while loop and the for loop.
A ‘for’ loop is a way of telling a computer to do something over and over again. It can be used to repeat a block of code a certain number of times, or to go through a list of things one by one.
A ‘for’ loop is also known as a counting loop. We use a variable to create the ‘for’ loop called the loop variable.
for item in sequence:
If no more item to iterate
Next item from sequence
The two ways to create a ‘for’ loop:
1 Using the range() function.
2 Using the in operator.
Using range() Function
The range() function in Python returns a sequence of numbers, starting from 0 by default, and increments by 1 (by default), and stops before a specified number.
The range() function can be used in a ‘for’ loop to iterate over a sequence of numbers.
Syntax:
for loop_variable in range(start, stop, step):
<statements>
#the loop runs from start to stop-1
where:
start is the starting number (optional, default is 0) stop is the ending number (not inclusive) step is the increment (optional, default is 1)
Code Output
for num in range(0, 5):
print(num) 0 1
Here, the ‘for’ loop starts at 0 and counts up to 4, increasing by 1 each time.
The ‘in’ operator is a membership operator that checks if an item is a member of a sequence or not. It can be used in a ‘for’ loop to iterate over the items of a string, list, tuple, or dictionary.
Syntax:
for loop_variable in string_variable:
Here, the loop iterates over the letters of the string word, starting with the first letter ‘b’ and ending with the last letter ‘e’.
The ‘while’ loop repeats a set of instructions as long as a condition is True. It is also known as a conditional loop. It verifies the condition before executing the loop.
Here, the ‘while’ loop starts with the value of i being 1. As long as i is less than 6, the loop will continue. In each iteration of the loop, the value of i is printed and then incremented by 1. The loop will stop when i is equal to 6
The ‘for’ loop and the ‘while’ loop are both control flow statements in Python that are used to repeat a block of code. However, they have different usage scenarios.
The ‘for’ loop is used to iterate over a sequence of items, such as a list, tuple, or string, when the number of times you want to iterate is known.
The ‘while’ loop is used to repeat a block of code when the number of times you want to iterate is not known or when the number of iterations depends on the results of the loop.
Loops run the same set of code for a defined number of times or until the test condition becomes False, but sometimes we might wish to stop the loop even before the test condition becomes False or skip an iteration.
Jump statements allow you to skip code or terminate a loop. We have two jump statements in Python:
• break statement
• continue statement
The break Statement
The ‘break’ statement is used to terminate the loop.
Syntax: while expression:
if condition: break #breaks out of the loop
#executes statement outside the loop
word = input(‘Enter a word: ‘) for letter in word:
if letter in ‘aeiou’:
print(‘Vowel found!’)
Enter a word: apple Vowel found!
Here, the loop checks for all the letters in the word entered by a user for vowels. If the letter is a vowel, the ‘break’ statement will run, and the loop will terminate. Otherwise, the loop will continue to run until it reaches the end of the word.
The continue Statement
The ‘continue’ statement skips the current iteration of the loop and continues with the next iteration.
Syntax: while expression:
Statement_1
if condition: continue
#skips next set of statements and starts with next loop iteration Statement_2
Here, the loop starts counting from 1 and increments the value of num by 1 in each iteration. When the value of num is equal to 4, 6, or 8, the ‘continue’ statement is executed, which skips the printing of the number and goes to the next iteration of the loop.
In a program, if a loop is executed over and over again without stopping, it is called an ‘infinite’ loop. This can happen if the condition that controls the loop is always true, or if the loop is never terminated by a ‘break’ statement.
Code
while True:
print(“This is an infinite loop!”)
Here, the loop will print the message “This is an infinite loop!” repeatedly, until the program is terminated by the user. An ‘infinite’ loop can lead to the program becoming unresponsive.
Infinite loops can be useful when you want to create a program that runs continuously, such as a server or a chatbot.
To prevent an ‘infinite’ loop, it is important to carefully consider the condition that controls the loop. Make sure that the condition is only true under the circumstances you want. You should also use ‘break’ statements to terminate loops when you no longer need them to run.
counter = 0 while counter < 5: # This loop will run 5 times.
print(“Loop iteration:”, counter)
counter += 1
Loop iteration: 0
Loop iteration: 1
Loop iteration: 2
Loop iteration: 3
Loop iteration: 4
Here, the loop will run five times because the counter variable starts at 0 and increments by 1 each time the loop runs. The loop will continue as long as the counter is less than or equal to 5. Once the counter reaches 5, the condition is no longer true, and the loop exits.
1 Write a program to generate and display the first 10 numbers of the Fibonacci sequence. The Fibonacci sequence is a series of numbers where each number is the sum of the two preceding numbers. If the sequence starts with 0 and 1, and the first 10 numbers will be:
2 Write a program to calculate the sum of the digits of a given number. Take the number from the user as input. For example, if the input number is 4453, the sum of the digits will be 4 + 4 + 5 + 3 = 16
FizzBuzz
Write a program that prints the numbers from 1 to 100. However, for multiples of 3, the program should print “Fizz” instead of the number. For multiples of 5, the program should print “Buzz” instead of the number. For numbers that are multiples of both 3 and 5, the program should print “FizzBuzz” instead of the number.
A Fill in the Blanks.
Hints instructions equal to operator (==) conditional else comparison
1 In programming, statements are used to execute different blocks of code based on specific conditions.
2 operators are used to compare two values or expressions and return a Boolean result.
3 The operator checks if two values are equal.
4 A statement is used to specify a code block that executes when none of the preceding conditions in the ‘if’ and ‘elif’ statements are True.
5 An algorithm is a step-by-step set of for solving a specific problem or performing a task.
B Tick () the Correct Option.
1 What is the output of the given code?
x = 5
if x > 10:
print(“x is greater than 10”)
elif x == 10:
print(“x is equal to 10”) else:
print(“x is less than 10”)
a x is greater than 10
c x is less than 10
2 What is the output of the given code? i = 1
while i <= 5: print(i)
b x is equal to 10
d An error occurs
3 What is the output of the given code? for i in range(1, 6): if i == 3: continue print(i)
a
c 1 2 4
4 What is the output of the given code? while True: print(“Infinite Loop”) break
a Infinite Loop
c An error occurs
C Who am I?
d None of the above
b No output
d Loop runs infinitely
1 I can help a program make decisions based on specified conditions.
2 I am a precise plan with a clear set of steps to solve a problem.
3 I am a visual way to depict the flow of a program.
4 I can combine two conditions together to test.
5 I repeat a block of code as long as a certain condition is true.
D Mark T for True and F for False.
1 A flowchart is a text-based representation of the logical flow of a program.
2 The ‘for ’ loop is used to iterate over a sequence of elements.
3 The logical operator ‘and’ returns True if at least one of the conditions it combines is True.
4 The ‘continue’ statement in Python skips the current iteration of a loop and continues with the next iteration.
E Answer the Following.
1 What is the purpose of the ‘elif’ statement in Python’s conditional statements? Give an example.
2 Define the ‘and’ and ‘or’ logical operators and give an example of how they can be used in a conditional statement.
How does a ‘for’ loop differ from a ‘while’ loop in Python? Provide an example of when you might use a ‘for’ loop.
4 How are loops represented in a flowchart? Give an example.
F Apply your Learning.
1 Write a program to display a multiplication table for a number the user inputs. Ask the user for the number of terms to display and print the result.
2 Write a program to print the largest number among three inputs.
3 Create a program that calculates the factorial of a positive integer entered by the user using a loop. A factorial of a number ‘n’ is the product of all positive integers from 1 to ‘n’.
4 Write a program to implement a word guessing game where players guess one letter at a time until they solve the word or run out of attempts.
5 Ben, the school’s football team captain, wants to find players who are tall and strong for the defenders, and short and nippy for the attackers. He needs defenders to be over 6 foot tall and weighing over 68 kilos. For attackers, he wants players under 5 foot tall and weighing less than 57 kilos. Write a program to help Ben find the right players.
In our everyday lives, we use a lot of machines for different purposes, like washing machines, ovens, fans, tubelights, air conditioners, stoves, chimneys, and many more. All of these machines serve specific purposes.
Let us take the example of a vending machine. A vending machine is an automated machine that you can use to buy things, like snacks, juices, and soft drinks. To buy something from a vending machine, you need to:
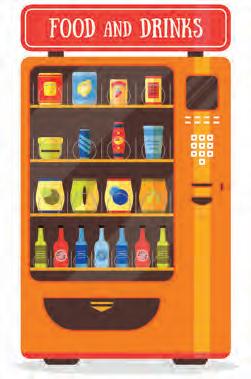
• Use the buttons or digital panel to select the item you want and pay for it.
• Once the payment is processed, collect the item from the dispenser. A vending machine does all of these things every time it is used. This is an example of a function.
Every day, we do certain tasks over and over again. If we can automate these tasks, meaning we only create them once and then reuse them as needed, it makes things easier.
In programming, we often need to repeat a specific set of code for a task. Instead of rewriting this code each time, wouldn’t it be better to write it once and then use it as many times as we want without having to copy and paste it?
We can solve this problem with functions. We can create them once and then call them whenever we need them.
Benefits of Functions
1 Organisation: Functions can help us organise a code by grouping related codes together to make the code easier to read and understand.
2 Reusability: We can reuse functions in different parts of a program to save time and effort, and it also helps to keep the code consistent.
A function is a block of code that does a specific job. It can take in information, process it, and give out information. Functions can be used to make a code more reusable and efficient.
We’ve already used some built-in functions in Python, like print(), input(), eval(), int(), and bool(). But Python also lets us create our own functions, called user-defined functions
A function is defined using the def keyword. The def keyword is followed by the name of the function, the inputs it takes (if any), and the body of the function. The body of the function is the code that will be run whenever the function is called for.
Syntax:
def function_name(parameters):
# Function body (code that performs the job)
return result # Optionally, you can return a value
def: Keyword used to define a function
function_name: The name you give to your function parameters: The values the function takes (optional) return: The value the function returns (optional)
To call a function, you simply use its name followed by parentheses. function_name(arguments)
Why is it important to give functions appropriate names?
You can pass on the arguments and values in the function by enclosing it in the parentheses.
Parameters are the variables that we pass while defining a user-defined function. Arguments are the variables that we pass while calling a function.
Here, the parameters are x and y, and the arguments are 3 and 4 for the respective parameters, i.e., x = 3 and y = 4.
Types of Arguments
Python functions can have two types of arguments:
1 Positional arguments
2 Keyword arguments
Positional Arguments
When we pass arguments to a function in the order they are specified in the function definition, they are called positional arguments.
def name (first_name, last_name) print (first_name + last_name)
name (”Daisy”, “Brown”)
Daisy BrownHere, Daisy and Brown will be taken by the parameters according to their position.
first_name = Daisy
last_name = Brown
Keyword Arguments
Keyword arguments are the arguments that are preceded by a keyword and an equal to sign (i.e., Key = Value). Here, the order of the arguments does not matter as the values are being assigned explicitly.
Code Output
def name (first_name , last_name ):
print (first_name + last_name)
name (last_name = “Brown”, first_name = “Daisy “)
Here, the arguments are passed with their respective keywords, such as last_name = “Brown” and first_name = “Daisy“.
Now, we will be creating a project while learning about functions.
Project: Temperature Converter
Create a program to make a Temperature Converter that can change temperatures from Celsius to Fahrenheit and from Fahrenheit to Celsius.
Task 1: Create a function to convert temperature from celsius to fahrenheit.
Code Output
def celsius_to_fahrenheit(celsius):
# Formula to convert Celsius to Fahrenheit
fahrenheit = (celsius * 9/5) + 32
print(fahrenheit)
celsius_to_fahrenheit(35)
What are the advantages of using keyword arguments over positional arguments?
Here, celsius_to_fahrenheit is a function that takes one input (celsius) and displays the converted value in fahrenheit. When you call celsius_to_fahrenheit(35), it displays 95.0.
A function can return a value in Python using the return keyword. The return keyword is followed by the value that you want to return from the function.
Let us update our project code with return value.
Project: Temperature Converter
Task 2: Update the celsius_to_fahrenheit() function to convert temperature from Celsius to Fahrenheit with a return value.
def celsius_to_fahrenheit(celsius):
# Formula to convert Celsius to Fahrenheit
fahrenheit = (celsius * 9/5) + 32
return fahrenheit
result=celsius_to_fahrenheit(35)
print(result)
Here, the celsius_to_fahrenheit() function doesn’t print the calculated value but returns it. When we call the celsius_to_fahrenheit() function with the argument 35, it returns the value 95.0, which is then received in the result variable. The result variable is printed.
We can also return multiple values from a function by returning them as a tuple.
def sum_and_difference(a, b):
sum = a + b
difference = a - b
return (sum, difference)
result = sum_and_difference(10, 5)
print(result)
Now, let us complete our project “Temperature Converter”.
Project: Temperature Converter
Task 1: Function to convert temperature from Celsius to Fahrenheit with a return value.
def celsius_to_fahrenheit(celsius):
# Formula to convert Celsius to Fahrenheit
fahrenheit = (celsius * 9/5) + 32
return fahrenheit
Task 2: Create a function to convert temperature from Fahrenheit to Celsius and return the result.
def fahrenheit_to_celsius(fahrenheit):
# Formula to convert Fahrenheit to Celsius
celsius = (fahrenheit - 32) * 5/9
return celsius
Task 3: Create the menu for the operations using a while loop.
while True:
print(“1. Celsius to Fahrenheit”)
print(“2. Fahrenheit to Celsius”)
print(“3. Quit”)
choice = input(“Enter your choice (1/2/3): “)
Task 4: If the user picks the first choice, call the function celsius_to_fahrenheit() and display the returned value. if choice == ‘1’:
celsius = float(input(“Enter temperature in Celsius: “))
result = celsius_to_fahrenheit(celsius)
print(celsius,”is equal to”, result, “°F\n”)
Task 5: If the user picks the second choice, call the function fahrenheit_to_celsius() and display the returned value.
elif choice == ‘2’:
fahrenheit = float(input(“Enter temperature in Fahrenheit: “))
result = fahrenheit_to_celsius(fahrenheit)
print(fahrenheit,”is equal to”, result, “,°C\n”)
Task 6: Quit the program once the user chooses ‘3’ and display “Goodbye!” If none of the given choice options are entered, display “Invalid choice. Please enter 1, 2, or 3.”.
elif choice == ‘3’:
print(“Goodbye!”)
break else:
print(“Invalid choice. Please enter 1, 2, or 3.\n”)
A recursive function is a function that calls itself directly or indirectly. Recursive functions can be used to solve problems that can be broken down into smaller and smaller sub-problems of the same type.
One example of a recursive function is the function to calculate the factorial of a number. The factorial of a number is the product of all the positive integers less than or equal to that number. For example, the factorial of 5 is 120 because 120 is the product of 1, 2, 3, 4, and 5.
Let’s look at a program to find the factorial of a number without using a recursive function:
Code Output
n=int(input(“Enter the number to find out factorial for: “))
result = 1
for i in range(1, n+1):
result *= i
print(result)
Now, let’s create the same program using a recursive function:
n=int(input(“Enter the number to find out factorial for: “))
def factorial(n): if n == 0: return 1 else: return n * factorial(n - 1) print(factorial(n))
Enter
This function works by recursively calling itself to calculate the factorial of the smaller and smaller numbers until it reaches the base case, which is when n == 0. In the base case, the function returns 1, because the factorial of 0 is 1. Recursive functions can be used to solve a variety of problems, such as finding the maximum value in a list, traversing a tree, and solving the Towers of Hanoi puzzle.
Here are some tips for writing recursive functions:
1 The function should have a base case, which is a condition that terminates the recursion.
2 The function makes progress towards the base case with each recursive call.
3 Avoid using recursive functions to solve problems that can be solved with a loop.
Palindrome Number Checker
Write a program to check whether the number the user inputs is a palindrome number or not using functions.
A palindrome number is a number that reads the same, backwards and forwards. For example, the numbers 121, 12321, and 5454 are palindromes.
To check if a number is a palindrome, you can reverse the number and then compare it to the original number. If the two numbers are the same, then the number is a palindrome.
1 An is the value that is passed to a function when it is called.
2 A argument is an argument that is passed to a function in a specific order.
3 A value is the value that is returned by a function when it finishes executing.
4 functions are built into Python and can be accessed by the programmer.
5 functions are declared by the programmer and can be used in their own programs.
1 Observe the given code.
def add_numbers(a, b): return a + b
print(add_numbers(1, 2))
Output: 3
Which of the following statements is TRUE?
a The add_numbers() function is a built-in function.
b The add_numbers() function is a user-defined function.
c The add_numbers() function has one argument.
d The add_numbers() function has two arguments.
2 Observe the given code.
def greet_person(name, age=None):
if name is not None:
print(f ”Hello, {name}!”)
if age is not None:
print(f ”You are {age} years old.”)
greet_person(name=”Bard”)
Output: Hello, Bard!
Which of the following statements is TRUE?
a The greet_person() function is a built-in function.
b The greet_person() function is a user-defined function.
c The greet_person() function has one positional argument.
d The greet_person() function has one keyword argument.
3 What will be the output of the following code?
def add_numbers(x, y):
result = x + y
return result
sum_result = add_numbers(3, 5)
print(sum_result)
a 8
c result
b add_numbers(3, 5)
d None
4 What will be the output of the following code?
def my_function(x, y=10):
return x + y
result1 = my_function(5)
result2 = my_function(5, 20)
print(result1, result2)
a 5 20
c 10 25
C Who am I?
b 15 25
d Error
1 When you give arguments to a function by naming them explicitly, you are using me.
2 I am the result that a function gives back after it finishes doing its work.
3 I am a type of function that comes with Python. Examples of me include print(), len(), and input().
4 I am a special type of function that can call itself from within its own code.
5 I help prevent infinite recursion in a recursive function by specifying when the function should stop calling itself.
1 An argument is the value that is passed to a function when it is called.
2 A recursive function is a function that calls itself.
3 A keyword argument is an argument that is passed to a function in a specific order.
4 An argument is the value of the argument inside the function.
1 What is an argument and how is it different from a parameter?
2 How does a user-defined function differ from a built-in function?
3 What is the difference between a function with a return value and a function without a return value?
4 Observe the given code: def power(x, n): if n == 0: return 1 else: return x * power(x, n) result = power(2, 3) print(result)
a What is the issue with the above code?
b How can you fix it to correctly calculate the power of a number?
5 Observe the given code: def countdown(n): if n == 0: return else: print(n) countdown(n)
countdown(5)
a What’s the issue with this code?
b How can you fix it to make it countdown from 5 to 1?
1 Write a program to calculate the square of any number using a function that accepts parameters and returns the result.
2 Write a program to accept two numbers as input from the user and calculate their LCM.
3 Write a program that takes a number and returns a list of the prime factors of the number.
4 Write a program to find the product of two numbers using a function with parameters.
5 Write a program to find if a number is prime or not by using a function that returns the result.
Web development is the process of designing, building, and maintaining web applications that work on the internet.
Imagine you need to make a cardboard house for your school competition project. Before you begin making the project, you need to plan for it.
You need to decide how many rooms your cardboard house will have and how they will be arranged. You also need to find out what materials you will need to build it.
Once you have your plan ready, you can start building the house by putting together the various parts like walls, roof, and windows.

Web development is similar to building a cardboard house; but instead of using cardboard and tapes, you would be using code. When you build a website, you use code to tell the computer how to display the various parts of the website, such as the text, images, and videos.
Web development involves multiple tasks, such as:
• Designing the layout and appearance of the website
• Writing the code that makes the website work
• Adding content to the website, such as text, images, and videos
The first website, CERN, was created in 1989 and is still alive today.
There are three main types of programming languages used in web development:
HTML (HyperText Markup Language): HTML is the markup language used for creating websites. It is also used to structure the content of a website. For example, HTML tags can be used to tell the computer whether a piece of text is a heading, a paragraph, or a list.
CSS (Cascading Style Sheets): CSS is used to style the content of a website. For example, CSS can be used to change the font size, colour, and alignment of text.
JavaScript: JavaScript is a programming language that can be used to add interactivity to a website. For example, JavaScript can be used to create menus, animations, and games.
HTML stands for ‘HyperText Markup Language’. It is used to develop web applications. It tells a web browser how to display content on a website. In HTML, ‘Hypertext’ means the text that is more than static text. It can be interactive and linked to other pages or resources.
Markup are the tags we use in HTML to structure and format the text on a web page. These tags are the instructions that tell the browser how and where to display the content on a page.
1 Easy to Learn: HTML is an easy language to learn, even for beginners. It is made up of tags that tell the browser what to do.
HTML is not a programming language because it does not include any logic or algorithms.
2 Platform Independent: HTML is platform independent, which means that it can be used to create web pages that can be viewed on any device, regardless of the operating system or web browser.
3 Media Support: HTML can be used to display images, videos, and audio on web pages.
4 Hypertext: HTML supports hypertext, which means that text on a web page can be linked to other web pages or resources.
5 Semantic Structure: HTML5 introduced many new semantic elements, which can be used to improve the accessibility and SEO of web pages.
6 Case Insensitive: HTML is a case-insensitive language.
An HTML document is structured into two main parts: the head and the body. The head contains information about the document, such as the title. The body contains the content of the web page, such as text, images, and videos. The body is displayed in the browser window.
The basic structure of an HTML document looks like this:
1 The <html> and </html> tags enclose the entire document.
2 The <head> and </head> tags enclose the head section of the document.
3 The <title> and </title> tags enclose the title of the document.
4 The <body> and </body> tags enclose the body section of the document.
A web browser is a software application that allows you to access and view web pages.
There are many web browsers available, such as Google Chrome, Mozilla Firefox, Microsoft Edge, and Apple Safari. All web browsers work in a similar way, but they may have different features and user interfaces.
<head>
HTML Document Basic Structure
<!--
They allow us to browse websites, watch videos, listen to music, and play games. Some of the basic components of a web browser are as follows:
• Address bar: The address bar is where you type the URL of the website you want to visit.
• Navigation buttons: The navigation buttons allow you to move forward, back, and refresh the current web page.
• Tabs: Tabs allow you to have multiple web pages open at the same time.
• Bookmarks: Bookmarks allow you to save the URLs of your favourite websites so that you can easily access them later.
• History: The history feature allows you to view a list of the websites you have recently visited.
Tags
A tag tells the browser how to display the content that follows it. Tags are enclosed in angle brackets (< and >). For example, <h1> is the opening tag for heading and </h1> is the closing tag for heading. To create an HTML document, we have the following tags:
Tag Purpose Syntax
<!----> Used to insert comments in the HTML code. <!--comment–->
<p> It is used as the paragraph tag that is used to add a paragraph.
Heading tags HTML heading tags are used to add headings and sub-headings to the content you want to display on a web page. HTML has six levels of heading from <h1> to <h6>.
<p>content</p>
<h1>Most important heading</h1>
<h2>content</h2>
<h3>content</h3>
<h4>content</h4>
<h5>content</h5>
<h6>Least important heading</h6>
<div> This tag is used in HTML to make divisions of content in the web page such as text, images, and header.
<div>content</div>
<br> Inserts a single line break Should be added where the line break is needed.
<b> Converts the text into bold <b>text</b>
<i> Converts the text into italics <i>text</i>
<img> Displays an image <img src=”https://example.com/image.png” alt=”This is an image of a cat.” />
<a> Creates a link. Links can be used to link to other web pages, images, or other resources.
<a href=”https://example.com”>This is a link to the example website.</a>
An element is a combination of a tag and its content. For example, the <h1> element is a heading element. There are mainly two types of HTML elements:
1 Container Elements: Container elements are HTML elements that can contain other elements or text within them. They have both an opening tag and a closing tag to enclose their content.
Opening Tag Content
Closing Tag
<h1> This is my first HTML document. </h1>
Examples: <html></html>, <head></head>, <body></body>.
2 Empty Elements: Empty elements, also known as void elements or self-closing elements, do not contain any content between opening and closing tags. They are self-contained and do not require a closing tag.
Examples: <br>, <hr>, <img>.
It is used to define the character of an HTML element. An attribute is always placed in the opening tag of an element and generally provides additional styling (an attribute) to the element.
Project: Space Exploration
Attribute
Let us build a simple Space Exploration web page project while learning the concepts in the chapter. We will be building this project by dividing it into tasks.
Task 1: Create a web page and name it Space Exploration. Add the heading ‘Space Exploration’ and then add an introduction for it. Code
<head>
</head> <body>
<title>Space Exploration</title>
<h1>Space Exploration</h1> <div>
<p><b>Space exploration</b> is the study of space and everything beyond Earth’s atmosphere. We use robots and spacecrafts to explore space and learn new things about it. <br><br> Space exploration has led to many <i><b>amazing discoveries</b></i>, such as exoplanets (planets that orbit other stars), water on Mars, and black holes. <br><br> Space exploration is also important for inspiring people and showing us what is possible. </p> </div> </body> </html>
Space exploration is the study of space and everything beyond Earth's atmosphere. We use robots and spacecrafts to explore space and learn new things about it.
Space exploration has led to many amazing discoveries, such as exoplanets (planets that orbit other stars), water on Mars, and black holes.
Space exploration is also important for inspiring people and showing us what is possible.
1 Match the following terms with their descriptions.
Column A
Column B
<h1> Is a language for structuring web content.
<!-- --> Converts the text into bold.
<div> Is used for inserting comments in HTML code.
HTML Is used to create a division within a web page.
<b> Defines the main heading of a web page.
2 Identify the error in the following element examples:
a <titl>My Web Page</title>
b <h1>Welcome to My Page<h1>
c <p>This is a paragraph</h>
d <a href=”https://www.example.com” Example Website</a>
CSS stands for Cascading Style Sheets. It is a language used to style HTML elements. CSS can be used to change the appearance of HTML elements, such as their font, colour, and size.
Some key features of CSS include:
1 Selectivity: CSS can be used to select specific HTML elements to style such as changing colours, styling fonts, spacing elements, and resizing them.
2 Consistency: You can use the same styles for many pages on a website to make them look similar.
3 Cascading: CSS styles are applied in cascading order. This means that the most specific style will be applied to an element, even if there are other styles that are more general.
4 Responsive design: CSS can be used to create responsive web pages that work on all devices, from desktop computers to smartphones.
5 Animations and transitions: CSS can be used to add animations and transitions to web pages, which can make them more visually appealing and engaging.
There are three ways to add style to an HTML document:
1 Inline CSS: Inline CSS is used to style a single HTML element. To add inline CSS, you use the style attribute.
For example, the following code will make the <h1> element red and 20 pixels in size:
<h1 style=”color: red; font-size: 20px;”>This is a heading</h1>
2 Internal CSS: Internal CSS is used to style all the elements on a single HTML page. To add internal CSS, you use the <style> tag. The <style> tag should be placed in the <head> section of your HTML document.
For example, the following code will make all <h1> elements on the page red and 20 pixels in size:
<html> <head> <style> h1 { color: red; font-size: 20px; } </style>
<h1>This is a heading</h1> <h1>This is another heading</h1> </body> </html>
3 External CSS: External CSS is used to style all the elements on all of the pages of a website. To add external CSS, you use the <link> tag. The <link> tag should be placed in the <head> section of your HTML document.
For example, the following code will link to an external CSS file called style.css: Code <html> <head> <link rel=”stylesheet” href=”style.css”> </head> <body> <h1>This is a heading</h1>
The style.css file would contain the following CSS:
Code
h1 { color: red;
font-size: 20px; }
What CSS will you use to style a web page?
If you only need to style a single element, then use inline CSS. If you need to style all the elements on a single page, then use internal CSS. If you need to style all the elements on all the pages in a website, then use external CSS.
CSS classes are a way to group similar HTML elements together so that you can style them all at once. This can save you a lot of time and effort, especially if you have a lot of similar elements on your page.
To create a CSS class, you add the class attribute to an HTML element and assign it a unique name. For example, the following code would create a CSS class called my-class: <p class=”my-class”>This is a paragraph</p>
Once you have created a CSS class, you can style it using the . (dot) character and the class name. For example, the following CSS code will make all paragraphs with the my-class class red and 20 pixels in size:
.my-class {
color: red;
font-size: 20px; }
Selectors are used to select the HTML elements that you want to style, and properties are used to define the styles that you want to apply to those elements.
Some of the most common selectors in HTML include:
1 Element Selectors: Select elements by their tag name, such as h1, p, or img.
2 Class Selectors: Select elements by their CSS class.
3 ID Selectors: Select elements by their ID.
4 Combination Selectors: Combine multiple selectors to target specific elements. There are many CSS properties, including:
CSS Property Purpose
color Sets the colour of the text.
font-family Sets the font family of the text.
Syntax
color:blue
Font-family:cambria
font-size Sets the size of the text.
Font-size:x-small
Note: x-small, small, medium, large, x-large, xx-large can also be used as values.
font-weight Sets the weight or thickness of the text. Font-weight: bold
Note: lighter, or any number can also be used
text-decoration Formats the text.
Text-align Aligns the text.
Text-decoration: underline
Note: line-through, overline can be used.
Text-align: left
Note: right, center, justify can be used.
Background-color Sets the background colour of the element. Background-color:red
background-image Sets background images for an element, you can set one or more images.
Background-image:url(”https://example. com/image.png”)
border To set the border around the element. Border: solid border-color Sets the colour of the border of an element. border-color:blue border-radius Round the corners of the outer border edges of an element. border-radius:30px
padding To set the space around the content of the element.
padding:40px
Note: Any number can be added according to the use.
margin To set the space around the element itself. margin:20px
Note: Any number can be added according to the use.
You can also use a shortcut called the background property to set multiple background-related properties in one declaration.
For example, you can use the background property to set the background colour, image, size, and position of a div element all at once.
Here is an example:
div {
background: blue url(‘image.jpg’) no-repeat center/cover; }
In this example:
• blue sets the background colour to blue.
How are Selectors and Properties different?
What are the benefits of having classes in an HTML document?
• url(‘image.jpg’) sets the background image to the image named image.jpg.
• no-repeat prevents the image from repeating.
• center/cover positions and sizes the image so that it covers the entire div element.
You can apply the background property to any HTML element, not just to div elements. For example, you can apply it to the <body> element to set the background of your entire web page.
Task 2: Use internal CSS to make the project colourful and attractive.
1 Inside the head element, create a style element and:
a Add a style for body elements.
b Create a content class for styling internal content.
Code
<html> <head>
<title>Space Exploration</title>
<style>
body {
background-color: powderblue; color: black;
text-align: center; }
.content{ color: darkred;
text-align: left; } </style>
</head>
2 Update the body element by applying the content style in content div.
Code
<body>
<h1>Space Exploration</h1>
<div class=content>
<p><b>Space exploration</b> is the study of space and everything beyond Earth’s atmosphere. We use robots and spacecrafts to explore space and learn new things about it. <br><br> Space exploration has led to many <i><b>amazing discoveries</b></i>, such as exoplanets (planets that orbit other stars), water on Mars, and black holes. <br><br> Space exploration is also important for inspiring people and showing us what is possible. </p> </div> </body> </html>
Space exploration is the study of space and everything beyond Earth's atmosphere. We use robots and spacecrafts to explore space and learn new things about it.
Space exploration has led to many amazing discoveries, such as exoplanets (planets that orbit other stars), water on Mars, and black holes.
Space exploration is also important for inspiring people and showing us what is possible.
a If you want to style all elements on a single HTML page, you can use CSS.
b CSS classes are used to group HTML elements together.
c The shorthand for setting multiple background-related properties in one declaration is the property.
d To set the background colour of an element, you can use the property.
e External stylesheets are linked to HTML documents using the element.
2 Write T for True and F for False.
a Internal CSS is added to the <body> section of an HTML document.
b You can create a CSS class by adding the class attribute to an HTML element.
c The no-repeat property of CSS prevents the image from repeating.
d External stylesheets are included directly within an HTML document, using the <style> element.
e CSS can be used to change the colour and size of HTML elements.
1. Create a web page with the following content:
a. A title: My Dream Vacation
b. A paragraph describing my dream vacation
c. Set the font and background colour.
2. Create a web page with the following content:
a. A title: My Favourite Game
b. A CSS class called ‘my-favourite-game’ that sets the background colour of the page to cyan.
c. A paragraph describing my favourite game and why I like it.
A Fill in the Blanks.
1 Web development involves designing, building, and maintaining
2 The basic structure of an HTML document consists of the and the
3 HTML tags are enclosed in brackets.
4 You can apply CSS using three main methods: inline styles, internal stylesheets, and stylesheets.
B Tick () the Correct Option.
1 Which type of CSS would you suggest to style a single HTML element?
a Internal CSS
c Inline CSS
2 Which HTML tag is used to create a single line break?
b External CSS
d Outline CSS
a <newline> b <line-break>
c <b>
3 Which of the following is an example of a CSS class?
a .my-class b my-class
c <class=”my-class”> d my.class
4 Which of the following HTML elements is used to create a link?
a <p>
c <h1>
<img>
<a>
5 Which of the following CSS properties is used to set the colour of the border of an element?
a border-color b color
c bordercolor d border
1 I define the characteristics of an HTML element and am placed in the opening tag.
2 I make divisions of content on a web page, like sections of text, images, headers, and more.
3 I am a CSS property to set the space around the element itself.
4 I convert text into an italic format in HTML.
5 I display images on a web page. You can specify the image source and alternative text using attributes with me. I am called an <img> tag.
D Mark T for True or F for False.
1 A web browser is a software application that allows you to access and view web pages.
2 CSS-created web pages don’t work on all devices.
3 You can use the . (dot) character and the class name to style a CSS class.
4 Element selectors select elements by their tag name, such as h1, p, or img.
5 Class Selectors select elements using their ID
E Answer the Following.
1 What is web development, and what are its two main categories?
2 What is the basic structure of an HTML document?
3 What does the HTML tag <img> do, and how can you specify the source of an image?
4 What is CSS, and what are some of its features?
5 What are selectors and properties in CSS, and provide examples of each?
1 In CSS, how would you make all paragraphs with the class “my-class” blue in colour and 30 pixels in size?
2 When you use the HTML tag <div>, what purpose does it serve?
3 You have a paragraph of text that you want to make bold. How would you do this using HTML tags?
4 Create a CSS class named “highlight” that changes the text colour to yellow and applies the ‘back.png’ images as background of the web page.
Just like pictures make a book more interesting, images make websites more exciting and interesting. Images are used for many purposes, such as providing visual support to written content, conveying feelings, telling stories, providing clarity of purpose, and making the content easy to remember.
In an HTML document, you can add images using the following methods:
1 Using the <img> element: The most common way to add images is by using the <img> element. You need to specify the source (URL) of the image, using the src attribute.
Here is an example: <img src=”image.jpg” alt=”A beautiful landscape”>
In this example, ‘image.jpg’ is the source file for the image, and “A beautiful landscape” is the alternative text (alt text) that appears if the image cannot be displayed.

2 Using background images: You can set background images for HTML elements (like <div> or the entire <body>), using CSS.
Note the following points while adding images in a web page:
1 You can acquire the image to be inserted into the web page from any resource. It can be a file downloaded and saved on your computer, or you can provide a direct link to an online resource.
2
If the image is on your computer, both the image and your web page should be saved in the same folder or location. In this case, you can reference the image file like this:
<img src=”image.jpg”>
3 If the image and the HTML file are in different folders, then you should give the full path or relative path to the image in the code. The corrected example should look like this:
<img src=”C:\images\image.jpg”>
or using a relative path like:
<img src=”../images/image.jpg”>.
4 You can provide the URL of the image directly if it’s hosted on the internet:
<img src=”https://www.example.com/image.jpg”>.
5 In case you are using the Tekie platform for developing your project, then you will get the required resources for the respective projects on the platform.
Here is an example of setting a background image for a <div> element:
<style> .my-div {
background-image: url(‘background.jpg’);
background-size: cover; /* Adjust the size as needed */ }
</style>
<div class=”my-div”>
<!-- Content of the div goes here --> </div>
In this example, ‘background.jpg’ is the source file for the background image and ‘background-size: cover;’ ensures that the image covers the entire div.
In the last chapter, we created a project called Space Exploration. In this chapter, we will add an astronaut image to the project.
Project: Space Exploration
Task 3: Adding an astronaut image Code
<body>
<h1>Space Exploration</h1>
<img src=”rocket.jpg” alt=”rocket” width=”100” height=”100”>
<div class=content>
<html>
<head>
<title>Space Exploration</title>
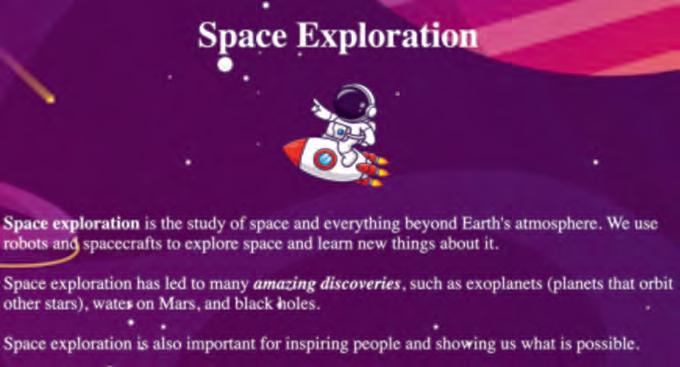
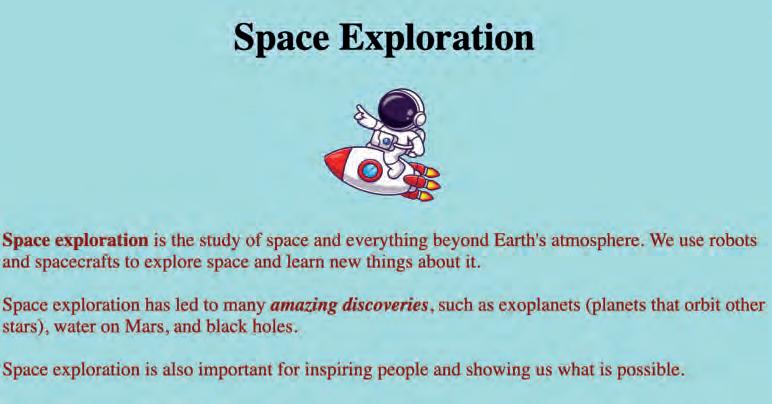
<style>
body {
background-image: url(“space_background.jpg”);
color: white;
text-align: center;
.content{
text-align: left;
</style>
</head>
We can style an image in two ways:
1 Using a style attribute: To use a style attribute, specify the CSS properties you want to apply to the image, separated by semicolons.
For example, the following code makes the image 100% wide and auto height:
<img src=”https://example.com/image.jpg” style=”width: 100%; height: auto;”>
2 Using a class: To use CSS to style an image, you can either create a CSS class or ID and apply it to the image using the class or id attribute, or you can use an inline CSS block. Here is an example of how to use a CSS class to style an image:
<img src=”https://example.com/image.jpg” class=”image-style”>
.image-style {
width: 100%;
height: auto;
margin: 10px; }
You can use CSS to style images in many ways.
Here are some of the most common CSS properties used to style images:
• width: Specifies the width of the image.
• height: Specifies the height of the image.
• margin: Specifies the amount of space around the image.
• padding: Specifies the amount of space between the border of the image and its contents.
• border: Specifies the border around the image.
• border-radius: Specifies the radius of the corners of the image border.
• box-shadow: Specifies a shadow around the image.
• opacity: Specifies the transparency of the image.
• filter: Specifies a filter to apply to the image.
Project: Space Exploration
Task 5: Adding an image and styling it using a class Code
<html>
<head>
<title>Space Exploration</title>
<style>
body {
background-image: url(“space_background.jpg”);
color: white;
text-align: center;
.img-style{
border: 5px solid orangered; border-radius: 15px;
width: 120px;
height: 80px; margin: 10px;
}
.content{
text-align: left; margin: 10px;
}
</style>
</head>
<body>
<img src=”planet.jpg” align=left class=”img-style”>
<h1>Space Exploration</h1>
<!-- The remaining code will be same-->
Output
1 Match the columns.
Column A
Column B
Is an attribute for specifying the source of an image Used to provide alternative text for images
Is an HTML element for adding images Using a class
Is a purpose of the alt attribute margin
Is a way to apply CSS styles directly to an HTML element src
Specifies the amount of space around the image <img>
Hints class height border-radius <img> background-image
a In an HTML document, you can add images using the element.
b The attribute of an <img> tag is used to style an image using a class.
c The property specifies the height of the image.
d To set background images for HTML elements, you use the property.
e The property can make the corners of an image round.
Imagine that a container element is like a box and the flex items are like the objects inside the box.
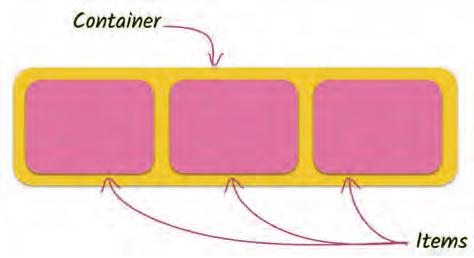
A flexbox is a CSS layout module that allows you to easily create flexible and responsive layouts by arranging the objects inside the box in a flexible and responsive way.
You can line up the objects in a row or a column, and you can control how much space each object takes up. You can also control how the objects are aligned inside the box, such as horizontally centred or vertically centred.
A flexbox works by dividing a container element into flex items. These items can be any type of an HTML element, such as divs, spans, and images. Flex items can be resized and rearranged to fit the available space in the container.
Here is a simple example of how to use a flexbox:
<div class=”container”>
<div class=”item”>Item 1</div>
<div class=”item”>Item 2</div>
<div class=”item”>Item 3</div>
</div> .container { display: flex; }
.item { flex: 1; }
This code creates a container element with three flex items. The flex items are arranged horizontally and take up equal amounts of space.
You can also use a flexbox to control the alignment of flex items. For example, the following code vertically aligns the flex items in the centre of the container: .container { display: flex;
align-items: center; }
You can also use a flexbox to control the direction of flex items.
Share some of the applications or websites where you notice the use of flexboxes.
For example, the following code arranges the flex items vertically instead of horizontally:
.container {
display: flex;
flex-direction: column;
display: flex Makes the parent container flexible.
flex-direction: row | column Allows flex items of the container to be displayed row-wise or column-wise.
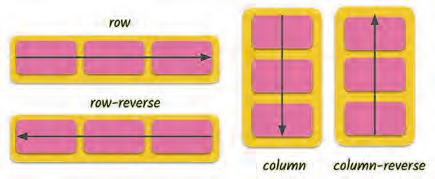
flex-wrap: wrap | nowrap Allows flex items to wrap onto more than one line.
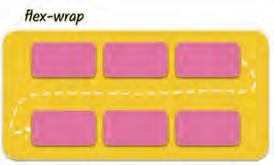
justify-content: centre | flex-start | flex-end Allows items to align along the main axis.
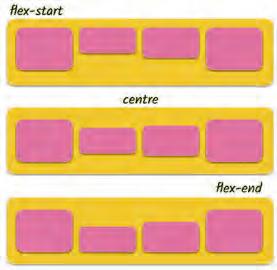
align-items: centre | flex-start | flex-end Allows multiple lines of items to align along the cross axis.
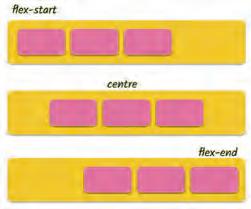
align-content: centre | flex-start | flex-end Allows items to align along the cross axis in a single line.
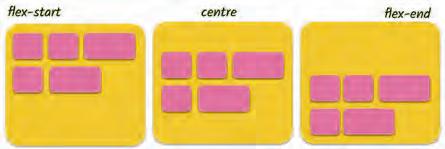
Property Purpose
order allows the change in order of items without altering the source order.
flex-grow allows an item to fill up the available free space.
flex-shrink allows an item to shrink if there is not enough free space available.
flex-basis defines the size of an item before space is distributed.
flex shorthand for flex-grow + flex-shrink + flex-basis.
flex-self can align a single item within the flex container.
Project: Space Exploration
Task 6: Use a flexbox to place items within a web page.
1 Replace the body element with the header class and update as shown to add a flex container for the header part of your web page.
2 Update the content class by adding a flex container. Code
<html>
<head>
<title>Space Exploration</title>
<style>
.header{
display: flex;
background-image: url”(space_background.jpg”);
justify-content: center;
color: white;
border-radius: 5px;
width: 100%;
.img-style{
border: 5px solid orangered;
border-radius: 15px;
width: 120px;
height: 80px;
margin: 10px;
.content{
display:flex;
text-align: left;
margin: 10px;
3 Add the new classes for cards.
a .card-holder – a flex container for flex items
b .cards - flex items
c .cards-img - for images in flex items
d .cards:hover - to add a hover feature Code
.card-holder { display: flex;
justify-content: space-around; flex-wrap: wrap;
.cards {
width: 16%;
color: white;
background-color: #2c3350;
padding: 10px;
border-radius: 5px;
margin: 0.35%;
font-size: 14px;
text-align: center;
.cards-img { position: relative;
width: 90px;
height: 65px;
border-radius: 5px;
.cards:hover {
background-color: #646f9a;
box-shadow: 5px 5px 5px 5px #d3d3d3;
4 Add the header division.
<h1>Space Exploration</h1>
<img src=”rocket.jpg”alt=”rocket” width=”100” height=”100”>
</div>
5 Add a sub-heading for the article cards. Code
<div class=content>
<p><b>Space exploration</b> is the study of space and everything beyond Earth’s atmosphere. We use robots and spacecrafts to explore space and learn new things about it. <br><br> Space exploration has led to many <i><b>amazing discoveries</b></i>, such as exoplanets (planets that orbit other stars), water on Mars, and black holes. <br><br> Space exploration is also important for inspiring people and showing us what is possible.
</p>
</div>
<h3> Links of interesting articles about Space:</h3>
6 Add the card-holder and cards div tags.
7 Add the image and text for the first article card.
<div class=card-holder>
<div class=cards>
<img src=”exoplanet.jpg” class=cards-img>
<p>What is an exoplanet?</p>
</div>
8 Duplicate the cards div of the first card.
9 Change the details of the second card.
<div class=cards>
<img src=”another_Earth.jpg” class=cards-img>
<p>Another earth?</p>
</div>
10 Repeat the process to create remaining cards.
<div class=cards>
<img src=”neutron_star.jpg” class=cards-img>
<p>Neutron Star</p>
</div>
<div class=cards>
<img src=”far_away_galaxies.jpg” class=cards-img>
<p>Far-away Galaxies</p>
</div>
When done, run your code to test it.
Hyperlinks, also known as links, allow users to navigate from one web page to another by clicking a text or an image link.
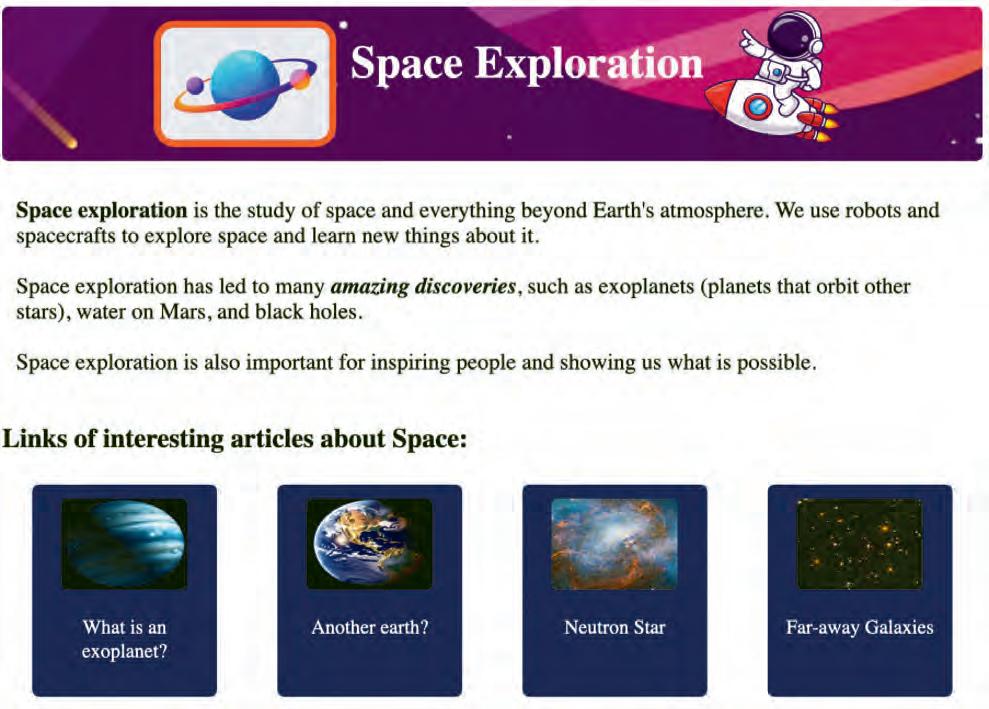
To create a hyperlink in HTML, use the <a> tag. The <a> tag has the required href attribute, which specifies the URL of the linked page. The text or the image that you want to be the link should be between the opening and closing <a> tags.
For example, the following HTML code creates a hyperlink to the Uolo home page:
Uolo
When a user clicks the word “Uolo”, the web browser opens the Uolo home page.

You can also use the <a> tag to create links to other resources, such as images, PDFs, and other types of files. Let us hyperlink the article cards for the Space Exploration project.
Project: Space Exploration
Task 7: Hyperlink the card images.
Use an anchor tag to add a link to the card image. Don’t forget to close the tag.
Code
<div class=cards>
<a href=”https://en.wikipedia.org/wiki/Exoplanet”>
<img src=”exoplanet.jpg” class=cards-img>
</a>
<div class=cards>
Code
<a href=”https://www.space.com/30172-six-most-earth-like-alien-planets.html”>
<img src=”another_Earth.jpg” class=cards-img>
</a>
Repeat the process for the remaining cards.
<div class=cards>
<a href=”https://en.wikipedia.org/wiki/Neutron_star”>
<img src=”neutron_star.jpg” class=cards-img>
</a>
<p>Neutron Star</p>
</div>
<div class=cards>
<a href=”https://en.wikipedia.org/wiki/List_of_galaxies”>
<img src=”far_away_galaxies.jpg” class=cards-img>
</a>
<p>Far-away Galaxies</p>
</div>
</div>
</body> </html>
Click a card to check if the link is opening or not.
Consider any four famous persons from the past in whom who you are interested. Make a web page about them using flexboxes. Include a picture of them, a short story about their lives, and a link to another web page with more information about them.
A Fill in the Blanks.
1 The attribute is used to display the alternative text describing the image, if the image does not load on the web page.
2 The property allows flex items to wrap onto more than one line.
3 The tag is used to create a hyperlink.
4 The property allows multiple lines of items to align along the cross axis.
5 The flex container can change the width, height, and order of the elements.
1 How do you create a hyperlink to an external website, using the <a> tag in HTML?
a <a href=”#external-website”>External Website</a>
b <a href=”http://www.example.com”>Visit Website</a>
c <a src=”http://www.example.com”>Open Link</a>
d <a link=”http://www.example.com”>Go There</a>
2 Which CSS property is used to create rounded images?
a border-radius
c round-image
b image-shape
d Image-border
3 What is the main purpose of flexboxes in web development?
a To add images to a web page
c To change the font style on a web page
b To create flexible layouts and arrange elements flexibly
d To add animations to web pages
4 How can you set a background image for an HTML <div> element, using CSS?
a Using the <background> element
c Using the src attribute
b Using the background-image property
d Using the alt attribute
5 Which CSS property is used to make a parent container flexible in flexbox?
a display: flex
c flex-direction
C Who am I?
b flex-grow
d align-items
1 I have attributes like ‘src’ and ‘alt’ to specify the image source and the alternative text.
2 I ensure that a background image covers the entire HTML element.
3 I create a shadow around an image, using CSS.
4 I am a CSS property to specify a filter to apply to the image.
5 I control the alignment of items in a flex container.
1 In CSS, the ‘border-radius’ property is used to make images transparent.
2 You can style images using CSS in two ways—using the style attribute and using classes.
3 Hyperlinks can be created using text only, and images cannot be linked to other web pages.
4 The ‘margin’ property in CSS determines the space around an image.
5 The ‘flex-direction’ property determines whether flex items are arranged horizontally or vertically.
E Answer the Following.
1 Identify and correct the error in the following HTML code for inserting an image: </img src=”image.jpg” alt=”A beautiful landscape”>
2 Which CSS property is used to specify the amount of space between the border of the image and its contents?
3 Correct the CSS code that sets the background image for a <div> with class “my-div” and ensures that it covers the entire div:
.my-div {
background: url(‘background.jpg’); background-size: cover; }
4 Find the error in the following CSS code that arranges the flex items vertically in a flexbox: .container { display: flex; flex-direction: row; }
5 Explain the purpose of the ‘flex-grow’ property in a CSS flexbox.
1 Given the following HTML and CSS code, what will be the background colour of the div when you hover over it?
<div class=”hover-button”>Hover Me</div>
.hover-button:hover {
background-color: yellow; }
2 If you have a web page with three images styled using the class ‘image-style’ and the following CSS code, what will be the output?
<img src=”image1.jpg” class=”image-style”>
<img src=”image2.jpg” class=”image-style”>
<img src=”image3.jpg” class=”image-style”>
.image-style { width: 80%; margin: 10px; }
3 What is the output of the following HTML code?
<img src=”https://example.com/image.png” alt=”Image of my cat”>
What error will you get if you try to display an image that is not found?
What error will you get if you forget to add the alt attribute to an image tag?
4 Consider the following HTML code: <div class=”flex-container”>
<img src=”https://example.com/image.png” alt=”Image of my cat”>
<a href=”https://example.com/cat-breeds”>Read more about cat breeds</a> </div>
What output will you get if you try to display the above HTML code without using a flexbox?
In this chapter, we will learn about lists and tables in HTML. Lists in HTML are similar to a shopping list or a to-do list. They help us organise items in a neat and easy-to-read way on a webpage.
In HTML, we can create three types of lists:
• Ordered (numbered)
• Unordered (bulleted)
• Description
Ordered Lists
Ordered lists, also known as numbered lists, are used to list items in a specific order. They are defined using the <ol> tag.
Each list item in an ordered list is defined using the <li> tag. Here is an example of an ordered list:
Code Output
<ol>
<li>Item 1</li>
<li>Item 2</li>
<li>Item 3</li>
</ol>
1. Item 1
2. Item 2
3. Item 3
You can use the type attribute to specify the type of numbering for your ordered list. The default numbering type is numbers, but you can also use uppercase letters, lowercase letters, or Roman numerals.
Code Output
<ol type=”I”>
<li>Item 1</li>
<li>Item 2</li>
<li>Item 3</li>
</ol>
I. Item 1
II. Item 2
III. Item 3
Here are some examples of different numbering schemes:
Types of Numbering Description
type=” 1”
type=” A”
type=” a”
type=” I”
type=” i”
The list items will be numbered with numbers (default).
The list items will be numbered with uppercase letters.
The list items will be numbered with lowercase letters.
The list items will be numbered with uppercase Roman numbers.
The list items will be numbered with lowercase Roman numbers.
Unordered lists, also known as bulleted lists, are used to list items in no particular order. They are defined using the <ul> tag.
Each list item on an unordered list is defined using the <li> tag.
Here is an example of an unordered list:
<li>Item 1</li> <li>Item 2</li> <li>Item 3</li>
3
You can use the style attribute to specify the bullet style for your unordered list. The default bullet style is a disc, but you can also use squares, circles, or other symbols.
<ul style=”list-style-type: square;”>
<li>Item 1</li>
<li>Item 2</li>
<li>Item 3</li>
1
3
Here are some examples of different bullet point styles: Bullet
disc Change the list item marker to a bullet. circle Change the list item marker to a circle.
square Change the list item marker to a square.
none No list item marker will be displayed
Description lists are used to display a list of terms and their definitions. They are defined using the <dl> tag. Each term in a description list is defined using the <dt> tag, and each definition is defined using the <dd> tag. Here is an example of a description list: Code Output
<dl>
<dt>Term 1</dt>
<dd>Definition 1</dd>
<dt>Term 2</dt>
<dd>Definition 2</dd>
<dt>Term 3</dt>
<dd>Definition 3</dd>
</dl>
Term 1
Term 2
Term 3
Definition 1
Definition 2
Definition 3
Styling lists means improving the appearance of the list items, such as the bullet style, numbering, padding, and margin. There are two main ways to style HTML lists:
1 Using the style attribute
2 Using CSS classes
The style attribute can be used to specify the appearance of individual list items or entire lists. To use the style attribute, simply add it to the opening tag of the list or list item and specify the desired CSS properties.
Styling a List Item: We can style a list item in a list using the style attribute. For example, the following HTML code styles a list item to have grey background colour:
<li style=”background-color: #ccc;”>Item 1</li>
<li>Item 2</li>
<li>Item 3</li>
1
2
3
Styling a List: We can also use the style attribute to style entire lists.
For example, the following HTML code defines an unordered list with square bullet points and 10px padding and margin:
<ul style=”list-style-type: square; padding:10px; margin:10px;”>
<li>Item 1</li>
<li>Item 2</li>
<li>Item 3</li> </ul>
Here are some of the most common CSS properties that can be used to style lists:
• List-style-type: Specifies the style of the bullet points or numbers in a list.
• List-style-position: Specifies whether the bullet points or numbers are placed inside or outside of the list items.
• List-style-image: Specifies an image to use as the bullet points in a list.
• Padding: Specifies the amount of padding around the list items.
• Margin: Specifies the amount of margin around the list items.
• Font-size: Specifies the font size of the text in the list items.
• Font-colour: Specifies the font colour of the text in the list items.
• Border: Specifies a border around the list items.
CSS classes can be used to style lists in a more reusable way.
To use a CSS class to style a list, simply add the class name to the opening tag of the list or list item. For example, the following HTML code adds the CSS class list-style-square to an unordered list: <ul class="list-style-square">
<li>Item 1</li>
<li>Item 2</li>
<li>Item 3</li>
</ul>
Then, you can use CSS to style the list items with the list-style-square class. For example, the following CSS will give all list items with the list-style-square class square bullet points and 10px padding and margin:
.list-style-square { list-style-type: square; padding: 10px; margin: 10px; }
How are the list style and type different?
If you need to style only a few individual list items or lists, then using the style attribute is fine.
However, if you need to style a lot of lists or you need to reuse the same list style throughout your webpage, then it is better to use CSS classes.
Project: Space Exploration
Task 8: Create and style an unordered list of fun facts about space. To do so, we first need to identify where the list will appear and what flex container do we need. We need four flex containers to place our content on the webpage as shown.
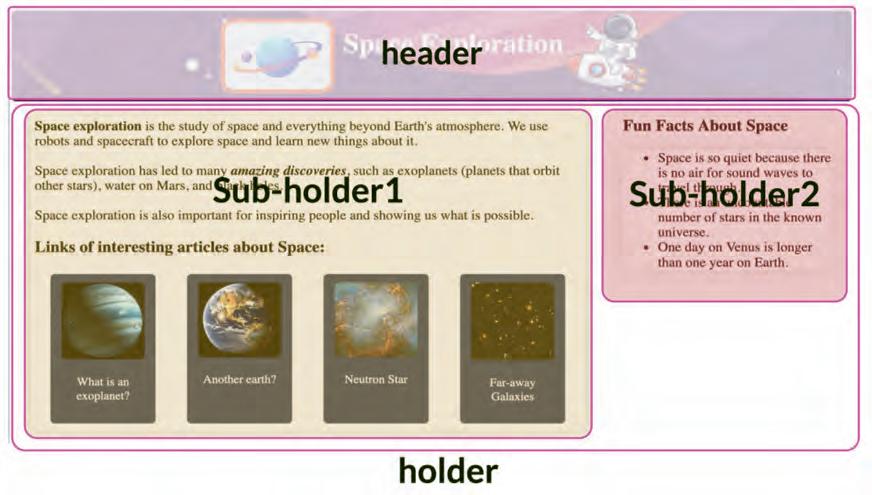
1 Create an unordered list of fun facts about space in sub-holder2 after the cards’ code.
Code
<div class=sub-holder2>
<div>
<h3> Fun Facts About Space </h3>
<ul>
<li>Space is so quiet because there is no air for sound waves to travel through.</li>
<li>There is an uncountable number of stars in the known universe.</li>
<li>One day on Venus is longer than one year on Earth.</li> </ul> </div> </div>
2 Update and add div for containers for header, holder and sub-holder1.
Code
<body>
<div class=header>
<img src="planet.jpg"align=left class=img-style>
<h1>Space Exploration</h1>
<img src="rocket.jpg" alt="rocket" width="100" height="100">
</div>
<div class=holder>
<div class=sub-holder1>
<div>
<p><b>Space exploration</b> is the study of space and everything beyond Earth's atmosphere. We use robots and spacecraft to explore space and learn new things about it. <br><br> Space exploration has led to many <i><b>amazing discoveries</b></i>, such as exoplanets (planets that orbit other stars), water on Mars, and black holes. <br><br> Space exploration is also important for inspiring people and showing us what is possible.
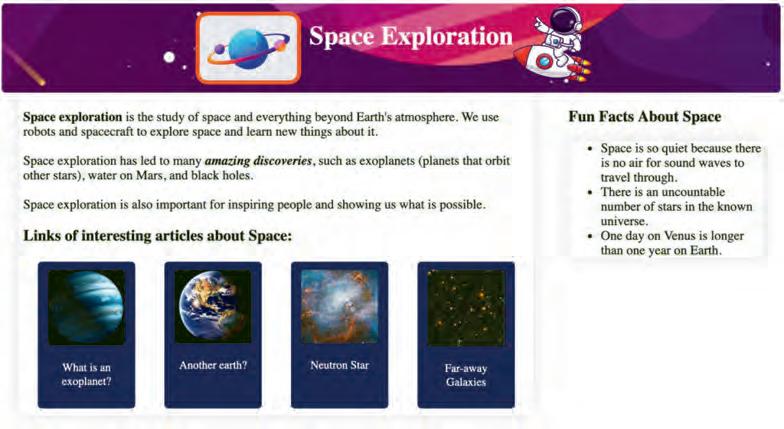
</p> </div>
3 Create style classes for containers and the list inside the style tag.
.holder { display: flex; justify-content: space-around;
.sub-holder1 { width: 65%;
box-shadow: 0 0 20px rgba(0, 0, 0, 0.15); padding: 5px;
.sub-holder2 { width: 25%;
ul{
box-shadow: 0 0 20px rgba(0, 0, 0, 0.15);
</style>
Just like the bookmarks we use in our books to quickly jump to a specific page, HTML bookmarks help us jump to a specific part of a webpage on the internet.
To add a bookmark in an HTML document, follow these steps:
1 Choose the element you want to bookmark. This could be a heading, a paragraph, an image, or any other HTML element.
2 Add an id attribute to the element. The id attribute must be unique on the page.
<h2 id=”mybookmark”>This is my bookmark</h2>
3 Create a link to the bookmark. To do this, use the a element and the href attribute. The href attribute should point to the id of the element you want to bookmark.
<a href=”#mybookmark”>Click here to go to my bookmark</a>
Project: Space Exploration
Task 9: Add Bookmarks
1 Add information about Documentaries on Space Exploration after the cards’ details.
<p>Far-away Galaxies</p>
</div>
<h3>Documentaries on Space Explorations</h3>
<p><b>Cosmos: Possible Worlds (2020):</b> This 13-part documentary series hosted by Neil deGrasse Tyson explores the universe and humanity's place in it. It covers a wide range of topics, including the origins of the universe, the search for life beyond Earth, and the future of space exploration.<br><br>
<b>Voyage of Time (2016):</b> This Terrence Malick-directed documentary is a visually stunning meditation on the cosmic journey of the universe, from the Big Bang to the present day. It features a voiceover by Brad Pitt.<br><br>
<b>One Strange Rock (2018):</b> This 10-part documentary series hosted by Will Smith explores the wonders of Earth and humanity's place in the universe. Each episode focuses on a different aspect of Earth, such as its atmosphere, oceans, and life forms.<br><br>
<b> The Last Man on the Moon (2019):</b> This documentary tells the story of Eugene Cernan, the last astronaut to walk on the moon. It features interviews with Cernan and his fellow Apollo 17 crew members, as well as archival footage from the mission.<br><br>
<b>Apollo 11 (2019):</b> This documentary tells the story of the Apollo 11 mission, which landed the first humans on the moon. It features restored footage from the mission, as well as interviews with the astronauts and other people involved in the mission.<br><br><br></p>
Add an id attribute to the elements you want to bookmark:
a The h3 element for the articles section.
<h3 id=b1> Links of interesting articles about Space:</h3>
b The h3 element for the documentaries section.
<h3 id=b2>Documentaries on Space Explorations</h3>
c The h3 element for Fun facts.
<h3 id=b3> Fun Facts About Space </h3>
3 Create link to the bookmarks
Code
<div class=holder>
<div class=sub-holder1>
<div>
<p><a href="#b1">Interesting Articles</a></p>
<p><a href="#b2">Documentaries on Space Explorations</a></p>
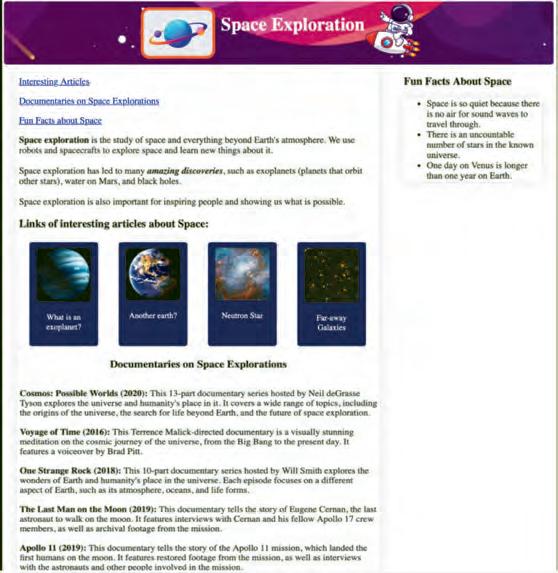
<p><a href="#b3">Fun Facts about Space</a></p>
<p><b>Space exploration</b> is the study of space and everything beyond Earth's atmosphere. We use robots and spacecrafts to explore space and learn new things about it. <br><br> Space exploration has led to many <i><b>amazing discoveries</b></i>, such as exoplanets (planets that orbit other stars), water on Mars, and black holes. <br><br> Space exploration is also important for inspiring people and showing us what is possible.
1 Read the statements and solve the puzzle.
Across
a CSS property can be used to add space around list items.
b The HTML tag used to create an unordered list.
c This HTML tag is used to create an ordered list. Down
a A type of HTML list that doesn’t have any specific order.
b The HTML tag is used for individual list items.
2 Match the Following.
Column A
Column B
HTML tag used for ordered lists disc
The default bullet style for an unordered list ol
CSS property used to specify the style of bullet points or numbers in a list
style an individual list item using HTML attributes
Using the style attribute list-style-type
Imagine you have a list of your favourite video games. You want to write down the name of each game, the genre, and the release date. You could write this information in a list, but it would be difficult to read and understand. A better way to organise this information is to use a table.
A table is a grid of rows and columns. Each row represents one item on your list, and each column represents a different piece of information about that item.
To create a table in HTML, we use the following tags:
Tag Purpose
<table></table> This tag is used to create a table.
Web designers choose colours for websites based on colour psychology. Like blue is often used for trustworthiness, while red can create a sense of urgency.
<th></th> This tag is used to add table headers. The headings are bold and centred by default.
<tr></tr> This tag is used to create table rows.
<td></td
<caption></caption>
This tag is used to create a data cell and add data to the cell. The data in a cell is left-aligned by default.
This tag is used to add captions to a table. It must be added right after the <table> tag. A table caption will be centred above a table by default.
<thead></thead> This stands for ‘table header’ and is used to group the header content in your table.
<tbody></tbody> This stands for ‘table body’ and contains the main content of your table, such as data rows with <td> (table data) elements.
<tfoot></tfoot> This stands for ‘table footer’ and is used for any footer content in your table.
Here is an example of a simple HTML table:
<caption>Favourite Video Games</caption>
<th>Release Date</th>
To style tables in HTML, you can use CSS. CSS is a language that allows you to control the appearance of HTML elements.
Here are some basic CSS properties that you can use to style tables:
• Border: This property controls the border of the table. You can specify the border thickness, style, and colour.
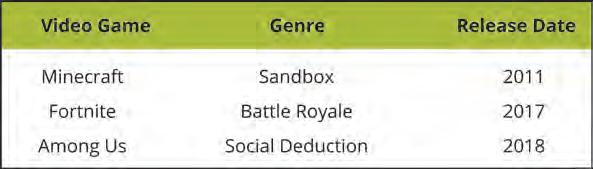
• Border-collapse: This property controls the collapse of table borders. By default, the borders of adjacent table cells will touch each other. You can use the border-collapse property to collapse the borders of adjacent table cells into a single border.
• Margin: This property controls the margin around the table. The margin is the space between the table and the other elements on the webpage.
• Padding: This property controls the padding inside the table. The padding is the space between the border of the table and the content of the table cells.
• Width: This property controls the width of the table.
• Height: This property controls the height of the table.
You can also use CSS to style the individual elements of a table, such as the table header cells, table data cells, and table caption.
Here is an example of how to use CSS to style a table:
table {
border: 1px solid black;
border-collapse: collapse;
margin: 0 auto;
padding: 10px;
width: 400px;
background-color: #ab2f;
text-align: center;
text-align: center;
Project: Space Exploration
Task 10: Add a table and style it.
1 Add the table on Stars with Exoplanets in sub-holder2 before Fun facts.
Code
<div class=sub-holder2>
<div>
<h3 id=b3>Stars with Exoplanets</h3>
<table>
<tr>
<th>Name of the Star</th>
<th>Number of Exoplanets</th> </tr> <tr>
<td>Epsilon Eridani</td> <td>3</td> </tr>
<td>Lacaille 9352</td>
<td>Ross 128</td>
<td>Epsilon Indi</td>
<td>6</td>
</div>
<div>
<h3 id=b4> Fun Facts About Space </h3>
2 Style the table by adding shadow. Code
table {
box-shadow: 0 0 20px rgba(0, 0, 0, 0.15); } </style>
You can add a bookmark for the newly added table as well.
1. Create a webpage for your travel bucket list.
2. Create a webpage about your favourite book. Add bookmarks to different sections of the book, such as chapters or characters, and create links to jump to those bookmarks.
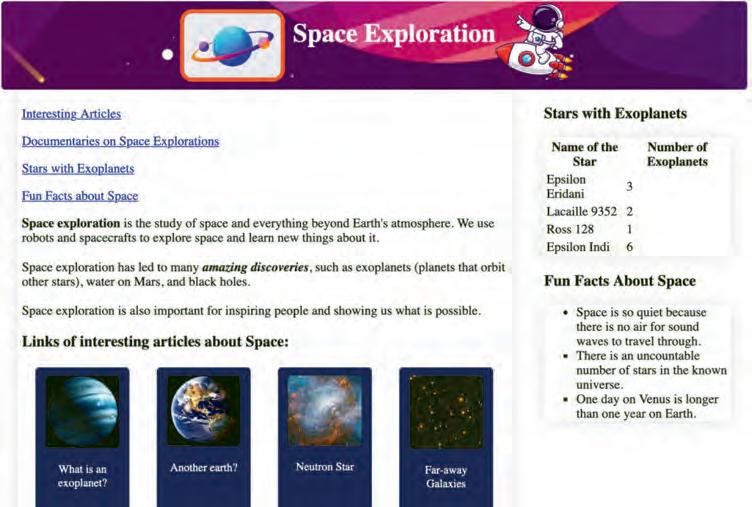
Does CSS allow us to change the appearance of multiple webpages by modifying just one stylesheet?
A Fill in the Blanks.
1 Ordered lists are also known as lists and are used to list items in a specific order.
2 You can change the style of unordered list items using the property.
3 To style an individual list item using HTML attributes, we can use the attribute.
4 You can change the type of numbering in ordered lists using the attribute.
5 The HTML tag used to contain the main content of your table, such as data rows with <td> (table data) elements is tag.
the Correct Option.
1 Which CSS property specifies an image to use as the bullet points in a list?
a List-style-image
c List-style-type
2 Which tag is used to define a term in a description list?
a <dd>
c <dl>
3 What property is used to add a border to a table in CSS?
a Border-style
c Border-collapse
4 The data in a table's cell is:
a Left-aligned by default.
c Centre-aligned by default.
C Who am I?
b Padding
d None of these
b <dt>
d <li>
b Border
d Table-border-style
b Right-aligned by default.
d Top Left-aligned by default.
1 I am an attribute to specify the type of numbering for your ordered list.
2 I am an HTML tag used to create a table header. I am commonly found inside the <thead> element.
3 I am a CSS property that helps you set the background colour for table cells. I can make your tables visually distinct.
4 I am centred above the table by default.
5 I am used to mark a specific spot on a webpage to quickly jump back to it when needed.
D Write T for True and F for False.
1 There must be at least one ‘tr’ tag inside the ‘thead’ element.
2 <style> table,th,td{ margin:2px;
border-collapse: collapse;
} </style>
In the code snippet other than ‘solid’, you can use any other style.
3 <th> tag does not have a closing tag.
4 <td> tag is used to create a row in a table.
5 <a href=”#bookmark”> is a valid way to create a link to a bookmark within the same HTML document.
E Answer the Following.
1 What happens when you click on a link with the following HTML code?
<a href=”#myBookmark”>Jump to Important Information</a>
2 Write the code to change the bullet style of the list to squares.
3 How would you change the text colour of all the list items to blue?
4 What is the purpose of using the id attribute when creating bookmarks?
5 Identify the error in this CSS code and provide the corrected version: body {
background-color: #f0f0f0;
font:size: 14px;
font-color: #333; margin 15px; padding: 10px; }
F Apply Your Learning.
1 Make an ordered list of your hobbies and number the list with lowercase letters.
2 Identify the error in the following HTML code snippets:
a <ol>
<li>Item 1</li>
<li>Item 2</ol>
<li>Item 3</li> </ol>
b <table>
<caption>Table of Products</capiton>
<tr> <th>Product</th>
<th>Price</th>
3
What’s the mistake in this code for creating a bookmark link?
<a href=”section2”>Jump to Section 2</a>
4 Write a program that creates a table of the planets in the solar system, including their names, distances from the sun, and number of moons.
5 Write a program that creates a table of the scores for a soccer game, including the team names, goals scored, and yellow and red cards received.
6 Create an HTML list of your favourite foods. Add CSS to change the colour of the list items when you hover over them.
This coding book is supplementary to the main “Mel n Conji” content book. This book represents a 21st-century approach to learning coding concepts and developing computational thinking and problem-solving skills. To prepare students for the digital age, the curriculum is interwoven with well-thought-out concept graduation with real-life examples and practice problems.
• Illustrative approach: Concepts in coding and computer science are delivered through pictorial representations and learner-friendly approaches.
• Learning through real-life examples: Age-appropriate examples that enable learners to relate to the concept and learn about the unknown from the known.
• Extensive practice: Multiple practice scenarios to reinforce learnings.
• Coding challenges: Includes projects through which learners can demonstrate their learning outcomes in coding and computer science.
Uolo partners with K-12 schools to bring technology-based learning programs. We believe pedagogy and technology must come together to deliver scalable learning experiences that generate measurable outcomes. Uolo is trusted by over 10,000 schools across India, South East Asia, and the Middle East. xxx
hello@uolo.com