


TOGETHERNESS, INSPIRATION AND CREATIVITY createandcraft.com SPRING 2023 16 pages of Easter ideas Snip a scene CREATE GORGEOUS ARTWORK WITH CARD, SCISSORS & GLUE! Page 12 60 JOYFUL SPRING PROJECTS FAVE BRANDS TREAT YOURSELF WITH OUR AMAZING DEALS ON TOP CRAFT NAMES YOUR FREE GIFT GET YOUR HANDS ON A FOREVER FLOWERZ DAHLIA MAKING SET UP TO 50% OFF STORAGE SOLUTIONS STAR SAVINGS TO SPRUCE UP YOUR CRAFTY SPACE MEMBER EXCLUSIVE OFFERS INSIDE! PLUS – Learn clever pop-up techniques for MOTHER ’S DAY CARDS SAVE £££ INSIDE EXCLUSIVE OFFERS ON PAPERCRAFTING TOOLS, KITS & SUPPLIES Gorgeous floral cards Yourself Happy DAVID WAIT Discover vintage découpage with me DECORATIONS, GIFTS, CARDS & MORE!
Hello and welcome...

… to the Spring issue of Craft Club Magazine. I hope that the New Year and 2023 is treating you well so far. This year we have even more to look forward to as we welcome more brands (some familiar) and exciting products to the Create and Craft family – including Crafts Consortium and Brother.

In the spirit of spring, sustainability and starting afresh, you may notice that many of the projects in this issue are ideal for eco-crafting, upcycling, and making the most of your scrap materials – and you’ll find some great inspiration that can help turn your trash into treasures. We’ve also featured a whole host of wonderful storage options (with exclusive Member discounts) to take your craft space to new heights.
To help you kickstart your spring, Tracey Collett has created a gorgeous set of April shower inspired cards on page 10, whilst Rachel Newsome shares some Mother’s Day crafting ideas for the kids on page 18. Plus, don’t forget to claim your special Member’s gift and print out your exclusive Nancy Watt downloads.
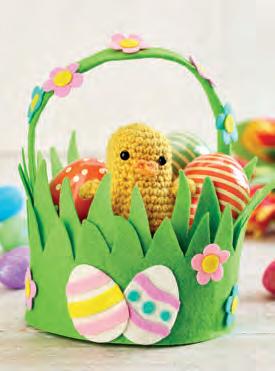
Hop on over to our Easter section starting on page 51 – here you can see how to make beautiful decorations by Lisa Richardson (p52), a sweet felt Easter basket by Hayley Victory (p56), egg-cellent cards by Helen Kirkham (p54), and much more.

I hope you enjoy bringing these projects to life as much as I’ve enjoyed putting them together. Be sure to send over your makes, stories and feedback to editor@hochanda.com


 Sophie Thornton, Editor

How to


Sophie
Subject to stock availability, all items in our ‘Buy Now’ panels, or with product details listed on the page, can be bought from Create and Craft. Simply call our orderline on 01733 60 2000 or visit our website at createandcraft.com
SAVE TODAY! Enjoy top deals on these seasonal picks
stunning papers from Nancy Watt to download!
miss our Member’s only gift All projects featured within Craft Club magazine are reproduced in good faith that they do not infringe any copyright. When making toys or projects for children, ensure that products used are suitable for the age group; if in doubt, omit products. The publishers are not responsible for any safety issues arising from any items created from projects contained within Craft Club magazine. Make our fun Easter egg cuties on page 52 Don’t miss our discount on Tonic Studios Look out for the product number you will need to use to purchase the item, and we’ve also highlighted your Member savings throughout. Please note that while we’ve made every effort to ensure that product details and prices are correct, they may be subject to change between publication of this magazine and your purchase. Always check price and availability when ordering. HALF PRICE Favourite brands Save £££s on this exclusive USB PAGE 36 PAGE 40 PAGE 30 JUST PAY P&P SAVE 33% Bring on spring with The Paper Boutique PAGE 38 SAVE 70% PAGE 32 PAGE 34 SAVE £10 Grab our back cover Stamps By Me bundle SAVE £9.50 PAGE 68 BUY NOW Look out for the QR codes throughout the magazine Scan them using the camera function on your smartphone or tablet to visit the Craft and Craft website
Fab freebies Six
Exclusive deals Don’t
What’s in your Craft Club mag this issue...
Our Club
4 The latest from CCHQ
Discover our crafting news
6 Your crafty nation
See what our Members have been busy creating
Papercrafting
10 April shower cards
Craft rainy-day inspired greetings full of colour and cheer
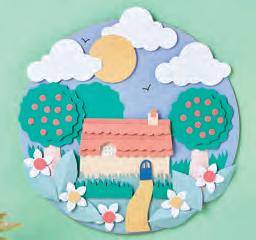
12 Spring scene artwork
Get creative with card, scissors and glue to make our cover star!
14 Pop-up Mother’s Day cards
Learn fun techniques to make standout greetings
16 3D watercolour art
Paint a beautiful butterfly scene
18 Mother’s Day cards
Kids can craft these fun greetings
20 Spring-inspired scrapbooking
Celebrate the season with floral layout ideas
22 Card challenge
Sophie takes on a reader in our crafty competition
24 Wedding favours
These boxes are perfect for holding table treats
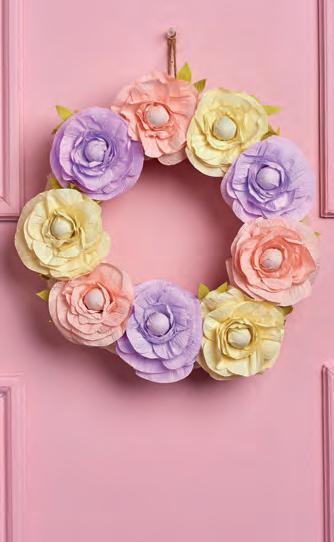
26 Spring wreath
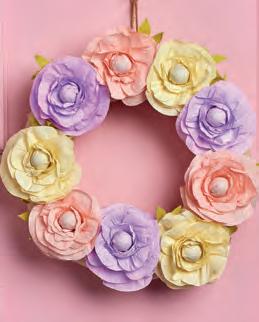
It’s easy to create this gorgeous wreath using crêpe paper
28 4 cards 1 paper pad
Discover different ways to utilise this botanic paper set
Exclusively for you
30 Member’s gift
Send off for this gorgeous faux flower kit
32 Star buy
Save £££s on our stellar storage solutions! Get
Email Sophie Thornton, Editor editor@hochanda.com or get in touch via Facebook create&crafttv & Instagram @createandcrafttv
34 Free downloads
Have fun crafting with Nancy Watt’s latest floral papers
36 Brand new & exclusive
Discover fabulous ways to use the designs on this USB
38 Spring sale
Awesome offers on seasonal papercrafting picks
40 Editor’s picks
Sophie selects her fave spring discounts for you
67 Special buys
Make great savings on papercraft supplies
68 Your exclusive deal
Bundle this crafty bundle into your shopping basket!
Soft crafts
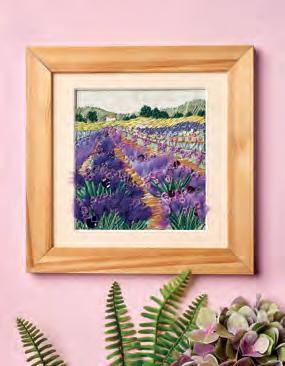
42 Lavender scene
Amaze yourself with an easier-than-it-looks embroidery project
44 Frill top bag
Try your hand at quilt-asyou-go with this nifty tote
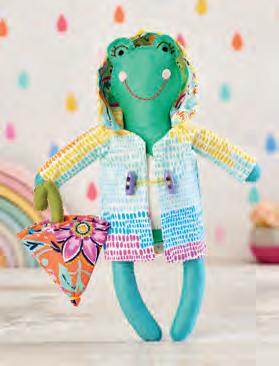
46 Rainy day frog
You’ll fall in love with this adorable amphibian!
Our skill levels will help you to decide whether or not a project is right for you!
48 Crochet cake set
Indulge in calorie-free delights!
50 Pom-pom buddies
Create fun animal mascots
Easter crafting
52 Felted egg characters
Who can resist these lovable needle felt animals?
54 Easter cards
Get cracking on some eggs-perimental ink effects
56 Colourful felt basket
Simple to make and perfect for holding Easter gifts!
58 Fabric bunny bags
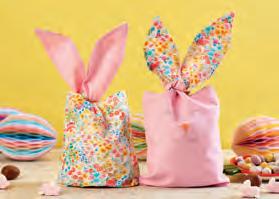
Stash toys and treats in these stitched totes
60 Table decorations
Craft centrepieces in colours to suit your scheme
62 Egg hunt markers
Do the Easter bunny proud with themed vinyl signs
64 Easter greetings
Create chic cards and decorations with a dictionary!
66 Author spotlight
We chat to crochet ace Emma Varnam about her latest book
On the cover...
Whip up this lovely spring artwork by Sarah Jackman Read on page 12
in touch!
Advanced p18 p56 p42 p46 p58
BeginnerIntermediate
p26
Read all the latest news from your favourite crafting club and the wider creative community. We love hearing from you –our creative and inspirational members. Submit your stories and projects by emailing: editor@hochanda.com and you could win our star letter prize of a £50 voucher to spend at Create and Craft.

COUNTDOWN TO CRAFTING LIVE DONCASTER

Get ready for a whole weekend of crafting fun with Crafting Live in Doncaster! The summer spectacular takes place at Doncaster Racecourse, kicking off on Friday 14th July 2023 with a full day workshop with Stephanie Weightman and crafty friends including Mel, David, Amanda, Carley, Anjie and many more!
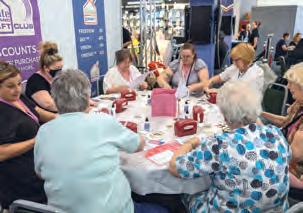
The Friday workshop covers a range of papercrafting projects, and includes materials, craft knowledge from our experts (all skill levels encouraged), refreshments during the workshop and goodies to take home. Whether you are an experienced crafter or you’ve only just started, there are projects that you can follow step-by-step or add your own personal touch to.
Pre-booking is essential but you are sure to have a great day, learn lots of new techniques and make new friends. The Workshop ticket on Friday also gets you into the show on either or both of the days (Saturday 15th/Sunday 16th July). Create and Craft Members get free show tickets so head to createandcraft.com to claim yours!
Did you guess the Masked Singer?
January saw the return of ITV’s popular singing contest, The Masked Singer, for a fourth season - and with it a whole host of new and whacky costumes from

a recycling bin to a cowboy rhino! Some of you may have perked up to see Knitting – a giant hot pink yarn ball with needles – but did you guess correctly as to who was the masked singer under the yarn? Well, if you guessed Claire Richards of 1990s pop band Steps, you’d be correct!

Claire is a keen crafter who won The Great British Sewing Bee back in 2021. “Knitting is easy, it's the crossing of sticks. Count all your stitches, there should be 26” was just one of the clues given as a hint to audiences by the singer, alluding to
the band's song entitled 5, 6, 7, 8. Though sadly voted out on Episode 6 of the show, Claire has been crafting for years and says, “I often say, ‘I’m crafty,’ and people give me funny looks. I’ve made loads of glitter-art canvases for people, and I put this pom-pom wreath on my door every Christmas. If I wasn’t doing music, I’d spend hours and hours making things.” Here’s hoping that following her performance on the show, that we’ll see even more from Claire and her crafts in 2023.
YOUR CRAFT
COMMUNITY
04 We Create and Craft
© Ken McKay/ITV/Shutterstock
© Vincent Dolman/Shutterstock
WATCH THIS SPACE!
THIS YEAR WE HAVE SOME VERY EXCITING LAUNCHES YOU WON’T WANT TO MISS!
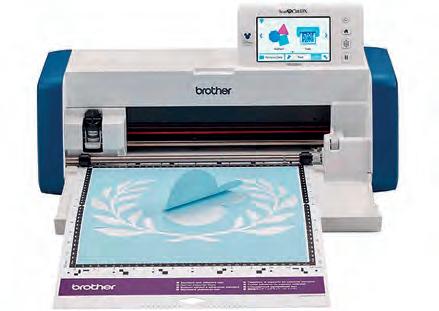
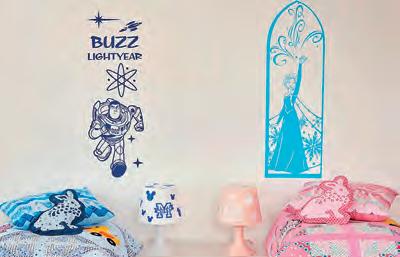
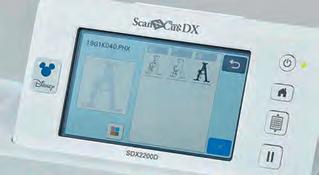
We’re excited to welcome not one but THREE new sewing machines from Brother, and, whilst we can’t spoil any surprises just yet, we can’t wait to share more details with you when we can. But that’s not all, for you papercrafters, we’re also excited to see the arrival of two brand-new ScanNCut machines, starting with a very special TV exclusive Disney ScanNCut, the SDX2240D, in March. This exclusive machine, available only from Create
and Craft and Highlight Crafts will include 152 wonderful Disney designs. The second, the SDX900, lands this August and includes a special collaboration with Tattered Lace.
Unwinding with papercrafts
Pinterest has shared the top crafting trends for 2023 – revealing that more and more people are trying out paper art. Pinterest says, “A desire to digitally detox drives this trend. People are looking for ways to switch off and unwind, and they’ve found a therapeutic outlet in the analogue. It’s a mindful artform that’s imaginative and inclusive to a mix of ages.”


They have also made the prediction that quilling, origami and paper art will be sure to satisfy crafty cravings this year; with a huge increase of Pinterest users sharing their makes in these fields. Searches for ‘How to make paper rings’ were reportedly up a whopping 1,725%, with ‘Origami instructions’ searches increasing

We Create and Craft 05
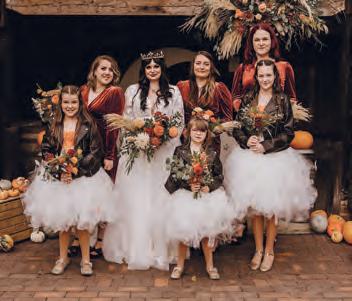
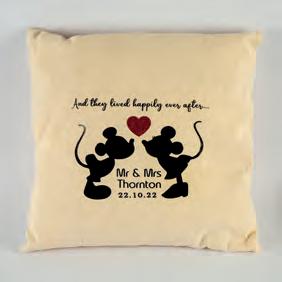
Editor Sophie gets wed


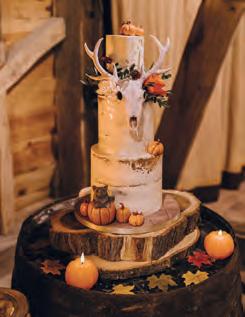
“Some of you might have noticed my name change since the last issue and the reason for that is because I got married! We had an amazing autumnal, pumpkin themed day and I wanted to share with you all some of the thoughtful, crafty gifts my husband and I received from loved ones for our wedding...”

STAR Letter!
PAPER SHOWCASE
“When I receive a paper collection that I really like, I try to find a way I can incorporate it into a piece of home décor. This is what I came up with for this particular collection of floral papers – a 12" x 12" shadow box sampler, using the dies and matching papers

This adorable, personalised Disneyinspired cushion was made by Create and Craft's own Rachel Newsome who is a whiz with vinyl. This cushion pays homage to my Disneyland Paris hen party!
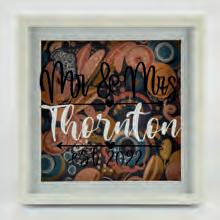
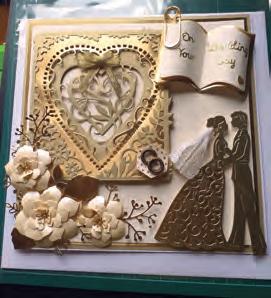
This vase was very kindly crafted and gifted by Willows. It was created by painting a glass vase, then shrink foiling the bride and groom and floral motif. She has finished it off beautifully by attaching a strip of silver diamantes around the rim.

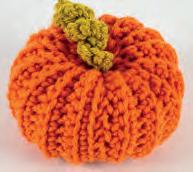
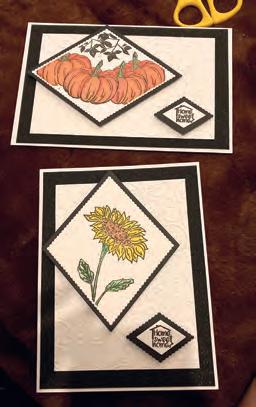
Tracey Bainbridge very kindly made us this box picture frame, personalised to include our names and wedding date. Tracey also made this adorable knitted pumpkin as she knows how much I love autumn – very fitting as our wedding was decorated with nearly 100 pumpkins!
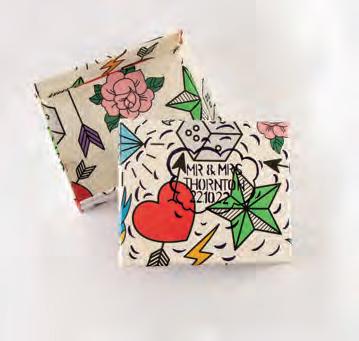
Jacqui Pearson made us this lovely wedding card box using a traditional tattoo-inspired design. The box is made by wrapping a box in patterned paper and finished using a Sharpie pen and stencil for the writing. It has come in very handy for storing all our wedding cards!
RESIN-ATING INSPIRATION
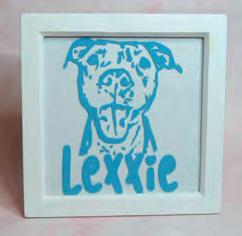
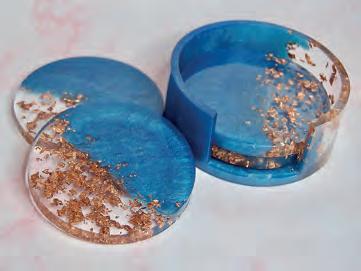
Rebecca Clark from South West London has become a keen crafter since lockdown, having taken inspiration from others on Instagram and Facebook. She says, “My sisters and I were always making Christmas and birthday cards and costumes at Halloween when we were younger. Now I use arts and crafts to keep my mind busy – it gives me an outlet for thoughts and feelings.” As you can see below, Rebecca creates pieces using permanent vinyl and resin, and she has started her own Etsy page taking commissions to make personalised dominoes, resin coasters and customised bottles, glasses and keyrings. See more of her work at heartcraftcreation on Etsy, or via @heartscraftsncreations on Facebook and Instagram.
Sophie Thornton, Editor
06 We Create and Craft YOUR
COMMUNITY
CRAFT
Cardmaking fans


It’s wonderful to see how imaginative our Members are with their cards – the art is in the application and they really do have an eye for creative compositions!
ONE KIT WAS ALL IT TOOK...
SWEET GREETING
A big thanks to Julie Algar for sharing this special birthday card with us featuring cakes, flowers and butterflies! “I made this using the Hunkydory Oh So Sweet Luxury topper set,” she says.
SHARED HOBBY
Kayla Brown from Bourne, Lincolnshire sent snaps of these lovely autumnal cards, made using dies from Tonic Studios and stamps from Stamps By Me. Kayla started crafting 11 years ago with family members who are keen papercrafters. “I’ve always been arty and studied art at GCSE so I fell in love with cardmaking straight away,” she says. “It’s lovely to be able to have crafty days with my mum and auntie and to go to craft shows together. My favourite items are Pixie Powders, embossing powders and stamps!”
A CRAFTY BUZZ


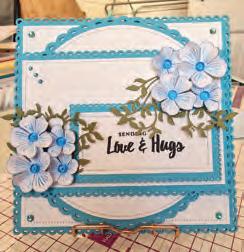
Connie Turnbull shared snaps of two of her latest springtime creations. “I adore crafting,” she says, It's most definitely my happy place and gives me quality time to myself – I find crafting so relaxing. I love to create cards using dies, stamps and embossing folders using inspirational colours that I feel give my creations a real lift.” We can see that happiness translates to your cards, Connie, they're bee-utiful!
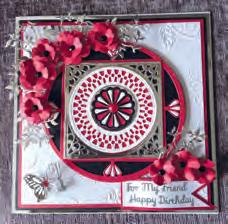
Andrea Jacobs has made a beautiful selection of cards using dies from John Next Door. Andrea says that she discovered cardmaking when she had children. "When my two boys were young and I was at home flicking through the channels, I came across the Queen of Crafting Dawn Bibby, and bought one of her kits… that was it, I was hooked.” Now Andrea uses her passion for papercraft to make gift boxes and cards to sell for the Cancer Support Group at her local hospice. You can see more of Andrea in our Card Challenge on pages 22-23
DIE DELIGHTS
Although Kim Foster is new to cardmaking, it looks like she is off to a flying start, judging by this elegant card made using the John Next Door Layering, Mallow Blossom and Leaf Sprigs dies. “I only started last year and have enjoyed the journey, learning lots from experienced crafters, and the demonstrators on Create and Craft TV,” she says. “I love John Next Door products, and used his die sets to make this birthday card for my friend.”
We Create and Craft 07
Write us a Poem!
Thank you to everyone who put pen to paper to come up with a poem using the words LOVE, SPRING and BRIGHT – we loved reading all your spring verses. Our winner for this issue is Ann Marvelly who takes home the prize of a £50 voucher to spend at Create and Craft. Many congratulations to our runnersup Barbara Wood and Pam Gormley too.
Runner-up
Spring into 2023
With crafting on Create and Craft TV. Spoilt for choice with different shades of pastel and bright
For cardmaking I’ll maybe even choose dark shades or white.
Jewellery making, knitting, sewing etcetera
You’ll find craft materials nowhere better than on Create and Craft TV
I just love to turn to channel 85 for a ‘crafty’ shopping spree!
Barbara Wood
Winner
Welcome to spring and see new life, Beginnings in all its colours so bright. Love to share in so many ways, In all our ‘Craft and Creation’ days. Whatever our talents to express, History seen is at its best. Paper, needles, wool, and threads, Therapeutic it must be said. Fingers busy, in rainbow hues, Minds receptive to challenges new. Designs, techniques, let’s bring it on, Completing the work in joyful song.
Ann Marvelly
Special Mention
As I sit by the fire, so cosy and bright
My thoughts turn to spring on this cold winter night!
New life will emerge in the soft dappled glow of the sun in the sky shining down on the snow
But, for now I will sit and watch Create and Craft on TV
It’s the channel I love most (along with a nice cup of tea!)
Pam Gormley
NEW POEM challenge
Write us a short ode featuring the words below relating to Create and Craft and we’ll publish our favourites in the next issue. We can’t wait to see what you come up with!
Send your poems to us by 14th April 2023.
BLOOM, FUN, AWAY
WIN £50
*T&Cs apply to spend at Create and Craft*
We want to hear from you!
We love hearing from our Club Members and know you love getting in touch... so thank you to everyone who sends in their crafty pictures and stories. Each issue, the lucky winners of our STAR LETTER and POEM COMPETITION will each receive a £50 voucher to spend at Create and Craft! You’ve got to be in it to win it, so get in touch now!
Send in photos of your makes (and yourself), plus your crafty tips, top tools and must-have products, or a ditty for our Poem challenge!
Email editor@hochanda.com
08 We Create and Craft
CUT OUT & KEEP


Enjoy hours of creating with seasonal Papercrafting We Papercrafting 09 Make our COVER STAR! Page 12 Learn pop-up techniques for Mother’s Day Page 14 These favours are perfect for a spring wedding Page 24 Craft rainy-day inspired cards Page 10 Paint a beautiful butterfly art piece Page 16 Create this gorgeous paper wreath Page 26
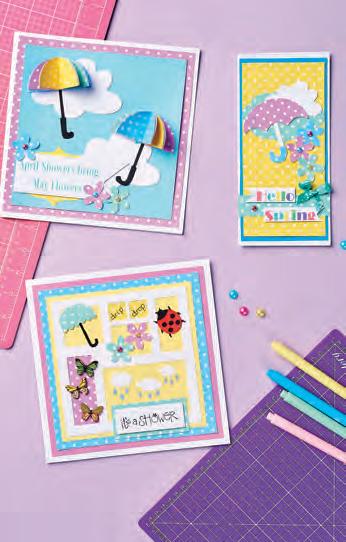
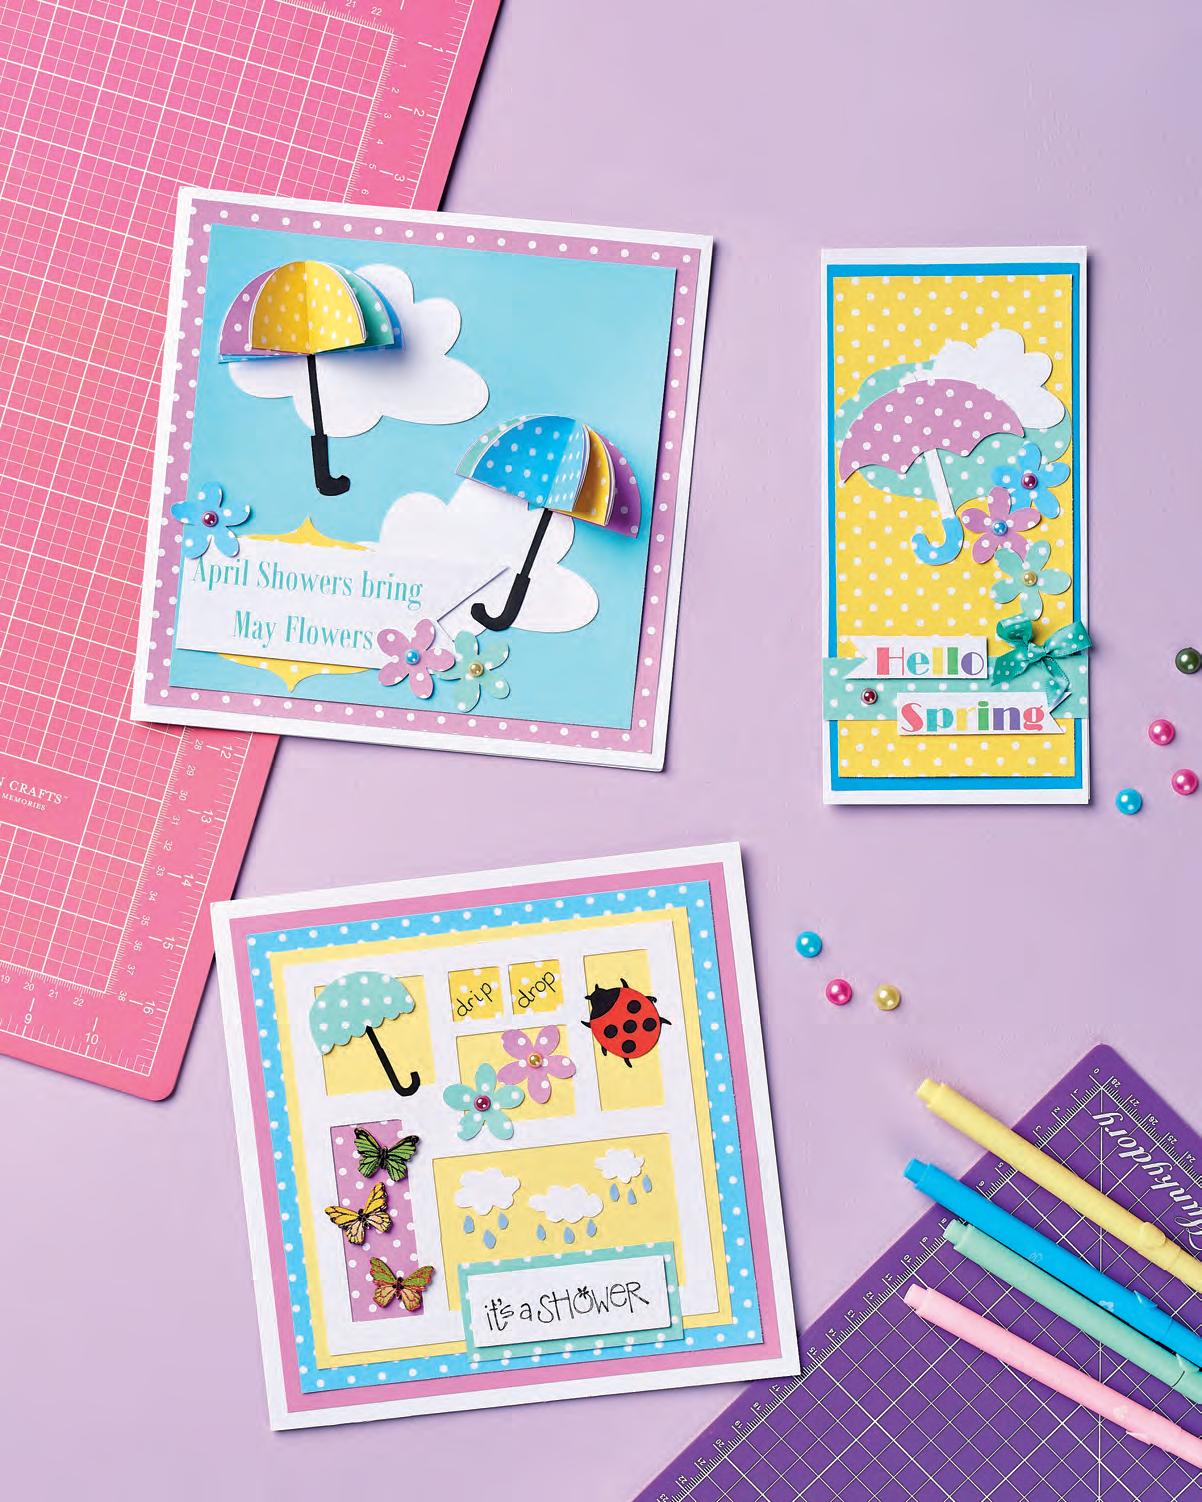
Craft a trio of AprilCardsShower
Soak up some inspiration from Tracey Collett and wish the rain away with bright colours and fun 3D elements
Send a little sunshine with these colourful rainy day themed cards, completed beautifully with pretty embellishments and polka dot papers in bold pastel shades.
Kit List
◆ Card stock: polka dot, pink, green, yellow, blue; plain, pink, yellow, blue, light blue, white, black, red
◆ Card blanks, white: 8" x 8"; DL size
◆ Brother ScanNCut die cutting machine
◆ Pinflair: Stencil Glue; Glue it
◆ PC/laptop and colour printer
◆ Double-sided sticky tape
◆ 3D foam adhesive tape
◆ Embellishments: adhesive pearls or gems; ribbon or bow, wooden butterflies
◆ VersaFine ink pad
◆ Spring sentiment stamp

April showers
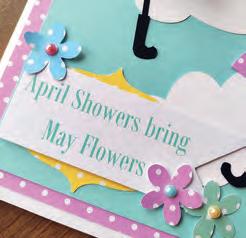
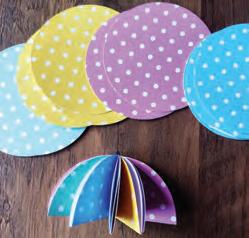
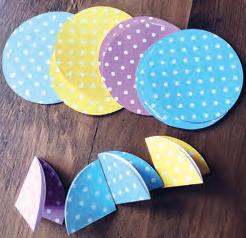
1 On the ScanNCut, cut out eight circles (7cm), a label shape (7cm) and three small flowers (3cm) in polka dot card stock then cut out two clouds in various sizes in white card.
2 To create the 3D umbrella, fold the 7cm circles into quarters [1] then glue them together to great the rounded umbrella shape [2].
3Using the black card make two pole and handle shapes, glue these on to the umbrella tops using Pinflair Glue It.
4 Create matts and layers using a sheet of polka dot card (7.5" x 7.5"), plain coloured card (7" x 7") and an 8" x 8" card
Helping Hand
◆ Make sure your ScanNCut is retacked ready for cutting, using Pinflair’s Stencil Glue
◆ Using a glue with a precison nozzle is a must for adhering small die cuts like the umbrella and raindrops
◆ Pre-cutting all the shapes ahead of the project makes mass-making a lot easier
blank, glued onto the card base.
5 Glue the two cloud shapes in place onto the blue card. Offset them slightly to fill the panel better.
6 Glue the umbrellas down on top of the clouds and add the polka dot label shapes into the bottom left corner.
7 Using a laptop or PC, create your own sentiment in your choice of font and colour. Print onto good quality card stock and trim to size so it fits on the label shape. Adhere into position.
8 To finish the card, add the polka dot flowers and place a coordinating pearl or gem in the centre of each flower [3]
Hello spring
1 On the ScanNCut, cut out three flowers (3cm) in a variety of polka dot card colours from the pre-stored shapes on your machine.
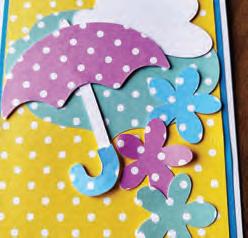
2 Cut out a cloud and umbrella (6cm) from the white card, a label shape (7cm) from polka dot card, plus an umbrella (6cm) from two polka dot colours from the pre-stored shape files.
3 Pick a selection of polka dot card (19cm x 9cm) and plain coloured card (20cm x 9.5cm) to create some matts and layers onto a DL card blank.
4 Create a topper design using a mixture of flower, cloud and label shapes then cover the white umbrella element with alternate polka dot paper colours as shown [4] Glue these in place.
5 On your laptop or PC create a fun sentiment by alternating the colour of font as you go [5]
6 Print and trim the sentiment into two banner shape panels, fix a strip of polka dot card on to the bottom of the card and fix the sentiment in place with foam tape [6] Add a few pearls and a ribbon bow to finish.
10 We Papercrafting
Whatever the weather

We Papercrafting 11
is here and with that means a few April showers and rainy-day craft sessions!”
COLLETT, DESIGNER Find these instructions in the Members Area at createandcraft.com
“Spring
TRACEY
Cut and layer a Paper Scene

Whip up a sweet spring artwork using seasonally coloured card and simple shapes
Coloured card is probably the most versatile product in our crafty stash – as well as being great value! It’s amazing what you can create by simply cutting out shapes, layering or moulding them, then adhering together.

Kit List
◆ Template from the Members Area
◆ The Paper Boutique Sunset Bouquet Coloured Card Collection (to purchase this head to createandcraft.com and type in product code 760330)
◆ Card stock: white, green, pink
◆ Printer and printer paper
◆ Scissors
◆ Cardboard box
◆ 17cm circle die
◆ Adhesives: foam pads, glue
◆ Scoreboard and tool
◆ String
◆ Ball tool and foam pad
◆ Die cutting machine
◆ Fineliner, black
Cottage scene
1 Die cut a 17cm diameter circle from a thin cardboard box

then die cut the same size circle in blue card. Adhere the blue circle on top of the other.
2 Lay the circle face-down then glue a loop of string to a strip of thin cardboard. Adhere towards the top of the circle to create a hanger.

3 Print out the templates then cut out all the pieces. Use the template to draw around and cut out three clouds and a sun. Attach across the top of the circle with foam pads.

4 Use the templates to draw and cut out grass then adhere across the bottom. Draw and cut out two trees then layer the tops with foam pads. Score and fold the trunks then adhere to the tops. Attach either side of the circle then adhere another tree top under the sun.


5 Draw then cut out a cottage then attach in between the trees with foam pads. Cut out the three roof pieces, layer up
Helping Hand
◆ Use thin, sharp scissors or a craft knife to cut out the pieces to achieve a neat finish
◆ If you don’t have any tools to shape your pieces then use your fingers. The warmth of your hands will help to shape the card
◆ Avoid using thick card as it will be more difficult to cut out neatly and shape
◆ Use PVA glue to adhere the pieces together or for speed you could use a glue gun
with foam pads then attach to the top of the cottage.
6 Cut out the second layer of grass, tuck under the tree trunks then adhere in place.
7 Cut out the window and door then adhere in place. Cut out a path to lead from the door then attach with foam pads. Cut out small strips of grass then attach either side of the path with foam pads. Cut out six leaves then score and fold in half. Adhere three leaves under each tree.
8 Cut out five flowers then shape using a ball tool on
a foam pad. Adhere around the leaves then add coloured circles in the centres. Add small coloured circles to the trees then draw in two small flying birds in the sky with the fineliner pen.
Craft in an afternoon
12 We Papercrafting
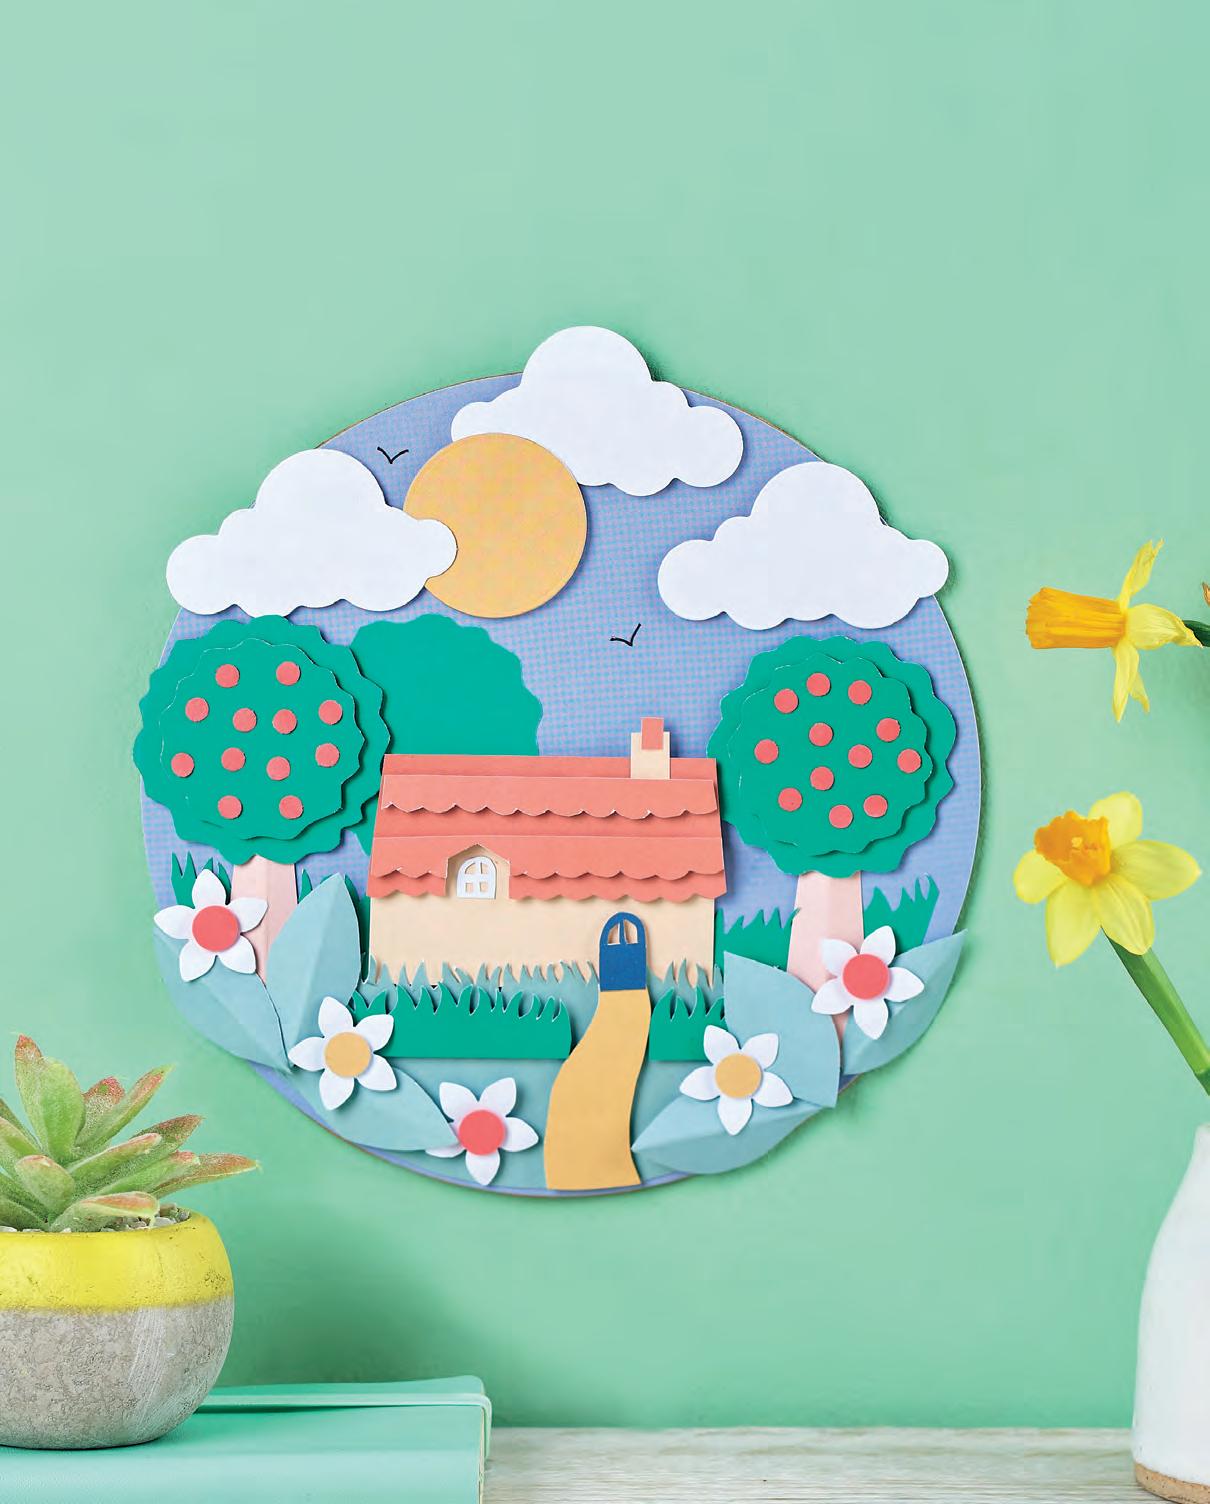

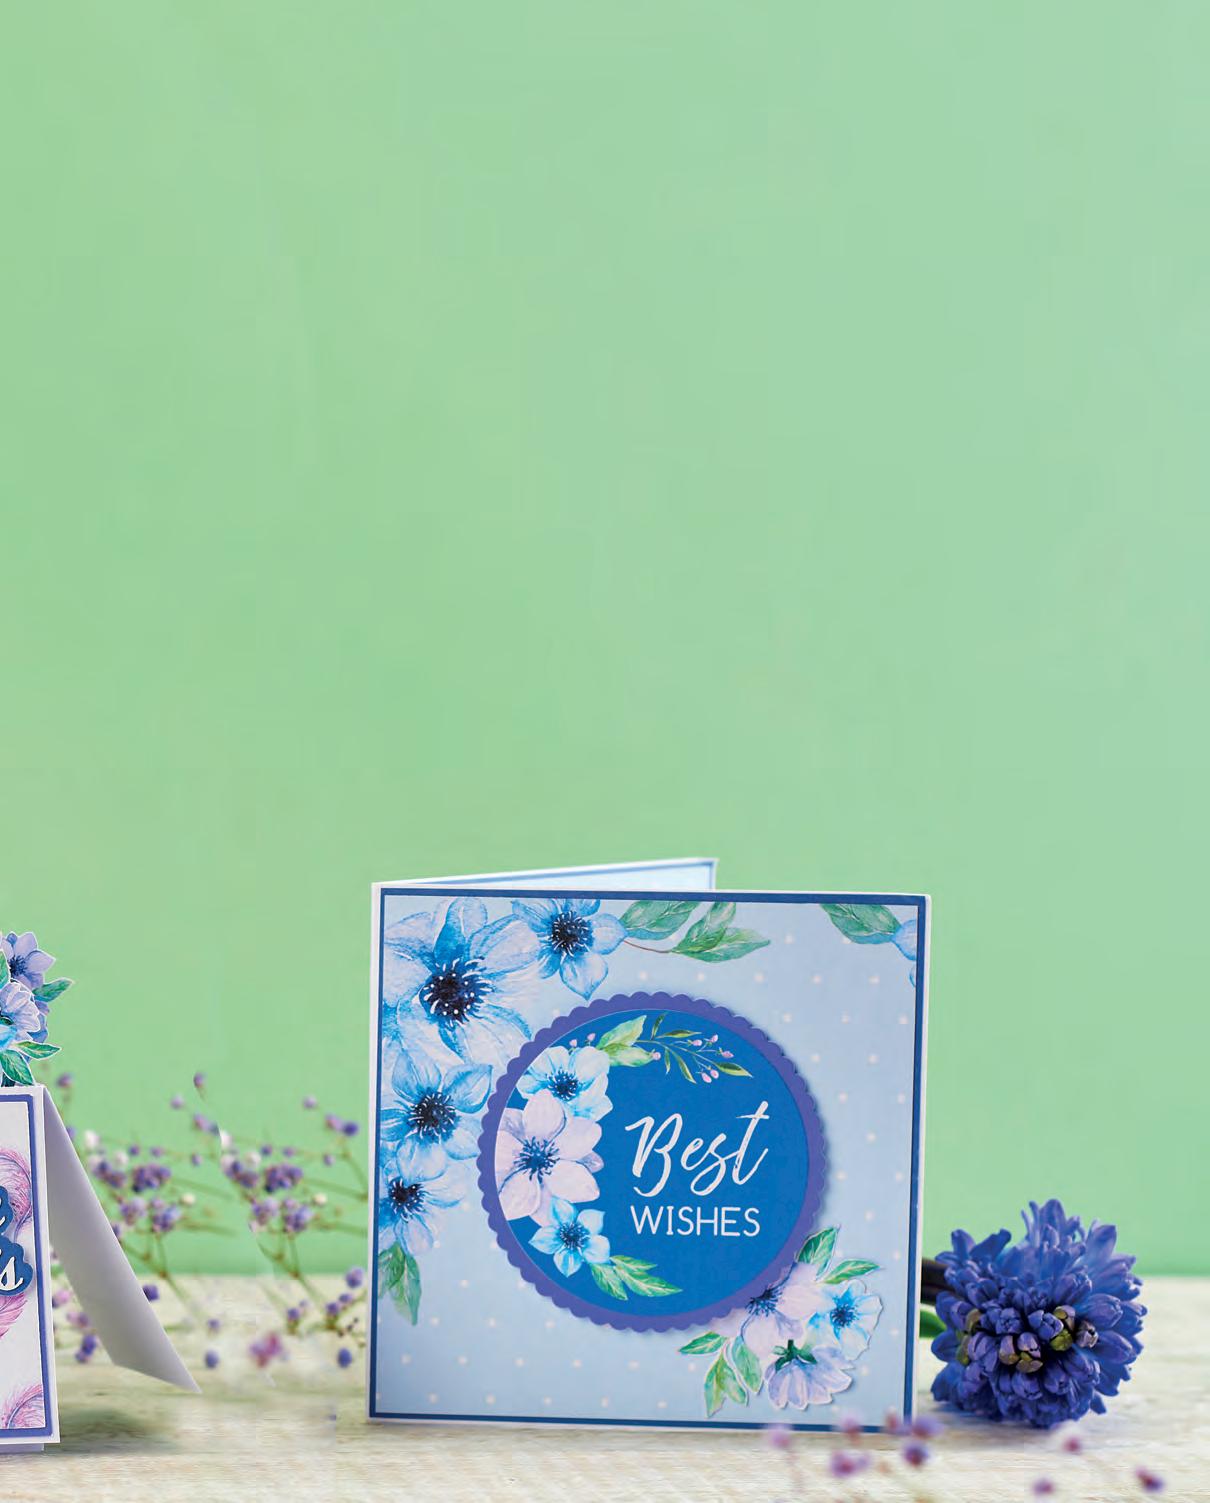
We Papercrafting 13 Ring the changes “Switch the colours of the card you use depending on the seasons” SARAH JACKMAN READ, DESIGNER Download the templates from the Members Area at createandcraft.com Scan the QR code using the camera on your smartphone or tablet to shop at createandcraft.com Find paper & card stock
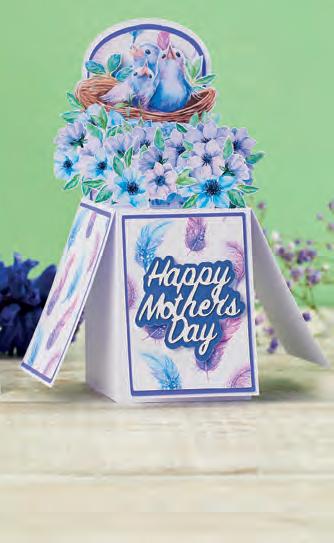
Craft a pop-up floral

Mother’s Day Card
Delight your mum or loved one with a gorgeous greeting card that has a fun interactive surprise!

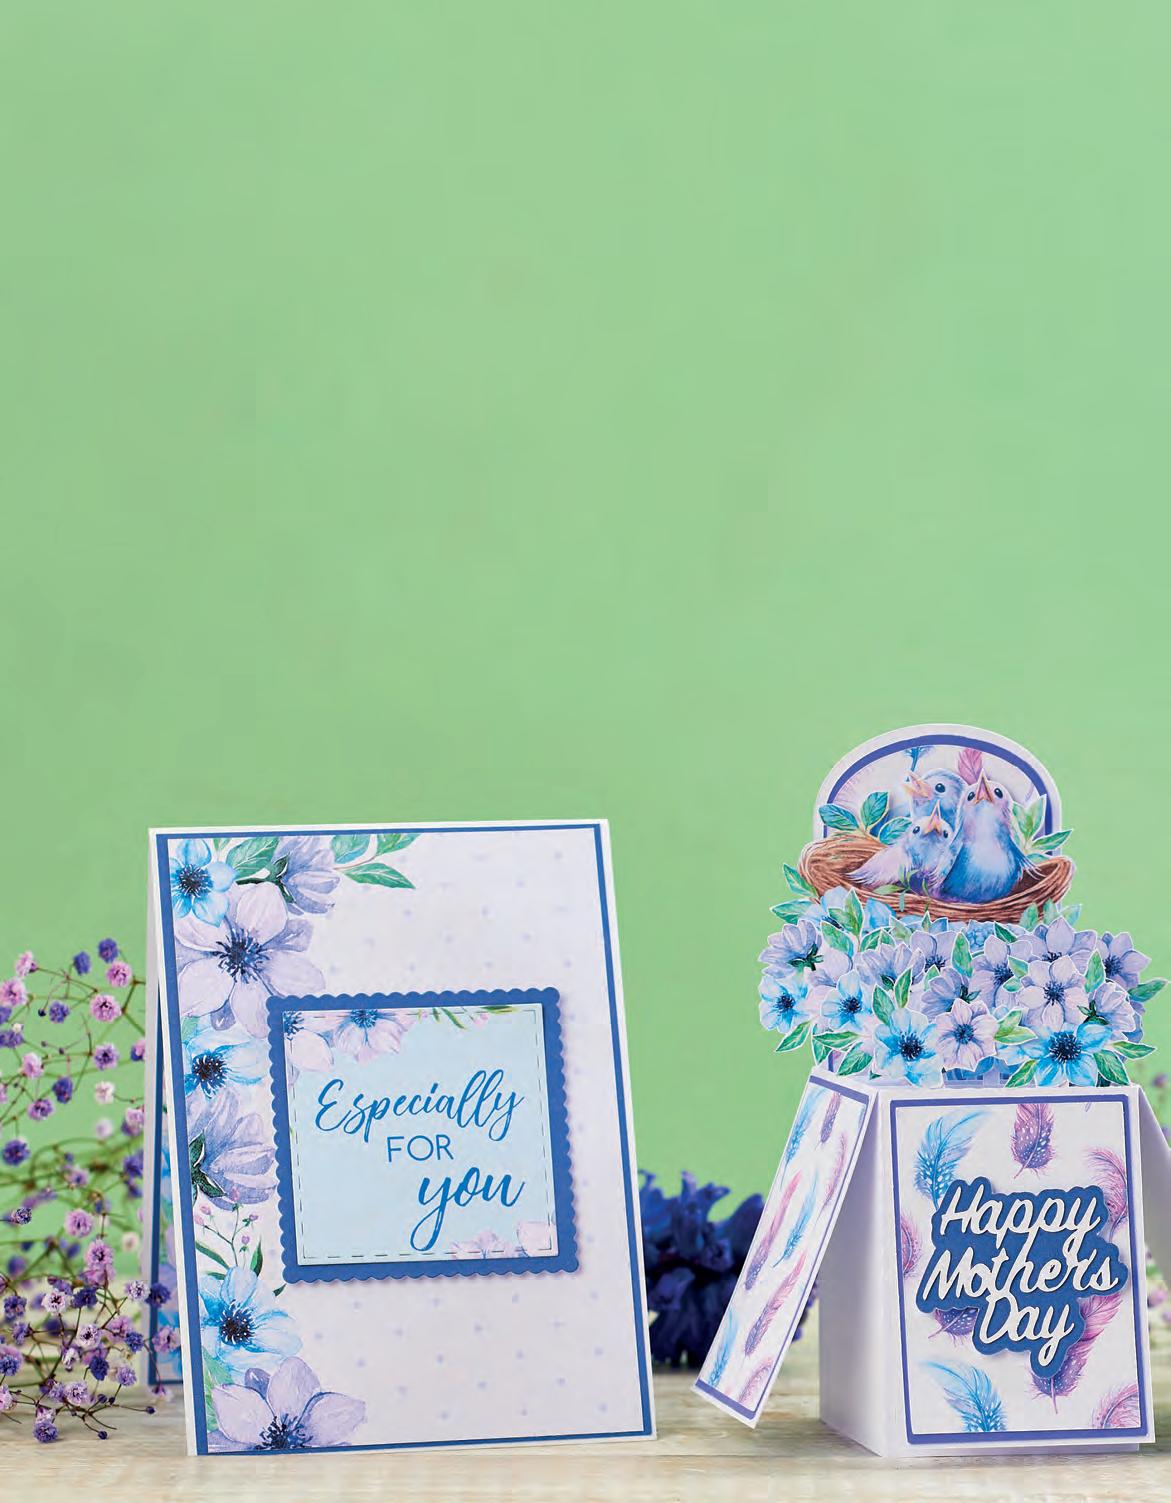
Who doesn’t love a pop-up card? Here are three fabulous kinetic creations to try – a 'twist and pop' design, an 'exploding box' and a


14 We Papercrafting
Find these instructions in the Members Area at createandcraft.com
pop-out – all fold flat for posting. The beauty of learning pop-up techniques is that you can use them to make cards for many occasions.
hexagonal
Helping Hand Kit List

◆ The Paper Pantry: Cutting Files with Papers USB Vol 4 (to purchase this head to createandcraft.com and type in product code 314370); USB Paper Collection Vol 9 (286996)
◆ The Paper Boutique Essential Nesting Dies Vol 1 Collection
◆ World Of Paper: Snow Leopard White Card 12" x 12" 250gsm 25 Sheets (321588);
◆ World of Paper Box of 250 A4 Sheets of White Card 250gsm, for printing the designs
◆ Card blank, white: 6" x 6"; 5" x 7"
◆ Die cutting machine
◆ Printer
◆ Scoreboard
◆ Paper trimmer
◆ Scissors
◆ Adhesives: glue, tape runner, red liner tape, foam pads
Mother's Day
1 Using Cutting Files Vol 4, cut out all of the elements for the pop-up box project using the die cutting machine.
2 Fold all the vertical and horizontal score lines on the pop-up box base and the support tabs [1]. Add adhesive to the tabs and glue the elements in place [2]. Note, there is an instruction sheet on the USB to construct the pop-up box if you need extra help. We have only used three supports in our pop-up box.
3 Print the desired designs on 250gsm paper from the Sweet Tweets Collection on The Paper Pantry – USB Paper Collection Vol 9 (we printed: one feathers decorative paper, one solid dark purple, a topper sheet with large image of birds in a nest, and one floral decorative paper, which was resized to fit the whole of the printing page so the flowers were enlarged).
Versatile greetings
◆ When fussy cutting, try to keep your scissors still and move the card instead, this will make cutting easier
◆ Check the printer settings that you are printing on best quality; this will give a better finish to printed papers
◆ Always read all instructions before starting a project, so you know exactly what to expect
4 Use the solid purple paper to die cut the Box Base Matts Layers. Then resize the Box Base Matts Layers images to 90%, now die cut these from the feathers decorative papers. Also die cut the sentiment Happy Mother’s Day from the Cutting Files USB. This will create all the matts and layers to decorate the pop-up box. Fussy cut the birds in nest and flowers in vase from one of the topper or embellishment sheets, and several flowers from the enlarged floral decorative paper [3]. Adhere all the matts and layers to the pop-up box [4]
5 Start to adhere white card strips to the back of the fussy cut flowers, then use them to adhere them to the supports in the pop-up box. Position the large image of the birds on foam pads on the back panel of the pop-up box. Adhere the Happy Mother’s Day sentiment on the front of the box with foam pads.

We Papercrafting 15
“Switch the sentiments and these cards could easily be given for birthdays, thank-yous, or other celebrations”
KELLY ANNE JORDAN, DESIGNER
Find these instructions in the Members Area at createandcraft.com
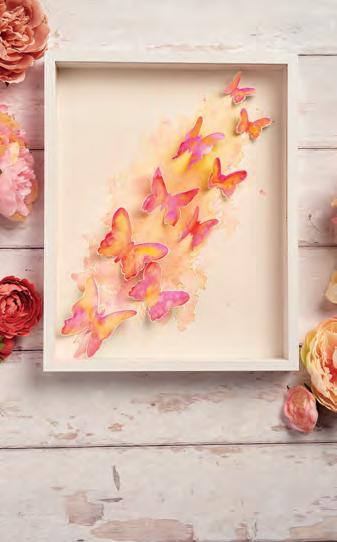
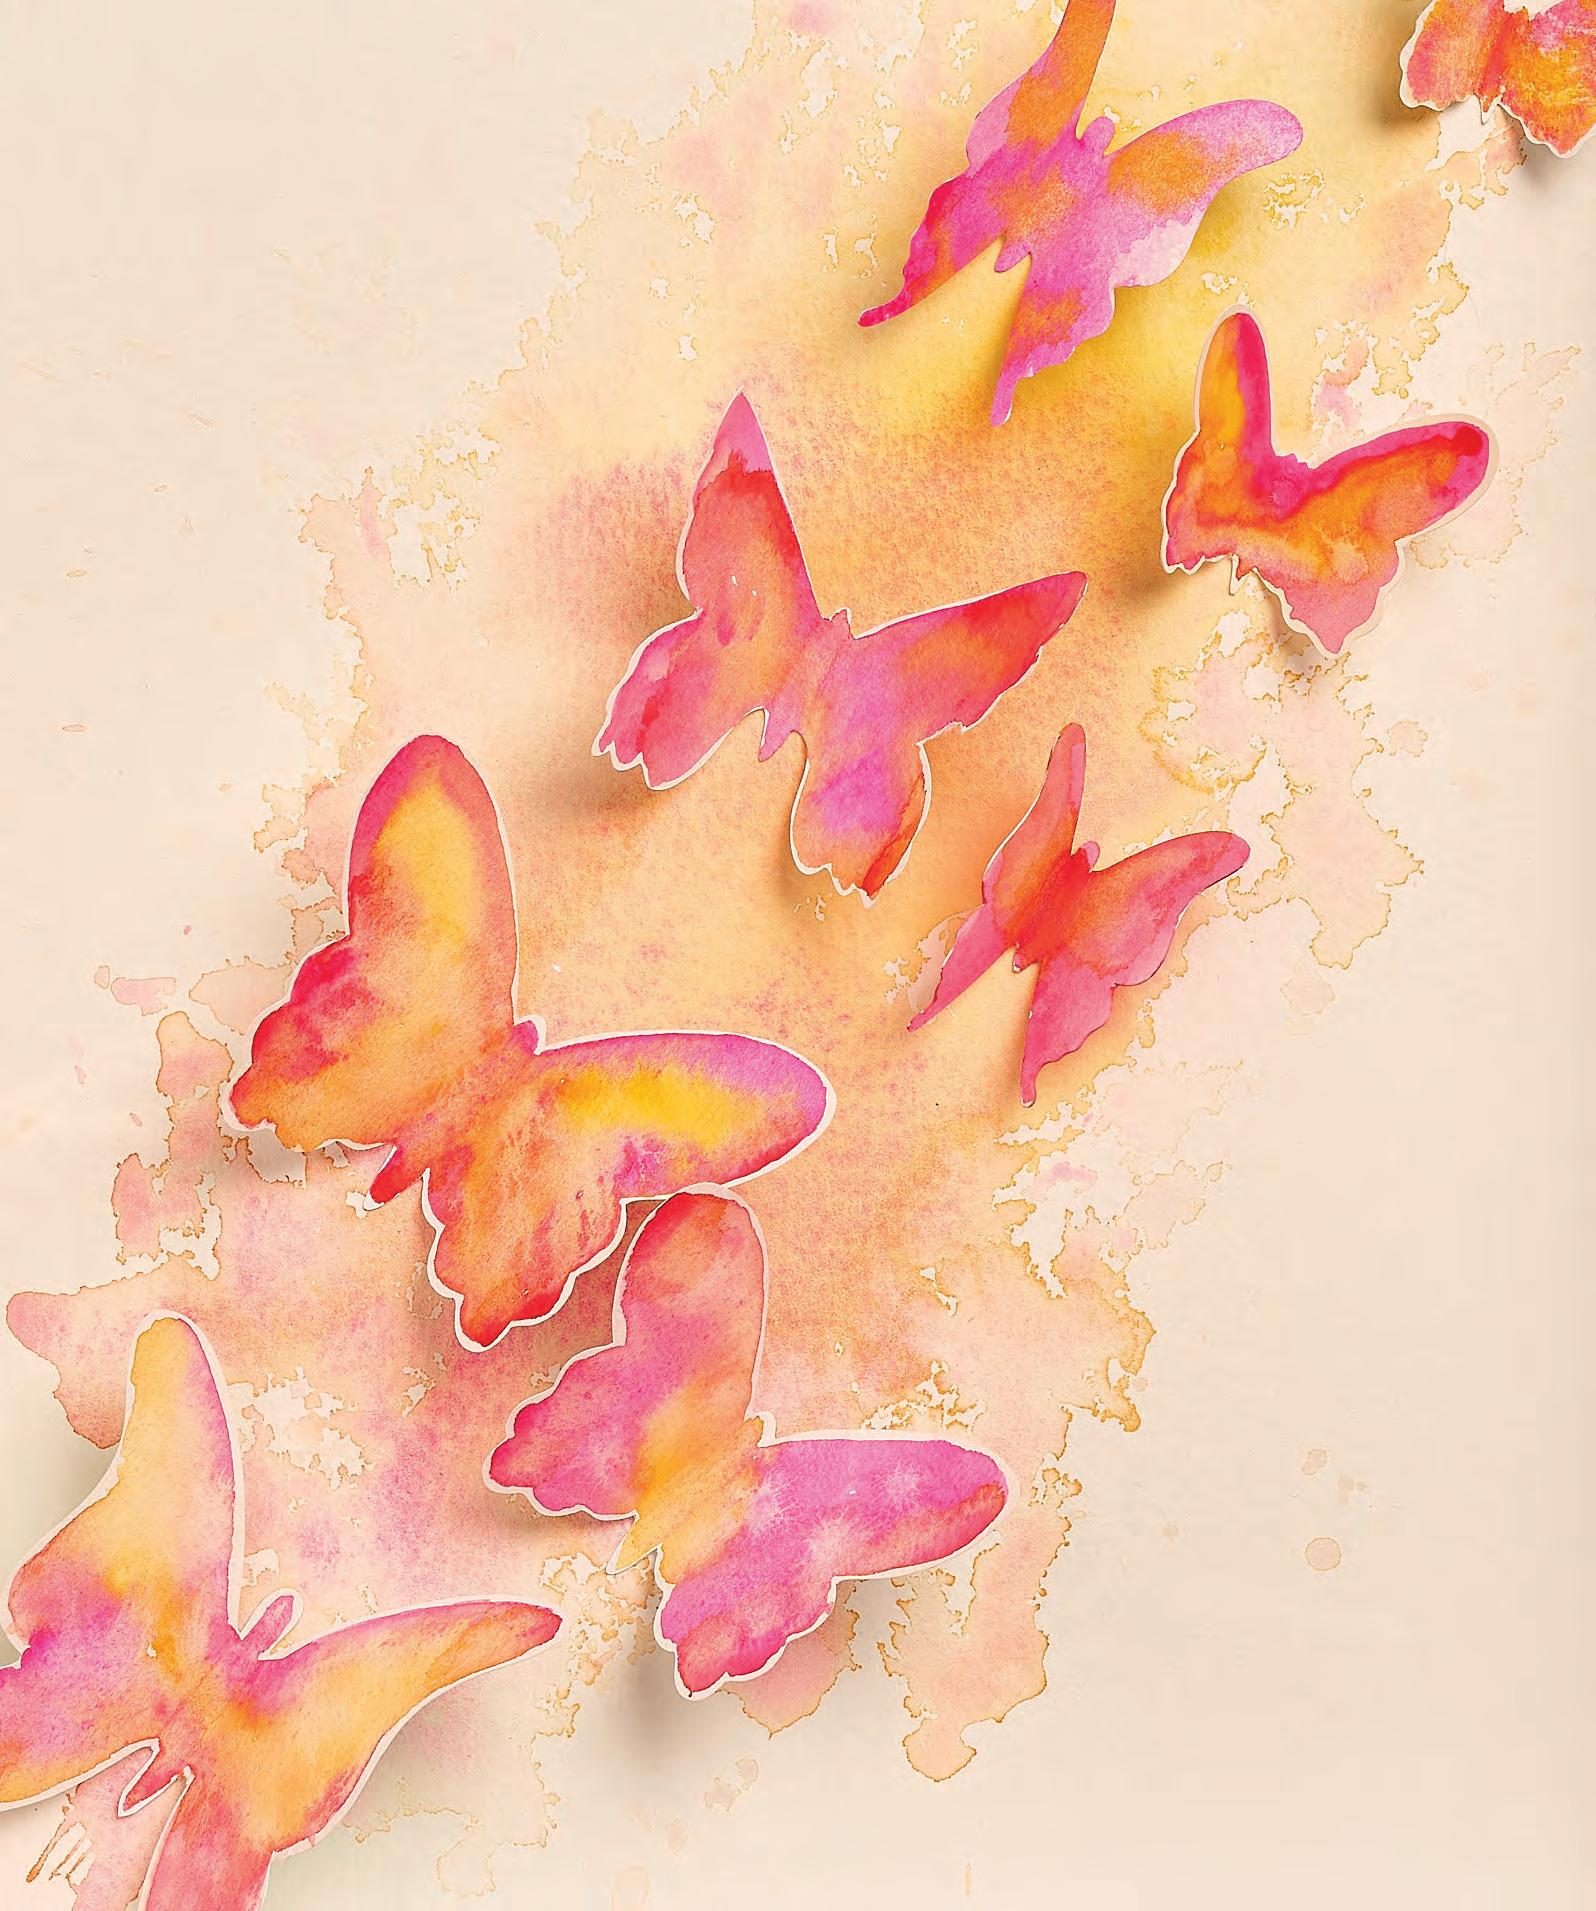
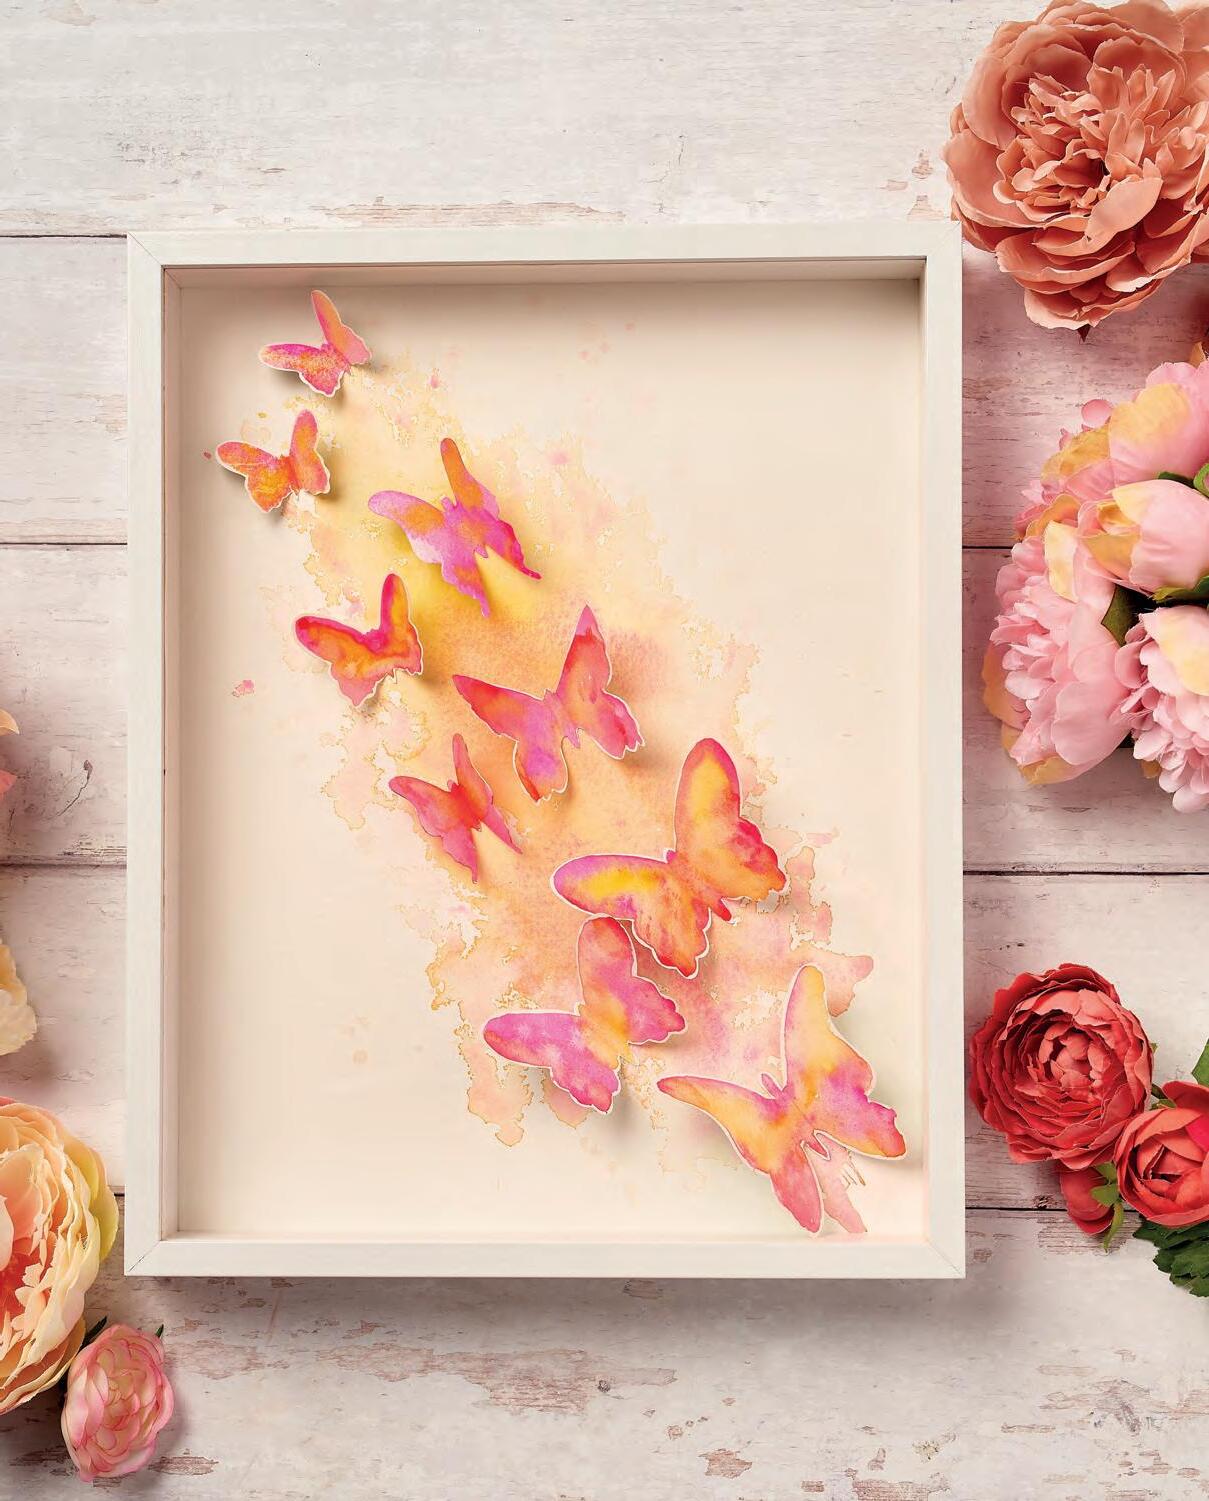
Try your hand at 3D Watercolour Art
You’ll be amazed at how easy it is to create this butterfly box frame
Kathryn Coyle shows you how to use watercolour to create unique and stylish wall art with 3D shapes and colours to match your room.
Kit List
◆ Watercolour paint, in three complementary colours of your choosing
◆ Water spray
◆ Paintbrush
◆ Watercolour paper or card, thick and thinner
◆ Craft glue
◆ Cricut machine and butterfly die or sharp scissors
◆ Box frame
3D wall art
1 Spray water onto thick watercolour paper or card. Drop some of the lightest colour into the water and swirl it around the page with the brush. Drop in the second colour and create a marble effect, lift the paper and


move it around so the paint mixes on the page. Spray water over the paint and flick out the edges; this will be the base artwork.
2 Using thinner watercolour paper, create the same marbling technique over the whole page using the same colours and some slightly darker ones for contrast. Allow to dry thoroughly, you can speed up the process with a hairdryer or craft heat gun.
3 Once dry, cut out a variety of butterfly sizes using either sharp scissors and a template or a Cricut machine.
4 Fold the butterflies into 3D shapes and glue onto your base background, with the larger ones towards the foreground.

5 Mount the sheet onto a canvas or in a 3D shadow box frame then display with pride!
Helping Hand
◆ If you have a butterfly die you can speed up the process with a die cutting machine
◆ Why not spatter the butterflies with gold paint for a touch of metallic shimmer?
◆ You could try using a textured watercolour card for the base piece for added depth
◆ Adhere the butterflies along the body sections only, so the wings lift up for a 3D effect
16 We Papercrafting
Simply stunning
“Create a beautiful wall art for a nursery or children's room using these beginner-friendly techniques”
KATHRYN COYLE, DESIGNER
We Papercrafting 17 Scan the QR code using the camera on your smartphone or tablet to shop at createandcraft.com Find watercolour supplies
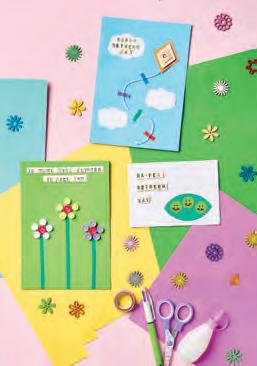
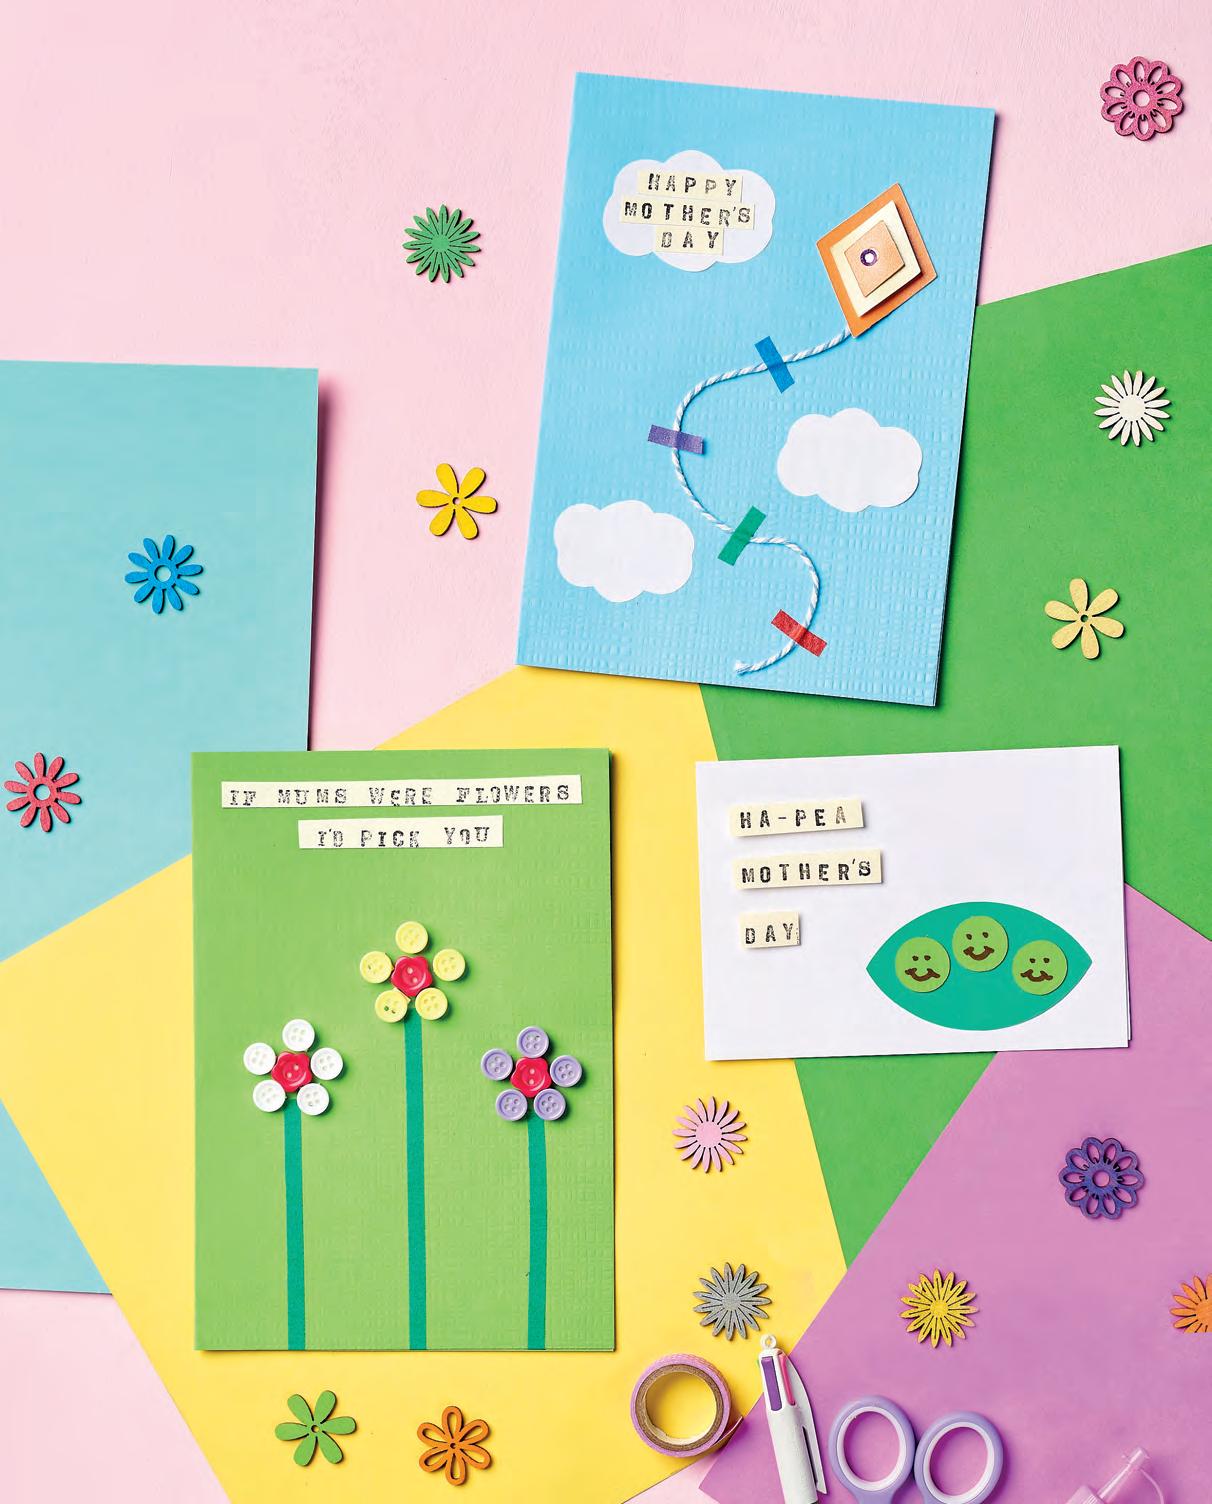
Mother’s Day Cards
Children can whip up these cheerful cards as easy as 1,2,3!
These cards are great as a quick last-minute make to create with the kids and the sentiments can be changed for any occasion. Plus, you’ll only need a few crafty staples from your stash so you shouldn’t have to buy anything you don’t already own.
If mums were flowers
Kit List
◆ Card stock: light green, cream
◆ Buttons
◆ Alphabet stamps
◆ Ink pad, black
◆ Adhesive foam pads
◆ Washi tape
◆ Glue
◆ Scissors
1 Take the cream card and stamp out If mums were flowers I’d pick you with the black ink and set aside to dry.

2 Fold the light green card in half. Add three lengths of washi tape to the card, trimming at the bottom.
3 At the top of each length of washi tape, fix six buttons with the sticky foam pads in a flower shape. Fix the sentiment to the top of the card with glue.
Kite Kit List
◆ Card stock: light blue, white, orange pearlescent, yellow pearlescent, cream
◆ Alphabet stamps
◆ Ink pad, black
◆ Adhesive foam pads
◆ Adhesive gem
◆ Washi tape
◆ Coloured twine
◆ Glue
◆ Scissors
◆ Pencil
1 Take the cream card and stamp out Happy Mother’s Day in black ink. Set aside to dry.
2 Cut out three clouds from the white card. Cut a kite shape three times, each time making the shape 0.5cm smaller. Use the orange card for the biggest and smallest shape and the yellow for the middle size. Using the adhesive foam pads, layer the kite shapes. Add an embellishment in the centre of the smallest kite shape. Stick a length of twine to the back of the kite.
3 Fold the light blue card in half. Glue the kite and clouds to the card base, arranged as shown in the photo. Adhere the sentiment to one of the clouds with glue. Attach the twine to the card base using different coloured strips of washi tape, winding it around to fit between the other elements. The washi tape strips can be trimmed into bow shapes first if you prefer.
Ha-pea Mother’s Day
Kit List
◆ Card blank, white
◆ Card stock: light green, dark green, cream
◆ Alphabet stamps
◆ Ink pad, black
◆ Adhesive foam pads
◆ Marker pen
◆ Glue
◆ Scissors
◆ Pencil
1 Take the cream card and stamp out Ha-pea Mother’s Day with the black ink.
2 Using the dark green card, cut out a pod shape. Using the light green card, cut out three pea shapes. Add two eyes and a smile on each of the peas with the marker pen.
3 Fold the card blank in half. Fix the pod and the peas to the card using glue. Fix the sentiment to the card using adhesive foam pads.
Mum Kit List

◆ Card blank, white
◆ Washi tape, grey
◆ Card stock: glitter, pearlescent
◆ Adhesive foam pads
◆ Pencil
◆ Scissors
◆ Ruler
1 Fold the card blank in half. Mark 2cm from the top and bottom of the card on each side.
2 Where you have marked the card, fix a line of the washi tape across the width and cut off.
3 Cut out two 'M's using the glitter card and a 'U' from the pearlescent card. Fix these in between the washi tape lines with the adhesive foam pads.
Mini makers
Helping Hand
◆ Make sure you help children with any small craft items
◆ You can mix up the design and materials that you use depending on what you have in your stash
◆ Instead of stamping the sentiment, you could print it or write it out free-hand
◆ Foam pads add depth to your cards but you can use glue if you don’t have any
18 We Papercrafting
Quick and easy
“These card ideas are great for getting your little crafters involved”
RACHEL NEWSOME, CREATE AND CRAFT’S IN-HOUSE DESIGNER
Craft today give tomorrow We Papercrafting 19
Go tag-tastic in your Spring Inspired
Die-cut your photos into tag shapes to create star quality layouts
Bring the 'wow' factor to your spring layouts with our innovative die cut tag ideas – use them to highlight photos, add eye-catching design elements and to create a standout title.
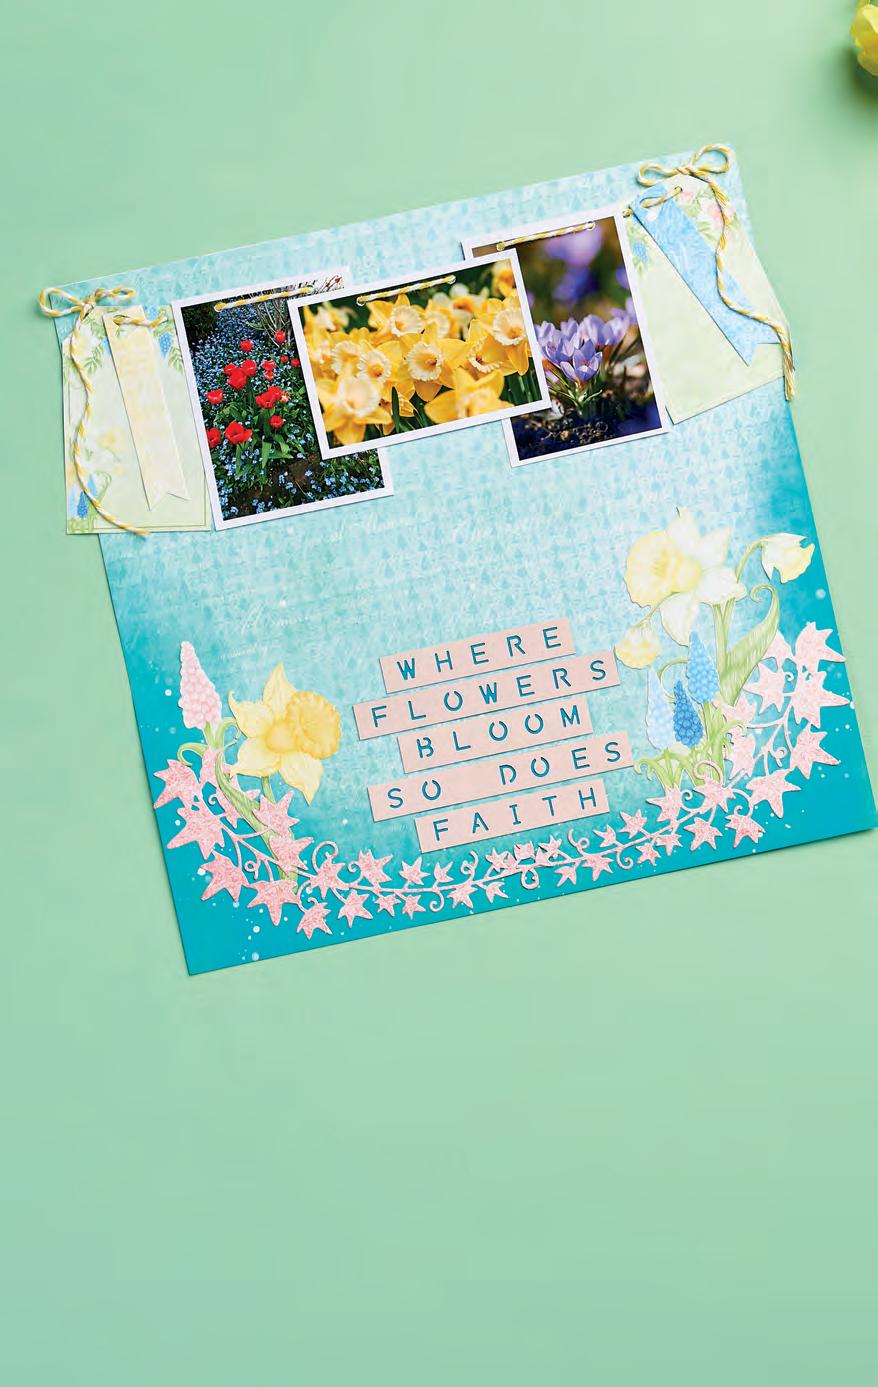
Flowers bloom
Kit List
◆ Heartfelt Creations Delightful Daffodil Collection Paper Pad
◆ Tonic Studios baker’s twine, yellow and white
◆ Card stock: pink, aqua
◆ Scissors
◆ Tim Holtz Distress Oxide ink pad, Peacock Feathers
◆ Blender brush
◆ Printer for photos
◆ Acrylic paint, white
◆ Paintbrush
◆ Dies: American Crafts Amy Tan Rise And Shine Scarlett die set (for banner); Tonic Studios Entwining Ivy die set
◆ Nuvo Deluxe adhesive
◆ Sizzix Bigshot die cutting machine
◆ We R Memory Keepers Word Punch Board
◆ Fiskars single hole punch
◆ Glass mat
◆ Paper guillotine
1 On a page of aqua paper from the pad, use a blender brush to blend the ink along the bottom and halfway up the sides.
2 Mix a little white acrylic paint with water on a glass mat then spatter it onto the page with a paintbrush.
3 Die cut two ivy trails from the pink paper in the pad and adhere them along the bottom of the layout in a curve using glue.
4 Fussy cut two daffodils and hyacinths in both pink and purple and glue them on either side of page at the bottom. Position the flowers so the bases are hidden under the ivy leaves.
5 Punch out Where flowers bloom so does faith from pink card then glue aqua card on the back of the strips. Adhere these strips in the middle of the layout at the bottom between the flowers.
6 Print out three photos sized 10cm x 7cm and leave a 5mm white border around them. Punch single holes in the vertical ones along the top at 2cm and 6cm and at 3cm and 7cm on the horizontal photos.
7 Fussy cut a couple of the tags from the pad and punch holes at 2cm and 4cm across the top. Die cut a banner from yellow and another from blue paper.
8 Thread the elements onto 40cm of yellow baker’s twine in this order: tag, banner, photos, banner and tag. Glue them across the top of the page. Make bows each end from the twine then glue the rest of the twine down the sides.
Make in an afternoon
Helping Hand
◆ Start off lightly when blending with ink and brushes and build up the colour as you go along, adding more ink if necessary
◆ Place the paper in an old box when creating the paint spatters to minimise mess!
◆ Fussy cutting elements from a paper pad gives you
quick and coordinating embellishments so you don’t need to think so hard!
◆ Distress ink is brighter than distress oxide ink so use it when you want to brighten a page
◆ Use a contrasting paper to frame the layout for extra impact
20 We Papercrafting
Inspired Scrapbooking
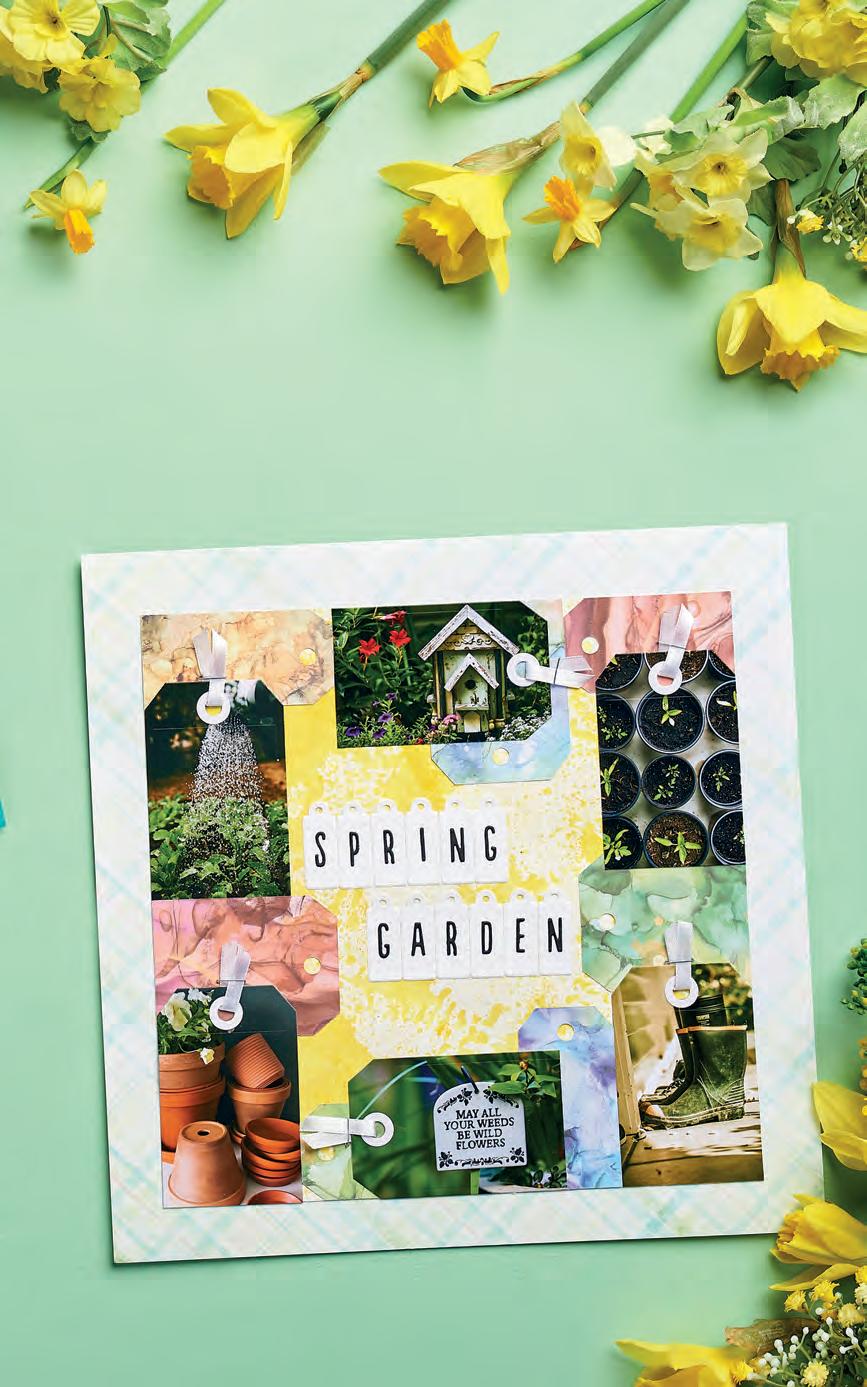
Spring garden Kit List
◆ Katy Sue Designs 8” x 8” Inky Backgrounds papers
◆ Heartfelt Creations Delightful Daffodil Collection Paper Pad
◆ Dies: Sizzix Tim Holtz Tag Collection; First Edition Alphabet
◆ Card stock: black, white
◆ Tim Holtz Distress ink pad, Mustard Seed
◆ Tonic Studios water sprayer
◆ Nuvo Deluxe adhesive
Get in line
◆ Red liner tape
◆ Paper guillotine
◆ Printer for photos

◆ Sizzix Bigshot die cutting machine
◆ White ribbon
◆ Stapler
◆ Acetate sheet
◆ Scissors
1 Take a sheet of yellow paper from the paper pad and trim to 10” or 25.5cm square. On a sheet of acetate, dab the ink and spray with water. Dab the acetate onto the paper and keep adding layers until you are happy.
2 Choose six photos and print them to 10cm x 7cm then use the 9cm x 6cm tag die to cut out the photos. Die cut the ring tabs in white card and stick on the photos with a small amount of adhesive.
3 Cut six lengths of ribbon to 7cm and thread through the holes in the photo tags you created. Snip the ribbon tops at an angle with scissors then staple across the bottom to hold the ribbon in place.
4 Die cut seven more tags from the Inky Backgrounds paper – four of them 8cm x 4cm, and the remaining three 9cm x 6cm.
5 Arrange the tags and photos as shown on the layout and stick down with glue. Trim any tags sticking out on the side.
6 Die cut 12 tags sized 4cm x 1.5cm from white card and Spring Garden from black card using alphabet dies then glue the letters onto the tags. Stick the sentiment in the centre of the layout.
7 Take a plain sheet of paper from the paper pad and adhere the completed Spring Garden sheet centrally on to it with red liner tape.
We Papercrafting 21
“Using twine to hang photos on a layout is a novel way to add a 3D element while showcasing your snaps”
SHABNEEZ KHAN-MUZTAR, DESIGNER
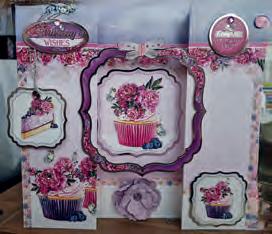
Spring Card Challenge
To celebrate the start of the season, editor Sophie takes on the crafty might of one of our readers Andrea, to create a cheery greeting bursting with the joys of spring
The challenge
Craft a showstopping springtime card using Dawn Bibby’s A Spring Dream card kit
Sophie Thornton, Editor

Made for: My mum, she loves any excuse for a card and I think she’ll be won over by the floral prints of this kit.
About this make: I really love this vibrant paper kit with its pretty patterns and gorgeous colour palette – there are just so many possible options that can be made using it. With animals like lambs, rabbits and chicks plus flowers and fruit like daisies, poppies, apples and strawberries, this paper pack simply sings spring! For this challenge, I decided to keep my card simple but colourful and layer up with mixed media. It was hard to choose which paper to go for but I liked the bright yellows and sunflowers and how nicely that contrasted against the purple. Thankfully, I had some flowers and ribbon in my stash to tie the whole thing together and it made for a very quick and easy make.
Andrea Jacobs, Craft Club Member

Made for: This card is definitely for my mum. She has kept all the cards that I have made over the years, and I have to say, we do chuckle over some of my first makes! About this make: Springtime is a lovely time of the year, and I was certainly spoilt for choice with the card kit because the designs are all so beautiful. The topper had such beautiful colours within, and I wanted to bring those out. Using silver mirri always makes things stand out, so I layered that behind the topper and the sentiment. I love adding flowers on my cards, so I die cut some sunflowers using plain card stock, then shaped and layered them. I did the same with the pink flowers and placed a gem in the middle of each with some foliage below. Then I added a few bug embellishments, along with some butterflies – they’re a must for a springtime card!
essentia
Top tip: Give a floral card dimension by picking out some flowers in 3D form.
Crafty motto: Being creative isn’t a hobby, it’s a way of life...
Top tip: Do the layout of your card first, before attaching it, that way you can have a play around to see what looks best, before you commit yourself.
Crafty motto: Always enjoy your crafting – never get stressed if anything goes wrong. Some of the best projects are the result of that outcome!
Your chance to win!
You decide!
Last issue, we challenged presenters Kathryn Sturrock and Nigel May to create a card using the Pollyanna Pickering paper pad. A huge thanks to everyone who voted for their favourite, but Nigel pipped Kathryn to the winning post by just 10 votes with his stunning owl creation – hoot hoot hooray Nigel! All votes were entered into the prize draw, and we’re pleased to announce that the winner of £50 to spend at Create and Craft is Francine Morgans. We also gave one lucky winner the chance to win the paper pack and so, Janette Rowe, your kit is on its way to you!
Vote for your favourite card for your chance to win £50 to spend at createandcraft.com. One runner-up will win a Dawn Bibby Designs A Spring Dream Paper Kit with 48 A4 sheets (750635). To be entered into the prize draw, visit the Members Area at createandcraft.com and cast your vote for this issue’s challenge by 14th April 2023 at 11.59pm. The winners will be selected at random. *T&Cs apply.

22 We Papercrafting
* For T&Cs visit our website at createandcraft.com
~
Sophie’s Florals for Spring
Kit List
◆ Dawn Bibby Designs A Spring Dream Paper Kit (750635)
◆ Card stock: textured purple
◆ Tonic Studios Craft
Tacky Glue
◆ 3D glue dots
◆ Pink ribbon
◆ Craft flowers
◆ 3D foam adhesive pads
◆ Paper guillotine
1 Take one of the patterned background card pieces and fold in half to create a gatefold card. To make a neat square shape, I used a paper guillotine.
2 Cut the purple card into a square then adhere to the background design.
3 Take one of the Springtime Fun toppers, fussy cut out the design and adhere onto the purple card.
4 Take another of the Springtime Fun toppers and fussy cut part of the floral design – I used the sunflower and poppy section from the bottom right.
5 Attach four adhesive foam pads to the back of the fussy cut floral topper. Place it over the corresponding floral section on the Springtime Fun square to create a 3D effect.
6 Finally, attach the craft flowers and ribbons to the card in each corner using glue dots – and you’re all done!
Andrea’s In Full Bloom Kit List
◆ Dawn Bibby Designs A Spring Dream Paper Kit (750635)


◆ Card stock: pink, silver mirri, white embossed
◆ 8" x 8" white card blank
◆ Dies: Dawn Bibby Winter Florals Camellia set; Tattered Lace Priceless Label Foundation Nesting Dies
◆ Scissors
◆ Ball tool and foam mat
◆ Adhesives: tacky glue, glue gel, foam pads, red liner tape
◆ Embellishments: adhesive gems, ribbon, ladybirds, bumblebees
1 Take an 8" x 8" white card blank (my favourite size to work on) and choose a topper from the Paper Pack. Choose complementary coloured card stock for the matts and layers – I used silver mirri, pink and white embossed.
2 Die cut the topper, layering it with silver mirri. Cut three 7” strips in
Sophie says...
Wow! this certainly puts me to shame. I love all the 3D elements and mixed media. It’s a really lovely composition.
Andrea says...
What a beautiful vibrant card! I love how the purple mount makes the card pop, and also the pink ribbon bow and flower embellishments.
white embossed, silver mirri and pink card to matt and layer behind a length of ribbon. Die cut borders in silver mirri and place at the top and bottom of the strip then adhere across the middle of the card with the topper on top.
3 Fussy cut the sunflower and bow from the paper kit and découpage them onto the topper using foam pads – I also added some ribbon to the bow, to make it stand out more.
4 Die cut flowers and foliage, shape them with a ball tool and position them to the top right of the card using glue gel.
5 Die cut a sentiment using the same nesting die as the main topper, and layer onto silver mirri to match with the main topper.
6 For the finishing touches, die cut some butterflies from contrasting colours, layer up, adding some gemstones through the body of the butterflies, and place at the top right and bottom left of card. Add a few ladybird and bumblebee embellishments, and finally add an insert inside the card.
We Papercrafting 23
pitting your creative talents against our team?
love to see if you’ve got what it takes! Send an email to editor@hochanda.com for your chance to be featured in our Card Challenge Join in the fun! The verdict ~
Fancy
We’d
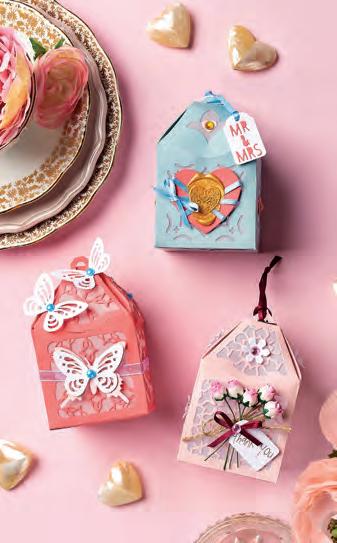
FavourWeddingBoxes
Add a personal touch to the big day with beautiful gift boxes for your guests
With just one clever die set, you can make as many boxes as you like in the colour scheme of your choice. These dinky containers are really pretty on their own but are perfect for adding your own ribbons, tags and embellishments to them.
Kit List
◆ Simply Made Crafts Oasis Adventure Arabian Nights Lantern Gift Box Die Set – 10 Dies (to purchase this head to createandcraft.com and type in product code 536615)
◆ Card: white; coloured
◆ Plain vellum
◆ Heart wax seal and gold sealing wax

◆ Ribbon: burgundy thin; blue organza; blue thin; jute twine
◆ Punch: heart, butterfly, tag
◆ Small alphabet dies
◆ Adhesive: gems; pearls
◆ Paper flowers
◆ Small sentiment stamp
◆ Ink pad, brown
◆ Acrylic stamping block
◆ Die cutting machine
◆ Glue
◆ Scissors
◆ Scoring tool and board
◆ Paper creaser
◆ Adhesive foam pads

◆ Craft tape
◆ Paper trimmer
Teal box
1 Die cut the main body of the box in teal card then remove from the die. Place your chosen top and side dies in position then hold in place with craft tape. Die cut then repeat on the other three sides and tops [1]


2 Lay the box face-down. Trim vellum to cover the sides then then adhere in place [2]. Trim pieces to cover the shapes in the tops then adhere in place.
3
With the box still face-down, valley-fold the side and base score lines then flatten with a paper creaser [3]. Turn over then valley-fold and flatten the score lines across the top.
4 Adhere the sides together then adhere the base to create the basic box shape [4] Tuck the ‘V’ shapes into the top of the box then hold the two pieces together that have the hole in them. Slide the pieces with the slits over the top to close the box.
5 Die cut or punch a heart in pink card then wrap thin blue ribbon across it three times. Melt some gold sealing wax, drip in the centre of the heart then stamp a heart seal on top [5]

6 Attach the heart to the front of the box with foam pads. Punch out smaller hearts in pink card then adhere to the other sides and the tops [6]. Add gold adhesive gems to each heart. Die cut small letters in pink card to spell Mr & Mrs then adhere to a small die cut tag. Thread with thin blue ribbon, thread through the hole in the top then tie in a knot.
Pale pink box
1 Follow Steps 1-4 from the teal box but use pale pink card.
2 Tie up five small paper flowers with a length of thin jute then tie in a bow. Adhere to the front of the box with the bow at the back. Die cut or punch a small tag in white card then stamp a small sentiment at an angle on top.
3 Attach the tag at an angle to the front of the box. Make

a small bow from burgundy ribbon then adhere to the top of the tag with a pink adhesive gem. Thread burgundy ribbon through the hole in the top.
4 Die cut the side die seven times in white card, remove the flowers then glue to the centre of the sides and tops. Lift up the petals with your fingers then add pink gems in the centres.
Dark pink box
1 Follow Steps 1-4 from the teal box but use dark pink card.
2 Wrap organza ribbon around the centre of the box. Die cut or punch a butterfly in pale pink card then attach to the front with foam pads. Punch out a butterfly in white card then attach on top.
3 Punch out two more butterflies in white card then attach to the top. Add blue pearls to the centre of each butterfly and the side panels.
24 We Papercrafting Die cut and decorate
Helping Hand
◆ Flattening the score lines with a paper creaser ensures the boxes fold properly and gives you a neat, professional finish
◆ Use an empty tealight case to melt sealing wax in. Create a pouring lip on it then hold on to the case with a bulldog clip before gently melting the wax using a lighter held below

◆ If you have a lot of boxes to make, die cut them all first so the messy bit is out of the way!
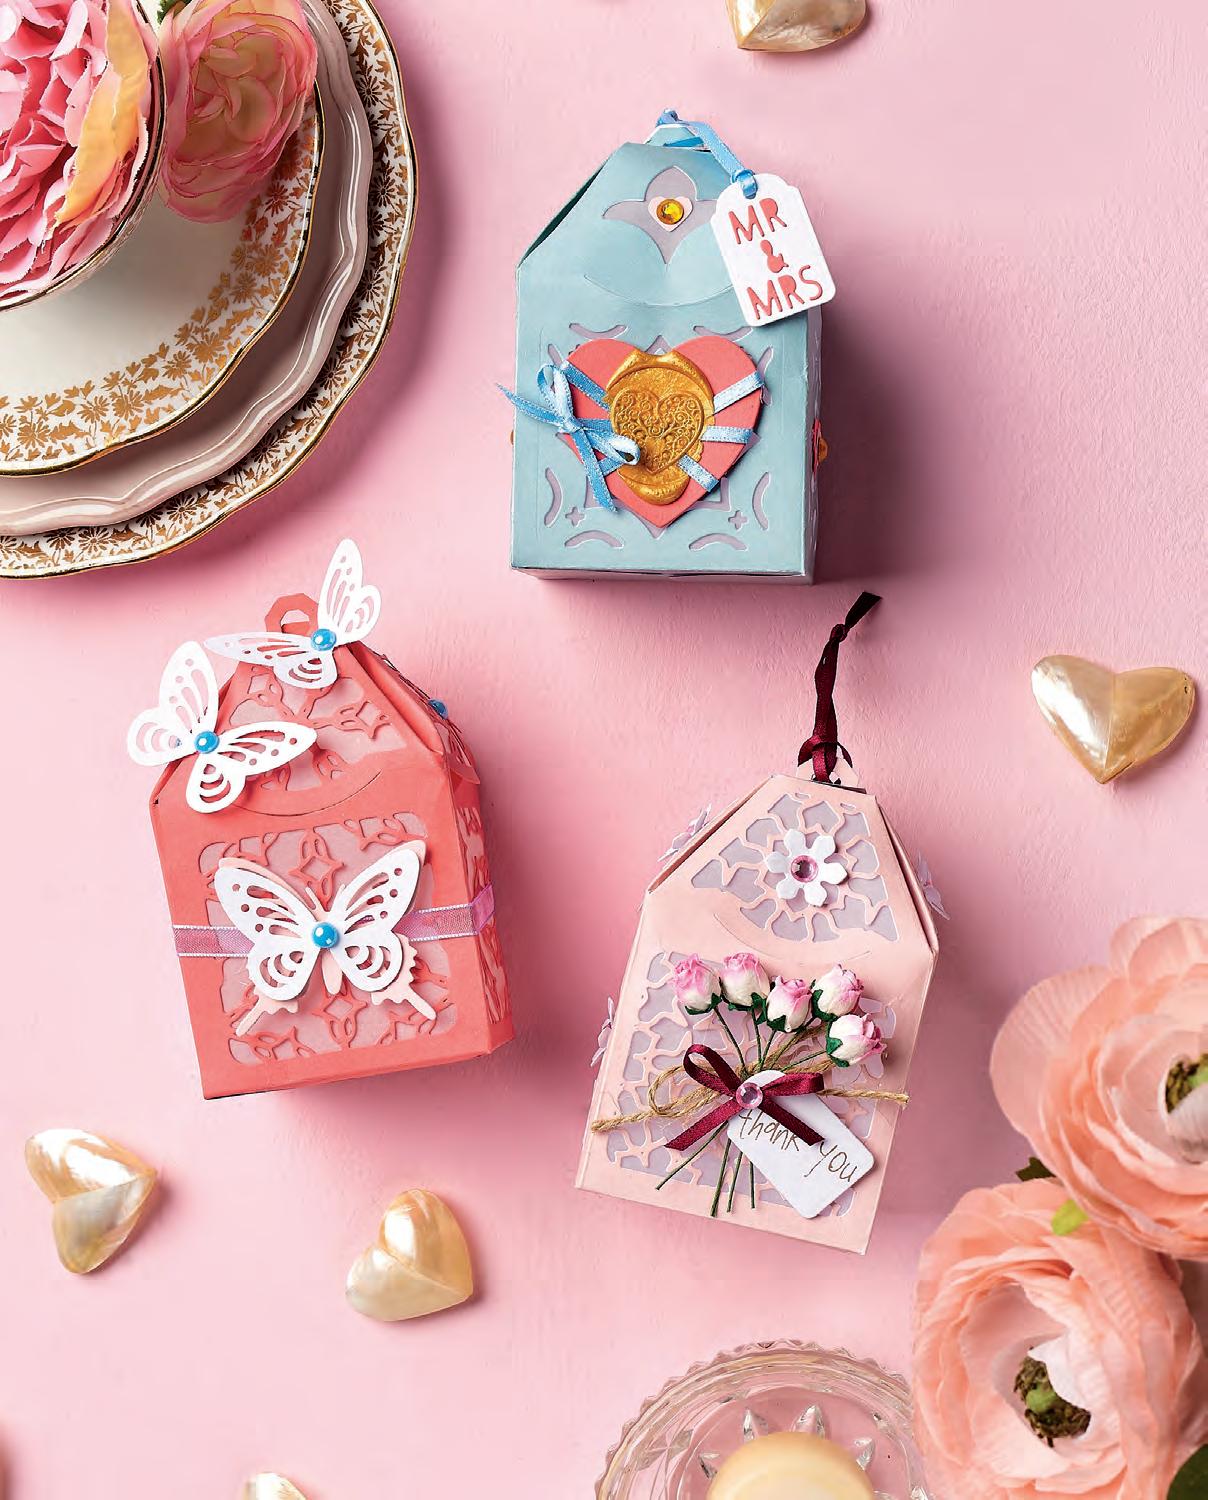
Inner workings
“You could omit the vellum so guests will get a glimpse of what goodies are inside the box”
We Papercrafting 25
SARAH JACKMAN READ
Whip up a six-step Spring Wreath
Welcome in the new season with this blooming lovely design that’s sure to brighten any room
With flowers made from crêpe paper in dreamy pastel shades, this sweet project is perfect for an afternoon's crafting. The different sizes of petals and the high elasticity of crêpe paper enable you to create realistic flowers with great dimension.

Kit List
◆ Sizzix Thinlits Spring Bloom die set By Jennifer Ogborn (to purchase this head to createandcraft.com and type in product code 459449)
◆ Sizzix Fold & Form tool (639070)
◆ Sizzix glue gun (586714)
◆ Sizzix crêpe paper

◆ Polystyrene wreath form, 10"
◆ Twine
◆ Burlap ribbon, cream

◆ Large wooden beads
Spring wreath
1 Cover the polystyrene wreath with burlap ribbon, using hot glue to secure it at the back as you wind. Tie a piece of twine around the top of the wreath so it can be hung [1]

Elegant palette
2
Die cut the various petal shapes from your chosen colours of crêpe paper. We used 10-12 large petals, 8-10 medium petals, 6-8 small petals and 1-2 flower bases to create leaves [2]
3
Use a scrap of crêpe paper and a glue gun to cover a bead. We used crêpe paper the same colour as the petals for these flower centres, but you could use yellow instead.
4

Stretch and shape the petals with your fingers and the Fold & Form tool. We curved the inner petals around the bead, then the larger outer petals were curved
outwards [3]. Once all the petals are shaped, start adhering the smallest to the bottom of the bead with the glue gun, continuing through the petal
sizes to create a full flower shape.

5 Repeat to make eight flowers, then adhere the green bases to look like leaves – snip them in half as only part will show.
6 Place the flowers around the wreath to check the spacing before attaching with hot glue so you don’t end up with a gap that’s too small to fit a flower in [4].
26 We Papercrafting
“Stick to three flower colours to prevent the project looking too busy”
SHARON CURTIS, DESIGNER
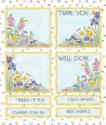
4 Cards 1 Paper Pack
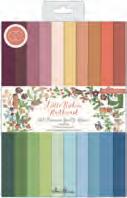
Get into the swing of Spring with this Little Robin Redbreast Paper Pad and four gorgeous design ideas by Craft Consortium!


We Papercrafting 27 CUTOUTANDCRAFT Turn over for step-by-steps
Lever card
Kit List
◆ Craft Consortium Little Robin Redbreast: Paper Pad A4; 12" x 12" pad; Rub-On Transfers
◆ Craft UK 6" x 6" card blank
◆ Oval scallop nesting dies, stitched ◆ Adhesive ◆ Card Making Magic Perfect Panels and Lovely Layers Collection Beautiful Verses stamp set
1 Cut a piece of green card to 5 ¾" x 5 3/4" and adhere to the front of the card blank.
2 Cut a piece of the Daisy paper to 5 ½" x 5 ½" and adhere to the green layer.
3 Die cut two green and two white ovals using consecutive nesting dies. Stamp two different greetings on the white ovals,
4 ways with your paper pack...
Create beautifully coordinated cards with this Paper Pack by Little Robin Redbreast featuring pretty pastel shades.


finally affix the white ovals onto their respective green oval.
4 Cut a piece of green card to 1 3/8" x 8 ¼”, score at 3 ¾”.
5 Adhere one sentiment to the centre of the card. Position the strip from Step 4 inside the card with the shorter end overlapping the card front.
6 Use the sentiment already in place to position the remaining greeting. It should match exactly.
7 Apply adhesive to the bottom of the overhanging strip from Step 5 to secure the sentiment; be careful not to stick it to the sentiment below. Next add glue to the longest part of the green strip and attach it to the inside of the card.
8 Adhere white card cut to the same size of the base to conceal the green strip. Decorate the card with the transfers.
to the 3" mark. Then cut from the 1 ¼" mark to the opposite corner. Discard the scraps from the middle.
5 The triangle is attached bottom left. Adhere green to white, with the white piece slightly in front to create a small border.
6 Repeat Step 5 for the remaining pieces, these adhere to the top right with the shortest side facing left.
7 Stamp a sentiment directly onto the front of the card.
Recessed panel card Kit List
◆ Craft Consortium Little Robin
Redbreast: Paper Pad A4; 12" x 12" pad; 6" x 6" pad ◆ Sentiment stamp ◆ Card stock: white
◆ Pencil, ruler and eraser
◆ Paper trimmer ◆ Adhesive
Embossed card
Kit List
◆ Craft Consortium: Little Robin Redbreast Paper Pad A4; Little Robin Redbreast Embossing Folder; Adhesive Pearls, Gold; Ink Drops Rose Paper Pad; Patina Paper Pad ◆ Clear embossing powder ◆ VersaFine ink, Onyx Black ◆ Adhesive ◆ Heat tool
◆ Craft UK 5" x 7" card blank
◆ Stamping platform ◆ Creative Stamps Wiry words stamp set
◆ Tsukineko VersaMagic Dew Drop Chalk Ink Pads ◆ Aladine Izink Dye Ink Pads, various colours ◆ Microfibre cloth
◆ Dies: mini carnation flower, foliage ◆ Ball tool and foam mat
1 Cut pale pink card to 5" x 7" and gently mist with water. The water should sit on top on
Square easel card
Kit List
the card but not saturate it.
2 Place the card into your stamp platform, hover the 3D embossing folder over the top and use it as a guide to position the sentiment. Stamp the sentiment in VersaFine ink.

3 Emboss the card using the 3D embossing folder, then heat set the sentiment with clear embossing powder. Clean the folder immediately.
4 With a light hand, swipe the coloured inks over the embossed areas to add splashes of colour. Use a microfibre cloth to remove ink from the sentiment.
5 Trim the excess non-embossed edges and mount onto the card blank with adhesive.
6Decorate with foliage and double-layered flowers die cut from Patina and Ink Drops Rose Paper Pads, shaped using a ball tool with pearls in the centre.
1
Create a 6" x 6" base and attach a piece of patterned paper to the front with glue.
2
Cut a 6 x 6” square from the A4 pad in pale mint and also from white card.
3 On the left side of the mint piece measure 3" and make a pencil mark. On the right-side measure and mark at 1" and 1 ¼".
4
Lay the green square exactly over the white and place in a trimmer. Cut from the 1" mark
8
To decorate, fussy cut the seed packets from the front cover of the 12" x 12" pad and arrange on the front of the card.
BUY NOW
This versatile pack contains 20 double-sided 200gsm acid– and lignin-free papers in plain colours.
Craft Consortium Little Robin Redbreast Paper Pad A4 (to purchase this head to createandcraft.com and type in product code 551959) Price £6.49
Club Member £5.19
SAVE 20%
◆ Craft Consortium Little Robin Redbreast: Paper Pad A4; 12" x 12" pad; 6" x 6" pad; Washi Tape ◆ Crafter’s Companion Centura Pearl Single Colour A4 card stock, Baby Pink ◆ Square nesting dies, stitched ◆ Craft Consortium Gardener’s Delight A4 Premium Cardstock Paper Pad ◆ Card stock: white
◆ Adhesives: 3D foam pads and glue ◆ Daisy Mae Garden Gnomes Stamp set (for sentiment) ◆ Score board and bone folder
1 Create a 6" x 6" card base out of the pearl card stock, score at 3". Cut a separate square the same size as the base from the same card stock and put aside.
2 Fold and burnish the score line. Lay the base flat and add glue to the lower part of the scored card to secure the extra square.
3 Cut two pieces of dusty pink card from the Gardener’s Delight pad to 5 ¼" square. Cut two pieces of pattern paper from Little Robin Redbreast 6" x 6" pad to 4 ¾", cut one piece of pale pink card from the Little Robin
Redbreast A4 pad to 4" and one topper from the 12" x 12" pad.
4 Attach the matts and layers to the card base.
5 Place a strip of the seed design tape onto white card and cut out four packets. Add foam pads to the back.
6 Stand the top section up and decide how far forward it should come. Arrange the washi ephemera on the base as a stopper.
7 Cut a piece of white card to 5 ½" x 2 1/2", stamp a sentiment and adhere to the centre panel inside the card.
28 We Papercrafting


Check out our spring savings Exclusively For You! We Goodies 29 Don’t miss your Member’s Gift Page 30 Add Nancy’s free printable downloads to your stash Page 34 Take a sneak peek at this just-launched deal Page 36 Awesome offers on spring papercrafting Page 38 Editor Sophie picks out her fave spring discounts Page 40 Save £££s on our star storage buys Page 32
Your Exclusive Member’s Gift!
Create stunning bouquets, table decorations and more with our Member’s Gift by Forever Flowerz this issue
Forever Flowerz are so simple to make and will brighten any room all year round! You can add extra colour to the flower heads with ink or paint, and even spray them with scent, plus they fit all of the Forever Flowerz accessories, such as wreaths, garlands and stems.
Flower stems
Kit List
◆ Member's Gift: Forever Flowerz Orange DahliasMakes 20 (071072)
◆ Forever Flowerz Stems and Leaves – 20 Stems and 40 Leaves (935123)
1 Before you start constructing the flowers, ensure all the petals are individually separated, by rubbing them in between your fingers and pulling them apart. Make the flower heads using the instructions included in your kit, being sure to overlap the petals - placing a petal in between the gaps of the previous one will give a fuller looking flower, rather than ‘stacking’ them.
2 Hook your finger around the petals to hold them in place at each stage. If they have moved by the time you finish the flower, grab each layer individually and swivel them around the stem.
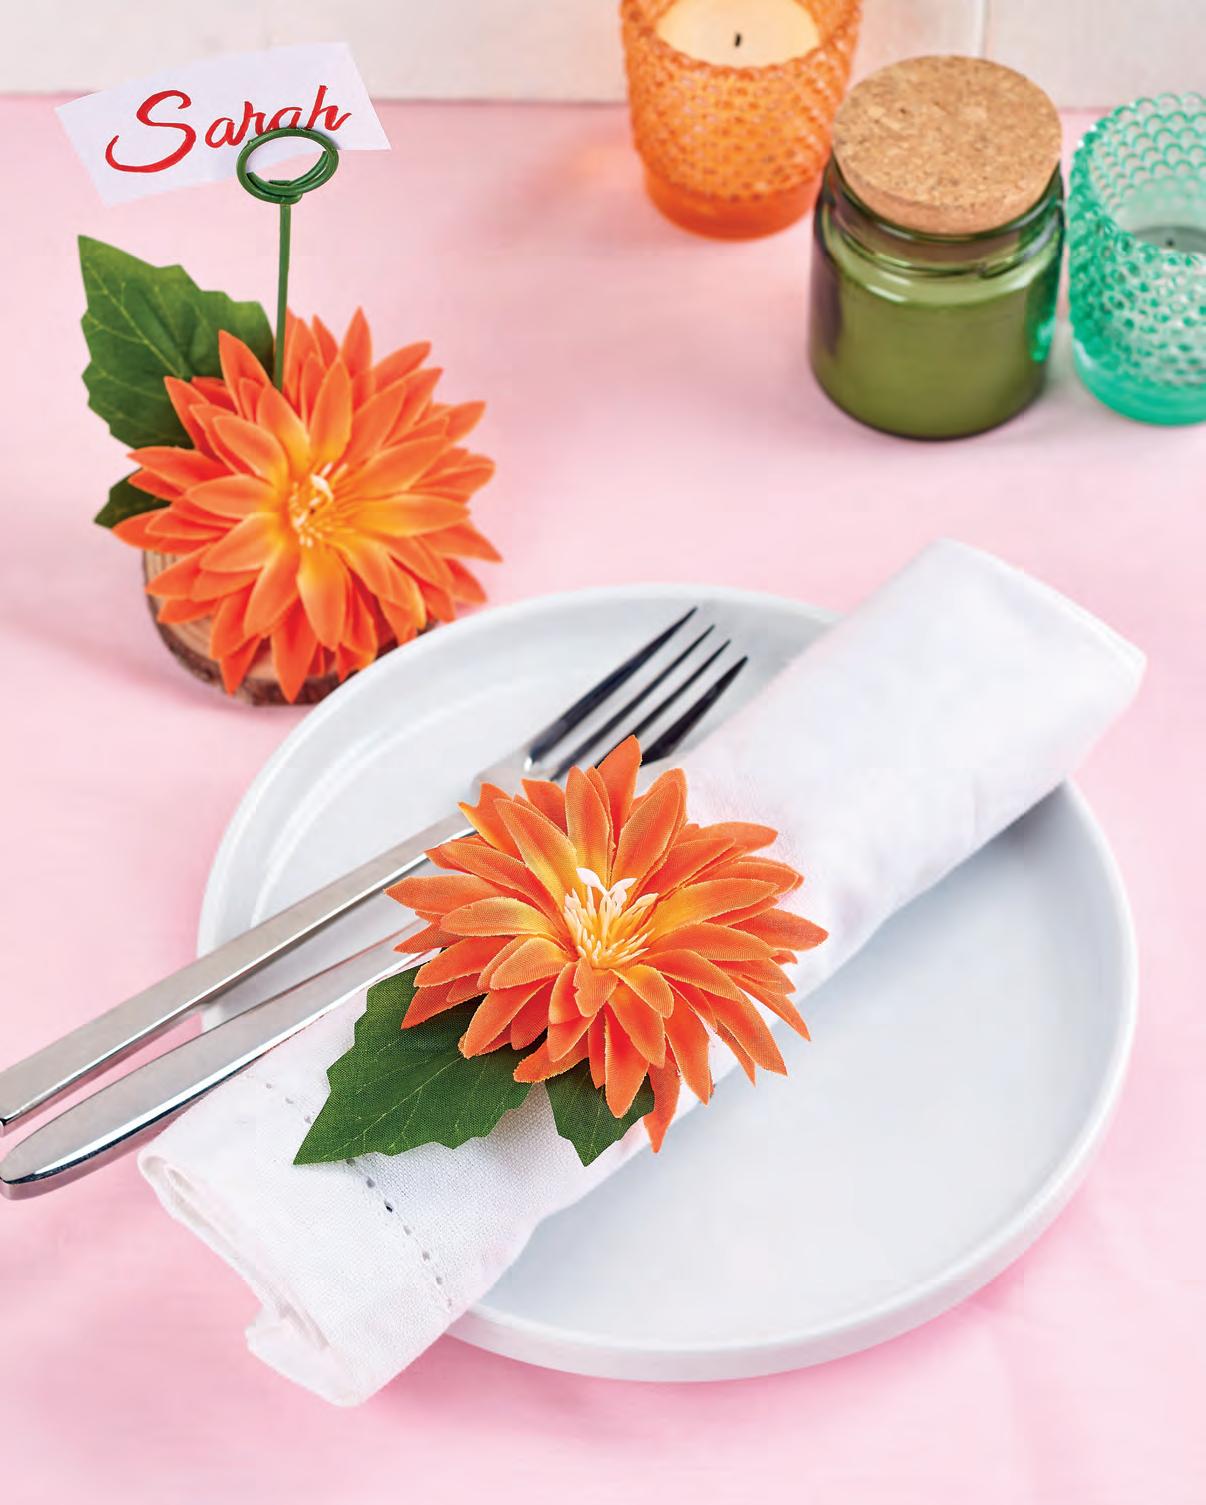
Place setting Kit List
◆ Member's Gift: Forever Flowerz Orange DahliasMakes 20 (071072)
◆ Forever Flowerz Stems and Leaves – 20 Stems and 40 Leaves (935123)
◆ Pliers
◆ Glue gun
◆ Wooden spoon
1 Take one of the florist stems or thick gauge wire, and shape into a circle using a wooden spoon handle or chunky pen, leaving a 0.5cm tail at the very tip of the wire. Wrap the wire around the handle twice, until it meets the tail coming back round.


2 Remove from the handle/pen and create a small hook with the tip of the tail, using pliers, facing towards the circles. This will hold everything in place [1]
3 You will notice that the circles are a little off-centre to the stem. Use pliers to bend the long remaining stem, so that the circles sit neatly above it [2]
4 Close in the circles tightly and connect the hook to the long stem [3]. You may need to tweak the length or direction of the hook, and if the circles are deformed, put them back on the handle/pen to neaten.
5 Craft log slices are often soft wood, so you can push a small hole into the centre using the stem, or something sharper. Use hot glue to secure the stem
BUY NOW
This starter kit gives you everything you need to make 20 dahlia flower heads. With the addition of stems and leaves you can display the flowers in vases and create stunning home décor and craft projects.
Forever Flowerz Orange Dahlias – Makes 20 (071072) Price £9.99 Club Member £0.00 (PLUS P+P)

How to claim...
Don’t miss out on this lovely flower kit by Forever Flowerz. Simply visit the VIP Gift section in the Members Area at createandcraft. com, or search the product number and add it to your basket
into the hole. Allow to dry for a few seconds. The stems are bendable, so you can also adjust the angle once dry, if needs be.
6 Use hot glue to secure a leaf and the flower to the base [4], positioned to the side of the stem and angled slightly upwards. Add more foliage or flowers if you wish.
Napkin ring Kit List
◆ Members Gift: Forever Flowerz Orange Dahlias –Makes 20 (071072)
◆ Forever Flowerz Stems and Leaves – 20 Stems and 40 Leaves (935123)
◆ Hot glue gun
◆ Scissors/craft knife
1 Wrap the entire stem around something like a water flask to create a ring, as you did with the place name holder. It will spring out to a larger circle, so test one first for size, you can always wrap again around a smaller cylinder.
2 Take each end of the stem and bind them together. You could wrap this with tape for a neater finish if you prefer.
3 Trim some of the flower head stem, to yield a flatter surface. You will need to leave a few millimetres of the stem, as it holds the flower together!
4 Use a hot glue gun to attach the flower and leaf to the top of the napkin ring. You could even add beads on the wire stems or extra embellishments, the choice is yours!
30 We Goodies
SAVE 20%
Helping Hand
◆ You can tilt the heads of the flowers, once on the stems, so they can face any preferred direction in your arrangement and vase!
◆ If the stems are too short for a vase, place a carrier bag in the bottom to pad it out and lift the flowers up – no water will be added after all!
◆ If your stems are too long for a smaller vase, bend the ends to shorten them rather than cutting; this way, you can use them time and time again for different arrangements
BUY NOW
Go on... TREAT YOURSELF
Ideal for turning your flower heads into arrangeable stemmed flowers, these stems and leaves will fit any of the Forever Flowerz flower heads in the collection, but are ideal to accompany the dahlias! They’re interchangeable, so you can change the flower heads you use with them as often as you like.
Forever Flowerz Stems and Leaves – 20 Stems and 40 Leaves (935123) Price £9.99 Club Member £7.99


We Goodies 31
Make super savings on this page
Save £326
Make mine a large!
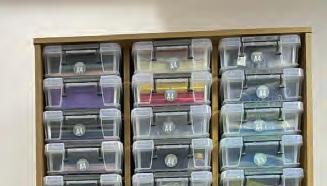
For those who are serious about their craft stashes, this tower unit measures over 6ft tall and comes complete with 36 A4 storage boxes, in three different sizes. Whether you’re storing yarn, card stock, stamps, tools, fabric or threads, rummage no more, as the boxes are transparent allowing you to see where everything is with ease! Available in Oak or Vanilla finishes.

Storage 4 Crafts 190cm Exford Tower with Allstore Boxes – H 76" x W 34" x D 16.5" (092007)
Club Member £799.00
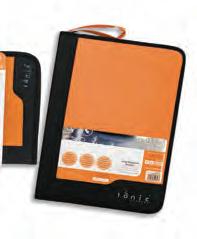
JUST THE TONIC
Worth £421.44
Save £23.24
Wouldn’t it be die-lightful if you could keep all of your favourite die sets safe and in one place, perfectly organised? Now you can with this set of two Tonic Studio cases, complete with clear plastic sleeves, each holding a doublesided magnetic storage sheet. The large A4 ringbinder comes with three, while the medium size comes with six. Additional sleeves and magnetic sheets are available to buy separately.


Tonic Studios Medium & Large Die Case –Magazine Issue 45 (380193) Price £46.48
Club Member £23.24
Get organised for a whole year of crafting with these smart storage solutions!
Creative minds are not known for being the tidiest of souls, so if you need a hand bringing a little calm and clarity to your craft room, check out our fabulous deals on these storage ideas!
32 We Goodies
Being able to see exactly what you have in your craft stash is half the battle, and that’s where these handy transparent boxes come in. They come complete with drop-on lids to keep your supplies dust-free and they can be stacked neatly. WestonBoxes – 12x12 Scrapbook Paper Storage Boxes 4 Pack (943429) Price £24.99

4 Handy helpers
We all know life is better with a little glitter, and now you can add sparkle and shine to your projects without the worry of mess with this handy bundle! The mini-vac removes glitter, powder, and other small scraps from your crafting table, and is easily cleaned out with its twist-off bottom, while the Desktop Dustbin with reusable bag comes with an adjustable clamp making it fit perfectly on almost any desk. We R Memory Keepers Desktop Dustbin Bundle With Mini Vac (270633) Price £29.99 Club Member £14.99

Tray chic
When it comes to storage, keeping supplies neatly stowed but easy to access is the aim of the game, and this beauty is a clear winner! Designed to sit on your workspace to enable you to keep your most-used items to hand, the compact store features eight transparent drawers ready to organise your papers, pens, embellishments, punches and more. It’s available in Oak, Vanilla, White or Grey finishes. Storage 4 Crafts Porlock Desktop Organiser (757224) Price £129.00 Club Member £99.00
Perfect match
Coordinate your storage with your décor with this desk tidy cum phone stand that can be decorated as you please. The easy-toassemble kit contains precision-cut MDF pieces and full instructions – simply glue together then personalise with paints, papers or embellishments.


CoolKatzCraft MDF Desk Tidy (904867) Price £13.99 Club Member £9.79
Stacking up
Take your storage to the next level with this clean-lined WestonBoxes stackable set. The boxes have a simple, minimal design with a base and drop-on lid, while the Stak Frames allow easy access to all of your boxes.
WestonBoxes – 10 A4 Clear Storage Boxes & 2 Stak Frames


(909779) Price £42.99 Club Member £29.99

We Goodies 33
Save £30
30% Save 40% Save 30% SEARCH THE PRODUCT CODE ON createandcraft.com BUY NOW and add to your basket
MAKE IT CLEAR HALF PRICE!
Save
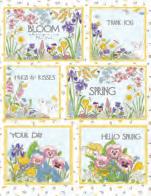
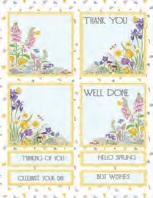
Your 6 FREE Spring Paper Downloads


Nancy Watt’s gorgeous floral designs are perfect for all occasions this season!
Head to the Members Area to download these exclusive papers and create some spring sensations for your family and friends


Floral elegance
“These designs are brimming with the delights of spring – with bunnies, bees, butterflies and a kaleidoscope of beautiful blooms”
 NANCY WATT, DESIGNER

34 We Goodies
Spring Kit List
◆ 14cm white tent card
◆ Card stock: lilac
◆ Craft flowers
◆ Adhesives: glue, 2mm foam tape
◆ Paper guillotine
1 Cut a 13cm square from backing paper and a 13.5cm square from lilac card. Glue the lilac square on the card then adhere the backing paper with 2mm foam tape.
2 Cut a 11cm x 9cm rectangle from lilac card and stick onto the card with 2mm foam tape.
3 Cut a topper from the papers and stick onto the card with 2mm foam tape.
4 Finish by adding craft flowers to two opposite corners with 2mm foam tape.
4 Ways with your papers...
Zig-zag card Kit List
◆ 29.7cm x 17cm white card
◆ Card stock: lilac
◆ Craft flowers
◆ Adhesives: glue, 2mm foam tape
◆ Paper guillotine
Helping Hand
◆ Use box envelopes to protect your 3D cards in the post
◆ Place foam tape close to but not at the edge of elements so that it isn't on show. Colour in the edges carefully with felt-tip pen if some can be seen
Your Day Kit List
◆ 14cm x 14cm white gate-fold card


◆ Card stock: lilac
◆ Adhesives: glue, 2mm foam tape
◆ Paper guillotine
1 Cut diagonally across at the top of the card.
2 Cut a 13.5 square from lilac card and adhere to the card with foam tape, then glue a 13cm square from yellow card.
3 Cut a 12.5cm square of butterfly backing paper and adhere to the card with glue.
4 Cut a topper from the papers and stick onto the card with 2mm foam tape.
5 Cut a 13.5cm square from lilac card and cut diagonally in half. Adhere one triangle to the card front with foam tape.
6 Cut another topper from the papers and adhere to the centre of the card front using foam tape.
1 Score then fold the white card into a gate-fold card, with a 17.5cm back section and 12.2cm front flap. Score down the front flap at 6.1cm (valley) and fold back.
2 Cut two 5.8cm x 17cm rectangles and one 17cm x 17cm from lilac card and adhere to the card with glue.
3 Cut a 5cm x 15.8cm strip and 16cm x 16cm square from backing paper and
Thank You
Kit List
◆ 14cm x 14cm white card
◆ Card stock: lilac
◆ Craft flowers
◆ Adhesives: glue, 2mm foam tape
◆ Paper guillotine
1 Open the card and score from the centre top to bottom corner and fold back.
2 Cut a 13.5cm square from lilac card and adhere to the inside of the card with glue, then to a 13cm square of backing paper.
3 Cut an 8.5cm square from lilac card and adhere to the card with glue. Cut a topper from the papers and adhere to the inside of the card with 2mm foam tape.
4 Cut another 13.5cm square from lilac card and cut corner to corner to create
adhere to the card with glue.
4 Cut a 11cm x 11cm from lilac card and stick to the card with 2mm foam tape.
5 Cut a topper from the papers and adhere to the card using 2mm foam tape.
6 Finish by adding a few flowers to two opposite corners with foam tape.
a triangle. Cut another 13cm square from backing paper and cut corner to corner to create a triangle. Adhere these to the triangular front of the card with glue.
5 Cut an 8.5cm square from lilac card and stick onto the card with foam tape. Cut a topper from the papers and adhere to the front of the card with foam tape.
We Goodies 35
Make one for a friend
Download the papers from the Members Area at createandcraft.com
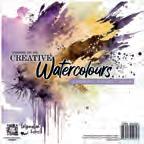
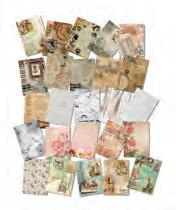
Save 33% on this fabulous RicePaperDesignUSB by Highlight Crafts
Create découpage home décor and gifts with ease using these vintage-inspired USB designs
USB designs are effortlessly versatile – and they’re not just limited to rice paper. All of these patterns can be printed onto printable acetate, card stock, paper and vellum, too!
Kit List
◆ Something for Everyone Rice Papers
Download – 25 Designs (572856)
◆ Craft Master Pure Print Rice Papers
– 20 Sheets (929547)
◆ Cadence Fabric Decoupage Glue
◆ Lemon Lane fabric, white
◆ Sewing machine and thread
◆ Scissors
◆ Flat paintbrush
◆ Iron and ironing board
◆ Glass plate
◆ Cadence Hybrid paint: Acrylic, Champagne; Metallic, Gold
◆ Cadence Decoupage Plus Matt glue
◆ Cadence Cut & Use Stamp Pad Foam
◆ Kit 'N’ Caboodle heat gun
◆ Sanding block
◆ Large pillar candle

◆ Greaseproof paper
◆ Ribbon/hessian embellishments
◆ Cadence Stencil Spray
Cushion
1 Using the fabric, sew a cushion panel of 27cm square and turn right sides out.
2 Print the following USB designs onto rice paper: 1x Victorian 01, 2x Floral 01. Use a flat paintbrush with water to wet, then tear the patterned edge off one side of each of the Floral 01 rice paper sheets. This will allow them to seamlessly meet in the middle and the florals will border the design
3
Cut or tear the framed sewing bust motif from the Victorian 01 rice paper.
4 Apply the fabric découpage glue with a flat brush to the reverse of the floral rice paper; gluing one at a time will give time to position the paper on the fabric. Once in place, glue the second down, mirroring the florals.
5 Apply the fabric découpage glue to the reverse of the rice paper frame, and position in the centre of the cushion. Once all paper is in place, use a light coat of the fabric découpage glue to seal the design.
6Leave the project to dry for 30 minutes at room temperature, alternatively dry with a hairdryer for 2-3 minutes. Once dry, heat set the fabric on the wrong side with an iron, to the temperature the fabric will take. Your project is now machine washable at 30°C.
Glass plate
1 Print the following USB designs onto rice paper: 1x Victorian 02, 1x Floral 05. Use scissors to cut out the overlayed notes and script from the Victorian 02 paper. Cut multiple ones from the top and the bottom to be positioned at both ends of the plate.
2 Fussy cut the flowers, leaves and buds from the Floral 05 paper.
3 A pply the matt découpage glue with a flat paintbrush to the surface of the print on the Victorian 02 paper elements. Position these on the reverse of the glass plate, to allow the print to show through the glass.
4 B egin to apply the matt découpage glue to the floral elements, again on the surface of the print. Position these coming in from both opposite corners of the plate (rice paper overhanging the plate is fine).
5 Leave glue to dry for 30 minutes, or use a heat gun for 1-2 minutes. Once totally dry, use a sanding block on the overhanging rice paper to yield a clean edge to the plate.
6 S patter the rice papered side of the glass with metallic gold paint for a mottled look. Use a heat gun for 1-2 minutes to set the paint.
7 U sing the Champagne acrylic paint, sponge over the rice paper and glass. Pouncing the paint with the sponge will give full coverage, making the colours pop. Heat seat with a heat gun for 1-3 minutes.
Candle
1 Print the following designs from the USB onto rice paper: 1x Victorian 03. Cut the rice paper so it wraps around the candle. Cover the reverse of the rice paper with a light mist of stencil spray, and place it over the candle in the desired position, ensuring it lays flat and smooth. The spray will allow the paper to cling to the candle during the heating process.
2 Cut a section of greaseproof paper to wrap around the candle over the rice paper, and hold in place. S lowly move a heat gun around the surface of the greaseproof paper so the wax candle begins to melt. As soon as the wax softens, move the heat to the next area until all the rice paper is adhered.
3 Remove the greaseproof paper and allow the candle to cool. If any areas haven’t stuck, re-cover with the greaseproof paper and repeat the heating process.
4 W hen cooled, decorate the candle with ribbons or hessian strips wrapped around at both ends. The candle is for decorative purposes and is not suitable for lighting.
36 We Goodies
Brand New & Exclusive
Inspirational ideas

SAVE £5!
BUY NOW
This USB includes 25 shabby chic designs for you to print your own papers with ease. Something for Everyone Rice Papers Download – 25 Designs (to purchase this head to createandcraft.com and type in product code 572856) Price £14.99 Club Member £9.99

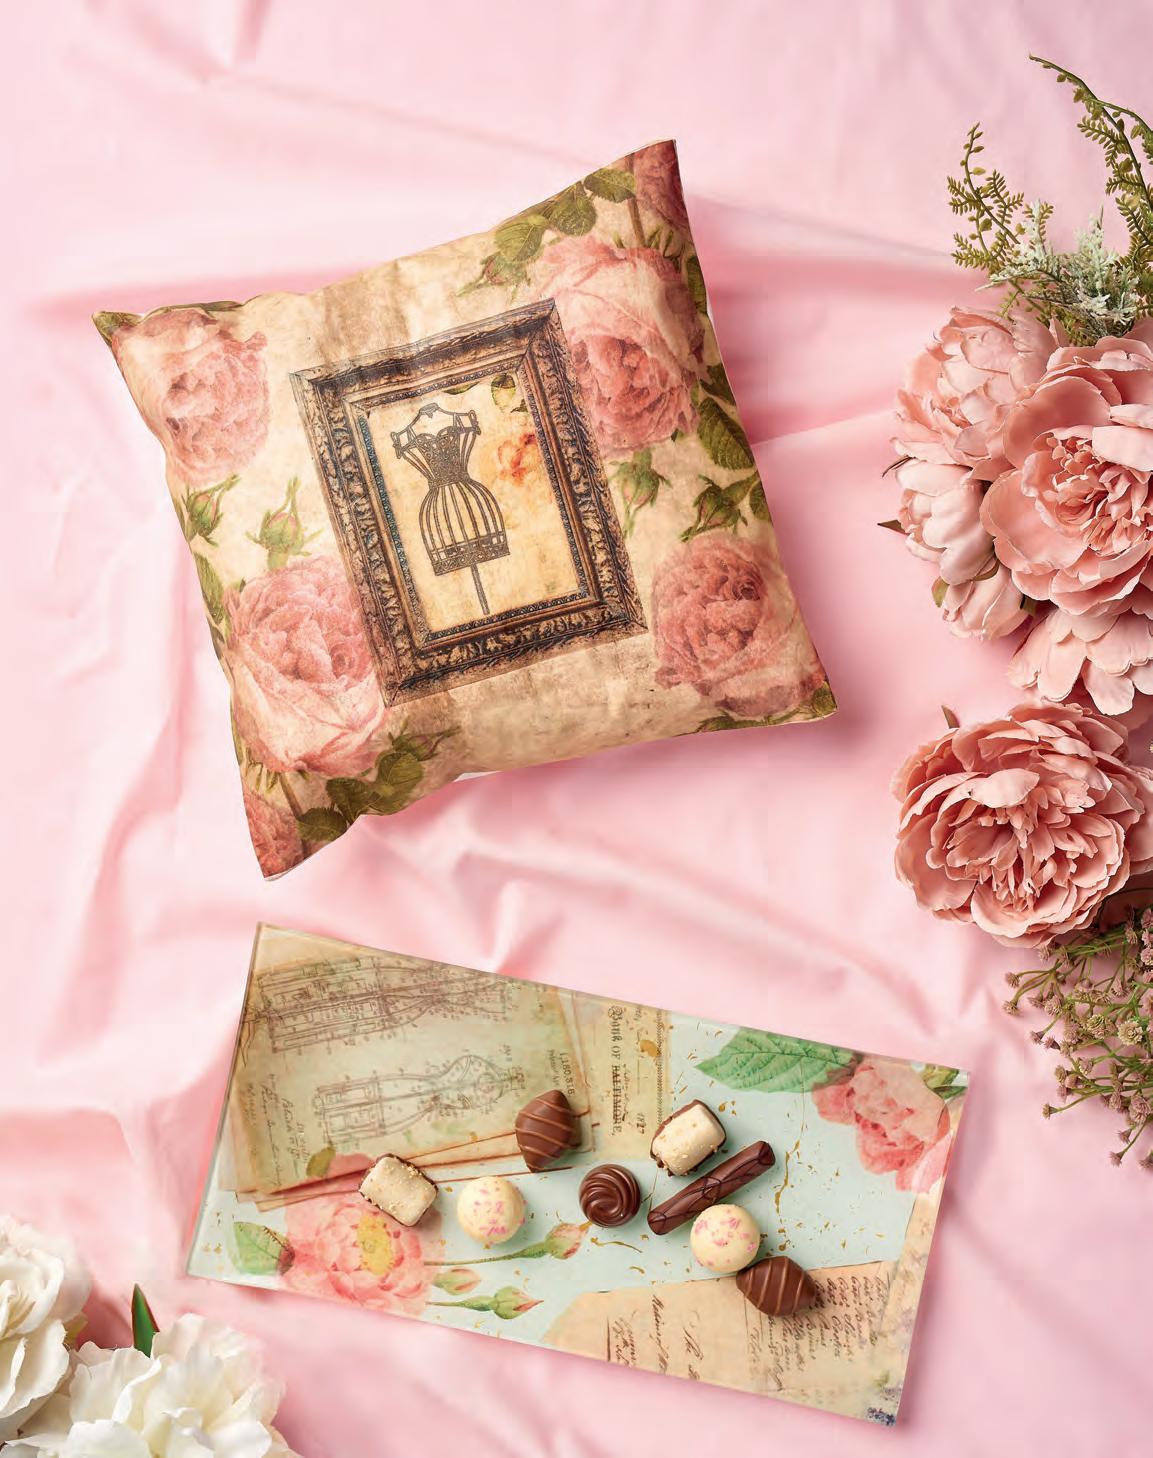
“If you’ve caught the découpage bug, you could decorate cards, glassware, crockery, gift boxes, jewellery blanks and more"
DAVID WAIT, DESIGNER
SAVE
SAVE £11.99
1
Timeless stamp
Create elegant toppers and more with this clear A5 stamp set which includes seven outline dies that will cut a 1mm border around the stamped floral designs. It also includes 18 uplifting sentiment word stamps such as Awesome, Kind, Wonderful and Special.
Stamps By Me Stamp & Die Set – Floral Banners (550884) Price £39.96


3 Standout designs
layouts, papercrafts and greeting cards bursting with the vibrancy of spring, check out our colourful card pack with two each of eight patterns.
Dawn Bibby Flamboyant Florals
Papers – 16 A4
Sheets 250GSM (064803)
Price £12.99
Club Member £3.90
SAVE 70%
2 Classic blooms
SAVE 60%
on this page!
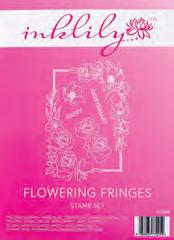
Add elegant floral flourishes to your projects with this versatile stamp set made in clear plastic for ease of use. The smallest stamp measures 3cm x 1.2cm and the largest, 13cm x 19.5cm.
Ink Lily Flowering Fringes A5 Stamp Set – 5 Stamps (094578) Price £12.99 Club Member £5.20

Spring Sale
Stock up your stash with up to 80% savings on this super selection of papercraft supplies with most priced under £10!
Floral treasures
Subtle shimmer
Make your arts and crafts truly shine with these highly pigmented gold shimmer pens, which are a perfect partner for your Ink Lily alcohol markers but are also amazing standalone waterbased pens. Use the exclusive spring colour pens to create watercolour backgrounds, to add shimmer to charisma designs and toppers, to highlight artwork and a whole lot more! Ink is quick drying and permanent and can be blended easily.
Ink Lily 6 x Gold Shimmer

SAVE £15.39
Pens – Spring (038800) Price £21.99 Club Member £6.60
SAVE £26.28
Make cards for any occasion with this stunning papercraft collection. It contains floral and doily-style dies, 6" x 6" double-sided patterned papers, four sheets of A4 3D découpage designs and a clear stamp, all carefully coordinated to make creating beautiful designs easy. Dotty Designs
Urban Flowers Collection – Decoupage, Paper Pad, Stamp & Dies (099072)
Price £52.56 Club Member £26.28
SAVE 70%
6
Cut & create
This die set is ideal for those who like to incorporate papercraft flowers into their craft projects. It has three dies creating 31 die cuts that can be used to form a variety of flowers using individual petals, leaves and stamens.
Fleurs A Thousand Flowers
Die Set (134463) Price £14.99
Club Member £4.50
38 We Goodies
£OVER138
SAVE
SAVE 70%
7 Spring set
From papercrafting
maestro Dawn Bibby comes this set of 12 dies – which is perfect for creating paper bows. It's also ideal for cutting out wreaths, flowers and decoupage items when combined with the A Spring Dream paper kit (as seen on p22) and matching background papers (as seen on p67).

Dawn Bibby Designs A Spring Dream Die (913017)
Price £14.99 Club Member £4.50
SAVE £12.59
8
Designer touch
Add some natural beauty and elegance to your crafts with this classic floral die set from Stephanie Weightmann’s Signature Collection, which contains three versatile dies – the main floral image and two fine foliage designs. The largest die measures 8.2cm x 17.5cm.
Stephanie Signature Noble Florals Die Set (440217)
Price £19.99 Club Member £6.00
Pastel palette
Craft coordinated greeting cards with finesse and ease using the pretty patterns in this 8” x 8” paper pad. Featuring flowers, birds, dashed stars and sentiment strips, there’s plenty of creative scope for all occasions. Contains six sheets of each six designs.
The Paper Boutique Spring Celebration (076470) Price £9.99 Club Member £3.00

10 Purple rain
Create big and bold paper flowers with these Giant Florals paper packs of 12 A3 die cut sheets in three colours of 140gsm card stock. Fleurs flowers can also be made into smaller blooms using just a few layers for a more subtle look.
Fleurs Giant Flowers Paper Pack – Summer Heat (783947)

Price £17.99 Club Member £5.40
SAVE 70%
SEARCH THE PRODUCT CODE ON createandcraft.com
BUY NOW and add to your basket
11Punch above
Create table confetti with ease or build flower designs to give a floral flourish to corners, borders and embellishments with this rotating punch that features four flower and two leaf designs.

Fleurs Rotating 6-in-1 Punch (707915)
Price £14.99 Club Member £7.50
HALF PRICE
12
Flower power
Stencil large flower heads and butterflies that are the perfect for a variety of occasions and for a variety of techniques. You can add inks or pastes through them, you could emboss the design or get creative with your paints, pens and powders to produce fabulous effects.

SAVE 80%
Imagination Crafts Mega Floral Bloom A4 Stencil – 1 Stencil (284801) Price £7.99

Club Member £1.60

We Goodies 39
£13.99
1
IDEAS A PLENTY
You’ll be spoiled for choice of gorgeous scrapbook layout ideas for every occasion, with these inspirational tomes. Each volume has 525 12” x 12” sketches that will help you to create beautiful albums of your own memories, not just for spring, but all year round!

Scrapbooking Coach
Sketches Book Vol 1 & 2
(232556) Price £54.00
Club Member £39.00
SAVE £15
EDITOR’S PICKS
Don’t miss out on these fabulous Club Member discounts – when they’re gone, they’re gone!

2 BEAUTIFUL BLOOMS
SAVE £17
Featuring gorgeous spring flowers such as daffodils, irises, crocuses and more, these simple-to-make stained-glass style greeting cards are perfect for all occasions this season. The kit includes 36 aperture cards and envelopes in blue and white, 36 ready-to-colour floral designs on acetate, plus two bonus acetate sheets showcasing the round and gothic window floral designs in full colour.
Red Button Spring Stained Glass Window Card
Bumper Pack – makes 36 cards (511220) Price Club Member £12.99

Spring is the perfect time to find fresh inspiration, try something new and rejuvenate your crafty stash! Editor Sophie Thornton says, "With all things spring in mind, I’ve sourced these super deals for you to enjoy!"


3 UPLIFTING TRIO
Great for beginners and experienced crafters alike, this set is perfect for bringing the joy of spring to your projects. It includes dies, stamps and an embossing folder with various bunny, duck, flower, egg and seasonal sentiment designs. Sizzix Spring Has Sprung Collection – 15 Dies, 5 Stamps & 1 Embossing Folder (469555) Price £27.97 Club Member £17.97


SAVE £10
4 SPRING WEDDING
Having recently tied the knot myself I couldn’t resist including this sweet offer in my spring selection! You can celebrate weddings and wedded bliss whatever the time of year with this romantic trio of die designs featuring To My Perfect Husband and To My Wonderful Wife sentiments and a Silhouette First Dance design.


Tonic Studios Silhouette & Sentiment Die Set
(953878) Price £19.97 Club Member £8.99
40 We Goodies
55% SEARCH THE PRODUCT CODE ON createandcraft.com BUY NOW and add to your basket
SAVE


Welcome in the new season with joyful Soft Crafts We Soft Crafts 41 Amaze yourself with this beginnerfriendly make Page 42 Try your hand at quilt-as-you-go Page 44 Fall in love with this friendly frog! Page 46 Cake lovers will delight in these crocheted sweet treats Page 48 Get creative with pom-poms Page 50
Paint with threads and create a Lavender Scene


This
You can almost smell the flowers with this delightful lavender fields landscape! Though it looks intricate, it's really not! The design only uses three stitches, along with coloured organza to create both background colour and texture.
Lavender fields
Kit List
◆ Rowandean Embroidery Lavender Fields Kit (711864)
◆ A 5" or a 7" spring tension embroidery hoop
◆ A sharp pair of embroidery scissors
◆ Pins or needle and thread
Key
2 Stitch as follows, using the coloured thread relating to the number referenced, with the relevant number of strands mentioned in brackets:
B Distant hill: diagonal satin stitch in no. 7 (1s) together with No. 3 (2s) [2]. Building roof: small slanting straight stitches in No. 12 (3s).
Walls: straight stitch in No. 10 (3s).
Trees: French knots in No. 1 (3s).
C Field: uneven straight stitch in No. 5 (3s).
D Field: horizontal straight stitch in No. 4 (3s).
3 Continue stitching as follows:
E Field: French knots in No. 6 (3s).
F: French knots in No. 11 (3s).
G: French knots in No. 7 (3s). Leave spaces to show green organza.
H: small straight stitches in No. 7 (3s). Refer to photo for direction of stitching.
Try something new approx 1cm x 1cm then fold three times into eighths. Attach to the fabric at the pointy end of folded fabric with 1s of No. 9. In between fields F-K, use small horizontal running stitches to cover green-printed lines using No. 12 (2s).
4 Continue to stitch as follows:
M Lavender fields
Soil: horizontal straight stitches in No. 12. Start in the distance using 1s and gradually increase to 2s then the foreground in 3s [3]

Lavender row on the left: Starting at the curved dotted line attach several organza flowers as above. Continue into the distance with a few more organza flowers and French knots in No. 8 (3s).
Foreground flowers
Helping Hand
◆ Don’t worry if some of the green organza background fabric shows through in areas E through K
1 Mount the printed background in the embroidery hoop. Tack or pin the piece of green organza over the fields of lavender, ensuring that the organza comes just above the distant fields C and D (refer to the lettered chart in the kit for details [1]). When the distant fields are stitched, the organza will be held in place.
I: small groups of French knots In No. 9 (3s) worked in curved lines to emulate groups of plants. Small bunches of straight stitches in No. 4 (1s).
J: random cross stitches in No. 7 (3s). Decrease stitches in size towards the distance as per the photo.
K: French knots in No. 6 (3s).
L: fill field with folded small pieces of light purple coloured organza. Cut small squares
Leaves: stitch over leaf printed lines using straight stitches in Nos. 1, 2 and 3 all 3s. Add more stitches crossing over in different directions. Then fill in the gaps with more organza flowers in dark purple and loose French knots in No. 8 (6s) [4] Scatter some sequins amongst the flowers.
5 Continue as follows: Lavender row on right: Repeat as for left side for leaves and flowers using the lighter purple organza and groups of French knots in No. 9 (3s) going smaller into the distance.
◆ You can either pin the organza to the background or, tack it to the fabric. The tacks are removed at the end of the project
◆ If you wish to frame your masterpiece in a square frame, ensure that the aperture in the mount board is no larger than 10cm x 10cm otherwise bare fabric will show through
◆ To make French knots ‘loose’ do not pull the thread tight around the needle. When you pull the excess thread through the fabric do not pull too tight and this will give a ‘loose’ effect to the knot
42 We Soft Crafts
beautiful all-in-one kit from Rowandean is the perfect opportunity to try your hand at embroidery
1 Darker green 2 Green 3 Lime green 4 Yellow 5 Variegated yellow 6 Lavender 7 Variegated lavender 8 Darker purple 9 Lighter purple 10 White 11 Pink
Variegated orange
12
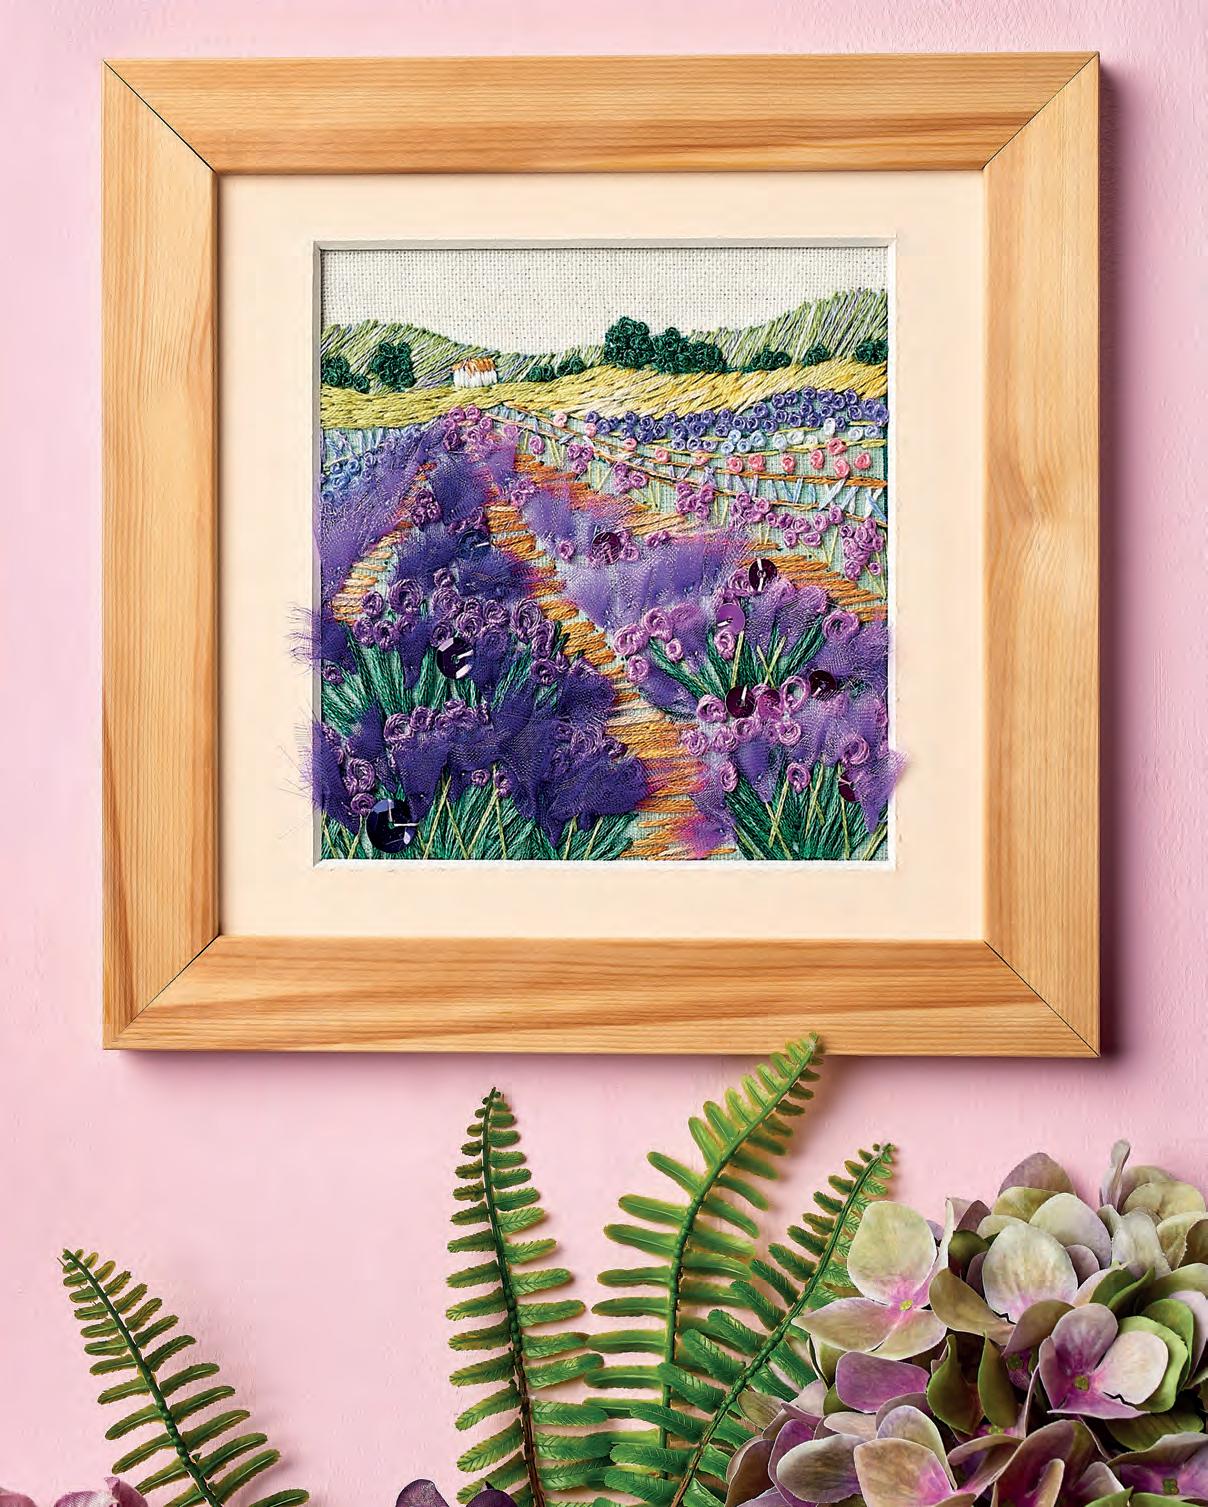

We Soft Crafts 43 Suitable for all skill levels, this kit includes organza, sequins, a printed background, chenille needle, six-stranded threads on a numbered organiser and full instructions with diagrams. Rowandean Embroidery Lavender Fields Kit (to purchase this head to createandcraft.com and type in product code 711864) Price £18.99 Club Member £17.09 Save 10% BUY NOW
Frilled bag
Kit List
◆ Template from the Members Area
◆ 1 fat quarter (20" x 21") fabric (for bag outer, base and handles), we used Touch of Spring by 3 Wishes

◆ 2 fat eighths (10" x 21") fabric (for bag outer), we used Touch of Spring by 3 Wishes


◆ 50cm (45" wide) fabric (for lining and frill), we used Home Grown by Benartex
◆ 1 pack of Bosal In-R-Form Single-Sided Fusible Foam Stabiliser (18" x 58")
◆ Pins
◆ Sewing machine and coordinating thread

◆ Iron and ironing board
◆ Tape measure
◆ Scissors or rotary cutter and mat

NB: Use ¼" seam allowance
Make a quilt-as-you-go Frill Top Bag
Our stash-busting bag is perfect for use as a handbag, lunch tote, shopping carrier, or as a gift bag... it’s quite the all-rounder! Using the quilt-as-you-go method you’ll be multitasking while making it.

1 Cut the fat quarter into four 10"H x 2"W strips, one 5"H x 11"W piece and two 3½" x 16½" strips. Cut six 10"H x 2"W strips from each fat eighth. From the lining fabric, cut two 10"H x 12½"W pieces and cut the base and four frill pieces using the templates. Cut the stabiliser into two 10" x 12½" pieces, one 5" x 11" piece and two 1¾" x 16½" strips.


2 Position a 10" x 12½" piece of stabiliser horizontally – fusible side up. Iron a 10" x 2" strip – right side up – to the left end of the stabiliser. Position a second strip on top of the previous strip – right sides together – and stitch along the right-hand side. Fold the second strip over and press onto the stabiliser. Sew six more strips in this way to fill the piece. Repeat to make another 10" x 12½" piece.

3Iron the 5" x 11" fabric piece onto the 5" x 11" stabiliser piece. Sew evenly spaced lines along the 11" length. Cut into a bag base shape using the template. With
right sides together, sew two frill pieces together around the curves. Snip the seam allowance into the points. Turn right side out and press. Make a second frill piece.
4 Fold the handle fabric strips in half lengthways with right sides in and place each on top of a 1¾" x 16½" stabiliser strip. Sew the strips to the stabiliser along the raw edge sides to make a tube. Turn right side out and press with the seams along one side. Top-stitch along each side of the handles. Fold the handles in half lengthways and stitch on top of the previous stitches starting and finishing 2" from the ends.
5 Sew the 10" x 12½" side pieces together – fabric sides together – along the 10" sides. With fabric sides together, pin the bag base to the side pieces, lining up the snips in the ends of the bag base with the side seams and the centre of the 12½" edges with the base piece long sides snips. With the base on the bottom, sew
the pieces together around the bag base. Turn right side out.
6Pin the frill pieces to the top edges of the bag, lining up the centre of the frills with the centre of the bag front and back – the ends of the frills will overlap. Pin a handle to each side of the bag with the folded seam facing up, each end of the handles should be 2½" from the bag's side seams. Tack the frills and handles in place.
7 Make the lining the same way as the bag in Step 5, leaving a gap in the seam along one straight edge of the base for turning. With right sides together, push the bag into the lining. Line up the raw edges and side seams of the lining and bag and pin. Stitch around the top of the bag and lining.
8 Turn the bag right side out through the gap in the lining. Sew the gap closed and push the lining into place inside the bag. Fold the frills and handles up away from the bag and top-stitch around the top on the bag about ¼" from the top seam – ensuring the lining is in place and not puckered. Fold the frills down.
44 We Soft Crafts
This tote by Quilters Trading Post is the ideal size for carrying all your essentials in style
Helping Hand
◆ Take note of the width and height letters – W and H – next to the cutting measurements if using directional fabrics. When sewing the strips to the stabiliser make sure you have the patterns all in the same direction
◆ Be sure to fold open the 10" x 2" fabric strips fully when pressing to the stabiliser – when all strips are sewn and pressed, trim any excess fabric to the same size as the stabiliser
◆ Before you turn the handles right side out, trim the stabiliser seam allowance as close to the seam without cutting the stitches
BUY NOW
This set has five bag patterns to make – Cross-Body Tote Bag, Crafter's Carry-All, Mini CarryAll, Frill Top Bag, Quilter's Tote Bag – along with instructions and full-size paper pattern pieces where necessary.
SAVE 15%
Quilter's Trading Post –5X Essential Bag Pattern Collection (to purchase this head to createandcraft.com and type in product code 226712) Price £32.99

Club Member £28.04
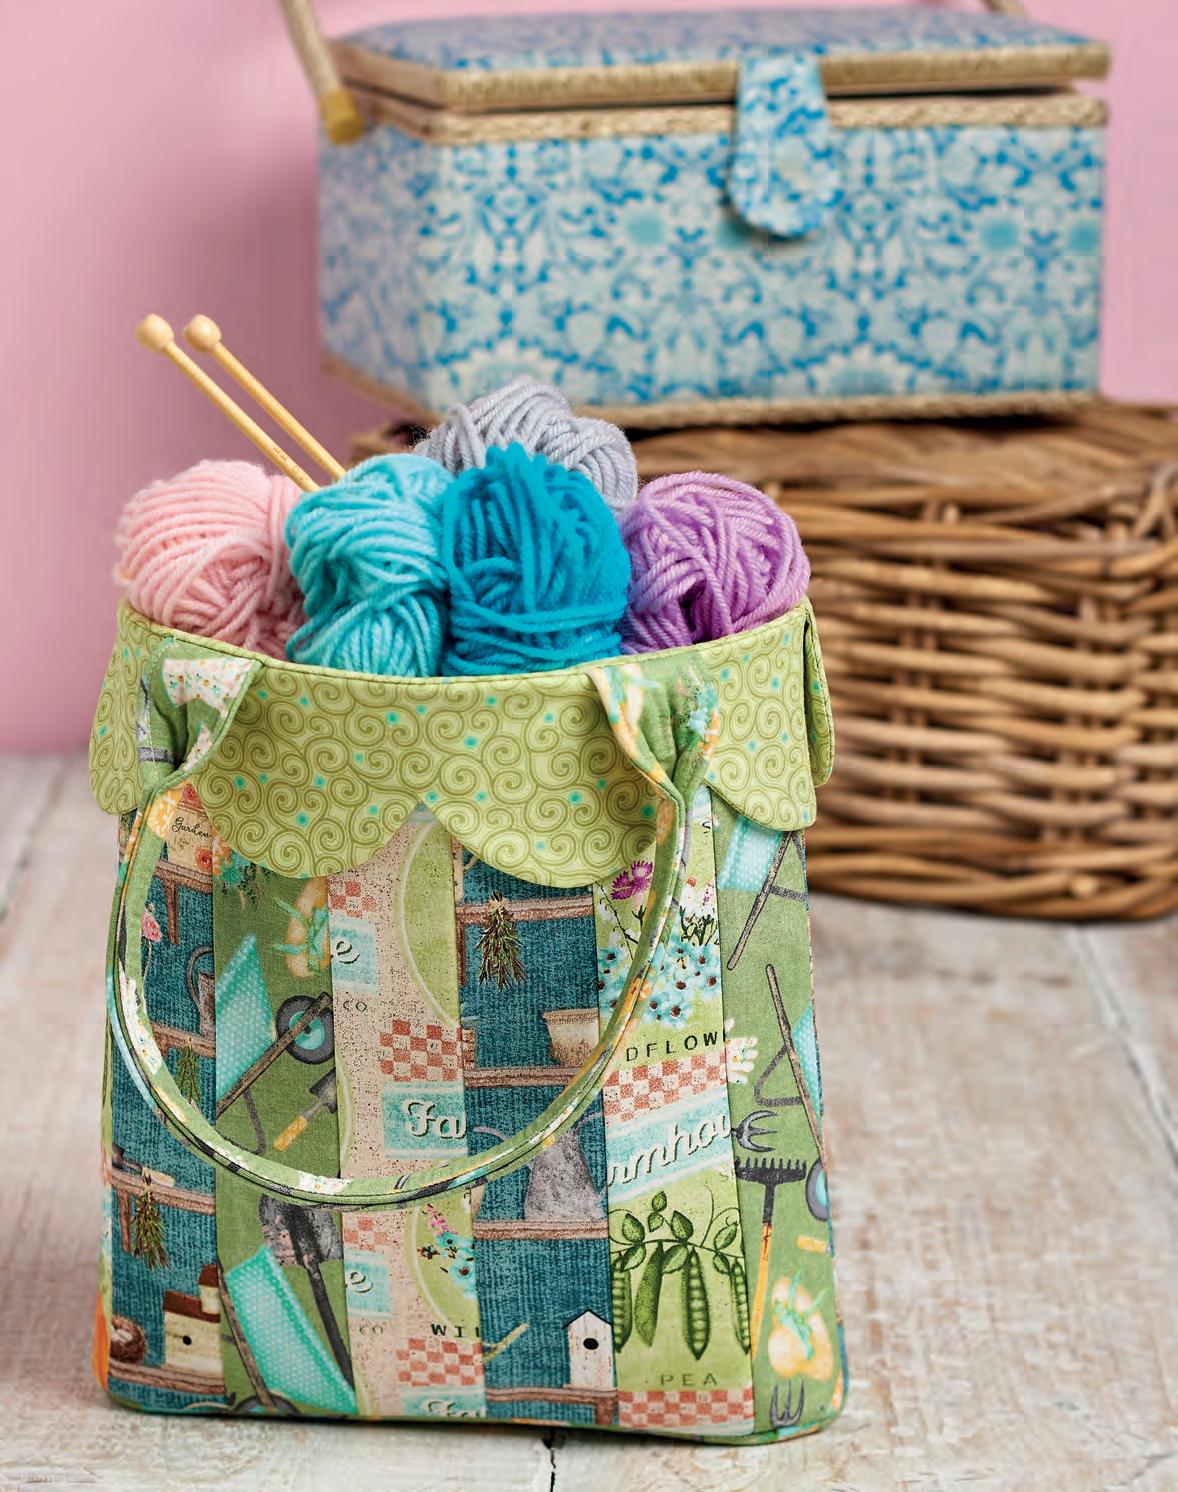
We Soft Crafts 45
Download the templates from the Members Area at createandcraft.com
Stitch a friendly Rainy Day Frog
Cheer up a drizzly day with this eye-catching amphibian in a technicolour raincoat!
If April showers have you holed up indoors, create your own fun by sewing this froggy friend! This project is perfect for zingy fat quarters or using up brightly coloured oddments from your stash.

Kit List
◆ Template from the Members Area
◆ Sewing Online Summer Song 5 Piece Cotton Craft Fabric Fat Quarter Bundle (to purchase this head to createandcraft.com and type in product code 220120)
◆ Corinne Lapierre Pastels Felt Bundle of 10 Squares (009373)
◆ Toy stuffing
◆ Sewing and embroidery thread and needles
◆ Scissors
◆ 2x toggles or buttons
◆ Fabric pencil
◆ Pins
◆ Iron and ironing board
Frog toy
1 For the frog, mark two arms, two legs and one body on green felt using the templates. Lay on top of another piece of felt and pin together through the marked pieces. Cut out, keeping the pins in place.
2 Cut out a tummy and separate the body pieces to stitch the tummy in place. Embroider the face, then pin the two bodies together again. Blanket stitch around the arms and legs leaving the straight, top edges open and fill with stuffing.
3 Blanket stitch around the head and body pieces, adding in the arms and legs. When attaching the arms and legs, first bring the needle between the layers of the body pieces and through the arms and legs to
attach, then blanket stitch over the top to keep the line of blanket stitching looking uniform. Stuff before finishing the stitching.
4 For the raincoat, use a seam allowance of 0.5cm. Fold cotton in half with right sides facing. Along the fold line, mark out one raincoat back piece. Away from the fold line, but still on the double fabric, mark a hood and a front piece so cutting out two mirror image hoods and fronts. Repeat for all pieces with a contrasting, lining fabric.
5 Open out the outer back piece and match up two front pieces on top, with right sides facing. Stitch along the top horizontal lines only. Open out and press the seams flat. Repeat with the lining pieces.
6 Lay both the outer and lining together, with right sides
facing. Stitch all round, leaving a 5cm turning gap along one edge. Make small snips in the seam allowance around corners. Turn through to the right side and close the gap.
7 Fold in half, with right sides facing, to a more jacket-like shape. Pin then stitch along the underside of the arms and down the sides. Snip the seam allowance at the underarm corners and turn the raincoat through to the right side.
8 Pick up the outer hood pieces. Stitch together round the curve only, as marked on the template. Repeat with the lining hood pieces. Tuck one hood inside the other, with right sides facing, and pin. Stitch the straight open edges together only. Turn through to the right side through the gap, press and
Helping Hand
◆ Blanket stitch with sewing thread or one separated embroidery thread strand for delicate, subtle stitches
◆ Cut the felt pieces out together and keep them pinned together before blanket stitching round so they're lined up perfectly
◆ To personalise your frog, why not add pockets for the jacket, a frill on the umbrella or a felt puddle for the froggy to splash in?
close the gap with ladder stitch.
9 Pin the bottom edge of the hood along the collar of the jacket, on the lining side and with wrong sides facing. Whip stitch together, making tiny stitches through just the tip of the fabrics. Leave 2cm unstitched on each end of the hood. Stitch two toggles or buttons on the jacket and a loop of embroidery thread to finish.
10 For the umbrella, mark an umbrella template on felt, layer a second piece of felt underneath, pin along the handle and cut out. Blanket stitch all around, leaving a gap along a bottom, side edge then filling with toy stuffing before finishing stitching.
11 Cut out two circles using the canopy template. Stitch together, with right sides facing, leaving a turning gap. Turn the umbrella through to the right side, close the gap with ladder stitch and press.
12 Pleat the canopy round the felt handle to look like an umbrella and make small stitches to hold in place. Wrap embroidery thread around the tip of the umbrella to finish.
46 We Soft Crafts
Stash buster


We Soft Crafts 47
“This is a wonderful project for using up oddments of clashing prints and bright colours – the bolder the better!”
fun sewing extra outfits Download the templates from the Members Area at createandcraft.com
CHLOE HAILWOOD, DESIGNER
Have
Find fabrics & haberdashery
Scan the QR code using the camera on your smartphone or tablet to shop at createandcraft.com
Cute, colourful and calorie-free Crochet Cakes
Whip up these teatime treats in colourful yarns for a charming seasonal display
These guilt-free decorative puds will add an extra pop of colour at the table. You could use them as pincushions, pattern weights (instead filled with plastic pellets) or toys for the little ones.
Abbreviations (UK)
beg: beginning
BLO: back loop only
ch: chain
cont: continue
dc: double crochet
dc2tog: double crochet 2 sts together
dec: decrease
dtr: double treble crochet
FLO: front loop only
folls: follows
htr: half treble crochet
inc: increase
pm: place stitch marker
rem: remain/remaining
rep: repeat
rnd: round
RS: right side
sl st: slip stitch
st(s): stitch(es)
tr: treble crochet
WS: wrong side
yoh: yarn over hook
*: repeat instructions following asterisk as many times as stated
Special stitches
For smoother and less noticeable increases and decreases in your crochet, you can replace the 2dc in same st with an invisible increase, and the dc2tog with an invisible decrease. Here is how to work each one – and remember you can also work these with ‘yarn under’ instead for a tighter stitch:
Invisible increase: 1dc into front loop only, 1dc into same stitch (through both loops as usual). One st inc
Invisible decrease: insert hook in front loop of first st, then insert hook in front loop of second st, yoh, pull through two loops on hook, yoh, pull through remaining two loops.
One st dec
Try
Kit List
◆ 4mm crochet hook
◆ Drops Paris Aran Cotton, Vanilla 35 (A) 18g, Light Turquoise 02 (B) 7g, Pink 33 (C) 12g, 67 Wheat (D) 17g, 68 Almond (E) 10g, 16 White (F) 2g, 21 Light Mint Green (G), 27 Peach (H), 6g of each, 11 Opal Green (J), 10 Dark Turquoise (K), 01 Apricot (L), 1g of each
◆ Soft toy filling
◆ Stitch markers
◆ Scissors
◆ Tapestry needle
Cake slice
◆ Size: 8.5cm tall, 8.5cm (max) length
SIDE & BACK
Note: read the pattern carefully as you will not turn at the end of every row
Using 4mm hook and yarn A make 43ch
Row 1 (WS): 1dc in 2nd ch from hook, 1dc in each ch to end, turn. 42 sts
Row 2: 1ch (does not count as st throughout), 1dc in each st to end, turn
Row 3: as Row 2
Row 4: 1ch, 1dc in each st to end, do not turn
Change to yarn B
Row 5 (RS): 1ch, 1dc in each st to end, do not turn
Fasten off yarn B
With RS facing, join in yarn A
Row 6 (RS): 1ch, 1dc in each st to end, do not turn
Row 7: 1ch, 1dc in each st to end, turn
Change to yarn B
Row 8 (RS): 1ch, 1dc in each st to end, do not turn
Fasten off yarn B
With RS facing, join in yarn A
Row 9 (RS): 1ch, 1dc in each st to end, turn
Rep last row 6 times Fasten off
TRIANGLE TOP/BASE
(Make 2)
Using 4mm hook and yarn A make 13ch
Row 1: 1dc in 2nd ch from hook, 1dc in each st to end, turn. 12 sts
Row 2: 1ch (does not count as st throughout), 1dc in each st to end, turn
Row 3: 1ch, dc2tog, 1dc in each st to end, turn. 11 sts
Rep Row 3 until 2 sts rem
Next row: 1ch, 1dc in dec st. One st
Fasten off ICING
Using 4mm hook and yarn C make 13ch
Row 1: 1dc in 2nd ch from hook, 1dc in each ch to end, turn. 12 sts
Row 2: 1ch (does not count as st throughout), 1dc in each st to end, turn
Rows 3-13: as Row 2
Row 14: 1ch, working in FLO, 1dc in each st to end, turn
Row 15: as Row 2
Commence decreasing into triangle as folls:
Row 16: 1ch, dc2tog, 1dc in each st to end, turn. 11 sts
Rep Row 16 until two sts rem
Next row: 1ch, 1dc in dec st. One st Fasten off
DRIP ICING
Using 4mm hook, yarn C and with RS facing, attach yarn to row end of Row 14 of Icing and work evenly into row ends as folls: 2ch, 1dtr in same st, 1tr in next st, 1htr in next st, 1dc in next st, 1tr in next st, 2dtr in next st, (1tr, 1htr) in next st, 1dc in next st, (1tr, 1dtr) in next st, 1tr in next st, 1dc in next st, (1htr, 1tr) in next st, 1dc in next st, cont along opposite edge, 1dc in same st, (1tr, 1htr) in next st, 1dc in next st, 1tr in next st, (1dtr, 1tr) in next st, 1dc in next st, (1htr, 1tr) in next st, 2dtr in next st, 1tr in next st, 1dc
in next st, 1htr in next st, 1tr in next st, (1dtr, 1tr in last st)
Fasten off to opposite end of Row 14
TO MAKE UP
Using whip stitch, join first row of Side & Back to wrap all around one Triangle. Seam row ends of Side & Back to resemble an empty slice of cake. Repeat to join second Triangle, stuffing as you go. Place Icing over Top of Slice, so Drip Icing protrudes and is slightly shorter over the Back. Using yarn C, discreetly sew Icing to Slice catching stitches underneath, allowing Drip Icing to hang free over edge. Weave in all ends
Macaron
(Make 3)
◆ Size: 5cm diameter
Note: work in a continuous spiral Using 4mm hook and B (G, H) make a magic circle, work 6dc into circle, pm for beg of rnd and move up each rnd. Six sts
Rnd 1: 2dc in each st to end.
12 sts
Rnd 2: (1dc, 2dc in next st) to end.
18 sts
Rnd 3: (2dc, 2dc in next st) to end.
24 sts
Rnd 4: (3dc, 2dc in next st) to end.
30 sts
Rnd 5: 1dc in each st to end
Rnd 6: (3dc, dc2tog) to end.
24 sts
Rnd 7: (2dc, dc2tog) to end. 18 sts Stuff as you go
Rnd 8: (1dc, dc2tog) to end. 12 sts
Rnd 9: (dc2tog) to end. 6 sts
Cut yarn, thread through rem sts, pull tight and fasten off
TO MAKE UP
Using yarn J (K, L) in tapestry needle, embroider chain st around edge along Rnd 5 to indicate filling. Weave in all ends
48 We Soft Crafts
something new
Helping Hand
◆ For a firmer fabric, you can work any yoh as a 'yarn under' as this creates a tighter stitch. You may like to try this with the increase and/or decrease stitches, or indeed all your crochet stitches, just be consistent within the pattern for an even result. There are many useful YouTube tutorials demonstrating these techniques
◆ Skill up by working neater 'invisible’ increases and decreases in place of the usual crochet stitches by checking out the Special Stitches panel
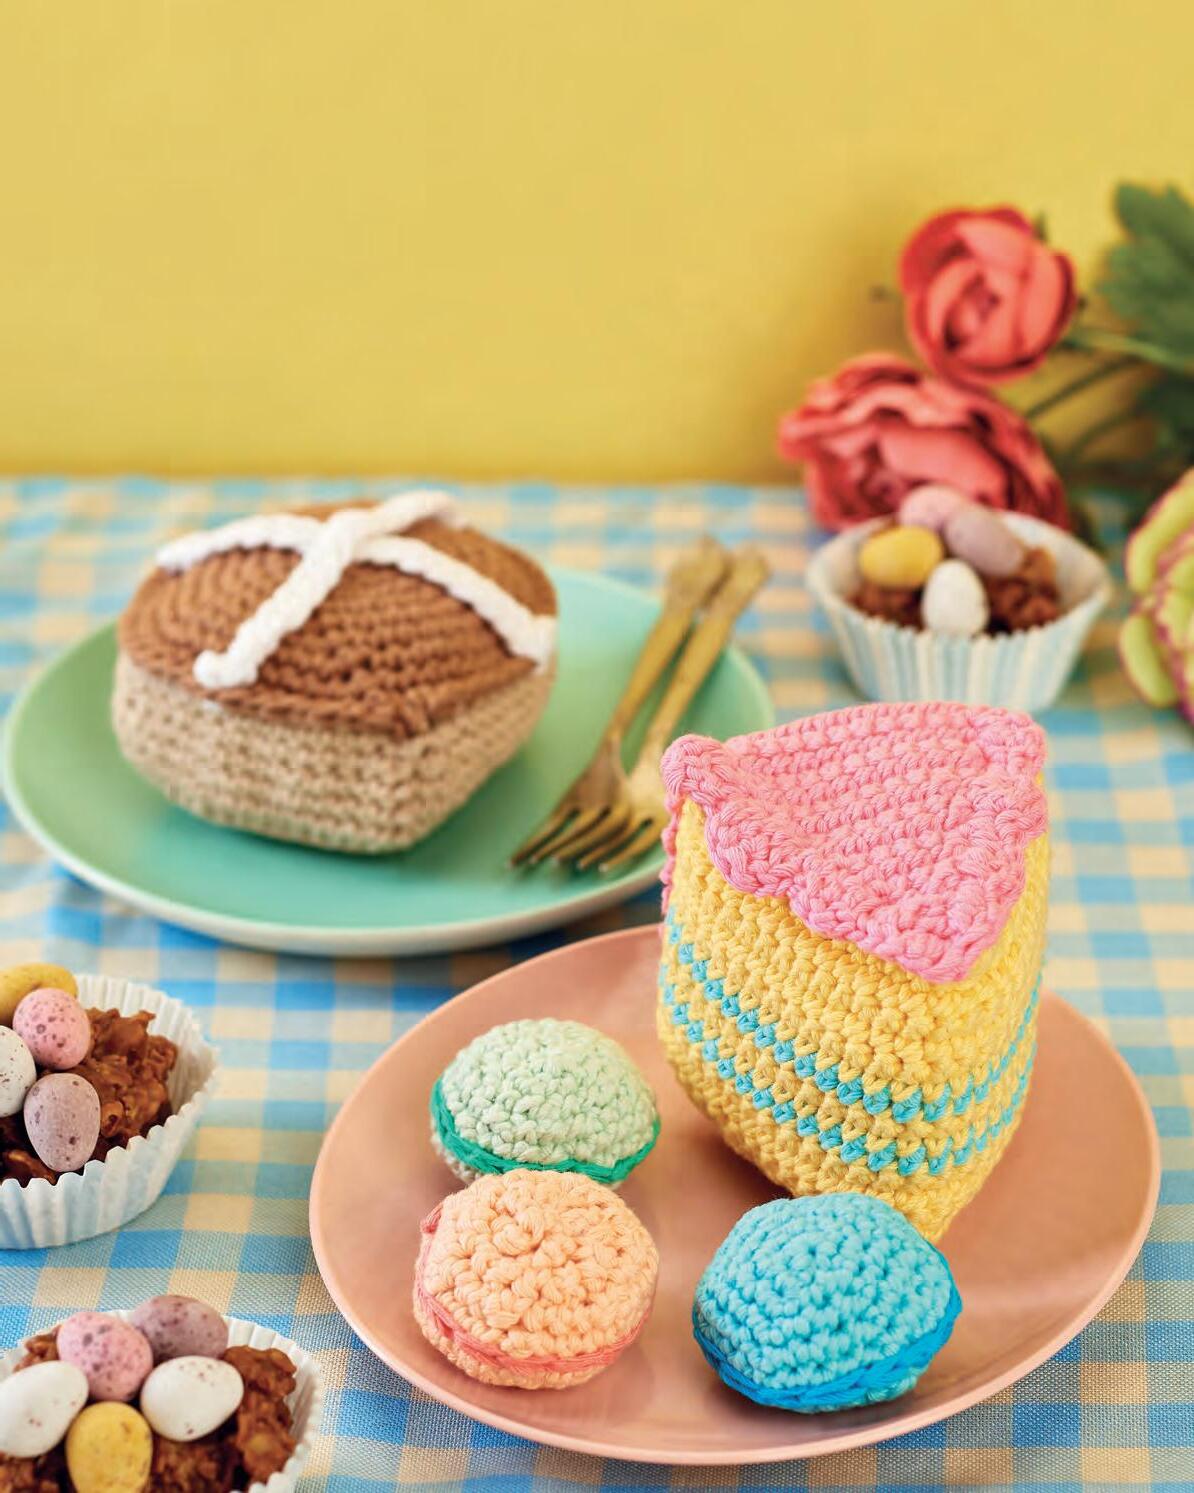
◆ Why not add embroidered faces for an extra dose of cuteness?
◆ You can see more of Hayley’s designs on Instagram at @franklinrosecrochet
Find these instructions in the Members Area at createandcraft.com

We Soft Crafts 49
Practice makes perfect
“These patterns are ideal to practise keeping your tension the same, which is a great skill to have for future projects”
HAYLEY TEMPLEMAN, DESIGNER
Create fluffy Pom-Pom Buddies
Put a spring in your crafting with this adorable bunny and cockatiel duo

Aperfect crafternoon activity with the kids, pompoms are easy and inexpensive to make – plus they can be made into all sorts of fun decorations. Once you’ve mastered these animals, why not experiment styling your own creatures using card cutouts?
Pom-pom animals
Kit List
◆ Brother ScanNCut SDX1200
◆ Stix2: PVA glue
◆ Corrugated cardboard, pencil and red liner tape (to draw template), or pompom maker
◆ Scissors: small; large
◆ Yarn: grey; white
◆ Card stock: grey; pink; black; white; yellow
◆ Floristry wire, clear
◆ Pearls: pink; brown; black
◆ Hot glue gun and glue sticks
◆ Mini pom-pom, white
1 Create a cardboard template by drawing around the outside and inside of the red liner tape and cutting out. Repeat so that you have two cardboard circles. Snip through to the centres [1]


2 Put the two cut-out pieces of card together and wrap the yarn around them. Once finished, cut a length of grey yarn ready for the next step.
3 Place the scissors in between the two pieces of card and carefully cut the yarn around the circumference of the circle. Be sure to not let any yarn fall out of the gap in the card circles [2]. Place the length of grey yarn in between the two pieces of card
Craft with the kids
Make the cut
and tie all the cut pieces of yarn together. Remove the card pieces from the pom-pom.
4 Repeat Steps 2 and 3 so you have two pom-poms, but make one smaller than the other. Trim the straggly fibres to create neat ball shapes, but don’t cut off the long length of yarn.

5 Repeat Steps 2, 3 and 4 with white yarn for the cockatiel.
6 Tie the two grey pom-poms together using the long strands then repeat with the white pom-poms. Trim the long yarn tails.
7 To make the rabbit’s ears, add stored image BA-A026 to the digital mat on the ScanNCut.
Rotate 90°, resize to 1.75" x 0.50" and cut twice from grey card. Resize to 1.30" x 0.34" and cut twice from pink card. Stick the pink part to the grey part with PVA glue [3]
8

To make the cockatiel’s beak, add stored image AR-C104 part D to the digital mat of the ScanNCut and rotate 90°. Resize to 0.50" x 0.73" and cut twice from black card. Stick the two together to create a beak shape. For the wings, add stored image AR-C008 part E and resize to 1.82" x 1.04". Duplicate to two and flip one. Cut both out of white card. Resize them both to 1.50" x 0.86" and cut both again

from white card. Stick the smaller two to the larger two wings. For the feet, add stored image AR-C008 part B to the digital mat and resize to 1.15" x 0.97". Cut twice from grey card and stick together. For the crest, add stored image AR-C104 part C to the digital mat and resize to 0.90" x 1.74". Cut from yellow card [4]
9 Using hot glue adhere the card elements to the rabbit and the cockatiel. Then glue black pearls to the cockatiel for eyes and brown ones to the rabbit. Glue the floristry wire to a pink pearl to create whiskers and glue to the rabbit as a nose. Glue the mini pom-pom to the rabbit as a tail.
50 We Soft Crafts
“If you don’t have a ScanNCut, trim the various card shapes by hand using scissors”
HELEN KIRKHAM, DESIGNER


Easter Crafts We Easter 51 Hop to it and enjoy making our egg-citing Who can resist these cute needle felt characters Page 52 Explore ink effects for Easter cards Page 54 Stash Easter treats in simple-to-sew bunny bags Page 58 Stitch a basket for Easter chocs or gifts Page 56 Go on an adventure with these egg hunt accessories Page 62 Create chic cards and decorations with a dictionary! Page 64
felt a set of
Easter Egg Cuties
If you're searching for a quick and fun Easter project, you've come to eggs-actly the right place!
Whether you’re a beginner wanting to try your hand at needle felting or a seasoned pro looking for a quick make, these spring animals are just the thing!


Spring animals
Kit List
◆ Wool suitable for needle felting, various colours

◆ Felting needles

◆ Felting mat
◆ Scissors
◆ Wire cutters
◆ A selection of small eyes, or short pins with plastic heads
◆ Glue (to secure the eyes and decorations)
◆ Wire (for chicken feet)
◆ Cotton and long needle (to add whiskers)

◆ Fimo polymer clay (to make any decorations like the glasses and flowers)
1 Start by making a fat sausage shape with the wool (any colour, this is the core so won’t be
seen). Stab with a needle until firm, then add more wool around the bottom of the sausage to build up the shape of an egg [1]
2 Once you have the basic egg shape, you can make it bigger by adding wool, or change the colour by covering it with wool in the colour of your choice [2]
3 For the chicken feet, shape the wire as shown [3], then wrap the wool around the wire until covered. This can be secured by brushing the shaped wire with glue for the first layer of wool, then building up with more wool. Gently stab until it is secured.
4 Use pins to plan the eye and nose positions, moving them around until they look right [4].
5 Make the chick's beak, crest and wings using small pieces of wool, stabbing into shape [5].


6 Do the same for the ears, arms and feet of the rabbits and lamb [6]. Decide where they look best then stab the wool until the body parts are attached to the egg shapes.
7 Add noses to the faces using small strands of wool stabbed into place [7]. Glue the eyes into position and glue on any accessories such as glasses and flowers.

8 For any stitched detail such as whiskers, use a very long needle and start at the underside so any knots won’t show [8].

52 We Easter
Needle
Helping Hand
◆ Any project can take a while to take shape – don’t worry if it doesn’t look right straight away, just keep adding wool and stabbing until you get the desired effect

◆ A needle holder is a great investment – they come in various sizes and can hold multiple needles which makes the project a lot quicker for large areas. For fine detail though it’s best to use a single needle
◆ You can use scraps of any-colour wool for the middle of the egg shapes as it won’t be seen
Yarn art
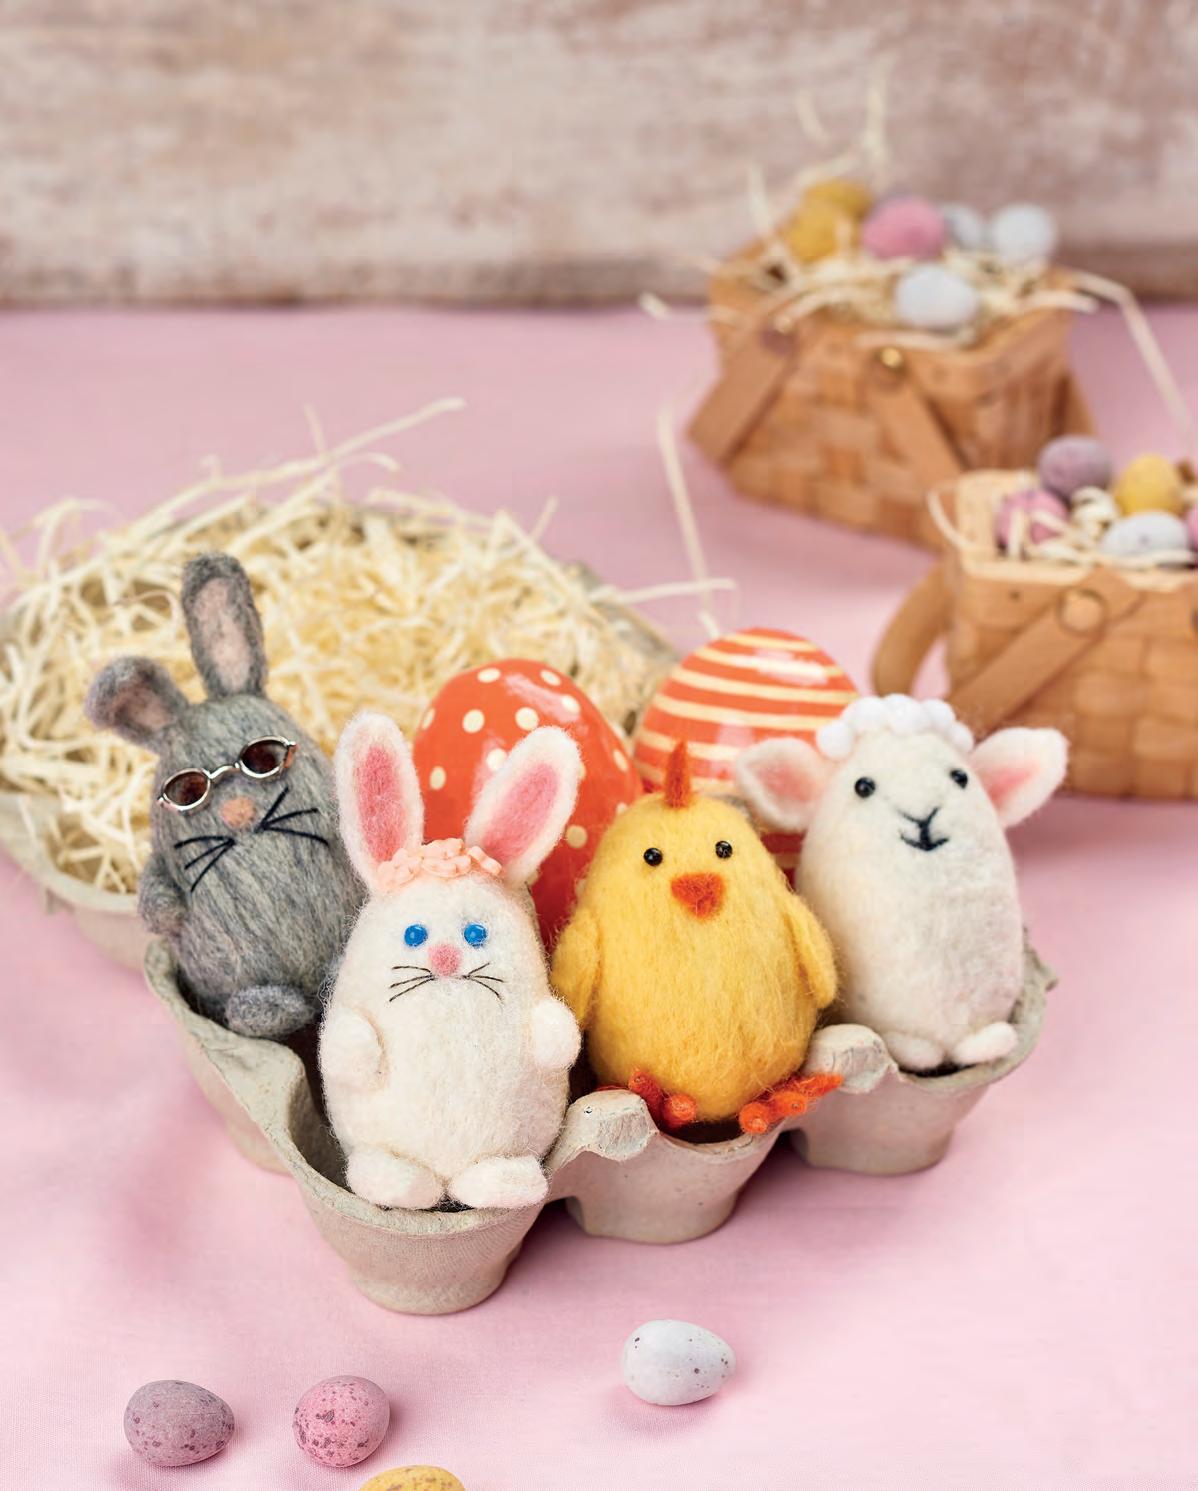
We Easter 53
“Use a good quality felting mat and always hold the needles straight – they will be less likely to break"
LISA RICHARDSON, DESIGNER
Craft an egg-cellent trio of
Easter Cards
Get your die cutting machine cracking on these fun inked ideas

Gather your ink and card stash, here are three fabulous ways to enjoy a Hoppy Easter! The coordinating set features several ink techniques to try out, all using the same glitter card and base.


Kit List
◆ Brother ScanNCut
SDX 1200

◆ Stix 2: foam pads; foam tape; gold ribbon; red liner tape; PVA glue
◆ Stamps By Me: Dotty stencil; Confetti ink, Oyster; Confetti ink, Bluebell
◆ Tim Holtz Distress Oxide ink: Tumbled Glass; Salty Ocean; Blueprint Sketch; Wild Honey; Carved Pumpkin; Lucky Clover; Ripe Persimmon; Cracked Pistachios; Pine Needles; Milled Lavender; Wilted Violet; Dusty Concord
◆ Card stock: white; gold glitter; white; scrap paper

◆ Paintbrush
◆ Acetate
◆ Spritz water bottle
◆ 7" x 7" card blanks, three


◆ Blending tool
◆ Tonic Studios sequins
◆ Mini pom-poms
◆ Glass mat
Egg wreath
1 Tear a piece of scrap paper to create a straight but torn edge that you can use as a stencil [1].
2 Using the blending tool and white card, add one of the green inks and swipe up over the edge of the torn paper, then repeat with the other two green inks lower down [2].
3 Repeat with the other distress inks to create four backgrounds in total [3].
4 Using the ScanNCut, add stored image AR-I024 (Part A) and resize to 2.45" x 1.98". Cut three eggs from each inked card.
5 Cut glitter card to 6.75" x 6.75" and white card to 6.50" x 6.50". Adhere the white to the glitter card. Spatter the white card with gold confetti ink using a paintbrush.
6 Again using the gold confetti ink and a brush, add splats to the eggs.
7 Glue the eggs in a wreath shape to the white card using foam pads, and add a ribbon and a bow at the top.
8 Using the ScanNCut, using font FO-A001 cut lettering for Happy Easter from glitter card measuring 0.75" x 8" and adhere to the egg wreath. Glue the topper to the card blank.
Hoppy Easter
1 Blend three blue distress oxide inks over a piece of white card, then ink through the Dotty stencil with the darkest blue. Repeat with the other three colours [4]
3 Using the ScanNCut, add stored image AR-I023 and resize to 11.76" x 8.34". Ungroup and weld together. Add a circle to the mat, resize to 1.55" and place over the top of the eyes. Add another circle and resize to 5" and place over the half circle on the bunny’s tummy. Weld all of the shapes together to create the silhouette [5]. Resize to 2.75" x 1.95" and cut three times, once from each of the blue, orange and purple inked cards.
4 Add stored image BO-A020 and resize to 1.50" x 5.75".
Helping Hand
◆ Use an anti-static powder tool on the acetate to prevent the sequins sticking to it
◆ Before cutting into a new piece of card stock, check your offcuts for a suitable size piece
◆ Ensure there are no gaps between the pieces of foam tape used to outline the chick for the Shaker card, or the sequins will escape!

Cut from the green inked card [6]
5 Cut glitter card to 5.75" x 5.75" and white card to 5.50" x 5.50". Glue the white onto the glitter card. Spatter the white card using the gold confetti ink and a paintbrush.
6 Glue the pom-poms to the bunnies then glue the bunnies and the grass to the card.
7 Glue the topper to the card blank. Using the ScanNCut and font F0-A001 cut the letters from glitter card for Hoppy Easter measuring 0.75" x 7.75" and adhere to the topper and card base.
54 We Easter
Chick shaker
1
Add a little Blueprint Sketch distress ink to a glass mat and spritz with water. Then pick up the colour with white card. Then spatter the card with both confetti inks [7]
2 Repeat the distress inking process above with the Ripe Persimmon then again with the Wild Honey ink. Spatter with the gold confetti ink only.
yellow inked paper to 5.50" x 5.0" and adhere to glitter card measuring 5.75" x 5.75". Add the sequins to the centre of the yellow card. Stick the chick topper to the yellow background using more foam tape.
Lastminute make
3
Add stored image AR-I107 to the ScanNCut, resize the egg to 2.25" x 2.89" and cut from the blue inked card. Add a square to the mat measuring 5.50" x 5.50". Resize the chick to 2.84" x 4.06", centralise the square and the chick vertically and horizontally. Cut from white card. Using the same chick, create an offset line at -0.15 and another at +0.12 and cut from the orange inked card. Add spatters to the white card with gold confetti ink. Adhere the chick and egg to the white card using PVA glue [8]
4 Cut acetate to 5.50" x 5.50" and adhere to the back of the white card using the red liner tape. Add foam tape to the back of the card around the chick shape. Cut the
5

Stick the topper to the card blank. Using the ScanNCut and font FO-A001, cut out letters from glitter card for Have A Crackin Easter measuring 0.58" x 10.50" and adhere to the card.
Bright idea
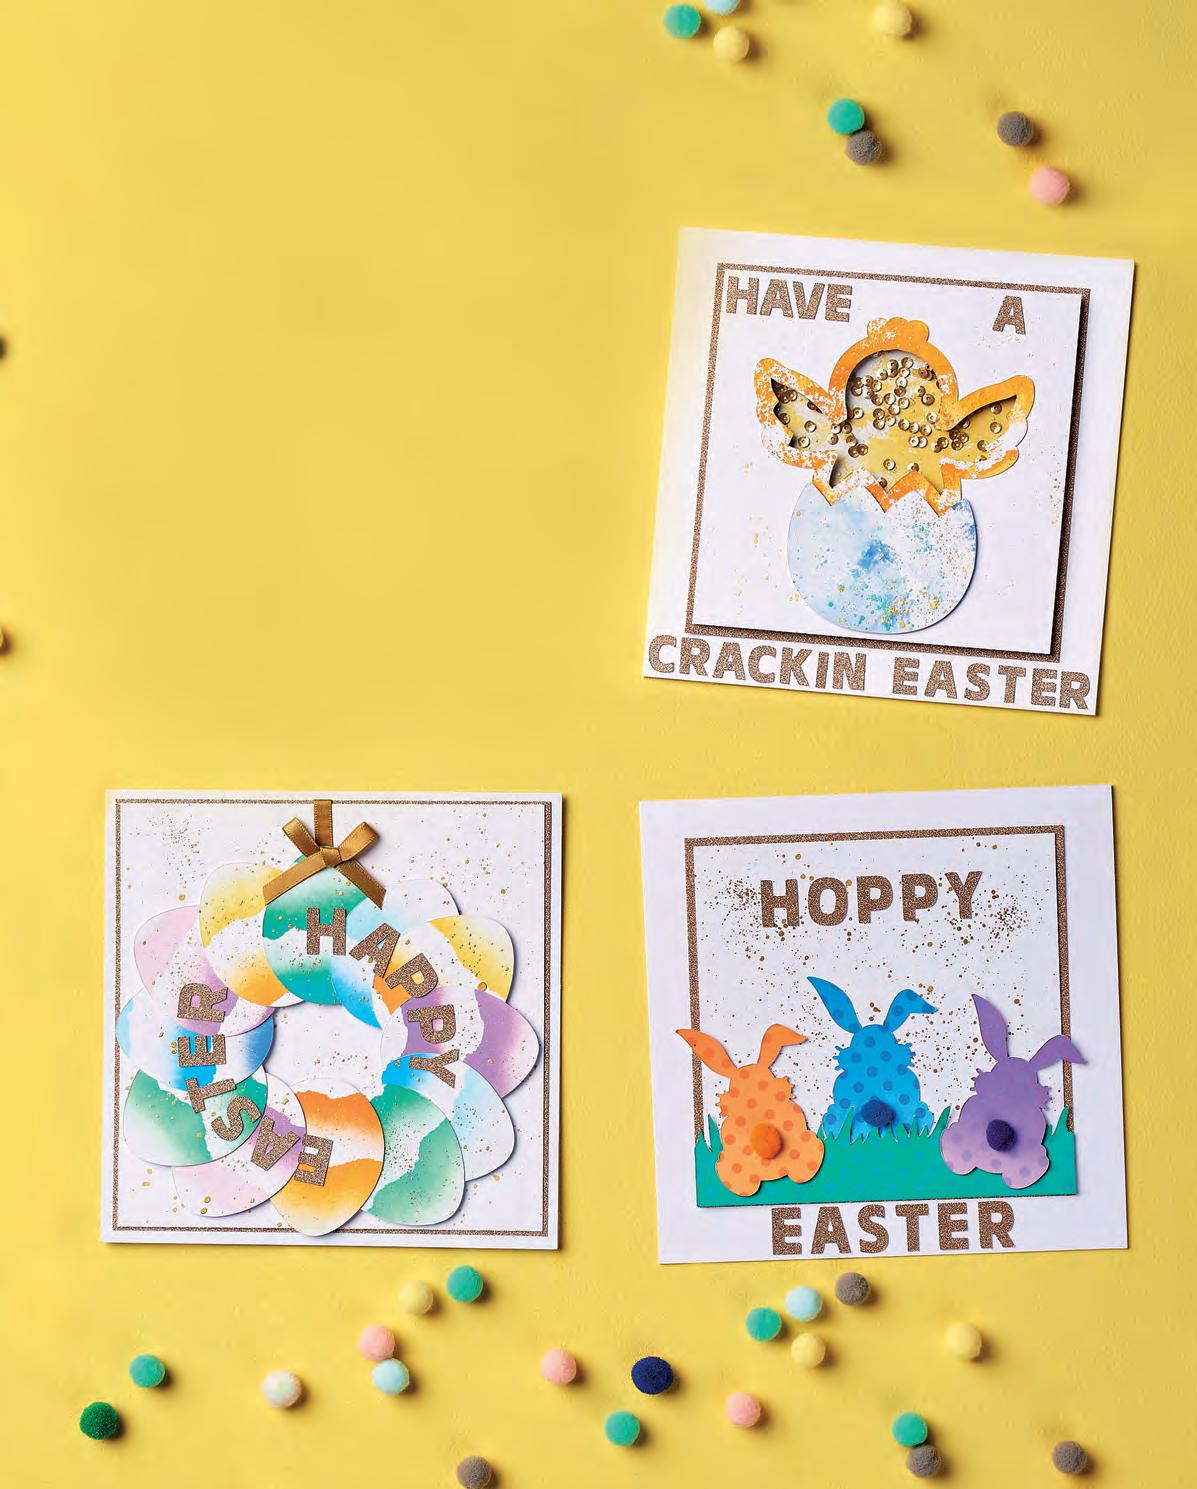
We Easter 55
“You can batch make these cards by die cutting several of the shapes at once from your inked card stock”
HELEN KIRKHAM, DESIGNER
It’s easy stitching an
Easter Basket
Hop to it and whip up this sweet basket for holding treats and decorations – the Easter Bunny would be proud!
Get creative crafting this adorable felt basket by Hayley Victory. It's simple to make and ideal for getting the children involved. Once you’ve made a batch, use them for collecting treats on an egg hunt, or for displaying potted flowers, eggs and Easter toys!
Easter basket
Kit List
◆ Template from the Members Area
◆ Felt: bright green, pink, yellow, turquoise, lilac, off-white
◆ Sewing needle and thread, green
◆ Glue gun or fabric glue

◆ Scissors
◆ Water erasable fabric pen
1 Using the templates found online in the Members Area, cut out one circle, one rectangle, one large grass shape, and one smaller grass shape from the green felt.

2 Stitch the base of the larger grass shape to the circle piece using blanket stitch. Take


your time as this can be fiddly, and try to keep your stitches close together, as this will give the basket more strength.
3 When you’ve finished stitching the grass to the base, you should have a slight overlap. Use fabric glue or a glue gun to stick the overlapping piece to the basket. This will be covered up later.
4 Fold the green rectangle in half lengthways, and close the open edge with a small bead of glue to make a handle for the basket.
5 Glue the handle inside the basket, then reinforce the joins with a few stitches to give it extra strength. These won’t be visible on the outside when you add the second grass layer.
6 Using the template cut out four egg shapes from the off-white felt. Using the pink, lilac, yellow and turquoise felt and glue, decorate the egg shapes with spots, stripes or your choice of patterns. Next,


Helping Hand
◆ To save time, you could use a sewing machine to attach the grass to the base, rather than hand stitching
◆ Slightly stiff polyester felt works better for this project, as it helps to keep the basket rigid. Avoid 100% wool felt, or a wool blend because it’s too soft
◆ Water erasable pens are great for drawing around the templates. After cutting out your shapes you can simply wipe away any stray pen marks
cut out approximately ten flowers and ten flower centres, in a mix of colours.
7 Glue the egg shapes to the smaller grass piece, and stitch or glue the flowers to it, filling any gaps.


8 Stitch a few flowers to the basket handle, then glue the grass piece to the basket so it has two grass layers.

56 We Easter
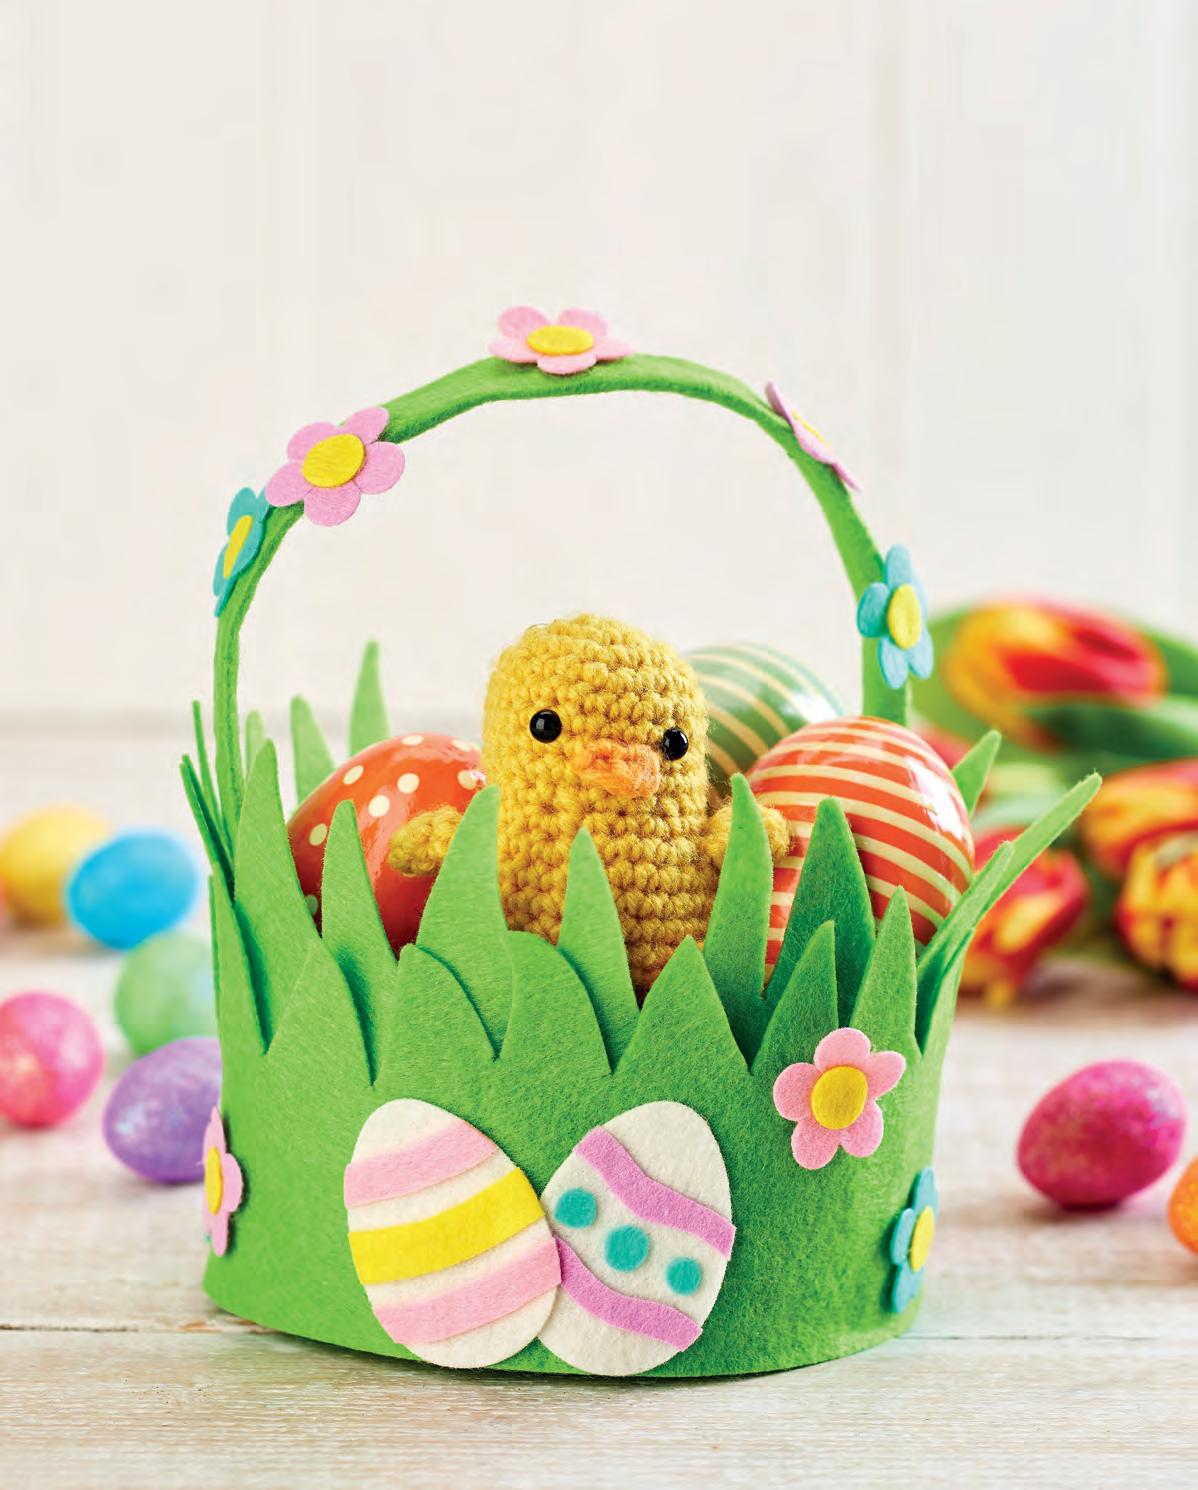

We Easter 57 Raid your stash
is a great project for using up felt scraps”
“This
DESIGNER Download the templates from the Members Area at createandcraft.com
HAYLEY VICTORY,
Use scraps to stitch sweet
Easter Bunny Bags
Spread a little hoppiness with these cute treat bags that are the perfect gift idea for Easter
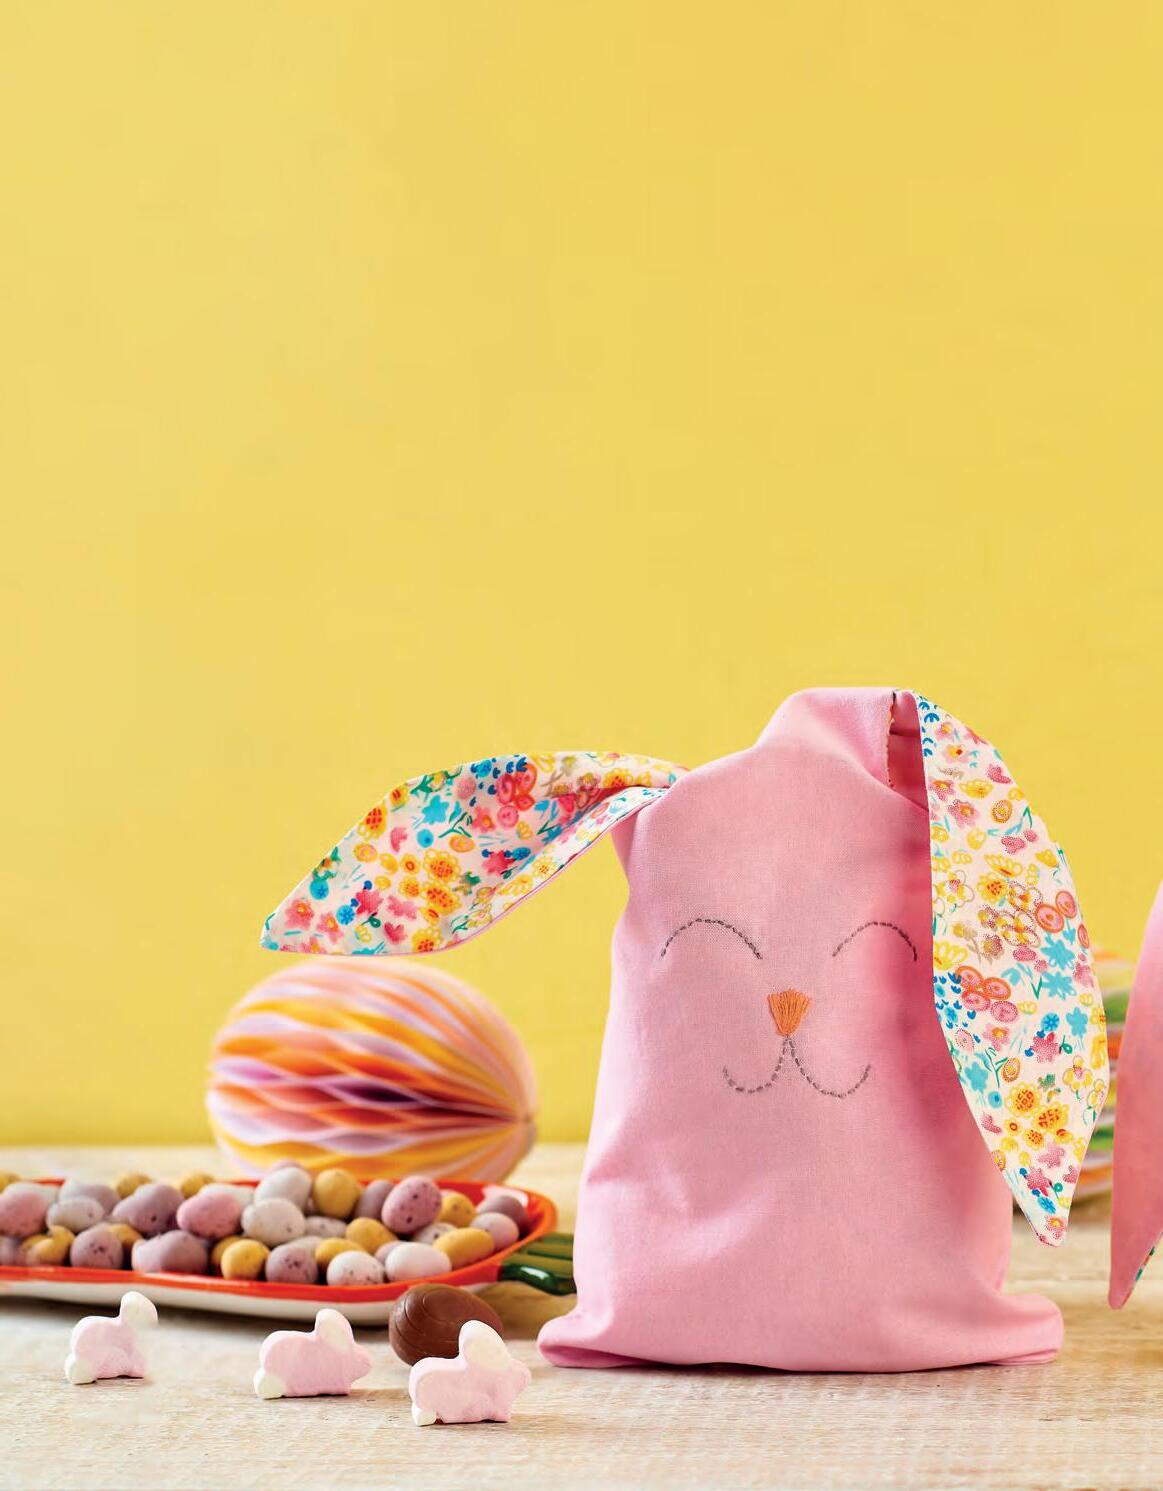
Whip up this speedy project for some-bunny special this spring – the bags are simple to scale up or down using the template in the Members Area online, so can be filled with little treats or something larger!
Bunny bags
Kit List
◆ Template from the Members Area
◆ Sewing machine
◆ Iron and ironing board
◆ 0.5 metre plain fabric
◆ 0.5 metre patterned fabric
◆ Matching sewing thread
◆ 0.5 metre iron-on lightweight fusible interfacing (to buy this head to createandcraft.com and type in product code 590454)
◆ Heat erasable fabric pen
◆ Embroidery thread and needle
◆ Point turner tool (optional)
◆ Scissors
1 Cut out fabric and interfacing using the pattern piece available on the Members Area online. Cut four pieces of each fabric (plain and patterned) and four pieces of interfacing using only the bag part of the pattern piece. This will create two bags.
2 Iron the interfacing onto the wrong side of two of the plain pieces and two of the patterned pieces. Ensure you
have the fusible side down on the fabric. Place a scrap of fabric over the top before you press it to protect your iron. These will be the outer sides of the bags.
3On one of the plain outer pieces draw then embroider the bunny’s face onto the bag. Make sure it’s not too near the top of the bag section and is central. You do not need to do
this step for the patterned bag or if you do not want a face.
4 Placing one plain outer piece and one patterned piece right sides together, sew around the ears only. Snip into the corners and snip off the top of the point. Repeat for the other outer and patterned piece.
5 Lay the two bag sections right sides together matching the patterned and plain fabrics together. Sew around the edge leaving a gap on the patterned piece for turning the bag through.
58 We Easter
Be careful not to catch the ears! Snip around all the curves.
6 Turn the bag right side out. Gently ease the ears through. It is helpful to poke up into the ears once they’re turned right side out, using a point turner to create the point of the ears. Press the ears to give them crisp edges.
7 Stitch up the gap left in the lining either by hand or machine. Press the bag.
8 Repeat Steps 1-7 for the patterned bag, ensuring you leave the turning through gap on the plain bag section this time.
Helping Hand
◆ Use a heat-erasable sewing pen to draw the face of the bunny on the bag freehand. Embroider along the lines you’ve drawn then the bag can be pressed on a low heat to remove the pen lines


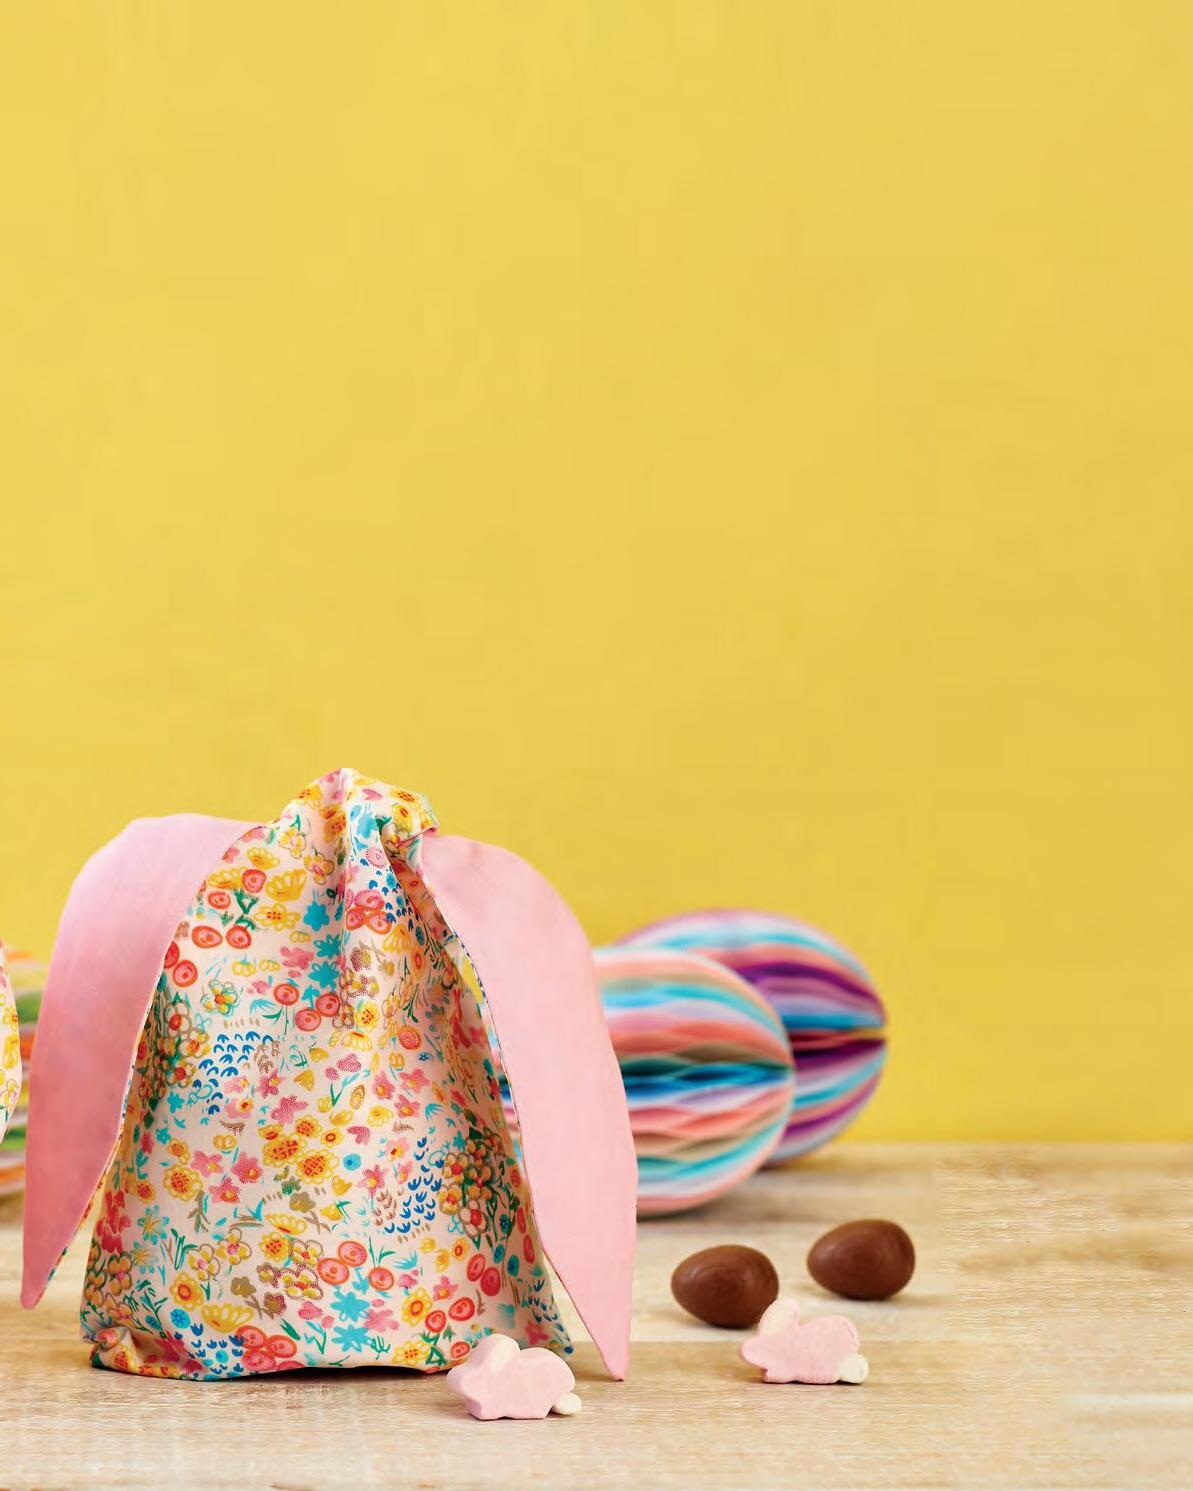
◆ Experiment with different coloured noses, add rosy cheeks or little flowers in a crown
◆ If you are not confident adding a face, you can experiment with different patterned fabrics instead

We Easter 59
Simply ear-resistible
“These goody bags are perfect for filling with Easter treats”
JUSTINE WOOLLEY, DESIGNER
Download the templates from the Members Area at createandcraft.com
Craft a colourful
Easter Decoration
Make the Easter Bunny feel right at home with these stunning yet simple-to-make table centrepieces
Follow these simple steps to create your own standout Easter decorations. And why not add your own creative spin to match your colour theme?
Easter egg bush
Kit List
◆ Styrofoam cone, around 20-30cm in height
◆ Tin foil
◆ Small terracotta pot
◆ Acrylic paint: white, pink, turquoise, purple
◆ Low-tack masking tape
◆ Sphagnum moss
◆ Hot glue gun and glue sticks

◆ Paintbrushes
◆ White plastic eggs, approx 25
◆ Fake flowers
◆ Ribbon
1 First, divide the eggs into three lots, and spatter paint on them in each colour with a stiff brush [1]. Wait to dry.


2 Prepare the pot by painting with two coats of white, and

a strip of pink around the rim – use masking tape to make this easier [2]. While this is drying, wrap the Styrofoam cone in tin foil (this step is optional, but it means that you can easily use the cone for another project after Easter).

3 Next, start to glue your eggs onto the cone one by one [3] Fill the gaps with sphagnum moss and fresh flowers. Add a bow on the pot to finish.
Bunny tree
Kit List
◆ Small terracotta pot
◆ Dowel or bamboo stick, 25cm long
◆ Scrap paper
◆ Paper and card for bunnies
◆ Ribbon
◆ Hot glue gun

◆ White plastic eggs, three
◆ Paintbrushes
◆ Acrylic paint: white, pink, turquoise, purple
◆ Craft flowers
Helping Hand
◆ If you haven’t used sphagnum moss in your crafts before, you’re in for a treat! It can be found at most garden centres, and is traditionally used for kokedama, seed starting or lining flower baskets. Used dry, it’s a great addition for projects that need an organic texture. And when you’re done, you can use the remainder as mulch for pot plants!
◆ Protect surfaces with newspaper before spattering the acrylic paint. Keep a wet cloth to hand to wipe up spills swiftly – as acrylic paint is difficult to remove once dry
1 Paint the pot with two coats of white, and a strip of pink around the base, blending it into the white to create an ombré effect. Paint the dowel white. Use a stiff paintbrush to spatter the eggs with paint, one per colour.
2 Spatter the three paints onto a sheet of white paper. Once dry, cut into a bunny shape and mount onto pink card, cut into a slightly larger bunny shape.
3 Once the pot is dry, scrunch up a piece of scrap paper into a ball that’s big enough to fill the pot. Carefully create a hole in the middle of the scrunched paper using a pair of scissors [4]

4 Place the painted dowel in the hole, using hot glue if you need to secure, and wrap some ribbon around to decorate, again securing with hot glue [5]
5 Stick sphagnum moss with a hot glue gun onto the top of the paper ball. Use a few layers to cover it and build up texture [6]
6 Stick a paper bunny to the top of the stick, and decorate the base with flowers, the three paint-spattered eggs, and a bow.
Sprinkle of twinkle
60 We Easter
“There are so many fun and different techniques for painting eggs – why not try a touch of gold leaf to add some sparkle?”
PENELOPE QUINN, DESIGNER
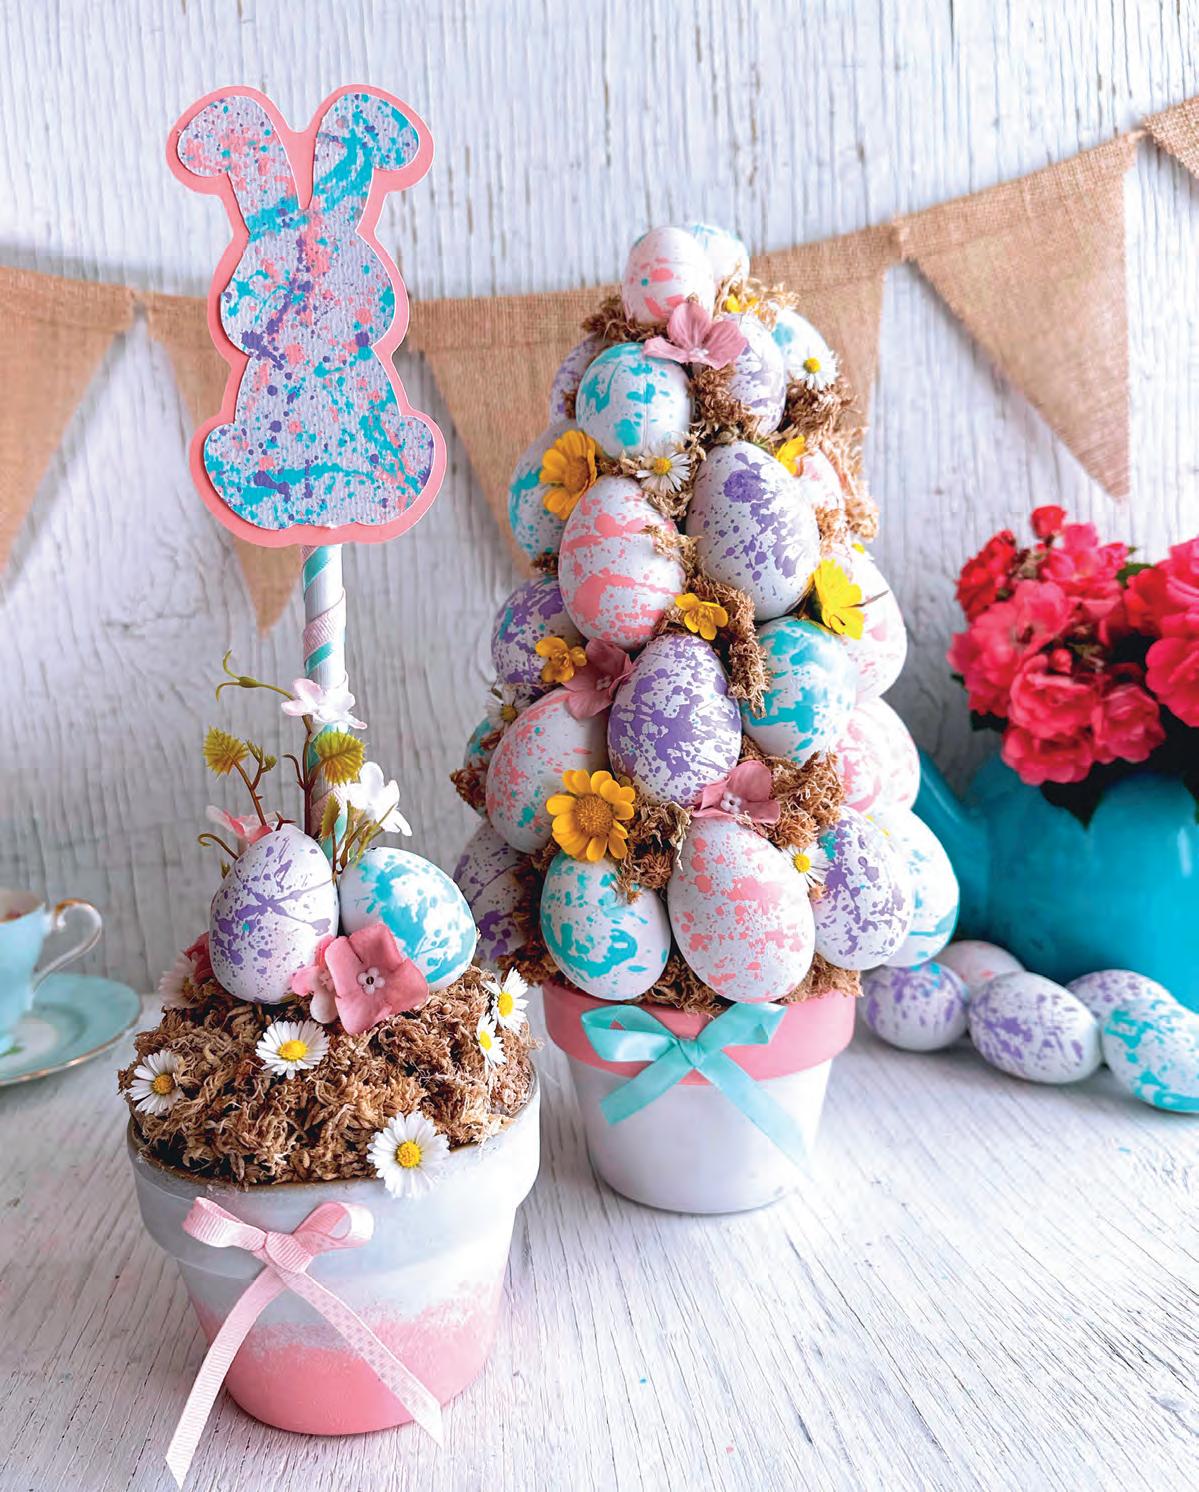
We Easter 61 Scan the QR code using the camera on your smartphone or tablet to shop at createandcraft.com Find glue guns & adhesives
Egg Hunt Markers
Create everything you need for an Easter egg hunt using your ScanNCut
Hop to it and create our simply ear-resistible egg hunt accessories for some-bunny special this Easter! Craft the clues in bright colours to stand out in the garden or make the trail a little harder by using nature-inspired shades that will blend in.
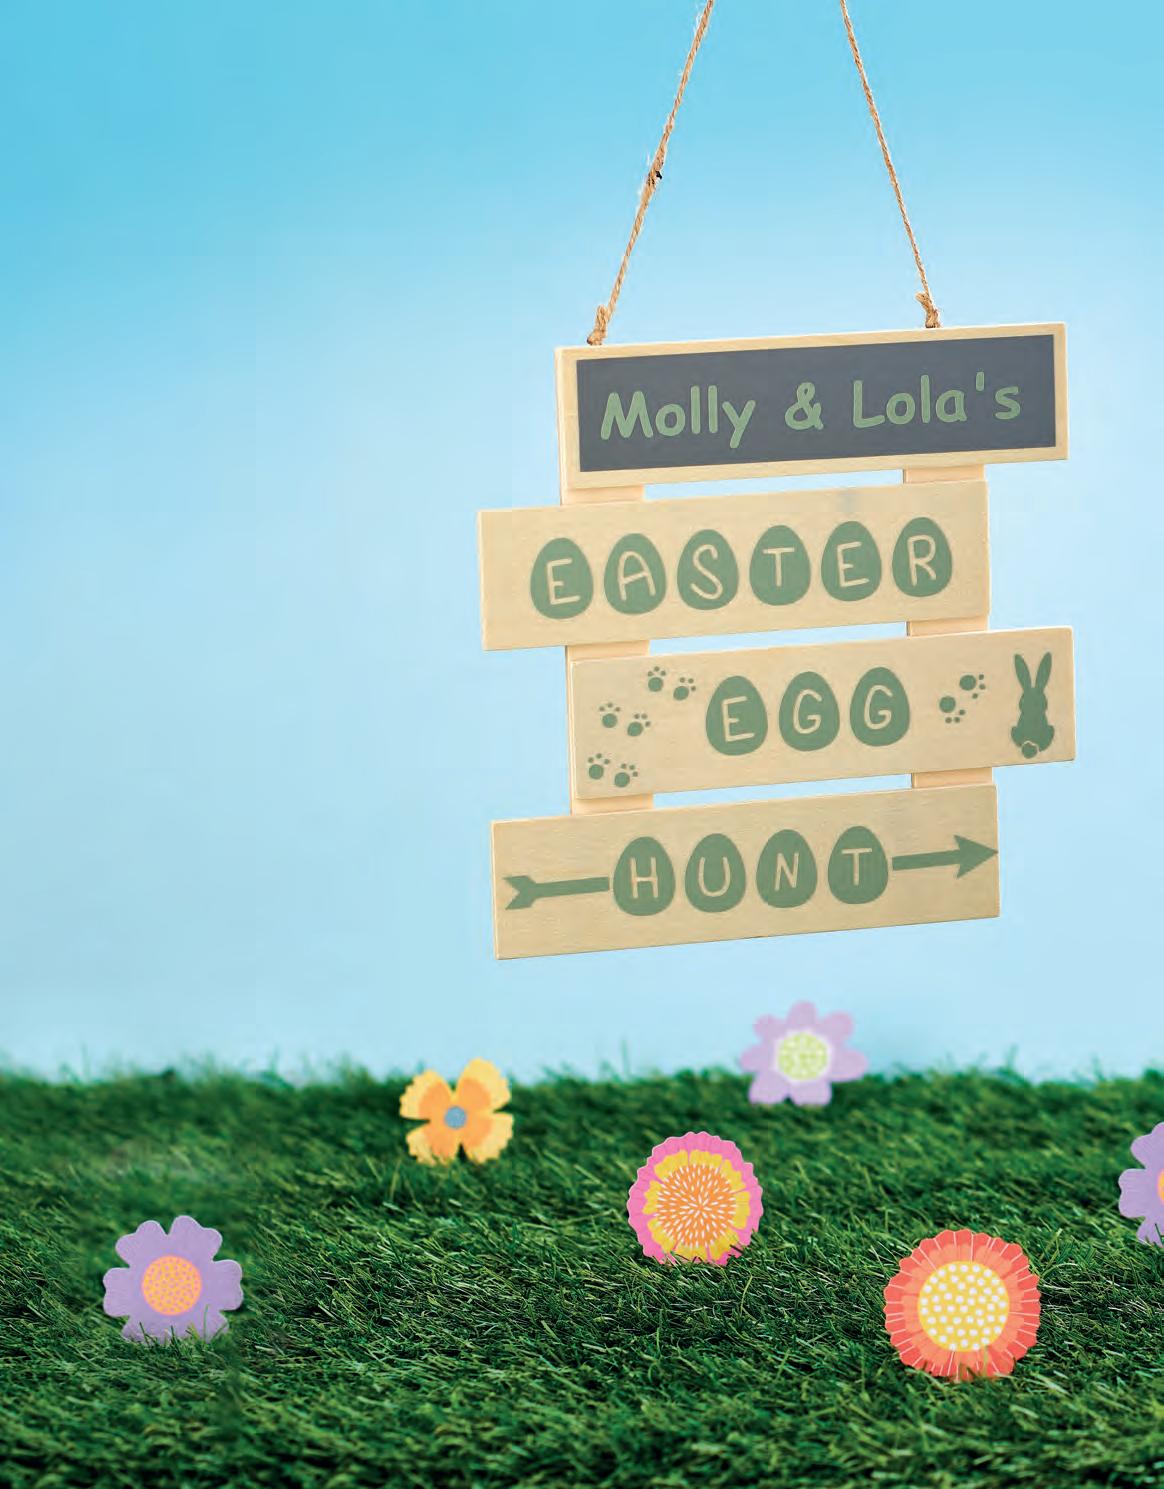
Hanging sign
Kit List
◆ Brother ScanNCut
◆ Wooden hanging sign
◆ Vinyl: sage green, silver
◆ Weeding tool
◆ Smoothing tool
◆ Transfer tape
1 In Brother Canvas Workspace, set out the template the same size of the sign, so you know the guidelines that you’re working within.
2 Download an Easter egg font, a bunny SVG file and a paw print SVG file online.
3 Create a rectangle for the top panel to cover most of the wood. Then using Comic Sans font add the name of the person the sign is for.
4 Using the Easter egg font, add the words Easter Egg Hunt so they fit in the other panels as shown.
5 Import the bunny SVG file, resize and position in the corner next to the word Egg. Then add the paw print SVG file and copy and paste so there are enough paw prints to look like the bunny has hopped to the corner, as shown.
6 Using the shapes within the workspace, add the two ends of the arrows so that they go through the word Hunt.
7 Cut the rectangle shape for the top part onto silver vinyl. Cut the rest of the elements on the sage green vinyl.
8 Weed all of the elements then transfer them onto the clear transfer tape, smoothing them out as you do. Then place them onto the hanging sign and fix them in place using a smoothing tool. Peel back the transfer tape.
62 We Easter
Whip
up some die cut
Hunt markers
Kit List

◆ Card stock: pale pink glitter; orange pearlescent; gold; cream
◆ Alphabet stamps
◆ Black ink pad
◆ Adhesives: foam pads, glue, tape
◆ Craft sticks
◆ White mini pom-pom
1 Download SVG files online for an egg, bunny and chick. Import them into Brother Canvas Workspace. Re-size them to be the same height – ours are 15cm tall.
2 Cut out each shape from the different colours of card then fix each one onto a craft stick using tape.
3 Stamp a clue or instruction onto strips of cream card. Fix them onto each element using foam pads.
4 Glue the pom-pom on the bunny where the tail should be.
Helping Hand
◆ To save time you can print out the sentiments instead of stamping them
◆ Why not use different colours or glittered vinyl on the sign for a more colourful effect?
◆ You could use garden twigs rather than craft sticks for the markers
◆ There are many free fonts and SVG shapes to download online, from sites such as dafont.com and lovesvg.com
◆ If you want additional Easter-inspired markers, you might like to download flower, lamb, cross, candle, carrot, hen, egg basket or butterfly SVG shapes online
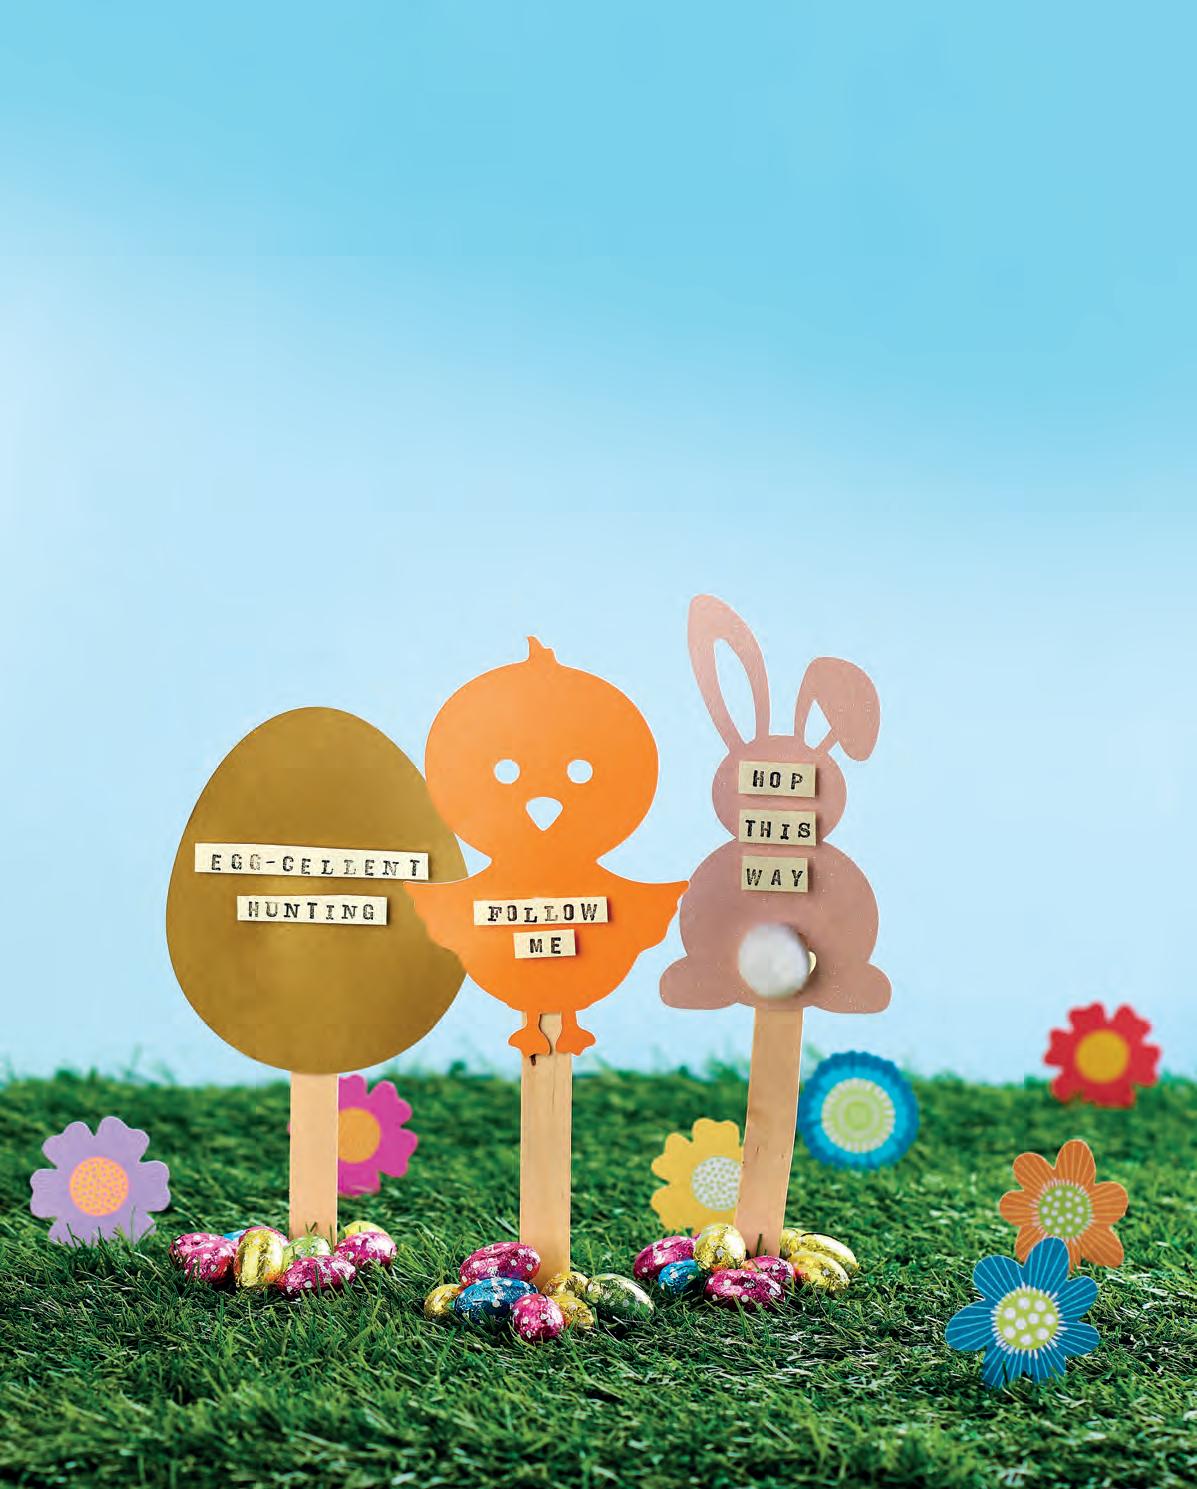
Perfect for beginners
Hop stuff
We Easter 63
“These simple projects will help you to create an egg-cellent Easter egg hunt for your little ones!”
RACHEL NEWSOME, CREATE AND CRAFT’S IN-HOUSE CRAFTER
Die cut layered
Easter Cards
Celebrate the arrival of spring and brighten someone’s day with cards and bunting in pretty pastel colours
Think twice before throwing away any damaged books, because you can turn that trash into treasure with a little creativity! Our colourful Easter cards and bunny bunting repurpose old book pages for a chic and eco-friendly vibe.
Bunny bunting
Kit List
◆ Template from the Members Area
◆ Old dictionary or book
◆ Altenew Layered Floral Elements die set
◆ Craft Consortium Let Spring Begin A4 Paper Pad (to buy this go to createandcraft.com and type in product code 594182)
◆ Die cutting machine
◆ Adhesive
◆ Ric-rac, pink
◆ Pencil
1 Download, print and cut out the template found online in the Members Area. Trace the template onto a dictionary page and cut out. You will need two pieces for each bunny. Make your garland as long or as short as you like [1]


2 Die cut a variety of different flowers and foliage in coloured card. Layer and assemble the flowers, ready for the next steps [2]
3 Use hot glue or a fast-drying adhesive to adhere the bunnies along a length of ric-rac, spacing them out evenly under
the ribbon. Ensure more of the bunny hangs below the ribbon than above so that the garland will hang without the bunnies tipping forward [3]
4 Place another bunny on top of each bunny, with the ric-rac ribbon sandwiched between [4]. They should line up perfectly if cut out neatly, but you can tidy up the edges with scissors, if needed.
5 Adhere white pom-pom tails with glue, then decorate the bunnies and gaps between them with die cut flowers and foliage. Leave a length of the ric-rac free at either end for hanging.
Helping Hand
◆ Repurposing pages from damaged books is a great way of adding a special touch to your craft projects – and pages discoloured by age give the finished garland an adorable vintage look too

◆ Save your bunny template for future projects. You never know when it could come handy!
Happy Easter card Kit List
◆ Old dictionary or book
◆ Altenew Layered Floral Elements die set
◆ Craft Consortium Let Spring Begin A4 Paper Pad (to buy this go to createandcraft.com and type in product code 594182)
◆ Card stock: white; Kanban Crafts gold mirri (881389)
◆ Card blank, A6, white
◆ Tonic Studios Layered Mixed Ovals die set
◆ Concord & 9th Perfectly Penned stamp set
◆ Tsukineko VersaFine ink pad: Onyx Black
◆ Washi tape
◆ Adhesive
◆ Paper trimmer
◆ Die cutting machine
◆ Sequins
◆ White ribbon
3 Select a round edge oval die that is one size down from the scalloped one, secure it with a piece of a washi tape on some white card and run it through the die cutting machine.
4 Stamp out the sentiment on the white oval die cut, toward the left-hand side to keep space on the right bottom where the die cut flowers will sit.
5 Select a few different colours of card stock from the paper pad and die cut several flowers and leaves using the Layered Floral Elements die set.
6 Assemble the flowers by adhering the individual corresponding layers together. It’s a good idea to keep the bottom layer of each flower darker than the top layer, but there’s no right or wrong when you create.

1
Tear out a page neatly from an old dictionary and cut it to 1" smaller than the card base. Adhere it onto the card base.
2 Select a medium-sized scalloped oval die, secure it on a piece of the gold mirri card with a small piece of a washi tape and run it through the die cutting machine.
7 Adhere the oval die cuts on top of each other, then adhere the panel in the centre of the card base. Arrange and adhere the prepared florals around the bottom and sides of the oval element.
8 Tie a small bow using the white ribbon, snip the ends diagonally and adhere it onto the card by the flower cluster. Embellish with a few sequins.
64 We Easter
Try something new
Upcycled treasure

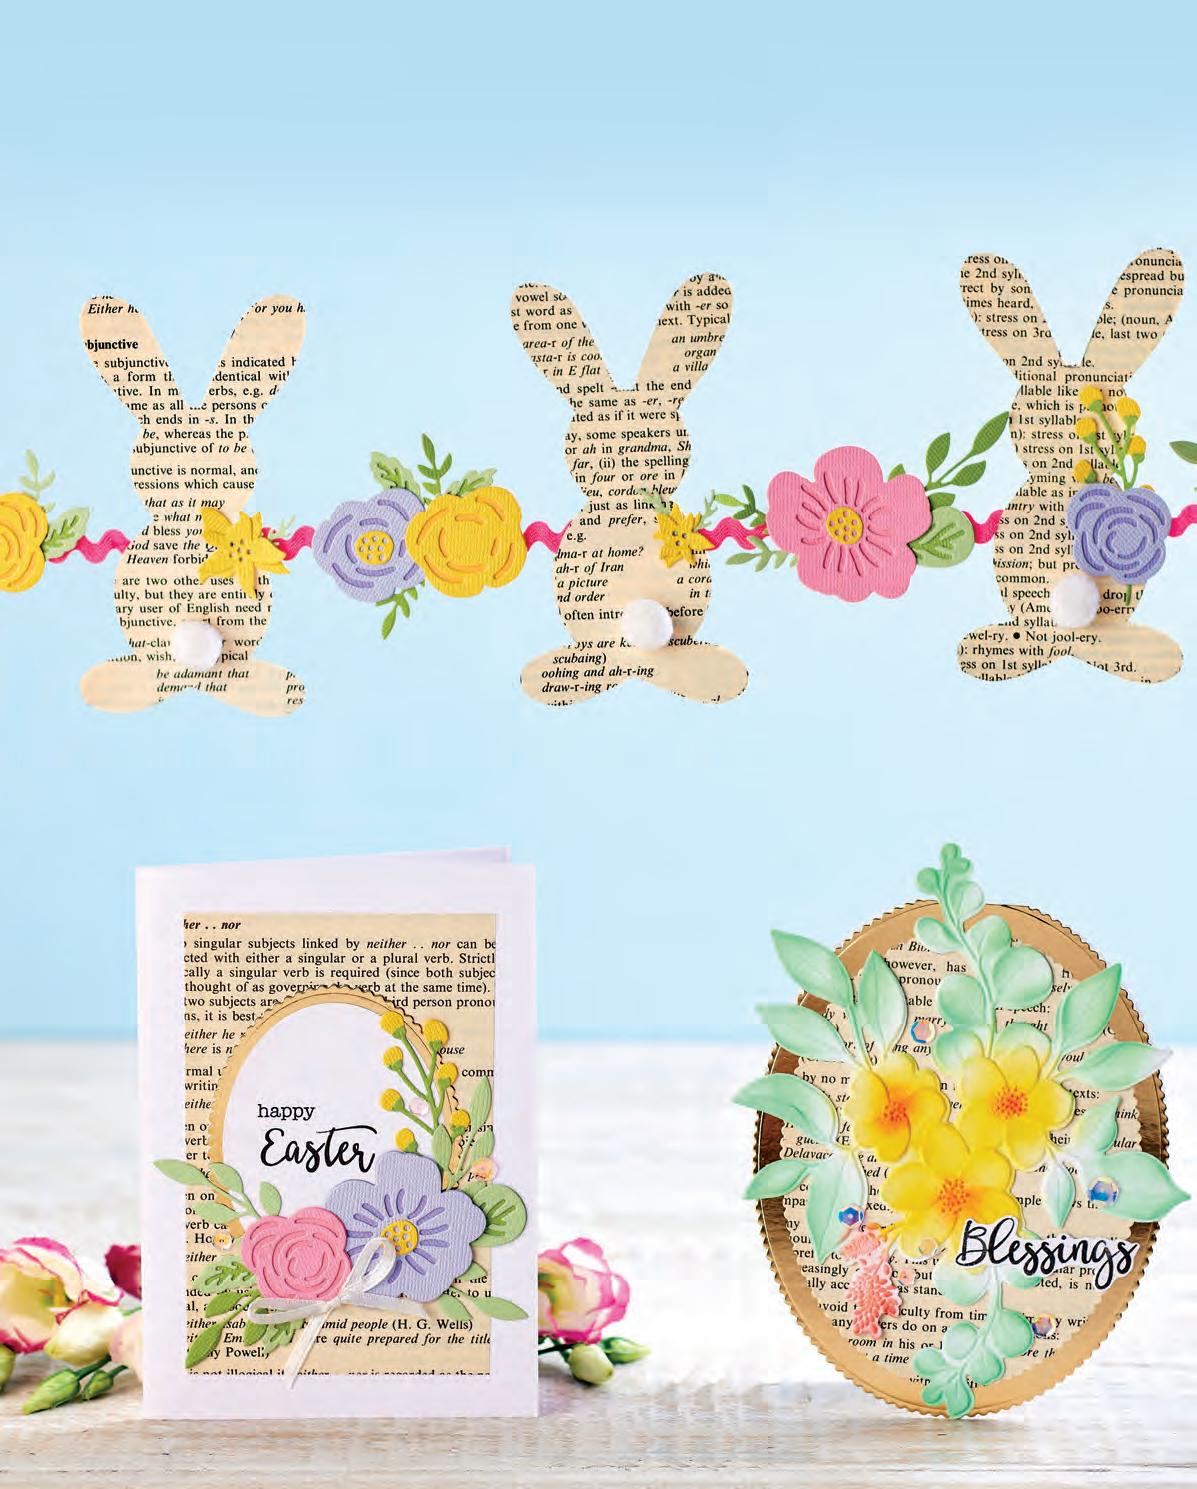
We Easter 65
very satisfying to give a new life to something old that would otherwise end up in the trash, like my old, damaged dictionary!"
“It’s
Download the templates from the Members Area at createandcraft.com Find these instructions in the Members Area at createandcraft.com
INGRID VICHOVA, DESIGNER
Author spotlight

EMMA VARNAM
Bestselling author and crochet aficionado Emma Varnam tells us about her latest book, Crocheted Houseplants

“ Houseplants have seen a fashionable resurgence in recent years, with chic interiors enhanced by elegant palms, huge Swiss cheese plants and glorious draping vines. I enjoy gardening and I also enjoy having houseplants in our home; a combination of succulents and leafy plants. Some have survived many years, others I have unceremoniously killed through overwatering or neglectful drought. Luckily, using crochet, you can make a plant that is impossible to kill. And crochet plants are one of my favourite choices for giving as gifts, although I must confess, I have found it difficult to part with the finished products!
About the book
Crocheted Houseplants features 25 stylish projects to revive your home or office décor and create a lush indoor garden, without ever having to remember about watering, repotting or feeding. Ideal for armchair growers who aren’t keen on getting their hands dirty, these crocheted beauties will give year-round horticultural satisfaction, without any of the hassle.
You’ll find retro crowd-pleasers, like yucca and spider plants, along with the dramatic purple foliage of coleus, the delicate blooms of the moth orchid and the menacing Venus fly trap. Flip through the stylish gallery pages, pick your favourite plants and get started.
Everything you’ll need to know is included in the book, from tools and materials to explanations of the basic crochet stitches. You’ll also find out how to pot up and display your fabulous crocheted creations.
BUY NOW Profile
To purchase Crocheted Houseplants: Beautiful Flora to Make for Your Home by Emma Varnam published by GMC Publications, head to createandcraft. com and type in product code 453563. Price £16.99 Club Member £11.69

Emma Varnam is an author, crafter and designer living in Greater Manchester, UK, with her husband and son. Emma is a keen knitter and crocheter, and when she is not crafting, she runs a successful blog and Etsy shop, selling her patterns and kits. Emma has written several popular crochet books – including Granny Squares Home, Cute Crocheted Animals and How to Crochet, all published by GMC Publications. Follow her on Instagram on @emmavarnam
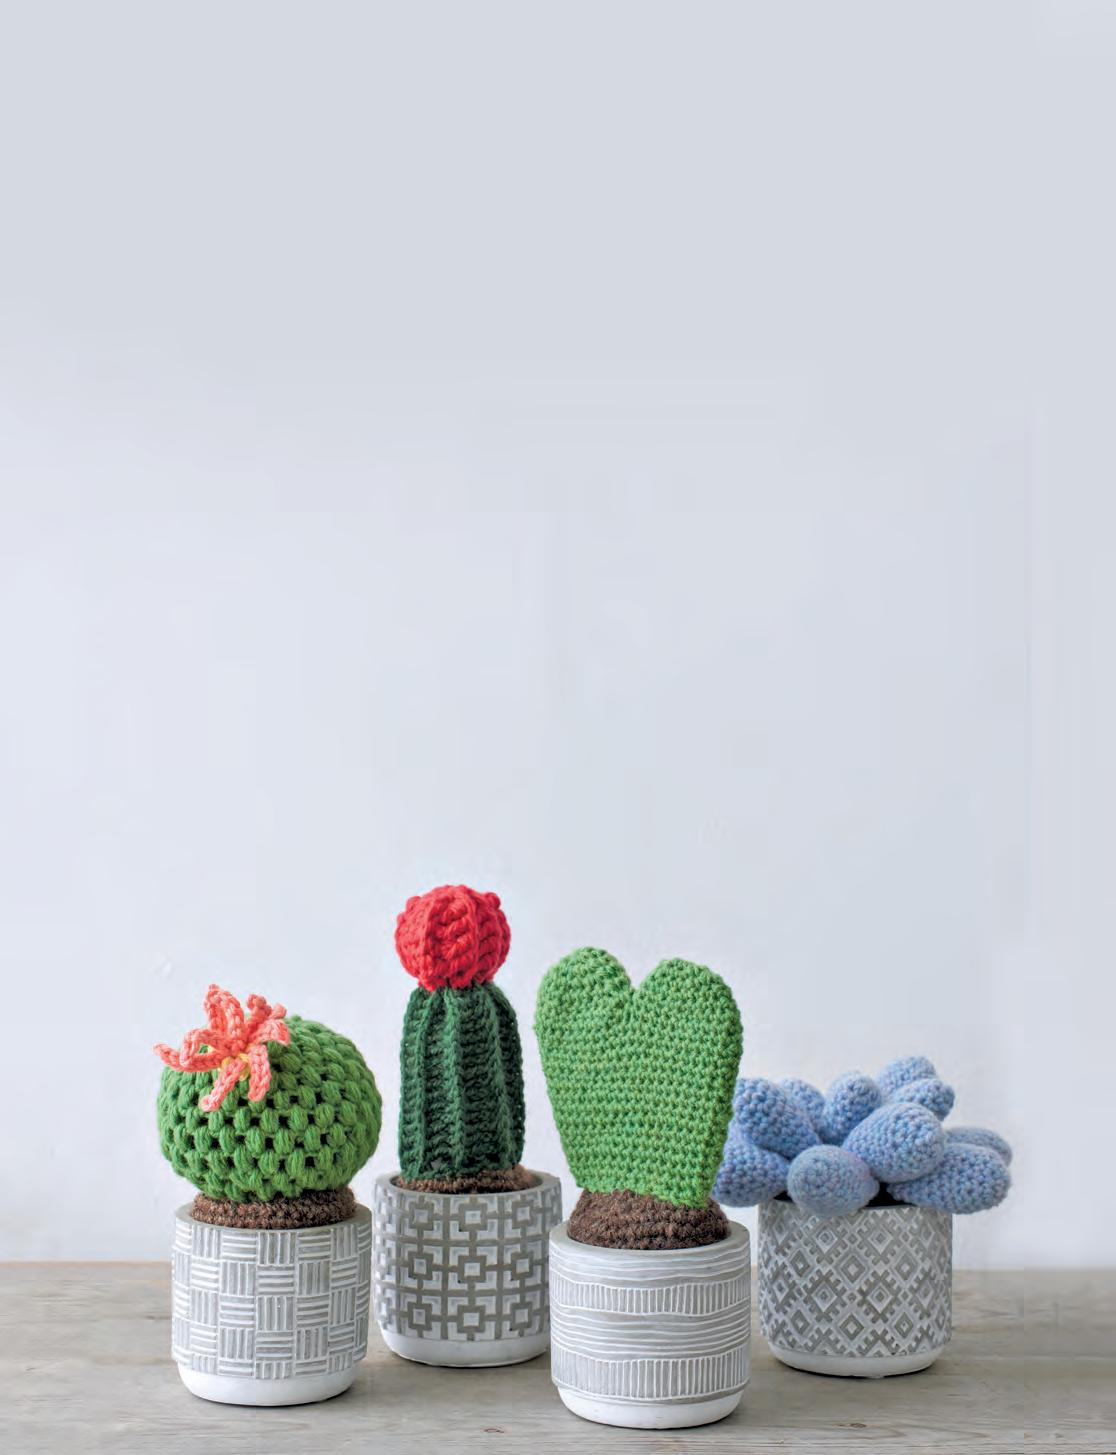
66 We Easter
”
SAVE £5
Special BUYS
Don’t miss our awesome deals Club Members!
BUY NOW
Joyful designs
BUY NOW
Realistic blooms
Calling all lily lovers! This 4" x 6" clear photopolymer stamp set includes an elegant five-layered lily that will make the ideal focal point on your handmade cards, scrapbook layouts and home décor projects. The nine stamps come with the Blossom Branch mini cube set of fast-drying dye inks in six vibrant shades of violet and green.

Altenew Layered Floral Stamp & Mini Cube Set (858867). Price £33.99


Club Member £28.99

SAVE 40%
The Grand Finale of Dawn’s Season Dreams collections, this springtime pack has all the bright colours needed to make uplifting and cheerful projects. The eight complementary patterns featuring wildlife, flowers and fruit can be mixed and matched with ease.
Dawn Bibby Designs A Spring Dream A4 Background Papers – 16 A4 Sheets 250GSM (985403) Price £9.99 Club Member £5.99

BUY NOW
Dreamy creations
With a whopping 41 clear polymer stamps to get creative with, this bundle from the Beautiful Dreams collection designed by Scottish artist Julia McNeill is perfect for building fantasy art scenes.
JMC Beautiful Dreams Stamp Collection – 4 A6 Stamps (556599) Price £36.80

Club Member £28.80
SAVE £8!
SEARCH THE PRODUCT CODE ON createandcraft.com
BUY NOW and add to your basket
BUY NOW
Sweet characters
Create heart-warming scenes with this bundle of 20 clear silicone stamps featuring the adventures of Mulberry Mouse and friends. The Card Hut – Mulberry
HALF PRICE

All

Your exclusive DEAL
6" x 6" Maple Leaf Stencil – this all-occasion design can be used with paints, inks, pastes, powders and more to create background scenes or toppers


So
"This
8"x 8" Watercolour Paper Pad with two each of ten coordinating designs in 200gsm paper – these versatile patterns are ideal for all your cards and crafts
Stamps by Me Friends Like You A5 Stamp Set with five images/sentiments –these are perfect for creative colouring and generational stamping techniques

huge savings on this essential papercrafting bundle from Stamps By Me
Make
many possibilities
is an
for
be
for these items time and time
EDITOR
by Me Friends Like You Stamp Set with Maple Leaf Stencil & 8x8" Watercolour Paper Pad (to purchase this head to createandcraft.com and type in product code 739223) Price £37.97 Club Member £28.47 BUY NOW
bundle
excellent staple
your craft stash – you’ll
reaching
again" SOPHIE THORNTON,
Stamps
HURRY LIMITED AVAILABILITY! HURRY LIMITED AVAILABILITY!
25%
bundle
SAVE
onthis
you need to create gorgeous cards with ease!

