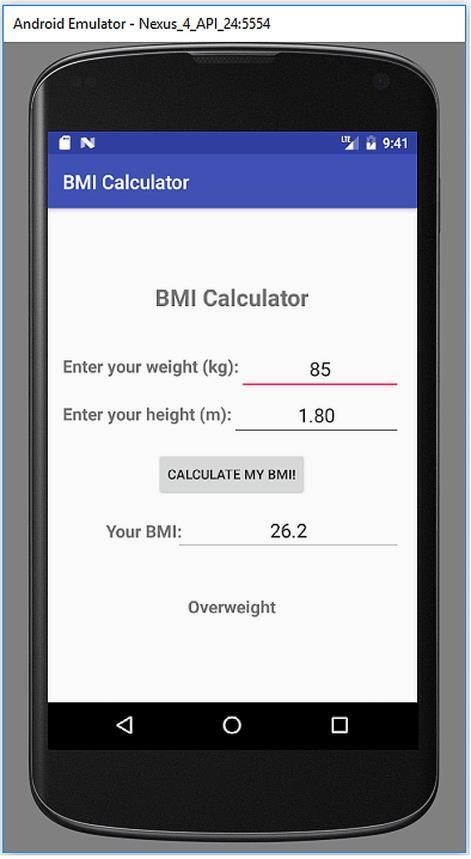
CHAPTER 3. TEST DRIVE: HELLO WORLD APP
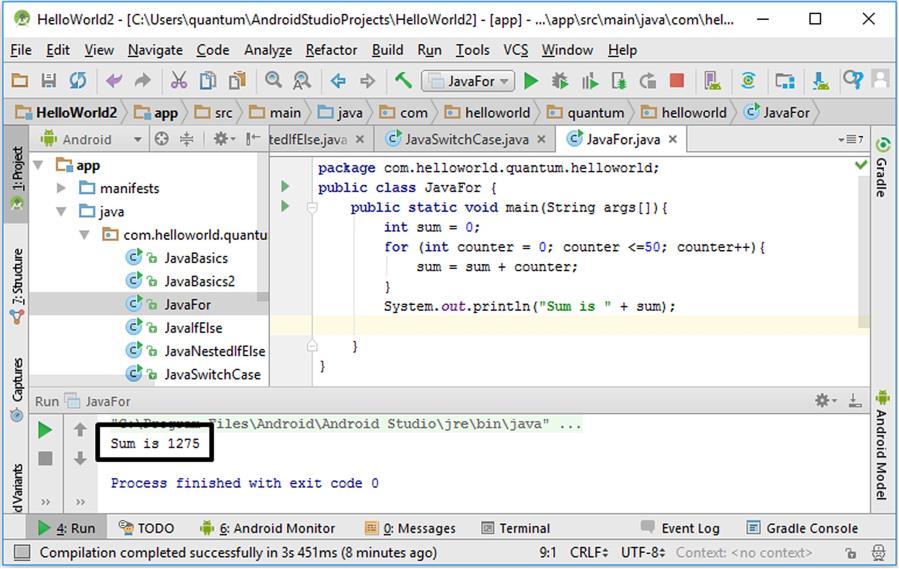
file called “MainActivity.java” is the active tab in Section 2 therefore the middle pane in Section 3 shows the contents of this “MainActivity.java” file. Section 4. This section is also controlled via tabs. The developer can switch project files, structures, captures and favourites for viewing in the left pane. Section 5. The current or previous compilation, building or debugging processes are shown here. For the snapshot of Figure 3.6, it is indicated that the “Gradle build finished in 14 seconds”. Gradle is the build system of Android Studio. Therefore, the message says that the building engine completed its previous task in 14 seconds. Section 6. This is the Run button of Android Studio. When we set up the user interface and write the Java code of a project, we click this button to make the Android Studio build the project (which means creating the executable file from project files) and then we can run it on an emulator or on a real device.
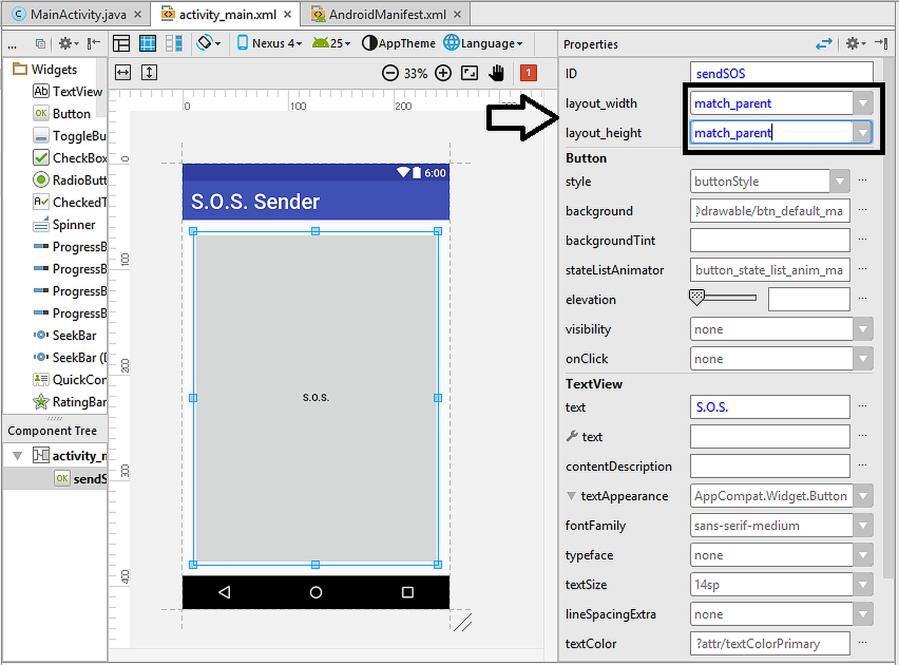
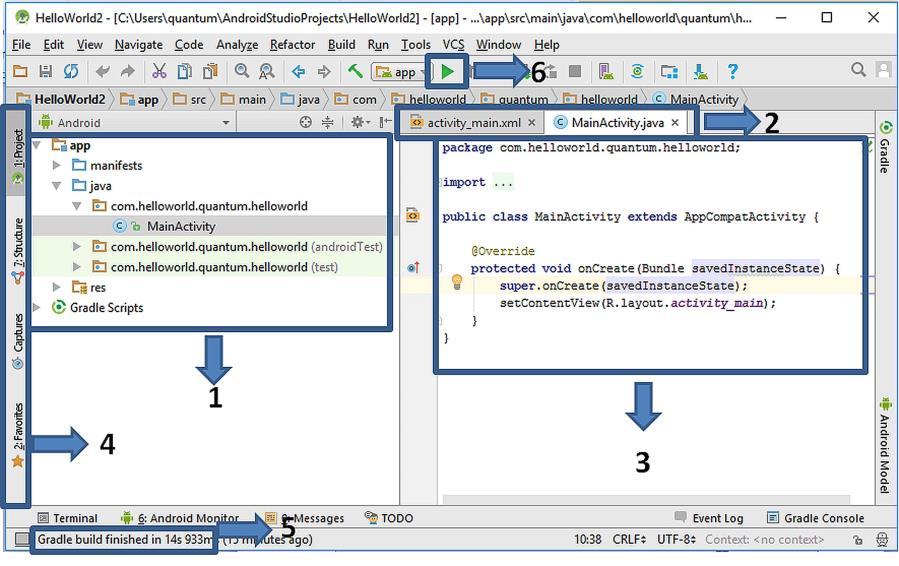
3.4. Folder and File Structure of an Android Studio Project The file structure of an Android project can be viewed in various forms in Android Studio. The button just at above the left pane (shown by the arrow) is used to open the selection box for choosing the preferred method of viewing the file hierarchy as shown in Figure 3.7. The default file viewer is the “Android” mode which is the easiest way of grouping files and folders in my opinion. When the selection is the “Android” mode, the default files and folders shown in Figure 3.8 is shown in the left pane. You can use the arrows (shown inside the circle in the figure) for viewing the contents of folders. The default folders (shown inside the rectangles in Figure 3.8) and their contents are explained as follows:
29