Creating a Document Library
Creating a Document Library In the previous chapter, you walked through the process of adding a document library when you added a web part in SharePoint Online. You can create a document library on any page you’d like, anywhere in your site. The trick is to begin on the page where you want to add the library. Then follow these steps: 1. Click the link in the navigation panel on the left that will display the page you want
to use.
Tip
Alternately, you can create a new page for the library by clicking [+ Add New Page] and entering a name for the new page. Click Create to add the page.
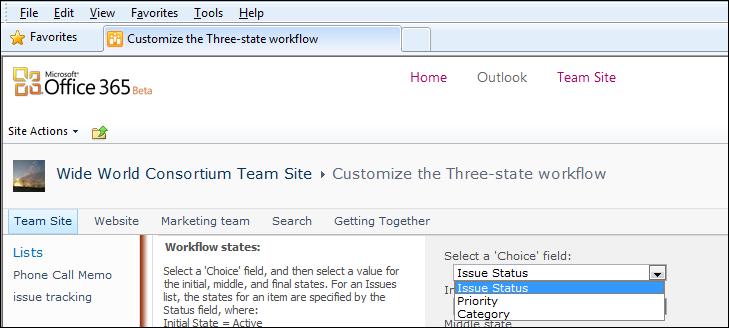
2. Click Edit to the left of the Browse tab. 3. Click the Editing Tools Insert tab. 4. Click Document Library in the Web Parts group, and choose New Document
Library. 5. In the Create List dialog box, type a name for the document library and click OK.
(See Figure 6-1.)
FIGURE 6-1 Create a new document library, and name it in the Create List dialog box.
Chapter 6
119