Google Sketch Up For Site Design

Page 84

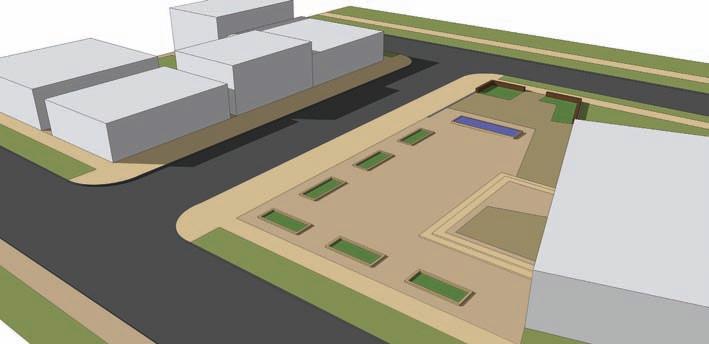
Preparing the Drafting Trace You can use the downloaded Conceptual Site Plan Image mentioned earlier for the rest of this chapter. This exercise’s image is already scaled to the correct size. The image group is on its own layer, and the group itself is locked. As described in Chapter 6, the Flatwork Base will be sculpted on a rectangular face. Because the plan image will be traced onto the rectangular face, the surface needs to be transparent. To prepare the drafting face, follow these steps: 1. Create the drawing surface.

a. With Layer 0 as the active layer, draw a rectangular face over the entire image. b. Snap the first point of the face at 0 insertion; make sure to cover and overlap the entire image surface (Fig. 7-3). 2. Make the face transparent.

a. From the Paint Bucket tool, select Color 001 from the Colors palette (select Colors from the drop-down menu). b. Apply Color 001 to the face. c. Select Edit in the Materials menu.

Fig. 7-3: Draft a rectangle face over the plan image.

d. Under Edit, find Opacity. (In some systems it might be hidden. Expand the menu by dragging the corners to locate Opacity at the bottom.) Set the Opacity value to 50 percent. The image plan underneath is now visible through the face, and the face is ready for drafting (Fig. 7-4).

Fig. 7-4: ​Paint the drafting face and make it transparent.

76

Part 2: SketchUp Process Modeling


Turn static files into dynamic content formats.

Create a flipbook

Articles inside

Adding People and Cars

0
page 362

Adding New Details

2min
pages 358-361

Making Adjustments

1min
pages 356-357

Importing Layers

0
page 342

Adding More Components

0
page 355

Exchanging 3D Components

0
pages 351-352

Exploding the Objects

0
page 341

Conceptual Grading

1min
pages 353-354

Replacing the Components

3min
pages 343-349

Populating the Flatwork Base

1min
pages 339-340

Troubleshooting Ruby Scripts

1min
page 335

Healing with the Line Tool

4min
pages 327-329

AutoCAD Clean-Up Ruby Scripts

2min
pages 330-331

Working with Ruby Scripts

2min
pages 332-334

The Flatwork Drawing File

1min
page 322

Exploding the Flatwork Base

1min
page 323

Write Block Surfaces and Objects

2min
pages 319-320

Closing Perimeters

1min
page 317

Organizing Site Objects

1min
page 318

Isolating Surfaces

1min
page 316

Arranging the Objects

2min
pages 307-310

Generating the Geometry

1min
pages 305-306

2D Plan to 3D Form

1min
page 274

Simple Canopy Tutorial

4min
pages 275-280

Campus Quad—Area 4

4min
pages 265-273

Campus Quad—Area 2

3min
pages 246-249

Campus Quad—Area 1

1min
pages 243-245

Park Landform

6min
pages 234-242

Building Entry Walk

9min
pages 223-233

Conceptual Grading

1min
page 214

Slopes and Grades

1min
pages 221-222

Pedestrian Ramp

1min
pages 216-217

Driveway Ramp

1min
pages 218-220

Simplify Contours

0
page 210

Construction Geometry

0
page 213

Drop Ruby

0
page 209

Joint Push Pull

1min
pages 206-207

The From Scratch Tool

0
page 200

Adding Detail to the Building

2min
pages 193-197

The Drape Tool

0
page 202

The Smoove Tool

0
page 201

Adding the Custom Components

2min
pages 183-187

Building

3min
pages 188-192

Hidden Geometry

1min
page 169

Adding Volume

3min
pages 176-182

Drafting the Floor Plate

1min
pages 173-175

The Courthouse Tutorial

1min
page 172

Working with Arcs and Circles

1min
page 168

Components and Faceted Surfaces

2min
pages 170-171

Furnishing Components

0
page 160

Balcony Component

2min
pages 149-153

Door Components

0
page 148

Window Components

2min
pages 144-147

Components

2min
pages 134-135

Adding Mass to Building 3

1min
pages 142-143

Components

1min
page 136

The Handrail

1min
pages 131-132

The Follow Me Tool

3min
pages 109-111

The Modern Bench

0
page 118

Components within Components

2min
pages 107-108

The Modeling Process

0
page 106

Detailing the Planters

2min
pages 103-105

Ramp

1min
page 98

Building Volumes

1min
page 100

Planter Walls

0
page 97

Create the Flatwork Base Group

1min
page 93

Adding Color and Texture

0
page 94

Drafting Order

7min
pages 86-92

Using Site Plans

0
page 81

Preparing the Drafting Trace

1min
page 84

Drafting Tips

1min
page 85

Importing Site Plans

1min
page 82

Modeling Your Own Designs

0
page 80

An Advanced Example

0
page 79

Adding Component Windows and Doors

1min
page 76

Component Tools

3min
pages 71-73

Flatwork Base

1min
pages 74-75

Creating the Building

1min
page 67

Reviewing the Drawing

1min
page 63

Organizing Models

1min
page 65

Drawing the Base

4min
pages 60-62

Drafting the Flatwork Base

0
page 59

2D = 3D

0
page 58

The Built Environment

1min
page 56

Troubleshooting an Installation

1min
pages 54-55

Components within Components

2min
pages 40-41

Components and Layers

1min
page 42

Downloading Ruby Scripts

0
page 52

Support Sites

1min
pages 50-51

Adjusting the Component/Group View

2min
pages 38-39

Model Organization

4min
pages 32-35

Drafting with Edges

2min
pages 30-31

Drawing and Modification Tools

1min
page 23

Part 4: AutoCAD to SketchUp

0
page 18

Additional Tools

2min
pages 24-25

Styles

1min
page 27

Navigation and 3D Inference System

3min
pages 28-29

Who Can Use This Book

1min
pages 10-11

The Value Control Box

0
page 26

Basic SketchUp Tools

1min
page 22
Issuu converts static files into: digital portfolios, online yearbooks, online catalogs, digital photo albums and more. Sign up and create your flipbook.